
Russian Version
Vuecket is a web framework that integrates VueJS on the client side and Apache Wicket on the server side. It takes the best of both and makes developing full-stack applications even faster and easier. Of course, these are all big words, because Vuecket is currently (August 2020) less than a month old, and it has not yet passed the baptism of "fire and blood" production servers. But it has already included all the best that we have developed during the development of our key Open Source product Orienteer (a platform for rapid development of business applications). And it is precisely because of its young age that Vuecket needs your help: please share what you liked, what is not very good, where improvements are needed, etc.
The basic principles that guide us when building Vuecket are:
- Being declarative is not imperative. Vuecket doesn't dictate any special code requirements. It can be applied fairly quickly and easily to existing Vue.JS or Apache Wicket projects.
- Follow the Pareto principle. Vuecket should provide 80% of the functionality you want out of the box, but there should be good and convenient extension points for the remaining 20%.
It's easy to see that these principles also apply to Vue.JS and Apache Wicket.
So how exactly are we going to get started with Vuecket? I suggest making a chat / guest board with Markdown support. I will not torment too much: the finished application is here , and the code is here .
We create a project
Let's generate our project via `mvn archetype: generate`. To do this, you can use, for example, the following command:
mvn archetype:generate -DarchetypeGroupId=org.apache.wicket -DarchetypeArtifactId=wicket-archetype-quickstart -DarchetypeVersion=8.9.0 -DgroupId=com.mycompany -DartifactId=mychat -DarchetypeRepository=https://repository.apache.org/ -DinteractiveMode=false
Vuecket has not yet got its own Maven project template. Perhaps in the future we will add this as well. Now let's connect Vuecket itself. Add the following dependency to the project `pom.xml`:
<dependency>
	<groupId>org.orienteer.vuecket</groupId>
	<artifactId>vuecket</artifactId>
	<version>1.0-SNAPSHOT</version>
</dependency>
Outputting text in Markdown
The Wicket project already contains a Wicket welcome page by default. Let's add some code to it to make sure Vuecket is already working. For example, let's display Hello World, but in Markdown, and so that the text itself is set on the server side in the Apache Wicket component. We will use the vue-markdown library to render Markdown .
In HomePage.html, instead of the Wicket greeting, add:
<div wicket:id="app">
	<vue-markdown wicket:id="markdown">This will be replaced</vue-markdown>
</div>
And in HomePage.java the following code:
public HomePage(final PageParameters parameters) {
	super(parameters);
	add(new VueComponent<String>("app")
			.add(new VueMarkdown("markdown", "# Hello World from Vuecket")));
}
But where is the VueMarkdown class? And we will define it as follows:
@VueNpm(packageName = "vue-markdown", path = "dist/vue-markdown.js", enablement = "Vue.use(VueMarkdown)")
public class VueMarkdown extends Label {
	public VueMarkdown(String id) {
		super(id);
	}
	public VueMarkdown(String id, Serializable label) {
		super(id, label);
	}
}
Pay attention to the @VueNpm annotation. It is needed to enable Vuecket on this Wicket component, which will load everything needed from NPM to help the browser render the already Vue component for Markdown correctly.
If you did everything correctly, then after starting the project through `mvn jetty: run` you should see something like this on http: // localhost: 8080
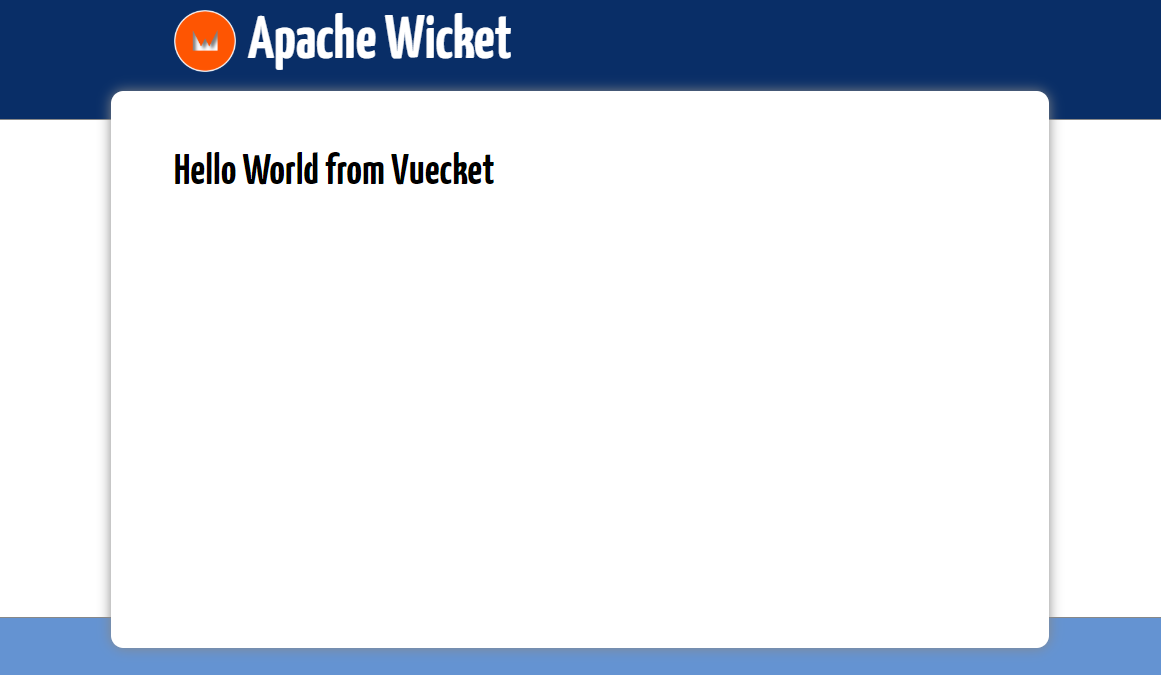
So what happened here and why does it work?
- We marked up the page by adding 2 Vue components to it: for the application and for the Markdown output
- We have bundled Vue components with Wicket components on the server side (in HomePage.java)
- We told Vuecket which Vue.JS library it needs to render the 'vue-markdown'
- And then everything is simple: Wicket, when rendering the page to the browser, used the line "# Hello World from Vuecket", which we set when adding the Wicket component, and Vuecket helped the browser load the necessary VueJS libraries, launch the VueJS application and render the greeting as rendered Markdown
Github commit to help
Entering a message and previewing it
In this step, we will complicate our application: we will make the message input and preview.
Let's add a textarea to HomePage.html for entering a message, as well as bind this field and vue-markdown to the VueJS "text" variable.
<div wicket:id="app">
	<textarea v-model="text" style="width:100%" rows="5"></textarea>
	<vue-markdown wicket:id="markdown" :source="text">Will be replaced</vue-markdown>
</div>
We are already using the "text" variable, but now we need to add it to the data Vue component. There are several ways to do this in Vuecket, but let's go for the longest:
- Create your own VueComponent for Vue application
- Let's associate it with our * .vue file
- Let's write the logic in the * .vue file: for now, just the "text" field
Here are some of the changes we'll make:
//HomePage.java:
public HomePage(final PageParameters parameters) {
	super(parameters);
	add(new ChatApp("app")
			.add(new VueMarkdown("markdown")));
}
//ChatApp.java:
@VueFile("ChatApp.vue")
public class ChatApp extends VueComponent<Void> {
	public ChatApp(String id) {
		super(id);
	}
}
Well, ChatApp.vue itself:
<script>
module.exports = {
    data: function() {
        return {
            text : ""
        }
    }
}
</script>
As a result, when you start `mvn jetty: run` and enter some text, you can see the following

In this chapter, we have learned how to: create familiar * .vue files and associate them with Apache Wicket components
GitHub commit to help
Display a list of messages and add a new one
There won't be anything Vuecket or Wicket specific in this chapter: pure VueJS shine.
If we decompose the task, then we will need to do the following:
- Add a list box to our Vue application to save messages
- Add a method to add a new message to the list
- Display a list of messages and don't forget about markdown
First, let's change our ChatApp.vue and add the necessary logic: a new `messages` field with a list of messages and the ʻaddMessage` method to add a new message. And let's not forget that when adding a message to the list, it's a good idea to clear the original input field. For messages, we will store not only the text, but also the date of adding / sending. In the future, it will be possible to expand with additional fields, for example, who sent this message, priority, required highlighting, etc.
<script>
module.exports = {
    data: function() {
        return {
            text : "",
            messages: []
        }
    },
    methods: {
    	addMessage : function() {
    		this.messages.push({
    			message: this.text,
    			date: new Date()
    		});
    		this.text = "";
    	}
    }
}
</script>
We will also change HomePage.html, add a display of the list of messages and add a call to our addMessage method when pressing Ctrl-Enter.
<div wicket:id="app">
	<div v-for="(m, index) in messages">
		<h5>{{ index }}: {{ m.date }}</h5>
		<vue-markdown :source="m.message"></vue-markdown>
	</div>
	<textarea v-model="text"
			  style="width:100%"
			  rows="5"
			  @keyup.ctrl.enter="addMessage"
			  placeholder="Enter message and Ctrl-Enter to add the message">
	 </textarea>
	<vue-markdown wicket:id="markdown" :source="text">Will be replaced</vue-markdown>
</div>
When you run `mvn jetty: run` and enter a few messages, you will see something like this
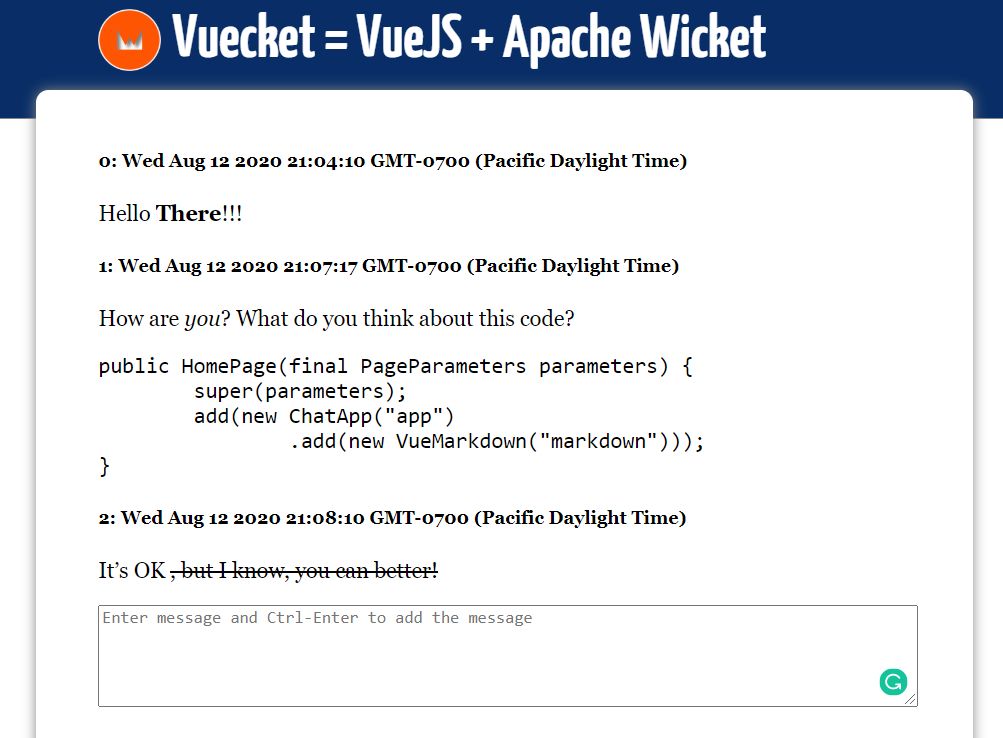
In this chapter, we have only taught the application using VueJS to add a message to the list and display the latter.
GitHub commit to help
Turn on collaboration
If before that the content of our guestbook was unique for each visitor of the page, then in this chapter we will enable communication with the server and allow synchronization with all visitors. For this we need Vuecket Data Fibers, a solution that allows browser-side objects to be synchronized with server-side objects. And what's most interesting, we don't need to do anything for this on the client side! Sounds cool? Let's go code! Although ... There are only two new lines in our ChatApp.java component:
private static final IModel<List<JsonNode>> MESSAGES = Model.ofList(new ArrayList<JsonNode>());

public ChatApp(String id) {
	super(id);
	addDataFiber("messages", MESSAGES, true, true, true);
}
What happened here:
- We have created a MESSAGES model that is available to everyone, since it is created as static final.
- Added data-fiber, which binds the messages object on the client side and the object inside the MESSAGES model on the server side.
- , data-fiber 3 : load, observe, refresh. Load — , Observe — , Refresh — .
-

GitHub commit
In the previous chapter, I cheated a little by granting read / write access to the message collection to all site visitors at once. It is highly discouraged to do this, because then, through data-fiber, any sender can overwrite all messages on the server with something of his own or even erase them. Data-fibers should only be used to link custom browser-side objects to server-side data objects belonging to the same user. This means no static models or data!
How can we fix the situation? For this we have to:
- Ditch data-fiber, which works across the board, and only use it to initially load the message list.
- Use the server side method of adding a new message to the list.
Thus, everyone can only add new messages to the general list, but they can neither delete nor change existing ones. Let's also complicate the server side a little: we will save not just JSON received from the client, but a specialized Message class with the necessary fields, methods, etc. to work with data on the server side.
Let's start with a Message class for storing user messages. This might be some JPA class, by the way, that allows you to save data to a database.
public class Message implements IClusterable {
	@JsonProperty("message")
	private String text;
	private Date date;

	public String getText() {
		return text;
	}
	public void setText(String text) {
		this.text = text;
	}
	public Date getDate() {
		return date;
	}
	public void setDate(Date date) {
		this.date = date;
	}
}
Pay attention to @JsonProperty. Thus, we have redirected the JSON field "message" to our Java field "text".
Next, let's change ChatApp.java to do what is described above: add a vuecket method to save the message. Also in the code, you can notice the cutting of the list of messages to only 20 (Habr users are very diligent), but when you delete a message, it is still saved forever in the server logs.
@VueFile("ChatApp.vue")
public class ChatApp extends VueComponent<Void> {

	private static final Logger LOG = LoggerFactory.getLogger(ChatApp.class);
	private static final int MAX_SIZE = 20;
	private static final IModel<List<Message>> MESSAGES = Model.ofList(new ArrayList<Message>());

	public ChatApp(String id) {
		super(id);
		addDataFiber("messages", MESSAGES, true, false, false);
	}

	@VueMethod
	public synchronized void addMessage(Context ctx, Message message) {
		List<Message> list = MESSAGES.getObject();
		list.add(message);
		trimToSize(list, MAX_SIZE);
		IVuecketMethod.pushDataPatch(ctx, "messages", list);
	}

	private void trimToSize(List<Message> list, int size) {
		//It's OK to delete one by one because in most of cases we will delete just one record
		while(list.size()>size) LOG.info("Bay-bay message: {}", list.remove(0));
	}
}
See the @VueMethod annotation method? In it, we receive a new message, save it in the list, cut it and send the already updated list to the client. Also note that data-fiber has been reconfigured to only request data when the Vue application boots up.
We also need to change the logic in ChatApp.vue so that instead of the local "messages" field, send a new message to the server in asynchronous mode (vcInvoke)
module.exports = {
    data: function() {
        return {
            text : "",
            messages: []
        }
    },
    methods: {
    	addMessage : function() {
    		this.vcInvoke("addMessage", {
    			message: this.text,
    			date: new Date()
    		});
    		this.text = "";
    	}
    }
}
What we learned from the chapter:
- How to Create Server Side Methods for Vuecket
- How to call methods on the server from a browser
- How to send the desired changes to the client
For a law-abiding visitor, nothing has changed, but a hacker can no longer so easily change the general list of messages on the server
GitHub commit to help
Conclusion
On this today, let me round off. There are many more improvements that can be made to our code, but I'll leave that to you, dear readers. If you need help, write, we will help!
Do you like the framework? Please share your opinion. After all, it is your opinion that Open Source lives and develops.
Spoiler of upcoming Vuecket improvements
- WebSocket' .
- , .
- data-fiber' .
- Vuecket/Wicket , VueJS , , Markdown