Table of contents
Training
The last time we ended up on the fact that our web server receives a domain name and learned to establish a secure connection with the client. However, we still have absolutely nothing to show our future user. Although we can already share the idea of a startup and announce the release date of the MVP . An informational web page is suitable for this task. Let's write it in Dart using the FlutterWeb framework. All of our client applications of the service will become an extension of this particular page. We will try to conduct development as adaptive and structured as possible, so that development and assemblies for the required platforms (web-android-iOS) become just a routine.

Let's start by installing Flutter:
- Install git
- We clone the repository with the beta version of Flutter with the command
git clone https://github.com/flutter/flutter.git -b beta - To run flutter commands from the command line, you must specify the path to its executable files in the operating system. Let's open the OS variables, for this we start to enter "change of the current user's environment variables" in the search bar.

In the window, select the Path variable and click Change . In the list that opens, create a new line with the address to the flutter executable files in the file system, for example C: \ flutter \ bin - Install VScode extension for flutter
- Restart VScode (so that the new OS variables are applied) and in the terminal check the state of flutter with the command
flutter doctor
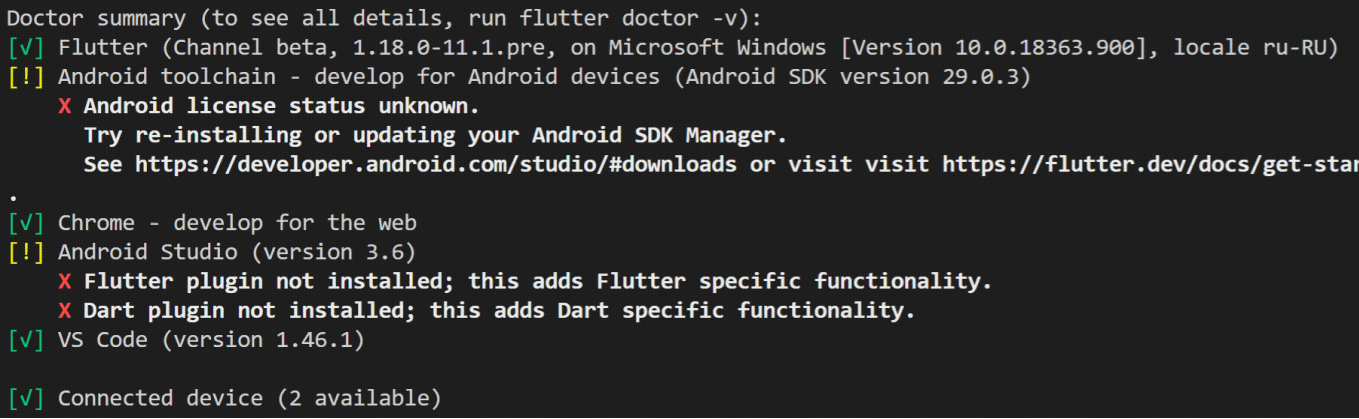
the most important thing here is that flutter is installed in beta version (with web development support) - Now we activate web development with the team
flutter config --enable-web
Create a new project and start debugging
We create a new project with a team
flutter create < >Let's immediately open it in VScode with the command
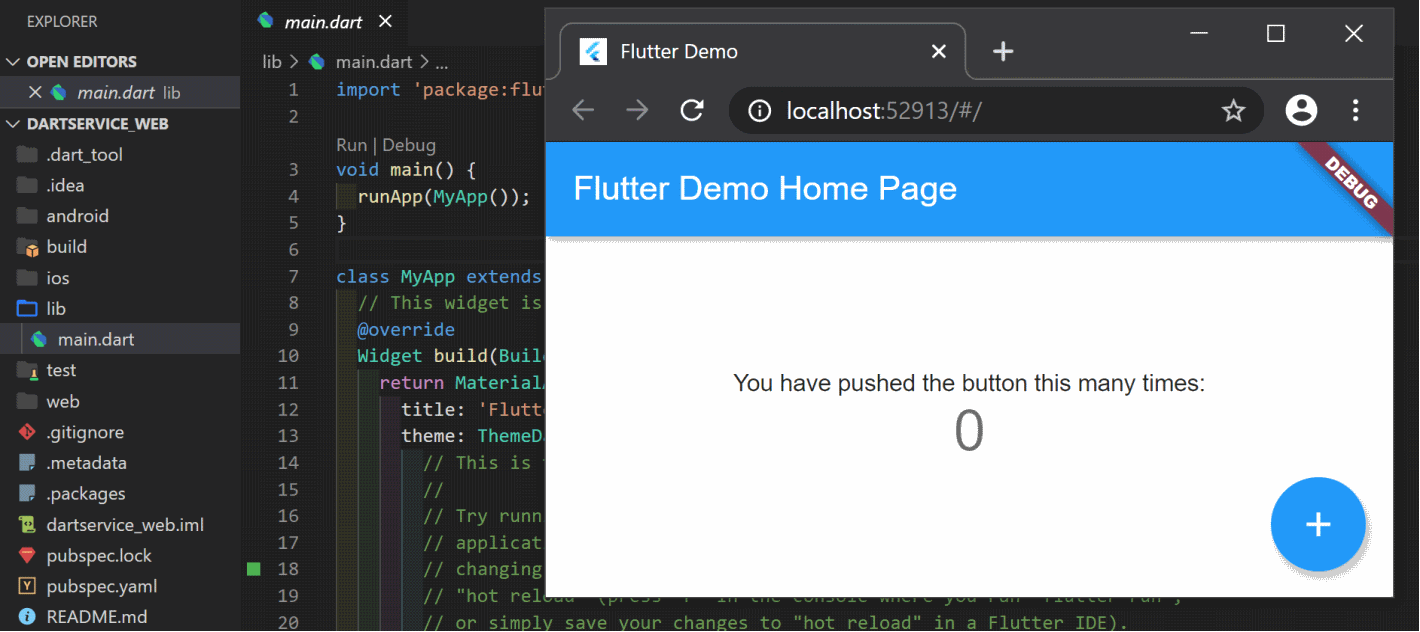
code < >Let's open the main.dart file in the lib folder and start debugging with the F5 command :
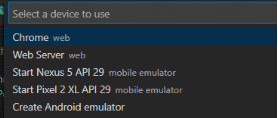
Perhaps, when you first start debugging, you will need to select Chrome as the device for debugging:
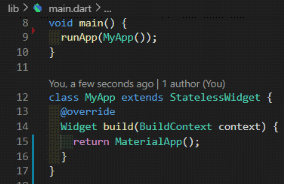
Delete the contents of the main.dart file . Add an empty main method and the root class of the application, which returns an instance of MaterialApp in the build () method : Next, create the following set of project subfolders: Briefly describe the purpose of each of them:

- di is a mechanism for communication between application components. All the necessary services, repositories, network clients necessary for the application to work will be created and registered here. I will use the GetIt library
- domain - data objects. Data presentation classes
- res - colors, lines, imports of paths to images and fonts. Anything related to static resources
- service - services for working with data
- ui - interface
- utils - utility classes
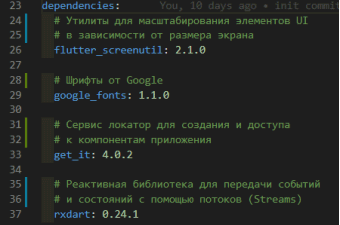
Add the required dependencies in the pubspec.yaml file:
Preparing to scale UI elements
Our page is supposed to adapt depending on the client device's screen size and location (portrait or landscape mode).
Let's start with the background pictures. Their preparation is beyond the scope of the article, so I'll just leave these two links here:
- Pixabay.com - repository of content photos
- Paint.net - graphic editor
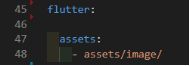
Place the finished images in the / assets / images folder, add this path to the resources in the pubspec.yaml file:
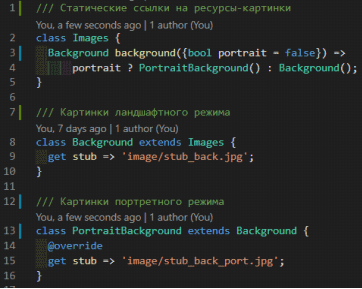
I prefer access to resources in the form of a tree with parameters. In this case, the path to the background image of the stub:
images.background(bool isPortrait).stubTo do this, in the res folder, create a file called images.dart with classes of image addresses:
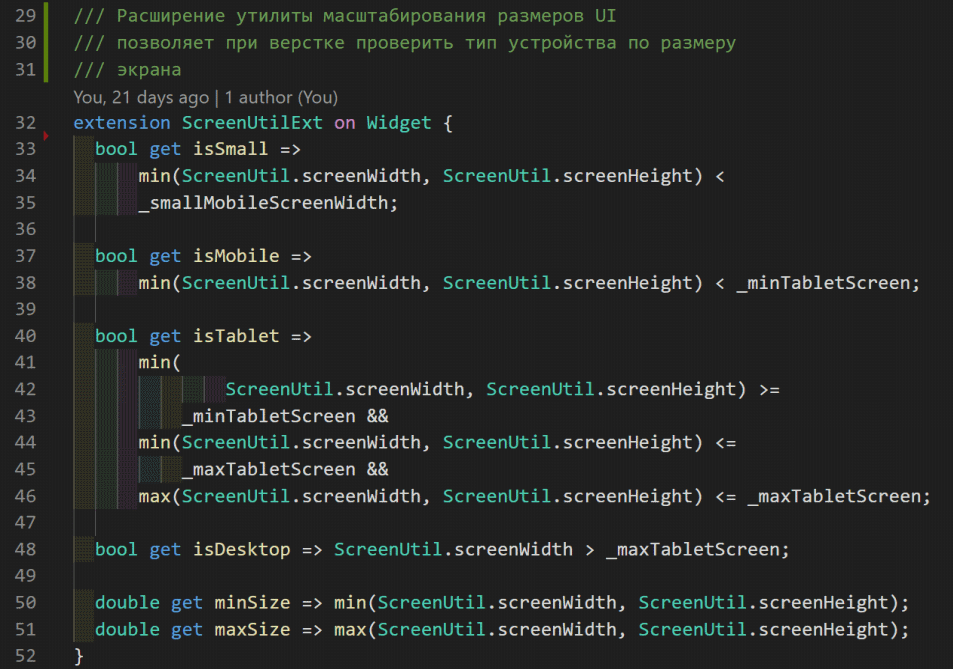
To scale the sizes of the interface and fonts, we connected the ScreenUtil library . Its functionality boils down to two things:
- Registration of the "base" screen size. Here you need to set the width and height of the screen for which the main layout is carried out and the need to scale fonts.
- A set of extensions to apply a scaling factor to numbers (num). For example, 100.w means that the result of this expression will be for a 1920dp screen => 100dp, and for an iPhone8 screen with a width of 414dp => 100x (414/1920) = 21.6dp. That is, five times less. There are also extensions for font height and size.
Create a file /utils/screen_util_ext.dart and a static initialization method in it: Add a
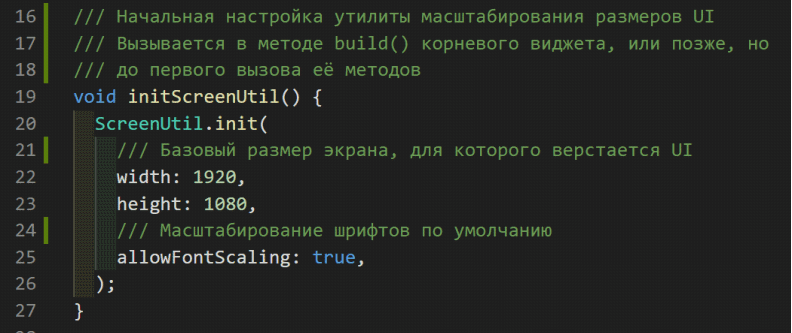
call to the zoom initialization method to the build () method of the root widget:

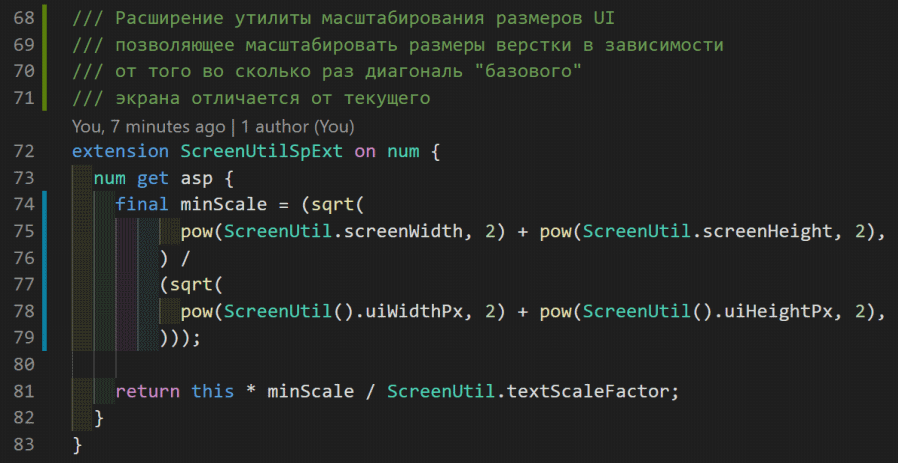
Extend the functionality of the zoom library with several additional extensions in the /utils/screen_util_ext.dart file :

Dependency injection
It's time to implement a mechanism for creating and registering application components using the GetIt library . In the lib / DI / folder, create the di_container.dart file . In it we will write a static method getItInit () and initialize an instance of the GetIt container . Let's register the first component - an instance of the Images class :

Add the call to the initialization method to main () :

Access to the Images component will look like this:

In the same way, let's register a class with resources with strings.
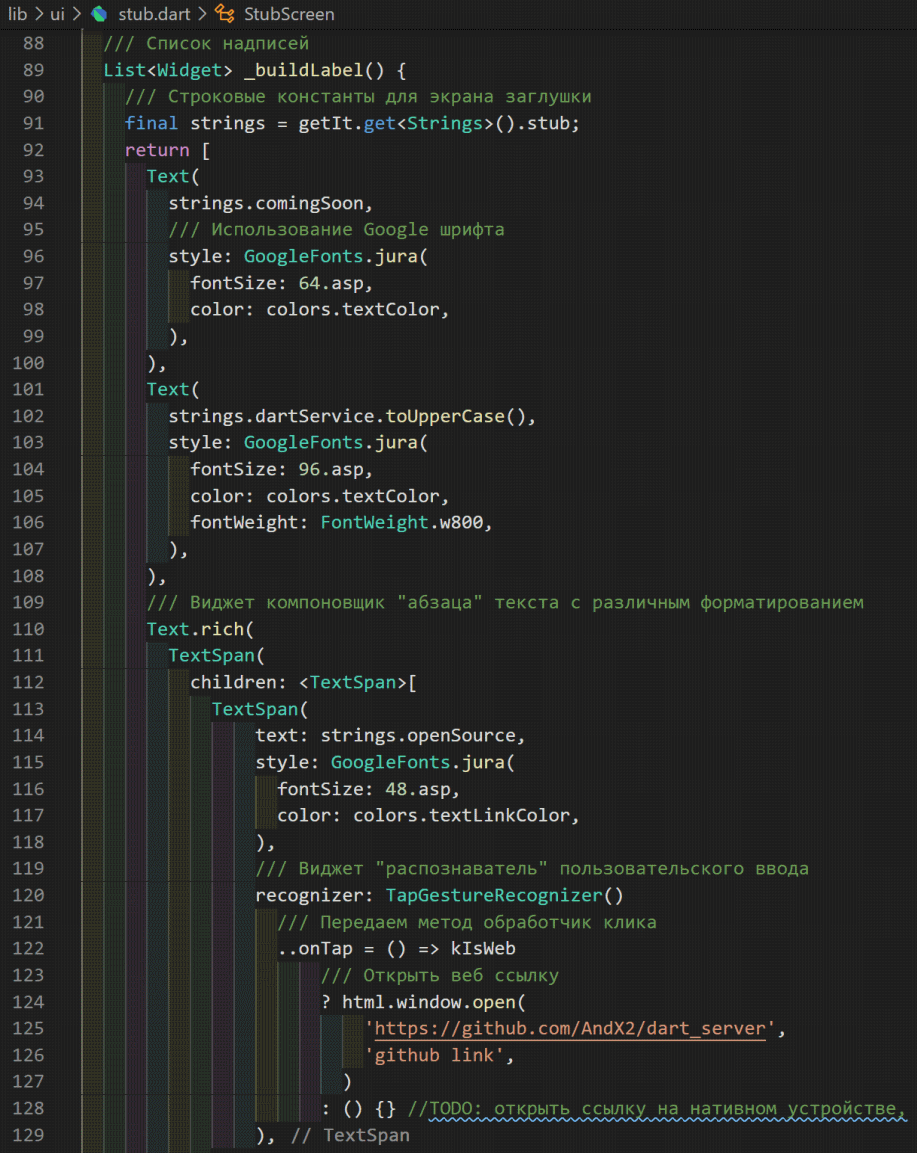
Stub page
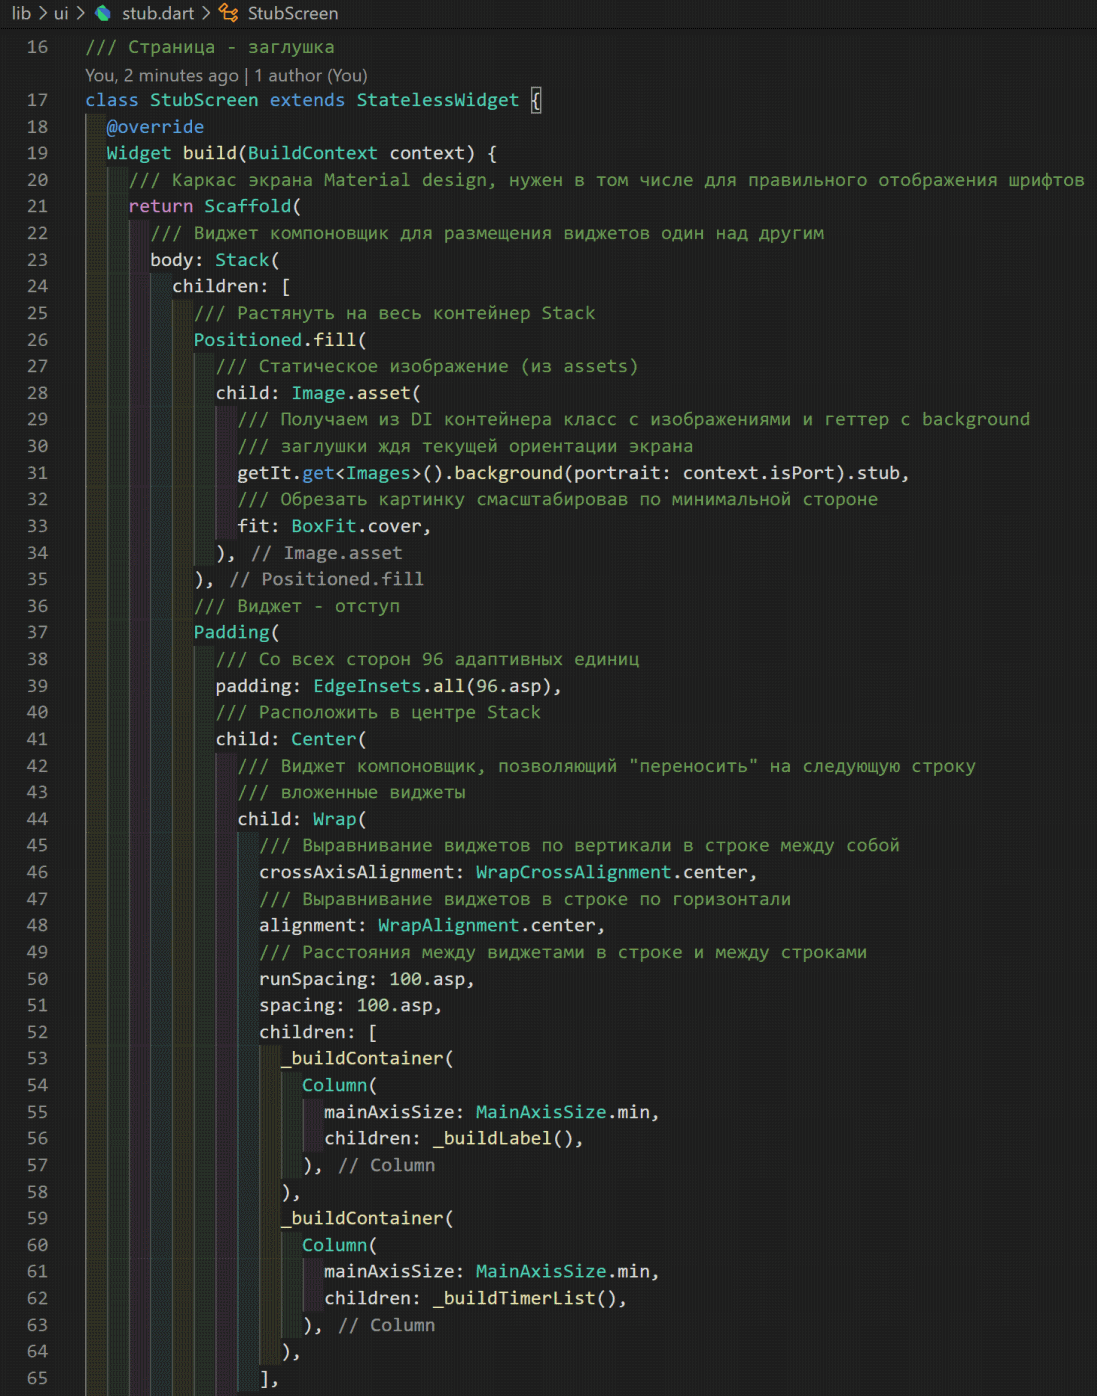
Now, in the UI folder, create a stub.dart file with the StubScreen stub page class , extend the StatelessWidget base class, and override its abstract build () method . Our page is a picture in the background and two information blocks in front of it, placed depending on the screen orientation.
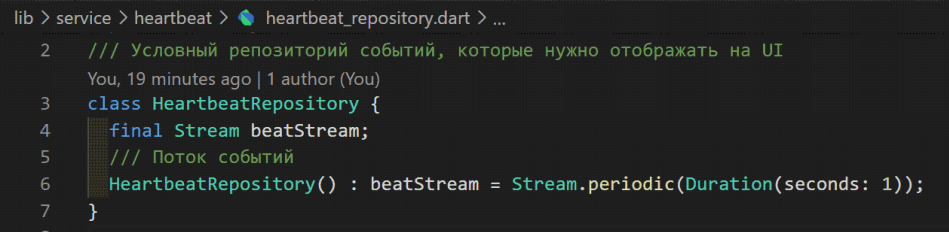
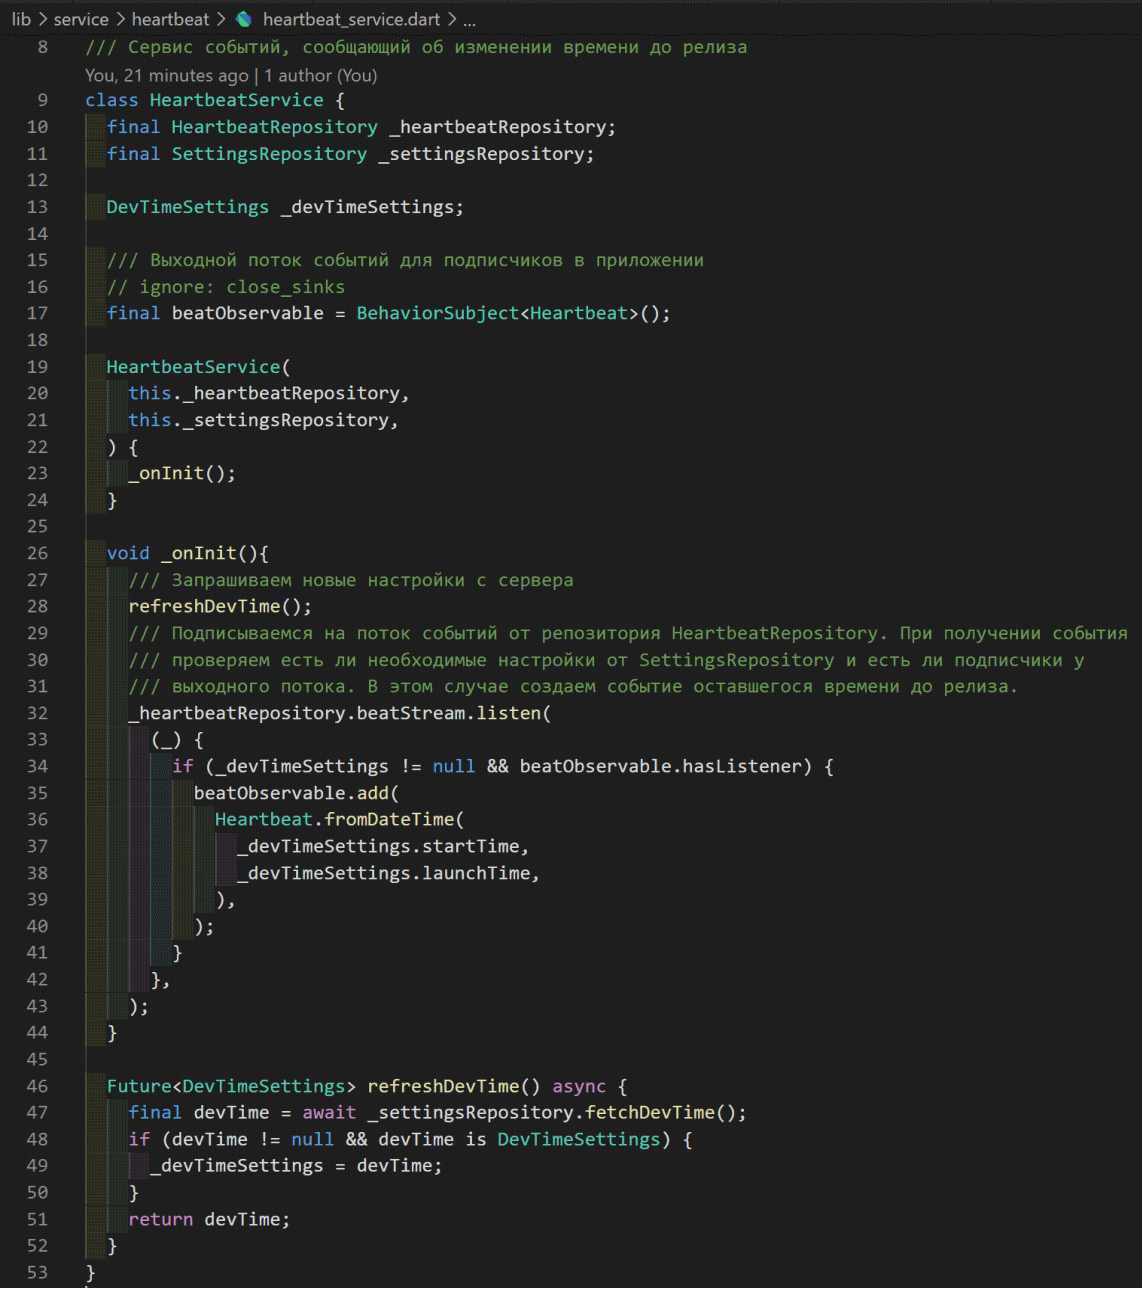
Repositories and service
To dynamically display the time remaining before the release, you must:
- Get the settings from the server with the dates of the start of development and release
- Create event stream for remaining time change
- Combine this data by passing it to the output stream for display on the UI
Let's describe domain objects (POJOs) for this data:


Repositories for receiving settings and creating an event flow:

Service for event logic:
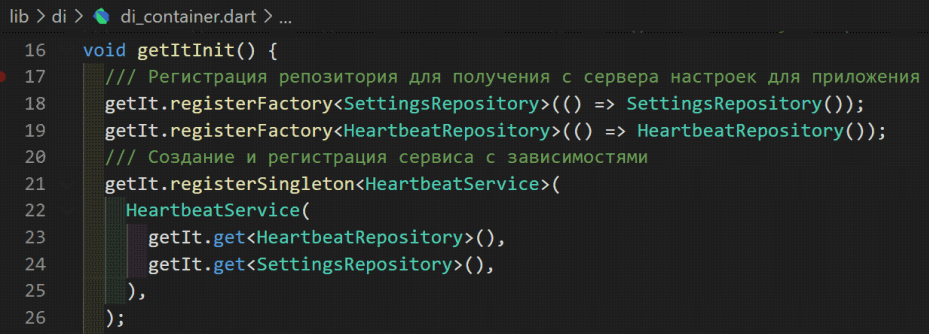
Register these components in a DI container:
Remaining time widget
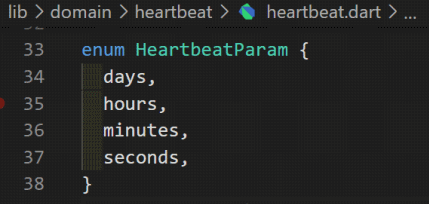
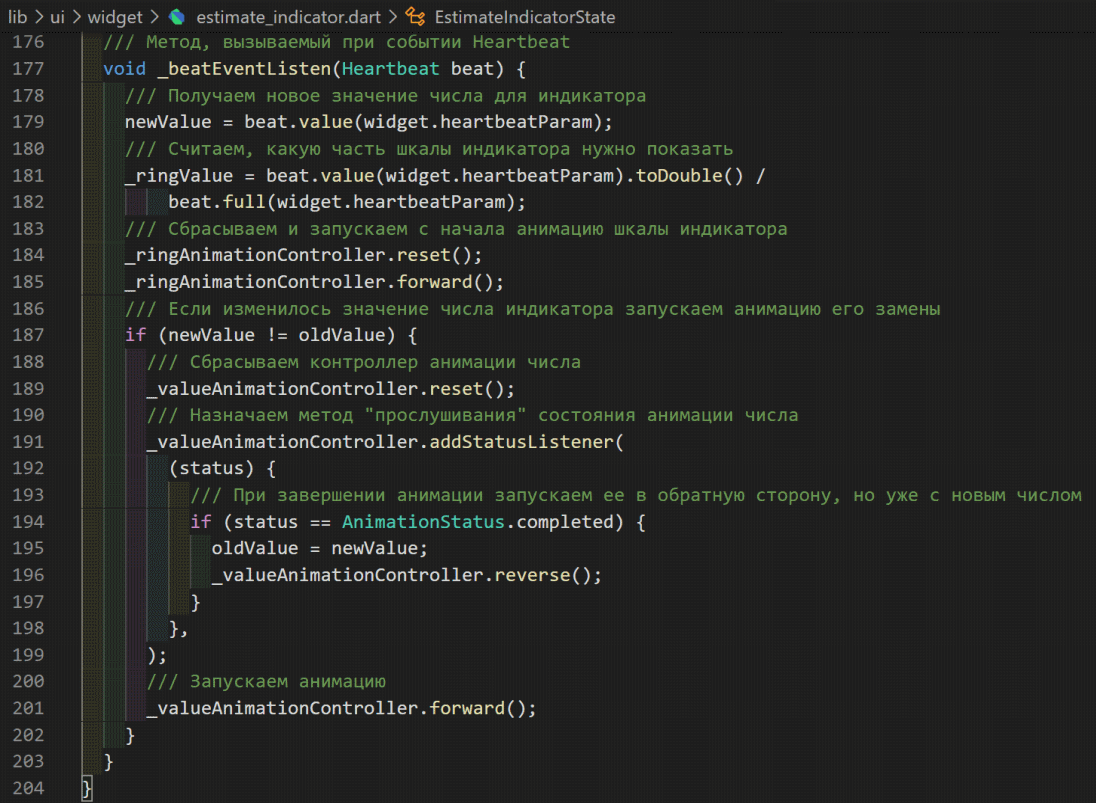
The time remaining before the release can be represented as 4 numbers: days, hours, minutes, seconds. Let's represent these parameters as an enumeration:
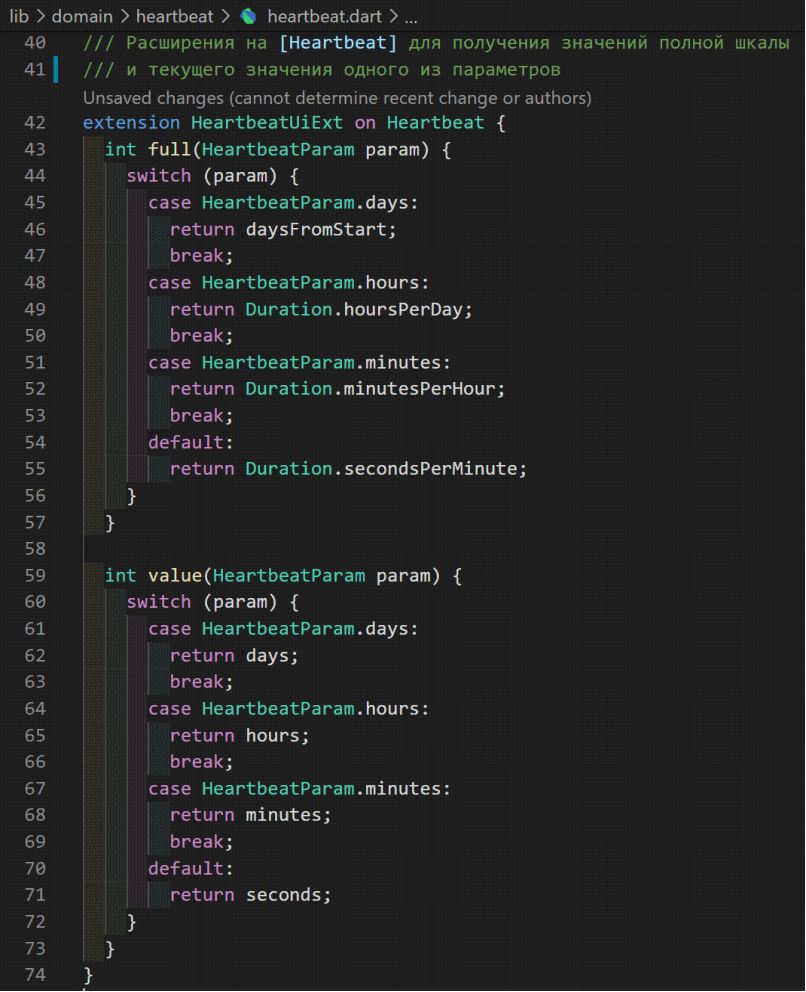
Let's add functionality to the parameters using the extension: The
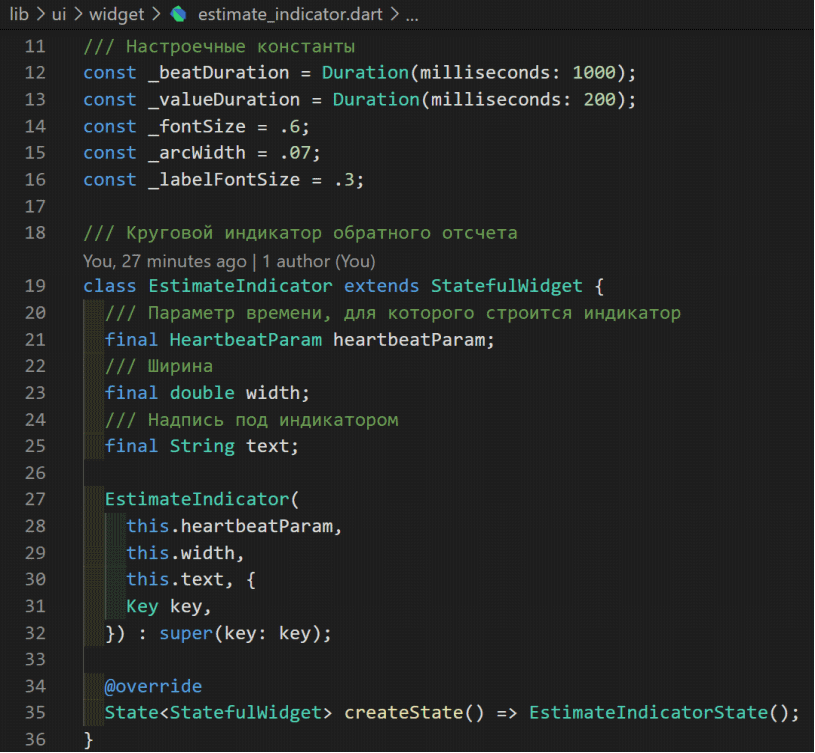
widget for displaying the dial, number and signature will be animated, for this we will extend the StatefulWidget class . Its peculiarity is that the Element (the constructed and displayed view) does not correspond to the widget itself, but to its state ( State ). The state, unlike the widget, is mutable. That is, its fields can be changed without completely re-creating the instance.

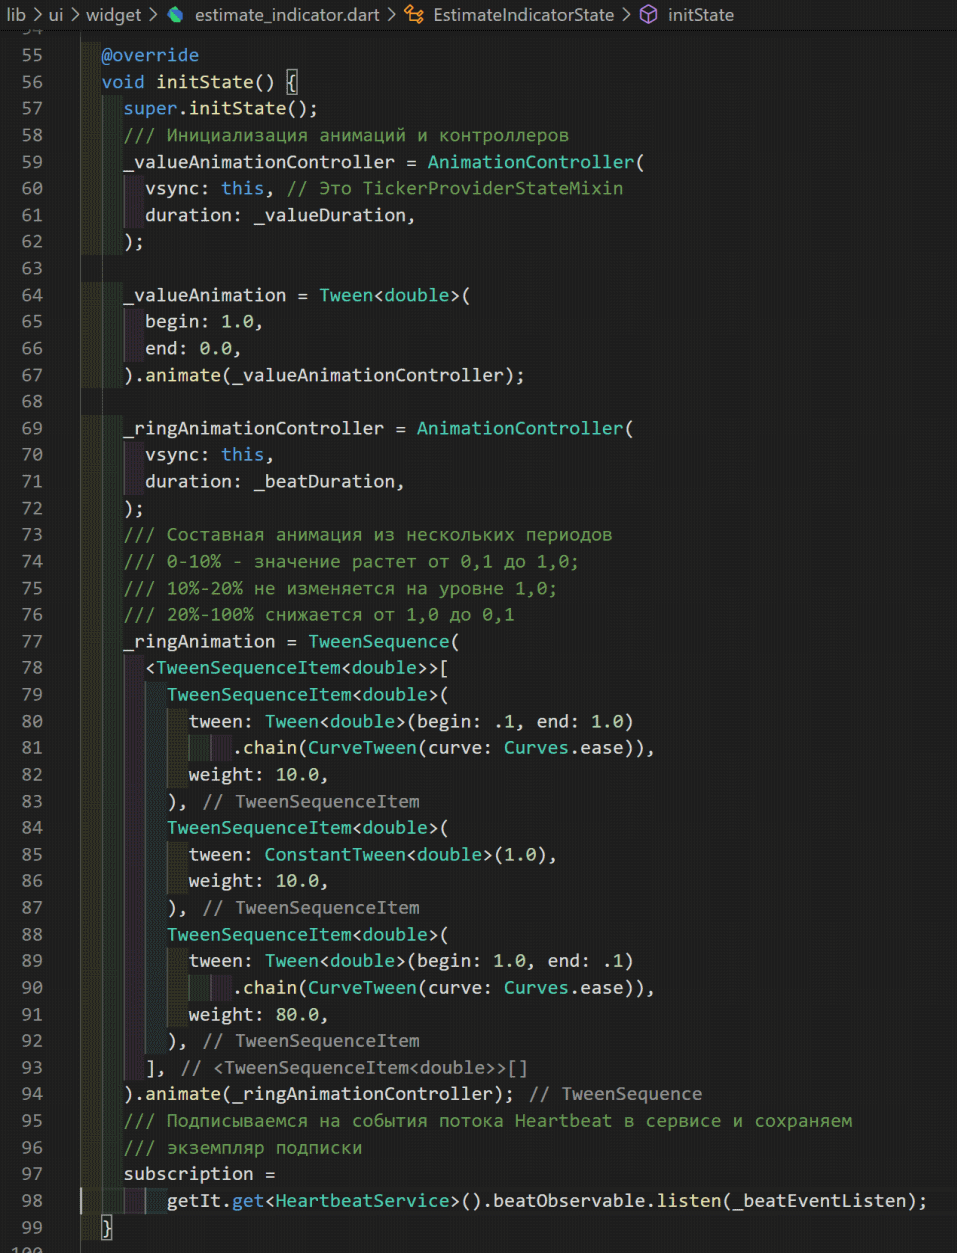
Need to clarify here what Animation , AnimationController and TickerProviderStateMixin are... So AnimationController is a wrapper over a simple double value parameter . The value of this parameter changes linearly in the range from 0.0 to 1.0 (it can also be changed in the opposite direction or reset to 0.0). However, to change this parameter, a special TickerProviderStateMixin object is used , which is a required parameter for the AnimationController and tells it that the graphics engine is ready to build a new frame. Having received such a signal, AnimationController calculates how much time has passed from the previous frame and calculates how much to change the value of its value . Animation objects subscribe to AnimationControllerand contain some function of dependence of the output value on the linear (in time) change of the AnimationController value .
The state initialization method initState () is called once upon creation:
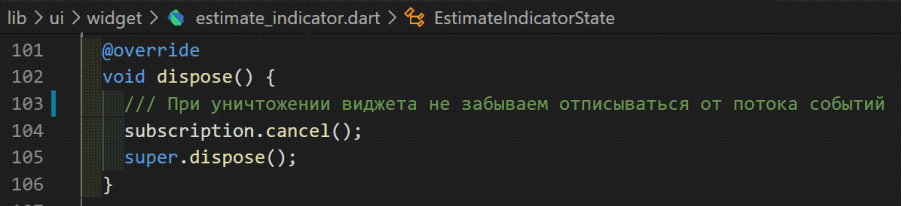
When the state of the widget is destroyed, the dispose () method is called :
The widget will be represented by a stack ( Stack ), with the AnimatedBuilder for the number and the scale placed in it :
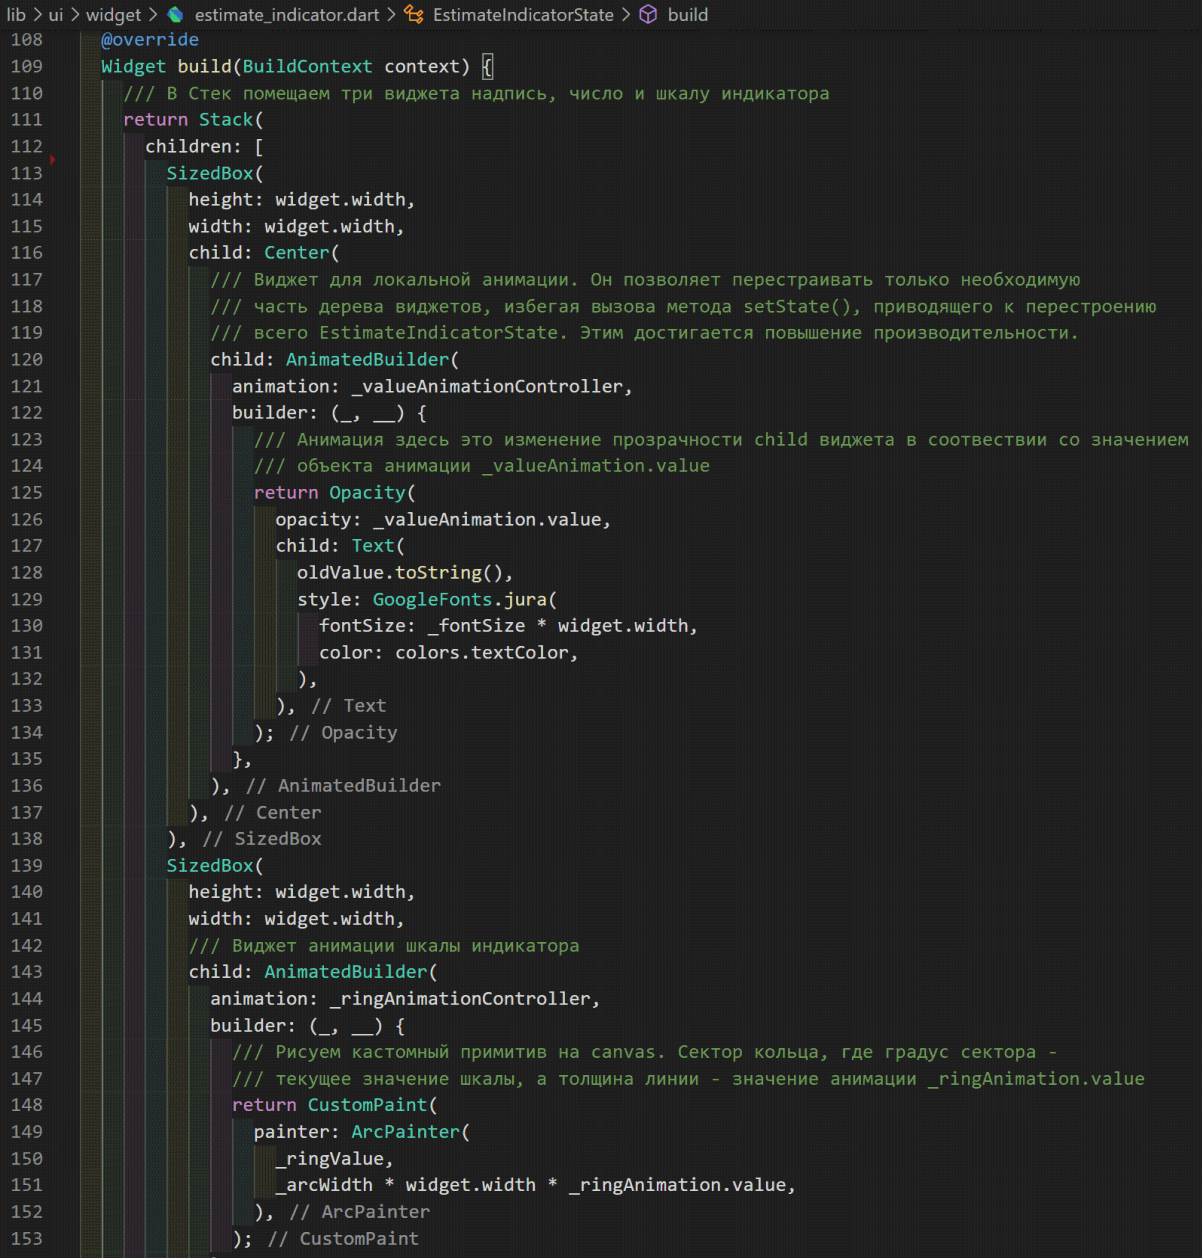
It remains to implement the graphic primitive in the form of an arc:

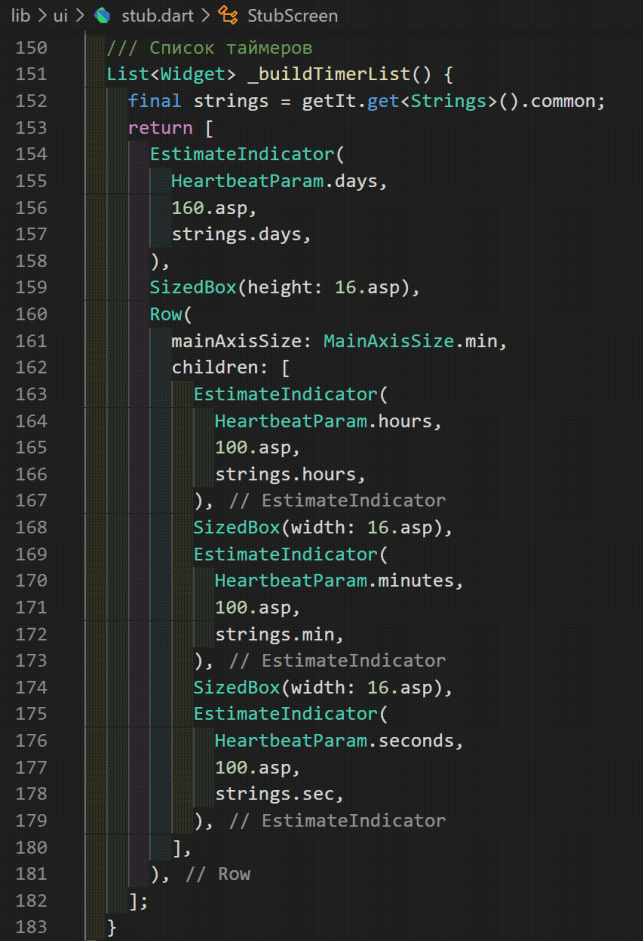
Add 4 Such widgets on the screen are stubs:
Build and release
Before building the application, you must replace the name and description of the application in the ./web/index.html ./web/manifest.json and pubspec.yaml files .
Stop debugging and build the application release with the command
flutter build webThe finished application is located in the ./build/web/ directory . Please note that the files .last_build_id and main.dart.js.map are service files and can be deleted.
Let's place the application on the server prepared in the previous article. To do this, just copy the contents of the ./build/web/ directory to / public / on our server:
scp -r ./* root@91.230.60.120:/public/Result
Source code github
Questions and comments are welcome. You can chat with the author in the Telegram channel .
Instead of a conclusion
Our client application is already ready to receive the first data from the server - information about the release date. To do this, in the fourth article, we will create a skeleton server application and host it on the server.