
→ Vue.js for Beginners Lesson 1: Vue Instance
→ Vue.js for Beginners, Lesson 2: Attribute Binding
→ Vue.js for Beginners, Lesson 3: Conditional Rendering
→ Vue.js for Beginners, Lesson 4: Rendering Lists
→ Vue .js for beginners lesson 5: event processing
→ Vue.js beginners lesson 6: binding classes and styles
→ Vue.js beginners lesson 7: calculated properties
→ Vue.js beginners lesson 8: components
→ Vue. js for beginners lesson 9: custom events
→ Vue.js for beginners lesson 10: forms
The purpose of the lesson
We want to have tabs on the app page, one of which allows visitors to write reviews about products, and the other allows them to view existing reviews.
Initial code
This is how the content of the file looks at this stage of work
index.html:
<div id="app">
  <div class="cart">
    <p>Cart({{ cart.length }})</p>
  </div>

  <product :premium="premium" @add-to-cart="updateCart"></product>
</div>
In
main.jsthere is the following code:
Vue.component('product', {
  props: {
    premium: {
      type: Boolean,
      required: true
    }
  },
  template: `
  <div class="product">

    <div class="product-image">
      <img :src="image" />
    </div>

    <div class="product-info">
      <h1>{{ title }}</h1>
      <p v-if="inStock">In stock</p>
      <p v-else>Out of Stock</p>
      <p>Shipping: {{ shipping }}</p>

      <ul>
        <li v-for="(detail, index) in details" :key="index">{{ detail }}</li>
      </ul>
      <div
        class="color-box"
        v-for="(variant, index) in variants"
        :key="variant.variantId"
        :style="{ backgroundColor: variant.variantColor }"
        @mouseover="updateProduct(index)"
      ></div>

      <button
        @click="addToCart"
        :disabled="!inStock"
        :class="{ disabledButton: !inStock }"
      >
        Add to cart
      </button>

    </div>

    <div>
      <h2><font color="#3AC1EF">Reviews</font></h2>
      <p v-if="!reviews.length">There are no reviews yet.</p>
      <ul>
        <li v-for="review in reviews">
        <p>{{ review.name }}</p>
        <p>Rating: {{ review.rating }}</p>
        <p>{{ review.review }}</p>
        </li>
      </ul>
    </div>

    <product-review @review-submitted="addReview"></product-review>

    </div>
  `,
  data() {
    return {
      product: 'Socks',
      brand: 'Vue Mastery',
      selectedVariant: 0,
      details: ['80% cotton', '20% polyester', 'Gender-neutral'],
      variants: [
        {
          variantId: 2234,
          variantColor: 'green',
          variantImage: './assets/vmSocks-green.jpg',
          variantQuantity: 10
        },
        {
          variantId: 2235,
          variantColor: 'blue',
          variantImage: './assets/vmSocks-blue.jpg',
          variantQuantity: 0
        }
      ],
      reviews: []
    }
  },
    methods: {
      addToCart() {
        this.$emit('add-to-cart', this.variants[this.selectedVariant].variantId);
      },
      updateProduct(index) {
        this.selectedVariant = index;
      },
      addReview(productReview) {
        this.reviews.push(productReview)
      }
    },
    computed: {
      title() {
        return this.brand + ' ' + this.product;
      },
      image() {
        return this.variants[this.selectedVariant].variantImage;
      },
      inStock() {
        return this.variants[this.selectedVariant].variantQuantity;
      },
      shipping() {
        if (this.premium) {
          return "Free";
        } else {
          return 2.99
        }
      }
    }
})

Vue.component('product-review', {
  template: `
    <form class="review-form" @submit.prevent="onSubmit">

      <p v-if="errors.length">
        <b>Please correct the following error(s):</b>
        <ul>
          <li v-for="error in errors">{{ error }}</li>
        </ul>
      </p>

      <p>
        <label for="name">Name:</label>
        <input id="name" v-model="name">
      </p>

      <p>
        <label for="review">Review:</label>
        <textarea id="review" v-model="review"></textarea>
      </p>

      <p>
        <label for="rating">Rating:</label>
        <select id="rating" v-model.number="rating">
          <option>5</option>
          <option>4</option>
          <option>3</option>
          <option>2</option>
          <option>1</option>
        </select>
      </p>

      <p>
        <input type="submit" value="Submit">
      </p>

    </form>

  `,
  data() {
    return {
      name: null,
      review: null,
      rating: null,
      errors: []
    }
  },
  methods: {
    onSubmit() {
      if(this.name && this.review && this.rating) {
        let productReview = {
          name: this.name,
          review: this.review,
          rating: this.rating
        }
        this.$emit('review-submitted', productReview)
        this.name = null
        this.review = null
        this.rating = null
      } else {
        if(!this.name) this.errors.push("Name required.")
        if(!this.review) this.errors.push("Review required.")
        if(!this.rating) this.errors.push("Rating required.")
      }
    }
  }
})

var app = new Vue({
  el: '#app',
  data: {
    premium: true,
    cart: []
  },
  methods: {
    updateCart(id) {
      this.cart.push(id);
    }
  }
})
This is what the application looks like now.
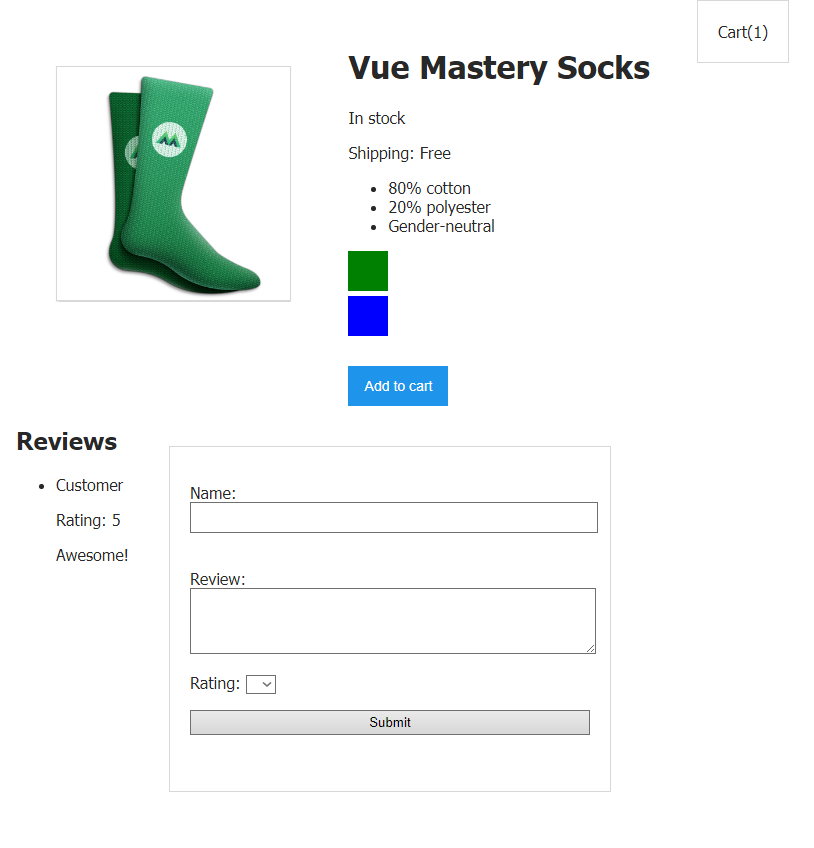
Application page
Task
Currently, the reviews and the form that is used to submit reviews are displayed on the page next to each other. This is quite a working structure. But more and more reviews are expected to appear on the page over time. This means that it will be more convenient for users to interact with a page that, of their choice, displays either a form or a list of reviews.
The solution of the problem
In order to solve our problem, we can add a system of tabs to the page. One of them, with a title
Reviews, will display reviews. The second, with a title Make a Review, will display a form for submitting reviews.
Creating a component that implements the tab system
Let's start by creating a component
product-tabs. It will be displayed at the bottom of the component's visual representation product. Over time, it will replace the code that is currently used to display the list of reviews and forms on the page.
Vue.component('product-tabs', {
  template: `
    <div>
      <span class="tab" v-for="(tab, index) in tabs" :key="index">{{ tab }}</span>
    </div>
  `,
  data() {
    return {
      tabs: ['Reviews', 'Make a Review']
    }
  }
})
Right now this is just a blank component that we will be finalizing soon. For now, let's briefly discuss what is presented in this code.
The component data has an array
tabscontaining the strings that we use as the tab headers. The component template uses a construction v-forthat tabscreates an element <span>containing the corresponding string for each array element . What forms this component at this stage of work on it will look like the one shown below.

The product-tabs component at the initial stage of working on it
. In order to achieve our goals, we need to know which of the tabs is active. Therefore, let's add a property to the component data
selectedTab. We will dynamically set the value of this property using an event handler that responds to clicks on the tab titles:
@click="selectedTab = tab"
The property will write strings corresponding to the tab headers.
That is, if the user clicks on the tab
Reviews, selectedTaba string will be written to Reviews. If you click on the tab Make a Review, then the selectedTabline will be included Make a Review.
This is what the complete component code will look like now.
Vue.component('product-tabs', {
  template: `
    <div>
      <ul>
        <span class="tab"
              v-for="(tab, index) in tabs"
              @click="selectedTab = tab"
        >{{ tab }}</span>
      </ul>
    </div>
  `,
  data() {
    return {
      tabs: ['Reviews', 'Make a Review'],
      selectedTab: 'Reviews'  //    @click
    }
  }
})
Binding a class to an active tab
A user working with an interface that uses tabs must be aware of which tab is active. You can implement a similar mechanism using class binding to elements
<span>used to display tab names:
:class="{ activeTab: selectedTab === tab }"
Here is the CSS file that defines the style of the class used here
activeTab. This is what this style looks like:
.activeTab {
  color: #16C0B0;
  text-decoration: underline;
}
And here is the class style
tab:
.tab {
  margin-left: 20px;
  cursor: pointer;
}
If we explain the above construction in simple language, then it turns out that the style specified for the class is applied to the tab
activeTab, in the case when selectedTabequals tab. Since the selectedTabname of the tab that the user has just clicked on is written in, the style .activeTabwill be applied specifically to the active tab.
In other words, when the user clicks on the first tab,
tabwill be located Reviews, the same will be written to selectedTab. As a result, the style will be applied to the first tab .activeTab.
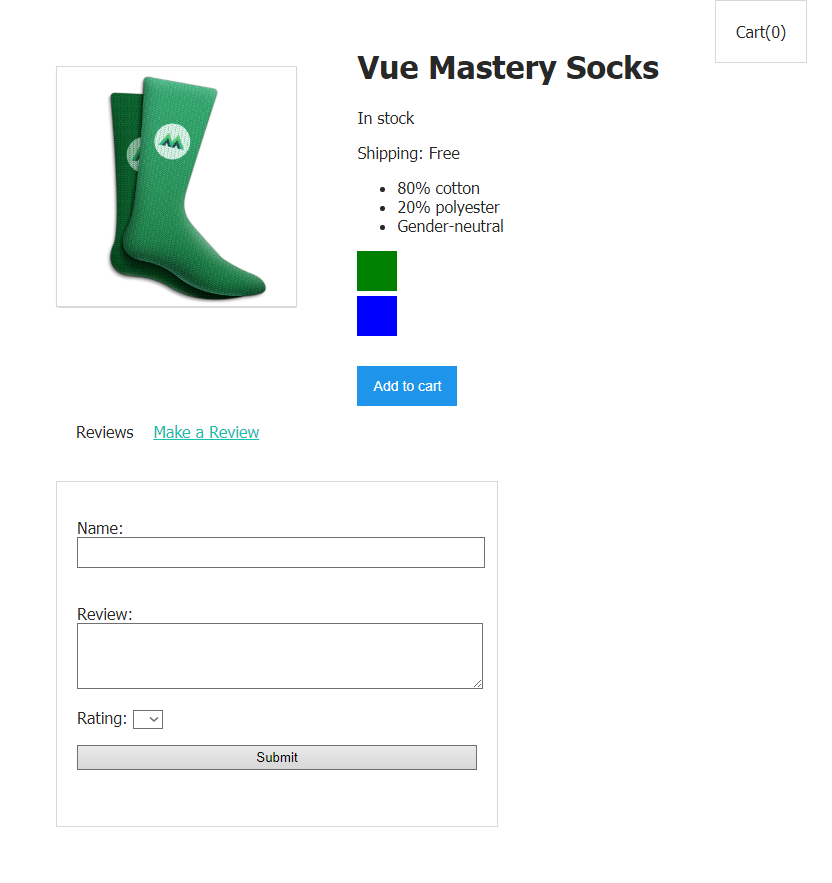
Now the tab titles on the page will look like below.

The highlighted title of the active tab It
looks like everything is working as expected at this stage, so we can move on.
Working on the component template
Now that we can tell the user which tab is the active one, we can continue working on the component. Namely, we are talking about finalizing its template, describing what exactly will be displayed on the page when each of the tabs is activated.
Let's think about what should be shown to the user if he clicks on the tab
Reviews. This is, of course, product reviews. Therefore, let's move the code for displaying reviews from the component template to the component producttemplate product-tabs, placing this code below the construction used to display the tab headers. This is what the component template will look like now product-tabs:
template: `
  <div>
    <ul>
      <span class="tab"
            :class="{ activeTab: selectedTab === tab }"
            v-for="(tab, index) in tabs"
            @click="selectedTab = tab"
      >{{ tab }}</span>
    </ul>
    <div>
      <p v-if="!reviews.length">There are no reviews yet.</p>
      <ul>
        <li v-for="review in reviews">
        <p>{{ review.name }}</p>
        <p>Rating: {{ review.rating }}</p>
        <p>{{ review.review }}</p>
        </li>
      </ul>
    </div>
  </div>
`
Note that we got rid of the tag
<h2><font color="#3AC1EF">as we no longer need to display the title Reviewsabove the list of reviews. Instead of this title, the title of the corresponding tab will be displayed.
But moving the template code alone is not enough to provide feedback. The array
reviewswhose data is used to display reviews is stored as part of the component data product. We need to pass this array to the component product-tabsusing the component props mechanism. Let's add the product-tabsfollowing to the object with options used during creation :
props: {
  reviews: {
    type: Array,
    required: false
  }
}
Let's pass an array
reviewsfrom component productto component product-tabsusing the productfollowing construction in the template :
<product-tabs :reviews="reviews"></product-tabs>
Now let's think about what needs to be displayed on the page if the user clicks on the title of the tab
Make a Review. This is, of course, a form for submitting feedback. In order to prepare the project for further work on it, let's transfer the component connection code product-reviewfrom the component template productto the template product-tabs. Let's place the following code below the element <div>used to display the list of reviews:
<div>
  <product-review @review-submitted="addReview"></product-review>
</div>
If you look at the application page now, you will find that the list of reviews and the form are displayed on it below the tab headers.
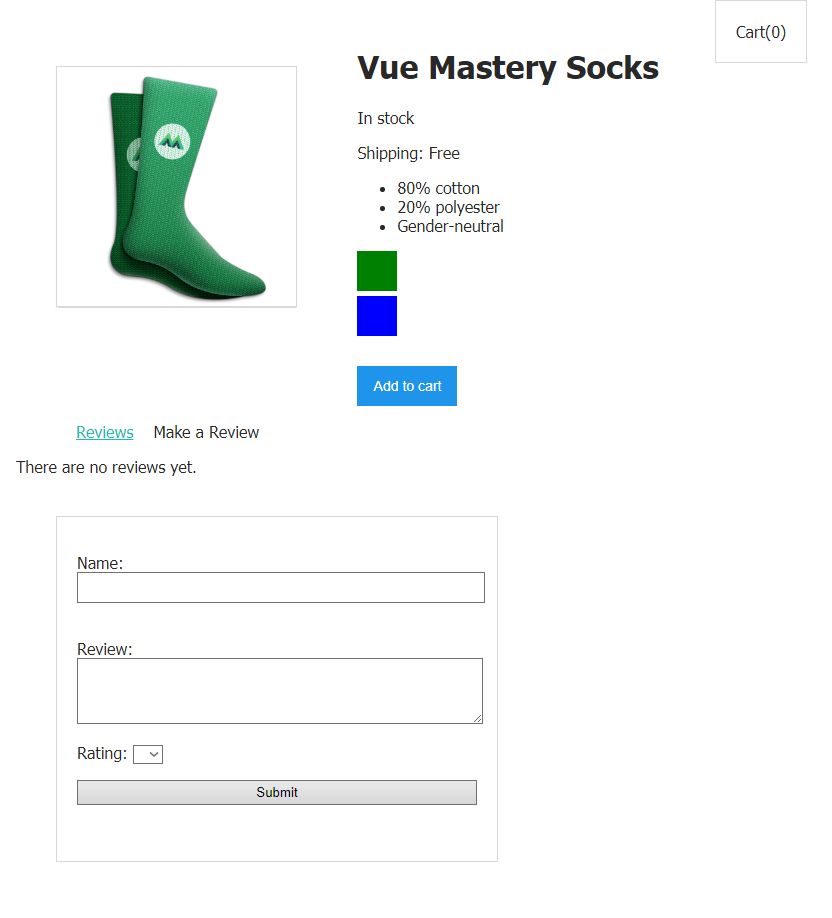
An intermediate stage of working on the page
In this case, clicks on the headings, although they lead to their selection, do not affect other elements of the page in any way. Further, if you try to use the form, it turns out that it has stopped working normally. All of these are quite expected consequences of the changes we made to the application. Let's continue working and bring our project to a working state.
Conditional display of page elements
Now that we have prepared the basic elements of the component template
product-tabs, it's time to create a system that will allow you to display different page elements based on which tab title the user clicked on.
The component data already has a property
selectedTab. We can use it in a directive v-showto conditionally render what belongs to each of the tabs.
So, to the tag
<div>containing the code for generating the list of reviews, we can add the following construction:
v-show="selectedTab === 'Reviews'"
Thanks to her, the list of reviews will be displayed when the tab is active
Reviews.
Similarly, we will add the following to the tag
<div>that contains the component connection code product-review:
v-show="selectedTab === 'Make a Review'"
This will result in the form being displayed only when the tab is active
Make a Review.
This is what the component template will look like now
product-tabs:
template: `
  <div>
    <ul>
      <span class="tab"
            :class="{ activeTab: selectedTab === tab }"
            v-for="(tab, index) in tabs"
            @click="selectedTab = tab"
      >{{ tab }}</span>
    </ul>
    <div v-show="selectedTab === 'Reviews'">
      <p v-if="!reviews.length">There are no reviews yet.</p>
      <ul>
        <li v-for="review in reviews">
        <p>{{ review.name }}</p>
        <p>Rating: {{ review.rating }}</p>
        <p>{{ review.review }}</p>
        </li>
      </ul>
    </div>
    <div v-show="selectedTab === 'Make a Review'">
      <product-review @review-submitted="addReview"></product-review>
    </div>
  </div>
`
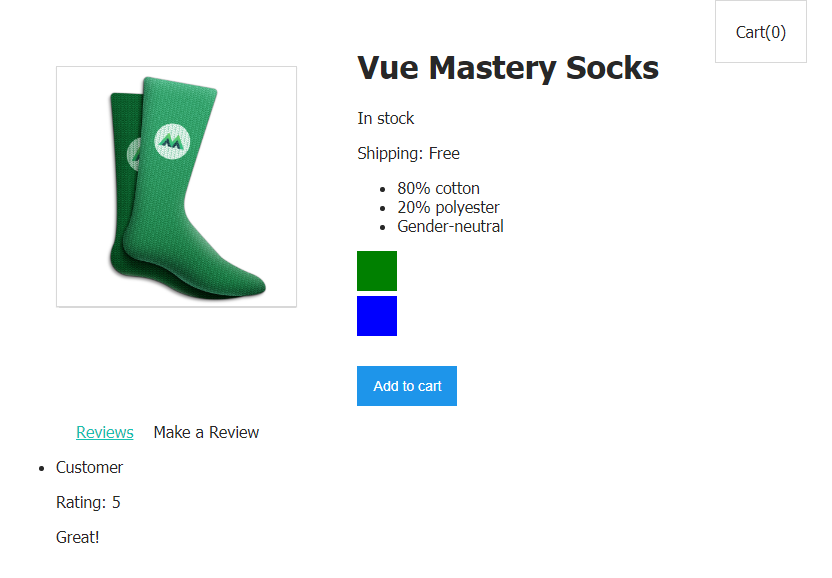
If you look at the page and click on the tabs, you can make sure that the mechanism we have created is working correctly.
Clicking on the tabs hides some items and displays others.
Submitting feedback via a form still doesn't work. Let's investigate the problem and fix it.
Solving the problem with submitting feedback
If you look at the browser developer tools console now, you can see a warning.

Console Warning
Apparently the system cannot detect the method
addReview. What happened to him?
To answer this question, let's remember that it
addReviewis a method that is declared in a componentproduct. It should be called if the componentproduct-review(and this is a child component of the componentproduct) generates an eventreview-submitted:
<product-review @review-submitted="addReview"></product-review>
This is how everything worked before transferring the above code snippet to the component
product-tabs. And now a component productis a child component product-tabs, and product-reviewnow it is not a “child”, a component product, but its “grandson”.
Our code is now designed to interact
product-reviewwith the parent component. But now it is no longer a component product. As a result, it turns out that in order for the form to work correctly, we need to refactor the project code.
Refactoring project code
In order to ensure communication of grandchild components with their "grandparents", or in order to establish communication between components of the same level, a mechanism called the global event bus is often used.
The Global Event Bus is a communication channel that can be used to transfer information between components. And it is, in fact, just a Vue instance that is created without passing it an object with options. Let's create an event bus:
var eventBus = new Vue()
This code will go to the top level of the file
main.js.
You might find it easier to grasp this concept if you think of the event bus as a bus. Its passengers are data that some components send to others. In our case, we are talking about transferring information about events generated by other components to one component. That is, our "bus" will travel from component
product-reviewto component product, carrying information that the form has been submitted and delivering the form data from product-reviewto product.
Now in the component
product-review, in the method onSubmit, there is a line like this:
this.$emit('review-submitted', productReview)
Let's replace it with the next one, using
eventBusinstead this:
eventBus.$emit('review-submitted', productReview)
After that, you no longer need to listen to the
review-submittedcomponent event product-review. Therefore, we will change the code of this component in the component template product-tabsto the following:
<product-review></product-review>
The
productmethod can now be removed from the component addReview. Instead, we will use the following construction:
eventBus.$on('review-submitted', productReview => {
  this.reviews.push(productReview)
})
We will talk below about how to use it in a component, but for now, we will describe in a nutshell what happens in it. This construct indicates that when it
eventBusgenerates an event review-submitted, you need to take the data passed in this event (that is, - productReview) and place it in the reviewscomponent array product. In fact, this is very similar to what has been done so far in a method addReviewthat we no longer need. Note that the above code snippet uses an arrow function. This moment is worthy of a more detailed coverage.
Reasons for using an arrow function
Here we are using the arrow function syntax that was introduced in ES6. The point is that the context of the arrow function is bound to the parent context. That is, when we, inside this function, use a keyword
this, it is equivalent to the keyword thisthat corresponds to the entity containing the arrow function.
This code can be rewritten without using arrow functions, but then you need to organize the binding
this:
eventBus.$on('review-submitted', function (productReview) {
  this.reviews.push(productReview)
}.bind(this))
Completing the project
We've almost reached our goal. All that remains to be done is to find a place for the piece of code that provides a response to the event
review-submitted. A productfunction can become such a place in a component mounted:
mounted() {
  eventBus.$on('review-submitted', productReview => {
    this.reviews.push(productReview)
  })
}
What is this function? This is a lifecycle hook that is called once after the component is mounted in the DOM. Now, after the component
productis mounted, it will wait for events to occur review-submitted. After such an event is generated, what is passed in this event will be added to the component data, that is, - productReview.
If you now try to leave a review about the product using the form, it turns out that this review is displayed where it should be.
Form works as it should
The event bus is not the best solution for communicating components
Although the event bus is often used, and although you may find it in various projects, keep in mind that this is far from the best solution to the problem of connecting application components.
As the application grows, a state management system based on Vuex can come in very handy . It is an application state management pattern and library.
Workshop
Add tabs
Shippingand to the project Details, which, respectively, display the cost of delivery of purchases and information about goods.
- Here is a template you can use to solve this problem.
- Here is the solution to the problem.
Outcome
Here's what you learned in this tutorial:
- You can use conditional rendering tools to organize the mechanism of tabs.
- , Vue, .
- — . . — Vuex.
We hope you have learned what you wanted after taking this Vue course and are ready to learn a lot more new and interesting things about this framework.
If you have just completed this course, please share your impressions.
→ Vue.js for Beginners Lesson 1: Vue Instance
→ Vue.js for Beginners, Lesson 2: Attribute Binding
→ Vue.js for Beginners, Lesson 3: Conditional Rendering
→ Vue.js for Beginners, Lesson 4: Rendering Lists
→ Vue .js for Beginners Lesson 5: Event Handling
→ Vue.js for Beginners, Lesson 6: Binding Classes and Styles
→ Vue.js for Beginners, Lesson 7: Computed Properties
→Vue.js for beginners, lesson 8: Components
→ Vue.js for beginners, lesson 9: custom events
→ Vue.js for beginners, lesson 10: Forms
