This text is a translation of the blog post Multi-Target in Albumentations dated July 27, 2020. The author is on Habré , but I was too lazy to translate the text into Russian. And this translation was made at his request.
I have translated everything I can into Russian, but some technical terms in English sound more natural. They are left in this form. If an adequate translation comes to your mind - comment - I will correct it.
Image augmentation is an interpreted regularization technique. You convert existing tagged data to new data, thereby increasing the size of the dataset.

You can use Albumentations in PyTorch , Keras , Tensorflow, or any other framework that can process an image as a numpy array.
The library works best with standard tasks of classification, segmentation, detection of objects and key points. Slightly less common are problems when each element of the training sample contains not one, but many different objects.
For this kind of situations, the multi-target functionality has been added.
Situations where this might come in handy:
- Siamese networks
- Processing frames in video
- Image2image Tasks
- Multilabel semantic segmentation
- Instance segmentation
- Panoptic segmentation
- Kaggle . Kaggle Grandmaster, Kaggle Masters, Kaggle Expert.
- , Deepfake Challenge , Albumentations .
- PyTorch ecosystem
- 5700 GitHub.
- 80 . .
For the past three years we have been working on functionality and performance optimizations.
For now, we are focusing on documentation and tutorials.
At least once a week, users ask to add transform support for multiple segmentation masks.
We have had it for a long time.
In this article, we will share examples of how to work with multiple targets in albumentations.
Scenario 1: One Image, One Mask

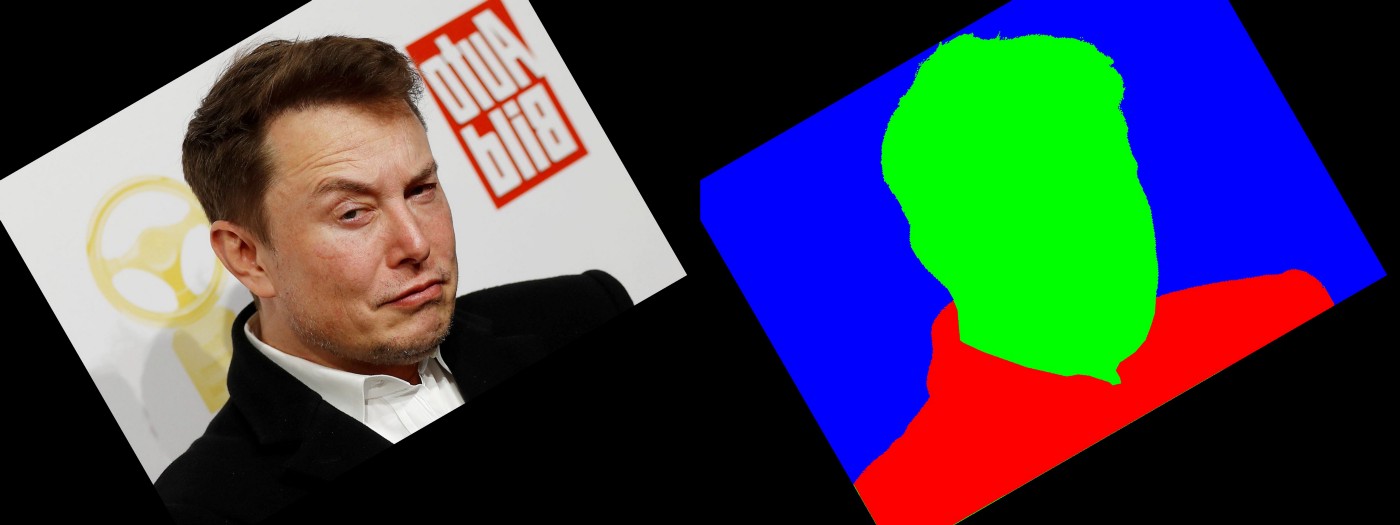
The most common use case is image segmentation. You have an image and a mask. You want to apply a set of spatial transformations to them, and they must be the same set.
In this code, we are using HorizontalFlip and ShiftScaleRotate .
import albumentations as A

transform = A.Compose([
    A.HorizontalFlip(p=0.5),
    A.ShiftScaleRotate(border_mode=cv2.BORDER_CONSTANT,
                          scale_limit=0.3,
                          rotate_limit=(10, 30),
                          p=0.5)
], p=1)

transformed = transform(image=image, mask=mask)

image_transformed = transformed['image']
mask_transformed = transformed['mask']
-> Link to gistfile1.py

Scenario 2: One image and multiple masks

For some tasks, you may have multiple labels corresponding to the same pixel.
Let's apply HorizontalFlip , GridDistortion , RandomCrop .
import albumentations as A

transform = A.Compose([
    A.HorizontalFlip(p=0.5),
    A.GridDistortion(p=0.5),
    A.RandomCrop(height=1024, width=1024, p=0.5),
], p=1)

transformed = transform(image=image, masks=[mask, mask2])

image_transformed = transformed['image']
mask_transformed = transformed['masks'][0]
mask2_transformed = transformed['masks'][1]
-> Link to gistfile1.py
Scenario 3: Multiple Images, Masks, Key Points, and Boxes

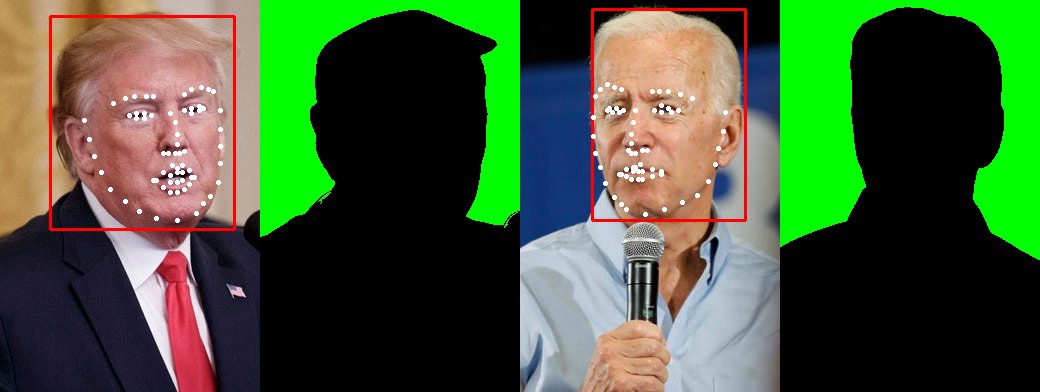
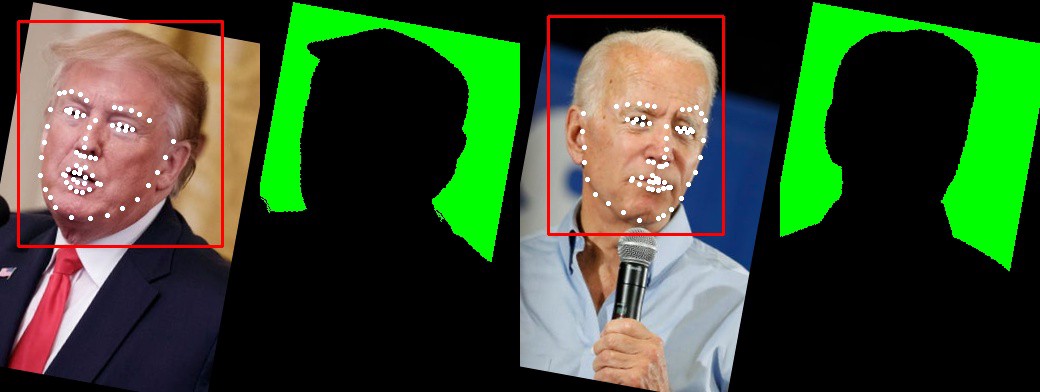
You can apply spatial transformations to multiple targets.
In this example, we have two images, two masks, two boxes, and two sets of keypoints.
Let's apply a sequence of HorizontalFlip and ShiftScaleRotate .
 import albumentations as A

transform = A.Compose([A.HorizontalFlip(p=0.5),
                       A.ShiftScaleRotate(border_mode=cv2.BORDER_CONSTANT, scale_limit=0.3, p=0.5)],
                         bbox_params=albu.BboxParams(format='pascal_voc', label_fields=['category_ids']),
                         keypoint_params=albu.KeypointParams(format='xy'),
                         additional_targets={
                             "image1": "image",
                             "bboxes1": "bboxes",
                             "mask1": "mask",
                             'keypoints1': "keypoints"},
                         p=1)

transformed = transform(image=image,
                        image1=image1,
                        mask=mask,
                        mask1=mask1,
                        bboxes=bboxes,
                        bboxes1=bboxes1,
                        keypoints=keypoints,
                        keypoints1=keypoints1,
                        category_ids=["face"]
                        )

image_transformed = transformed['image']
image1_transformed = transformed['image1']

mask_transformed = transformed['mask']
mask1_transformed = transformed['mask1']

bboxes_transformed = transformed['bboxes']
bboxes1_transformed = transformed['bboxes1']

keypoints_transformed = transformed['keypoints']
keypoints1_transformed = transformed['keypoints1']
→ Link to gistfile1.py

Q: Is it possible to work with more than two images?
A: You can take as many images as you like.
Q: Should the number of images, masks, boxes and keypoints be the same?
A: You can have N images, M masks, K keypoints and B boxes. N, M, K and B can be different.
Q: Are there situations where the multi target functionality does not work or does not work as expected?
A: In general, you can use multi-target for a set of images of different sizes. Some transformations depend on the input. For example, you cannot crop a crop that is larger than the image itself. Another example: MaskDropout , which may depend on the original mask. How he will behave when we have a set of masks is not clear. In practice, they are extremely rare.
Q: How many transformations can you combine together?
A : You can combine transformations into a complex pipeline in a bunch of different ways.
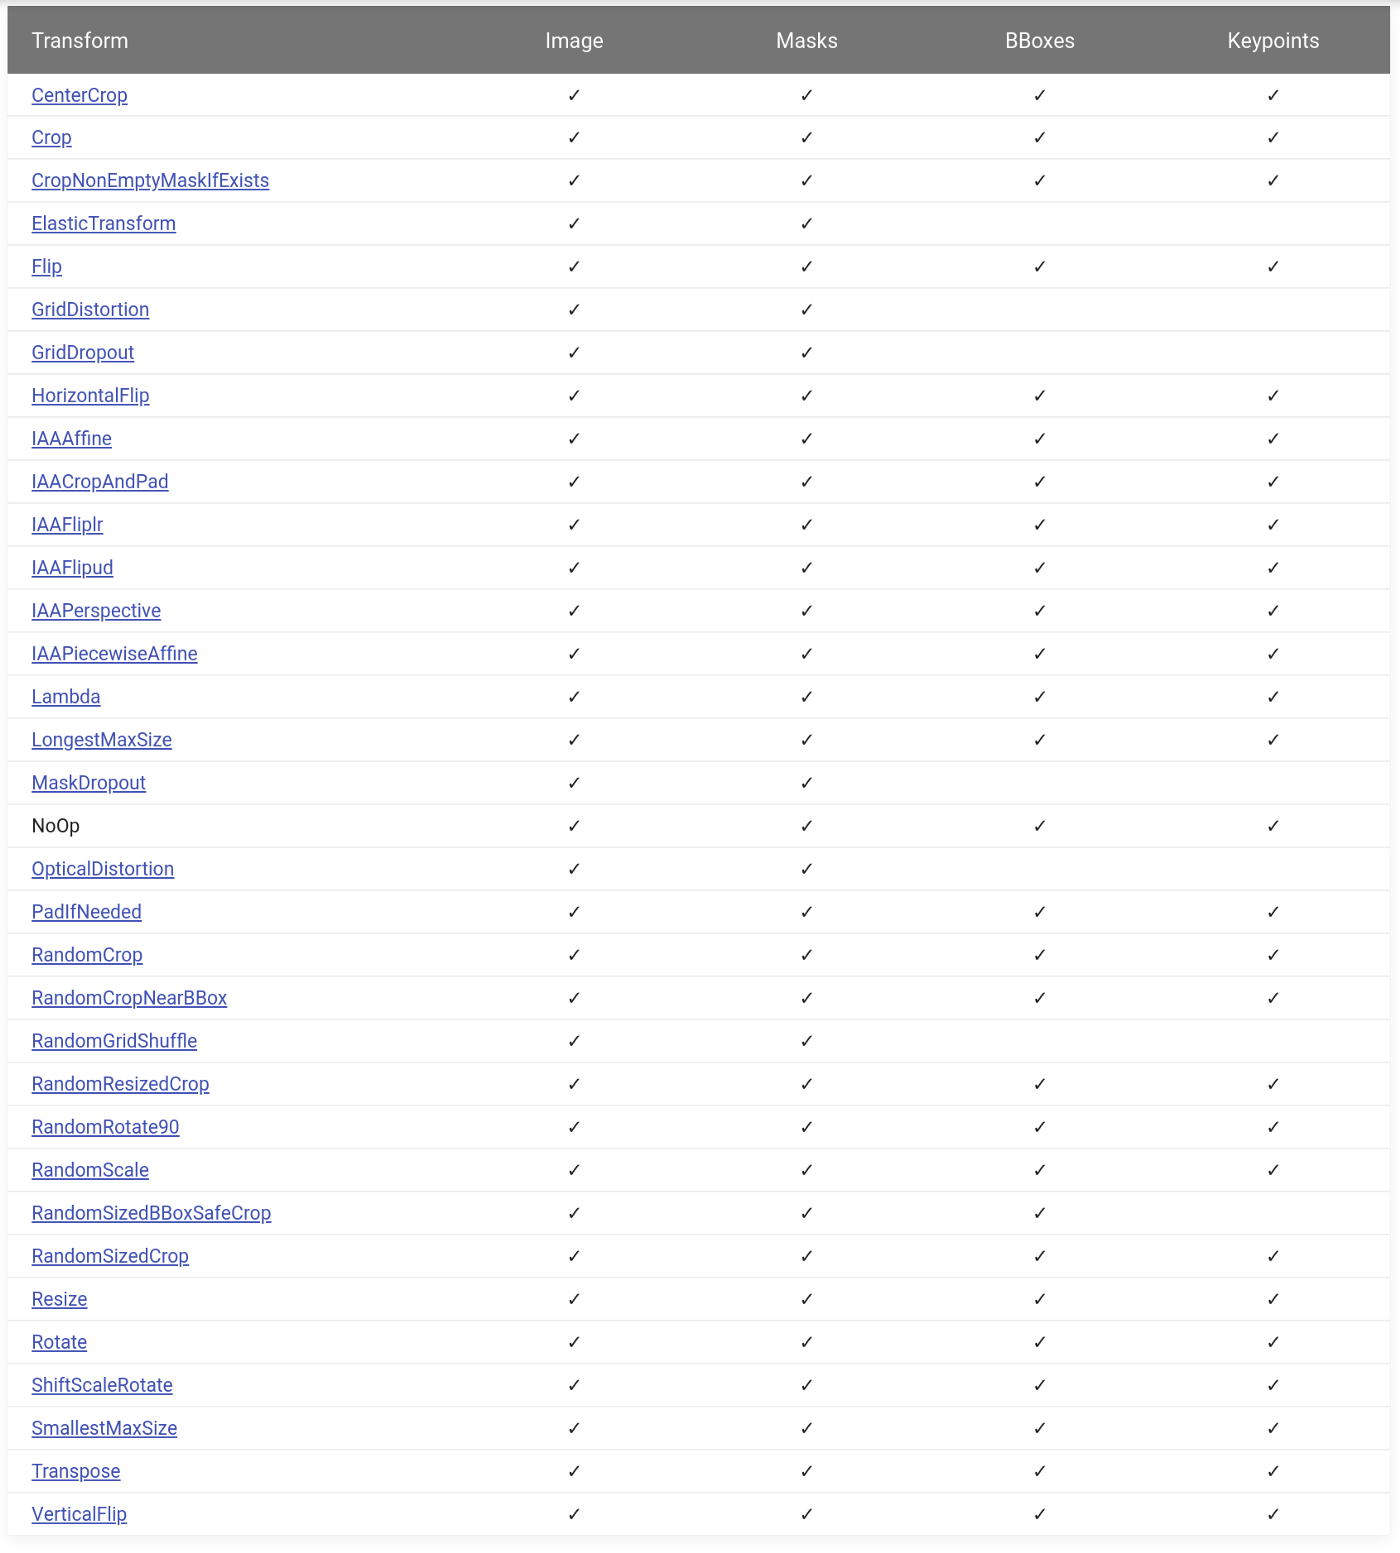
The library contains over 30 spatial transformations . They all support images and masks, most support boxes and keypoints.

→ Link to source
They can be combined with over 40 transformations that change the pixel values of an image. For example: RandomBrightnessContrast , Blur, or something more exotic like RandomRain .
Additional documentation
- Complete conversion sheet
- Mask transformations for segmentation tasks
- Bounding boxes object detection augmentation
- Key point transformations
- Synchronous conversion of masks, boxes and keypoints
- With what probability are transformations applied in the pipeline?
Conclusion
Working on an open-source project is difficult, but very exciting. I would like to thank the development team:
- Alexander Buslaev
- Vladimir Druzhinin
- Alexey Parnov
- Evgeny Khvedcheniya
- Mikhail Druzhinin
and all the contributors who helped create the library and bring it to its current level.