Read about what it is and what we managed to do during the work on the project in this article.
We, Denis Tarasov and Denis Filippov, are already second year undergraduate students in Applied Mathematics and Informatics at the St. Petersburg HSE. We worked on the project together with Yan Freidkin and Ivan Chunarev. We studied with them at the same school: St. Petersburg GFML No. 30.
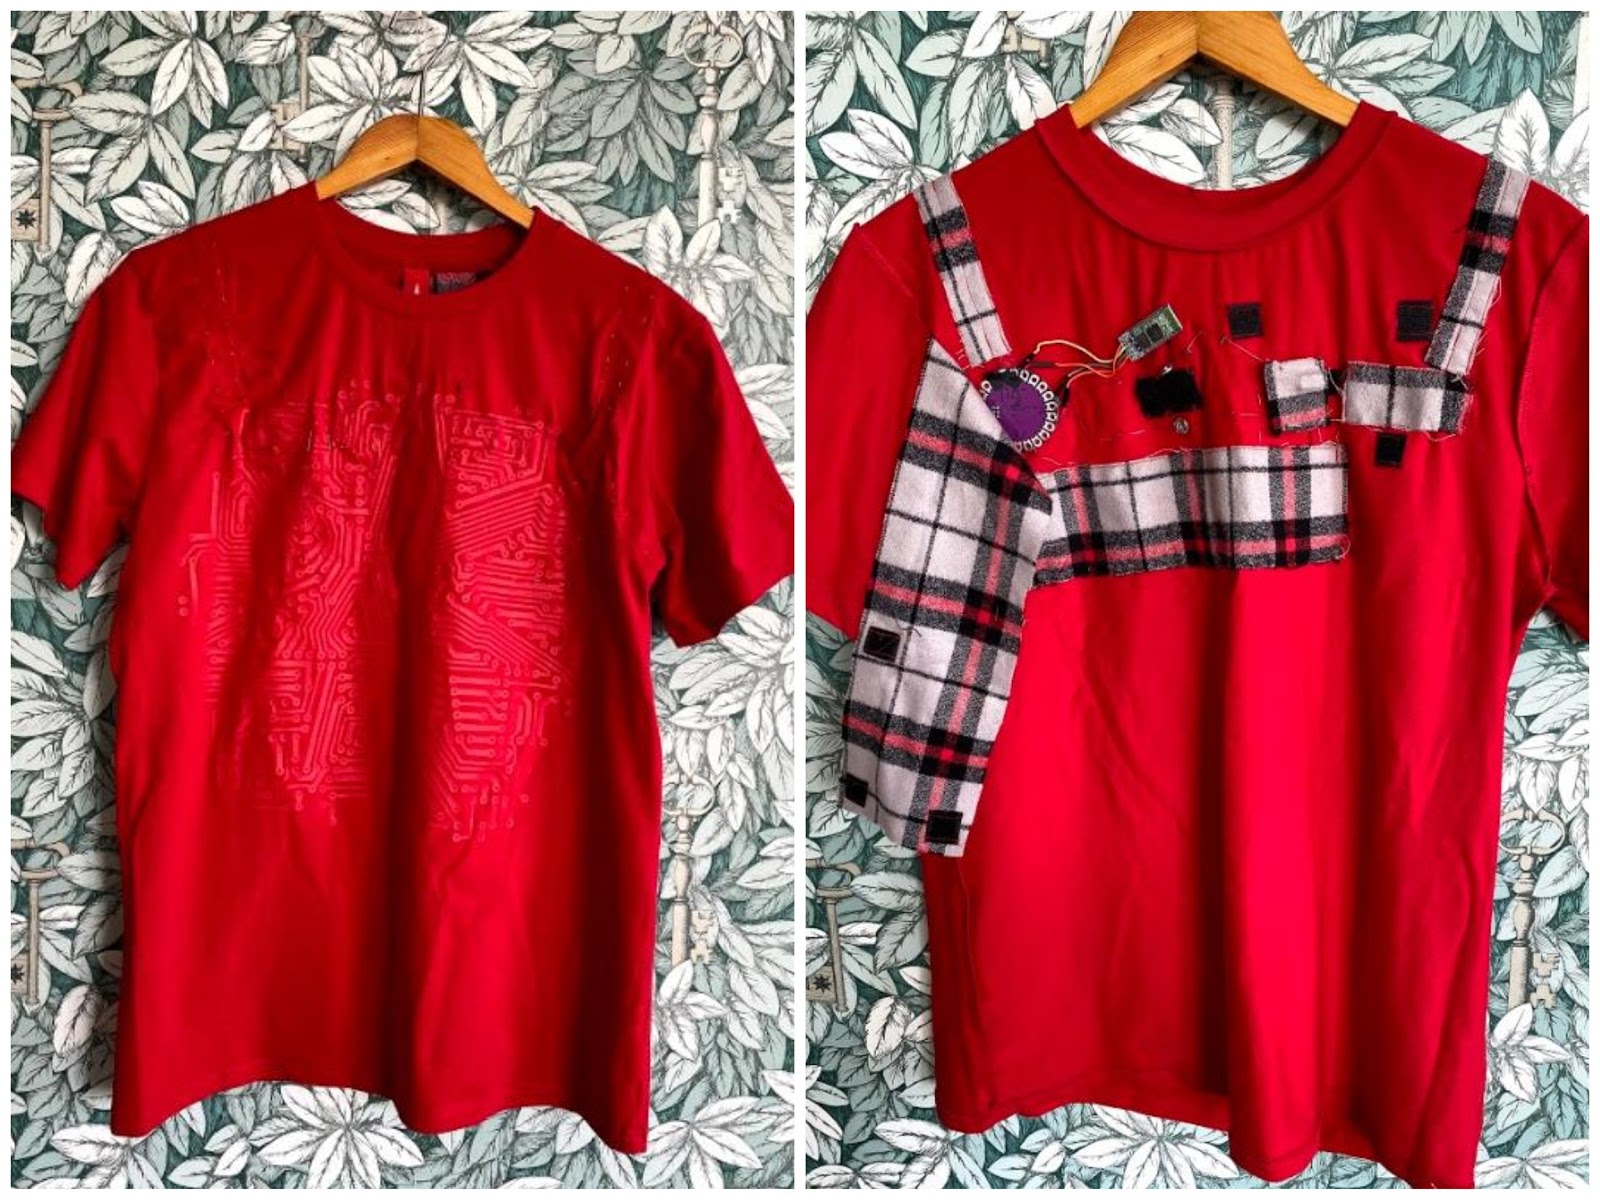
In the 11th grade, Yan and Ivan had a robotics project ー "Smart T-shirt" (it is in the first photo). The idea is this: a T-shirt is taken, various sensors are attached to it (accelerometer, gyroscope, and others). Some indicators can be determined from the read data, for example, the correct posture. The guys managed to take part in several conferences and were going to continue working on the project after graduation, but realized that they needed programmers.
Jan and Ivan's T-shirt could read the ECG and track the correct posture. For this, the Arduino UNO was used - a development platform with outdated AVR microcontrollers. Soon enough, they ran out of code memory. At a new stage of work on the project, we realized that it was necessary to impose more stringent requirements on the microcontroller:
- to connect more sensors, a processor with a higher frequency, more peripherals and faster peripherals was needed;
- more flash memory, RAM;
- lower cost;
- stability of the microcontroller.
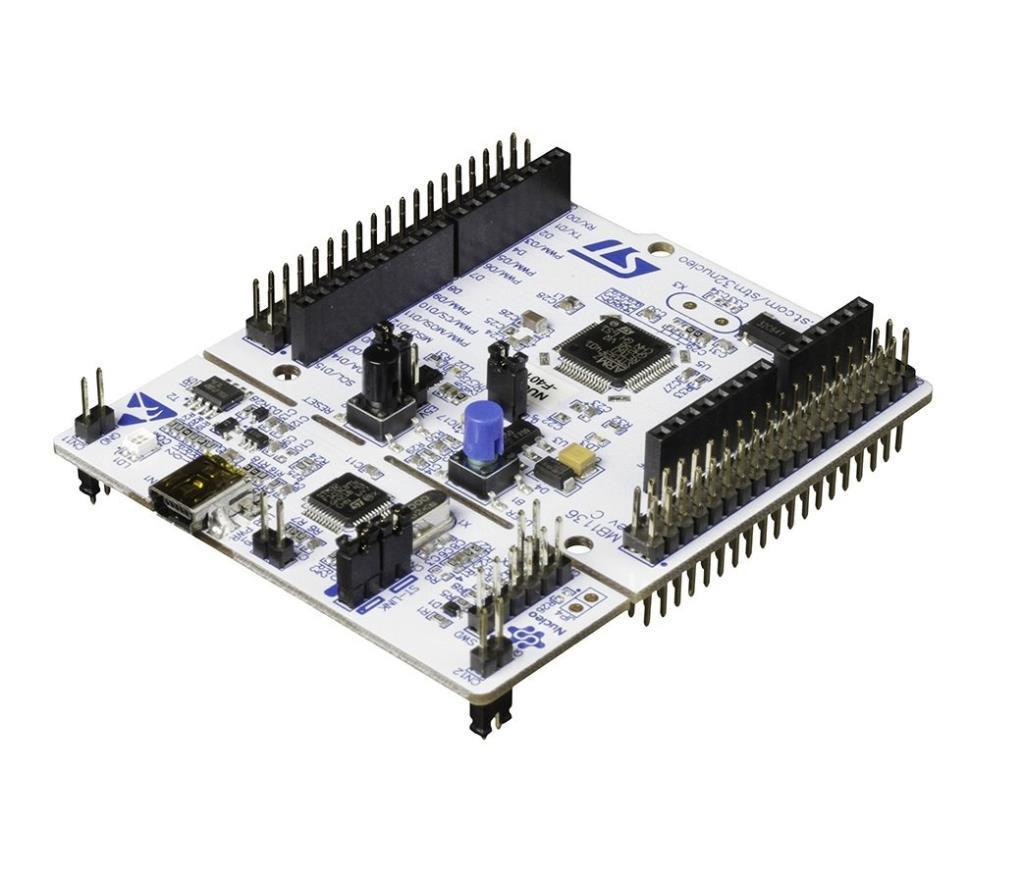
We decided that we needed to change the microcontroller. We had two options: use a more powerful AVR series microcontroller (in our case Arduino) or switch to another series of microcontrollers, namely ARM (in our case STM32). Despite the large Arduino community and the ease of use of this microcontroller, we decided to upgrade to STM32 because it has better performance and more memory. We are currently using an STM32f4 * microcontroller.
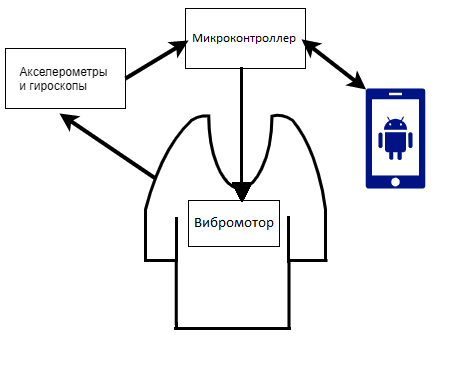
In the past semester, we set ourselves the goal of obtaining information about a person's posture and processing it. The scheme of the project is as follows: we have a T-shirt with accelerometers and gyroscopes attached to it, with the help of which we get the angles of twist. The data received from the sensors is sent to the microcontroller. There they are processed and, if necessary, voltage is applied to the vibration motor, which stimulates the person to straighten up. Using the Android application, posture processing is turned on and off, and the T-shirt is linked to the user. But in general, a T-shirt can work without access to a smartphone: you can turn on posture processing in the application, leave your phone at home and go for a walk in a T-shirt. In this case, the data will be processed on the microcontroller and the vibration motor will turn on if the position is incorrect.
The first steps. LED lit
We had no experience in programming microcontrollers, and we read that initializing and declaring sensors and pins on an STM is long and difficult. Therefore, we used a high level of abstraction using the HAL library and STM32CubeMX . STM32CubeMX is a tool that configures microcontroller ports using a graphical interface and generates appropriate code using the HAL library. First, we decided to do the most basic thing in microcontroller programming (at the “Hello world” level) light up the LED.
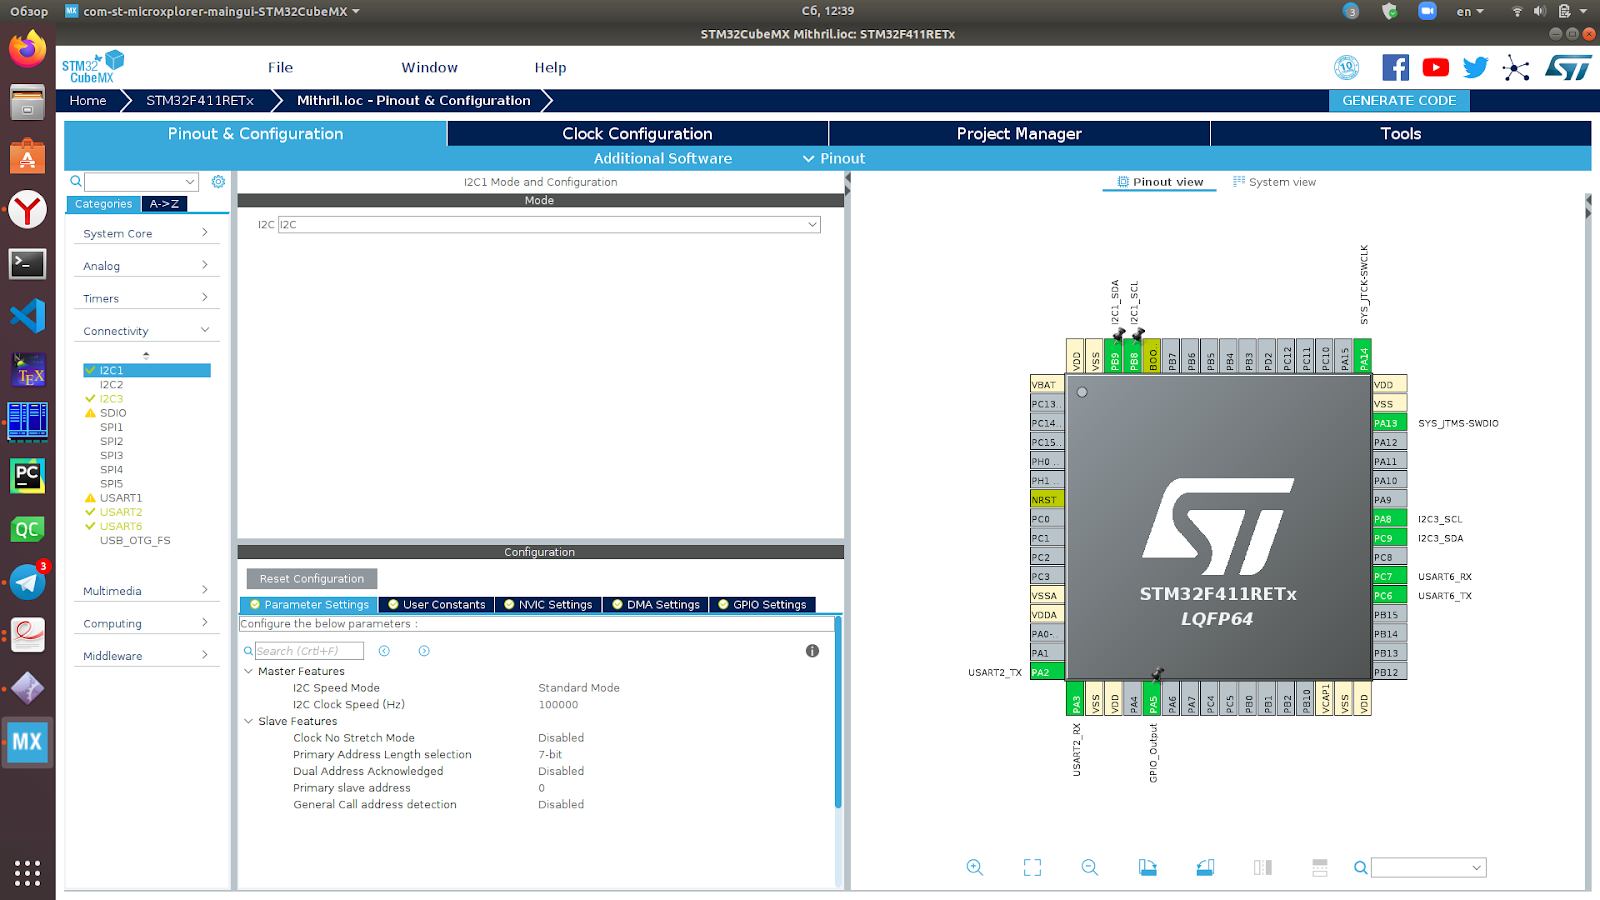
STM32CubeMX interface
After a long search for an IDE that would be cross-platform, free and easy to develop, we settled on STM32CubeIDE .
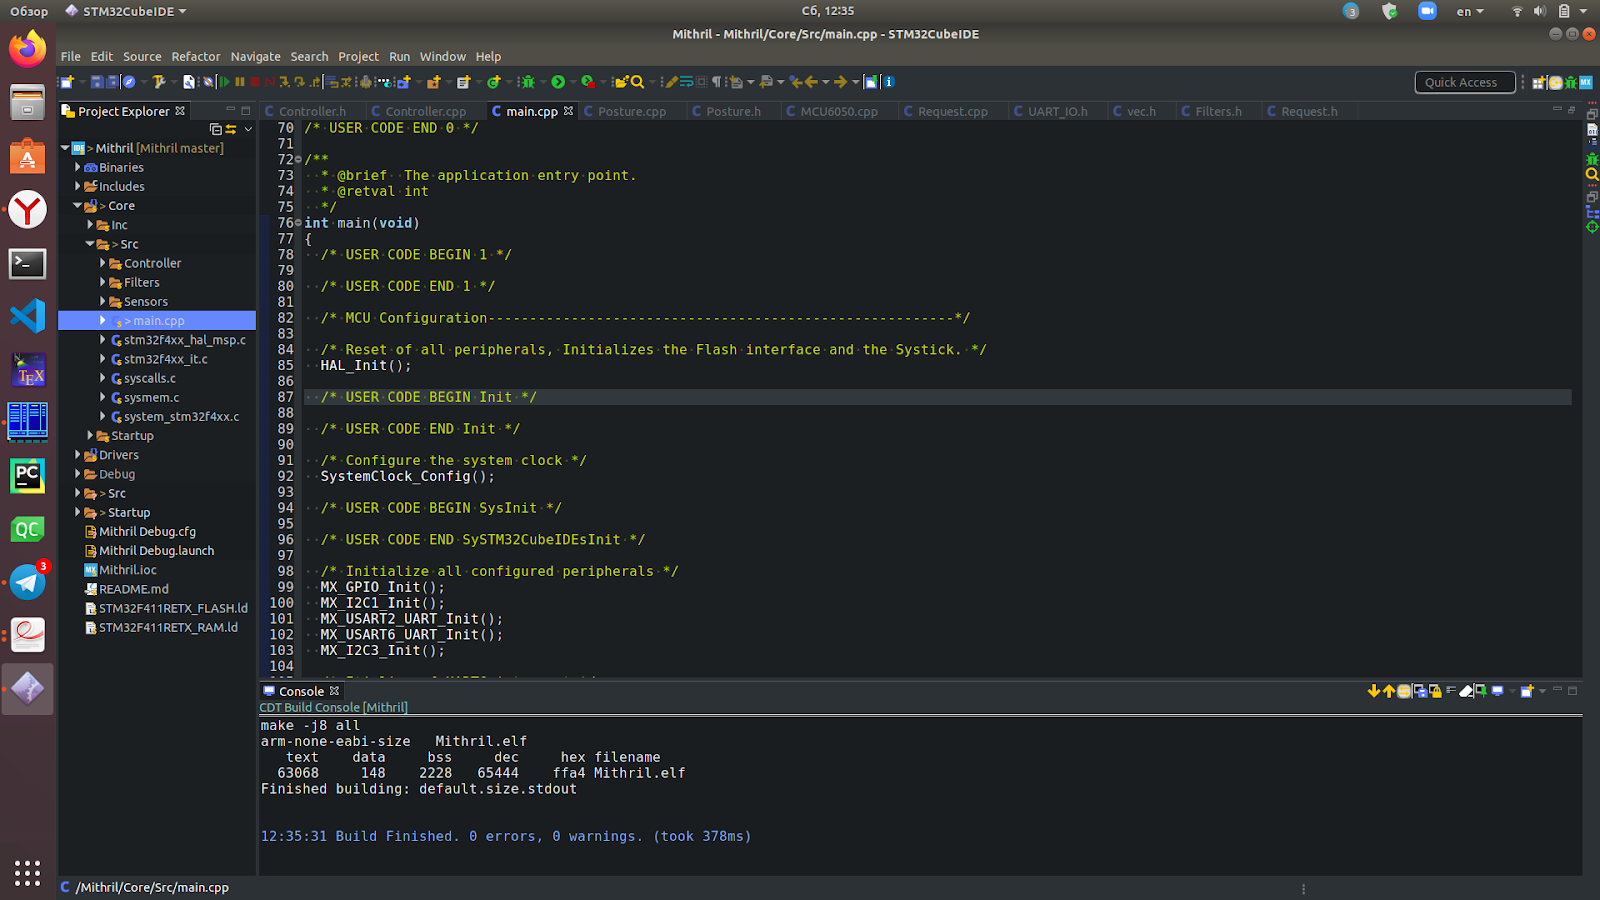
The task of turning on the LED turned out to be not the easiest one, since there is quite a bit of information on STM32 programming on the Internet (especially compared to Arduino). Later, this factor also complicated the work on the project.
Microcontroller firmware
After we learned how to light the LED and understood how to program the microcontroller in general, we started writing the basis of the microcontroller firmware, on the basis of which various functionality could be added in the future. To begin with, it was necessary to learn how to initialize the sensors and receive information from them. From the sensors we managed to get only to the IMU sensors: the gyroscope and the accelerometer. We had MPU-6050 sensors.
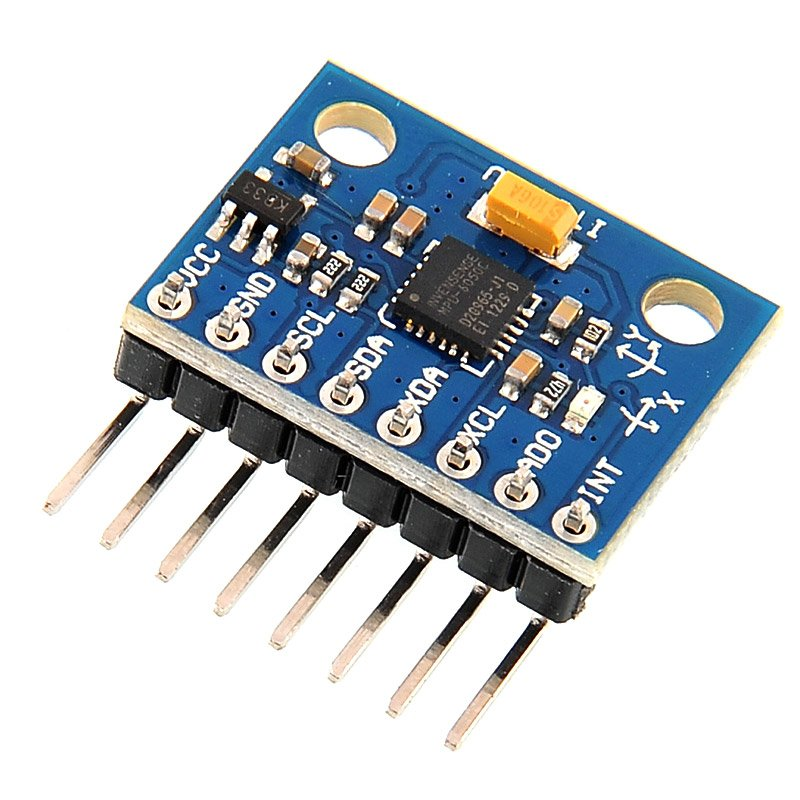
Communication with the microcontroller is carried out via the I2C bus. Thanks to the HAL library, data transfer is easy: you need to call a function to read / write. An example of reading data from an accelerometer from code:
HAL_I2C_Mem_Read(i2c_handle, addres, ACCEL_XOUT_H_REG, 1, buffer, 6, 1000)The function receives the handler of the desired bus, the address of the sensor on it, the register from which it is necessary to read (the registers are written in the documentation for the sensor), the size of the register, the buffer for writing, the size of the buffer and the timeout (the time spent waiting for a response) in milliseconds. The recording function has a similar signature. Example of setting the measuring range of a gyroscope:
HAL_I2C_Mem_Write(i2c_handle, addres, GYRO_CONFIG_RE G, 1, &Data, 1, 1000)We also had a Bluetooth module (HC-05 and HC-06), but it didn't require any special manipulations to work. After connecting it, you can simply send data through the universal asynchronous transceiver (UART) - a special device inside the microcontroller that allows you to communicate with other devices. For it, the HAL provides functions similar to those for I2C. We just wrote a small wrapper over them to make it easier to display messages while debugging.
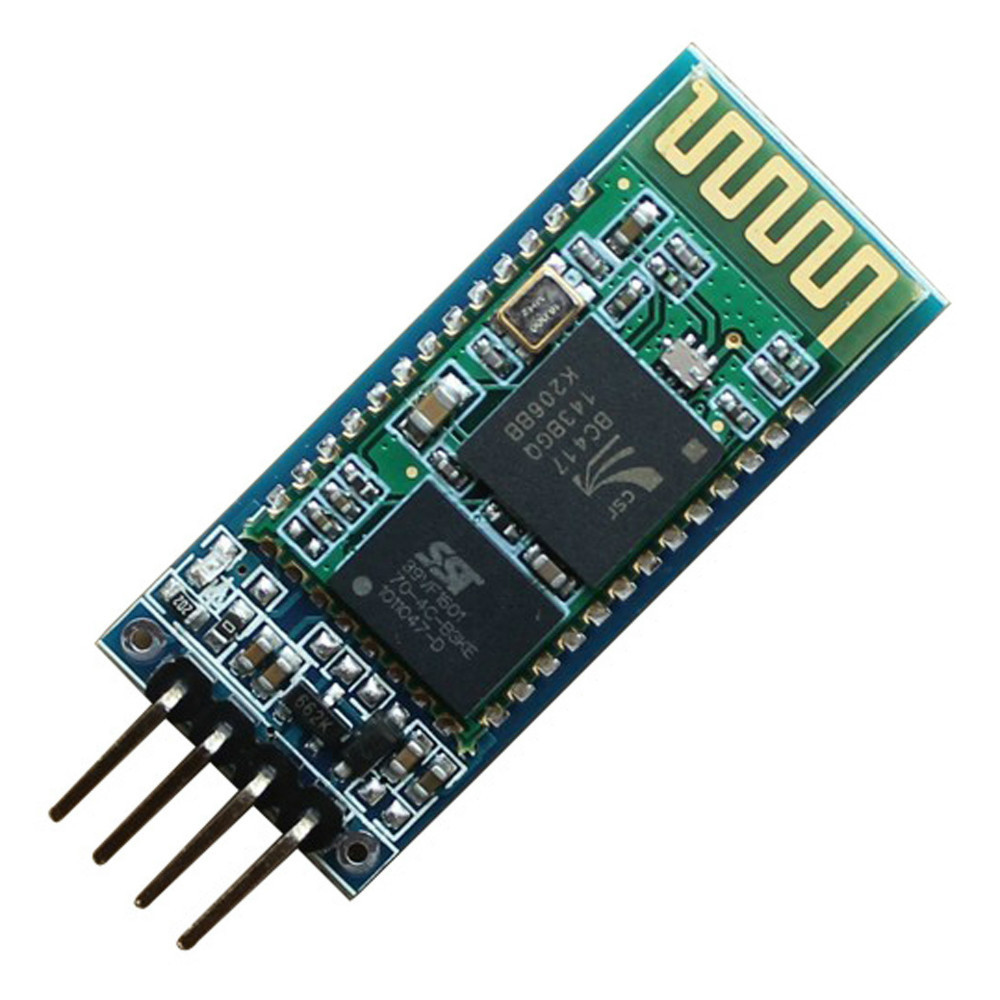
HC-06
Next, we created a Controller class that initializes the sensors, starts the main program loop and processes requests coming from the application. Requests are stored in a queue, received via Bluetooth, and received using an interrupt mechanism. An interrupt is a signal from software or hardware that informs the processor about the occurrence of an event that requires immediate attention. The interrupt mechanism is needed, among other things, for the system's quick response to important events.
The Controller also maintains a list of T-shirt functions using the base class BaseFunc. At the moment, we only have posture processing, but in the future, when adding new functionality, it will be enough just to create a descendant class and add it to the list of functions. The controller looks something like this:
class Controller {
std::vector<std::unique_ptr<IMU>> IMUSensors;  //
std::queue<Request> reqQueue; //
std::vector<std::pair<std::unique_ptr<BaseFunc>, bool>> mithrilFuncs; //
//< ,   >
Controller();
void Run(); //
};
Also, to get the twist angles from IMU sensors, we had to add a special filter, which, according to the data from the accelerometer and gyroscope, gives the correct deflection angles. We decided to use a complementary filter because it is efficient enough and easy to implement. When implementing this filter, we wrote the math for quaternions. It was possible to get by with vectors, but quaternions were needed in another filter that we tested, so now we are using quaternions.
What's on the prototype
After we figured out the programming of the microcontroller and wrote the basics of its firmware, we needed a prototype of a T-shirt, with which we could start doing posture processing. And then the coronavirus intervened ...
Due to the pandemic, we could no longer meet and work on a T-shirt with the four of us, and we actually did not have the opportunity to go to Jan and Ivan so that in case of problems with prototypes, we could quickly solve them. Jan and Ivan developed a prototype of a T-shirt on which the sensors could be placed by pulling the wires so that they would not affect the readings with their weight and tension. The guys sent me and Denis a copy of a T-shirt, as well as electrical tape, wires, etc., so that we ourselves could eliminate possible breakdowns.
Android app
We set ourselves the goal of creating an Android application with the ability to communicate via Bluetooth with a microcontroller. As in the case of programming microcontrollers, we did not have experience in writing applications for Android, but finding information about Android turned out to be much easier than about STM32. We learned the basics using the course on Stepik.org (the course is really good), where you first analyze the basics of the Kotlin language, and then talk about programming for Android.
The first version of the application allowed connecting to the microcontroller via Bluetooth and sending messages to it. The latest version is not much different from the first (writing an application was not a priority for us): it now has widgets for starting calibration and turning on / off the function of tracking the correct posture.
It took about 6 hours to write the first working version of the application - we spent more time studying the theory. The code for such a simple application took about 400 lines, which was a pleasant surprise. Moreover, for sure it can be written more compactly.
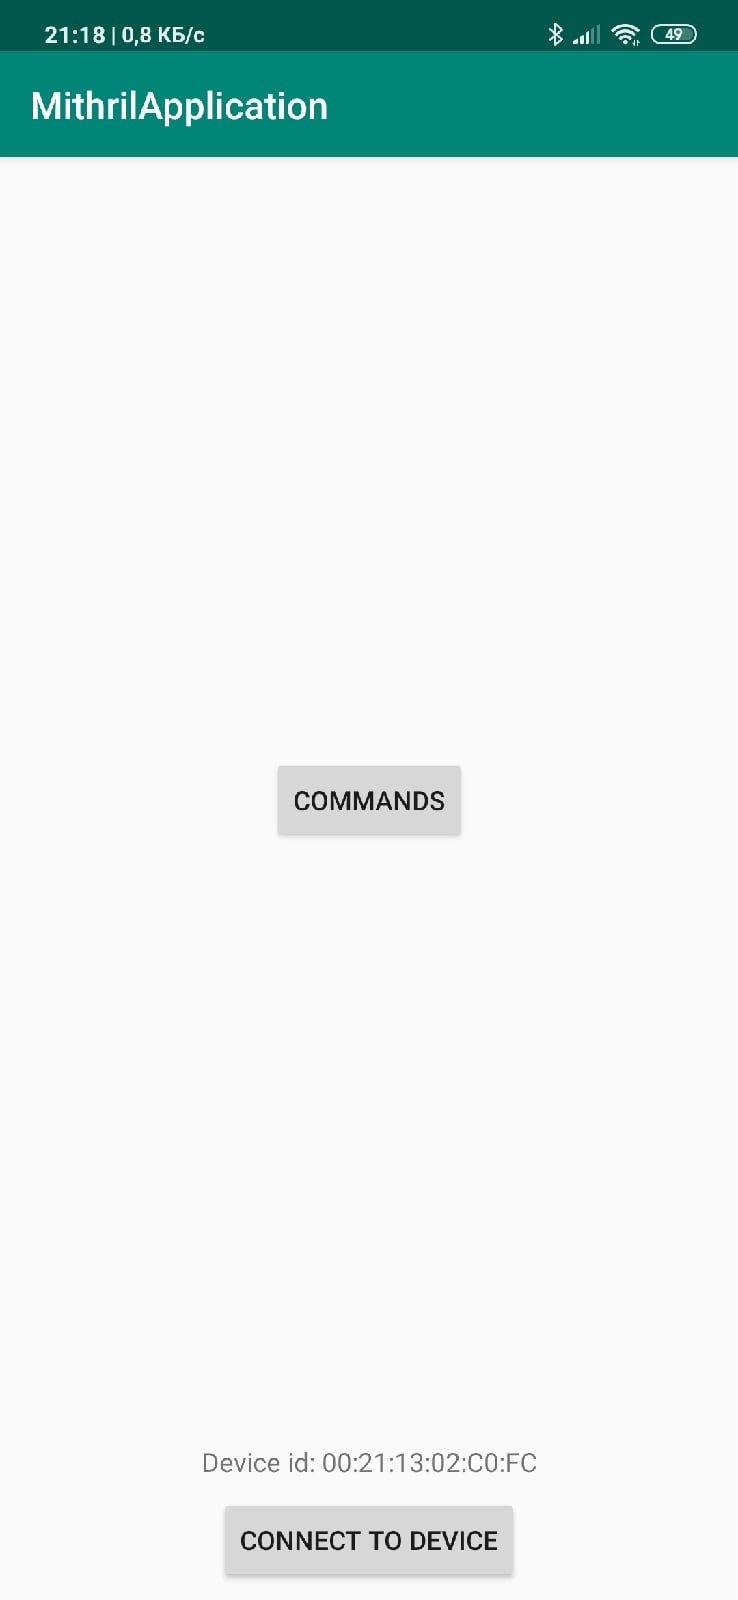
Navigation menu
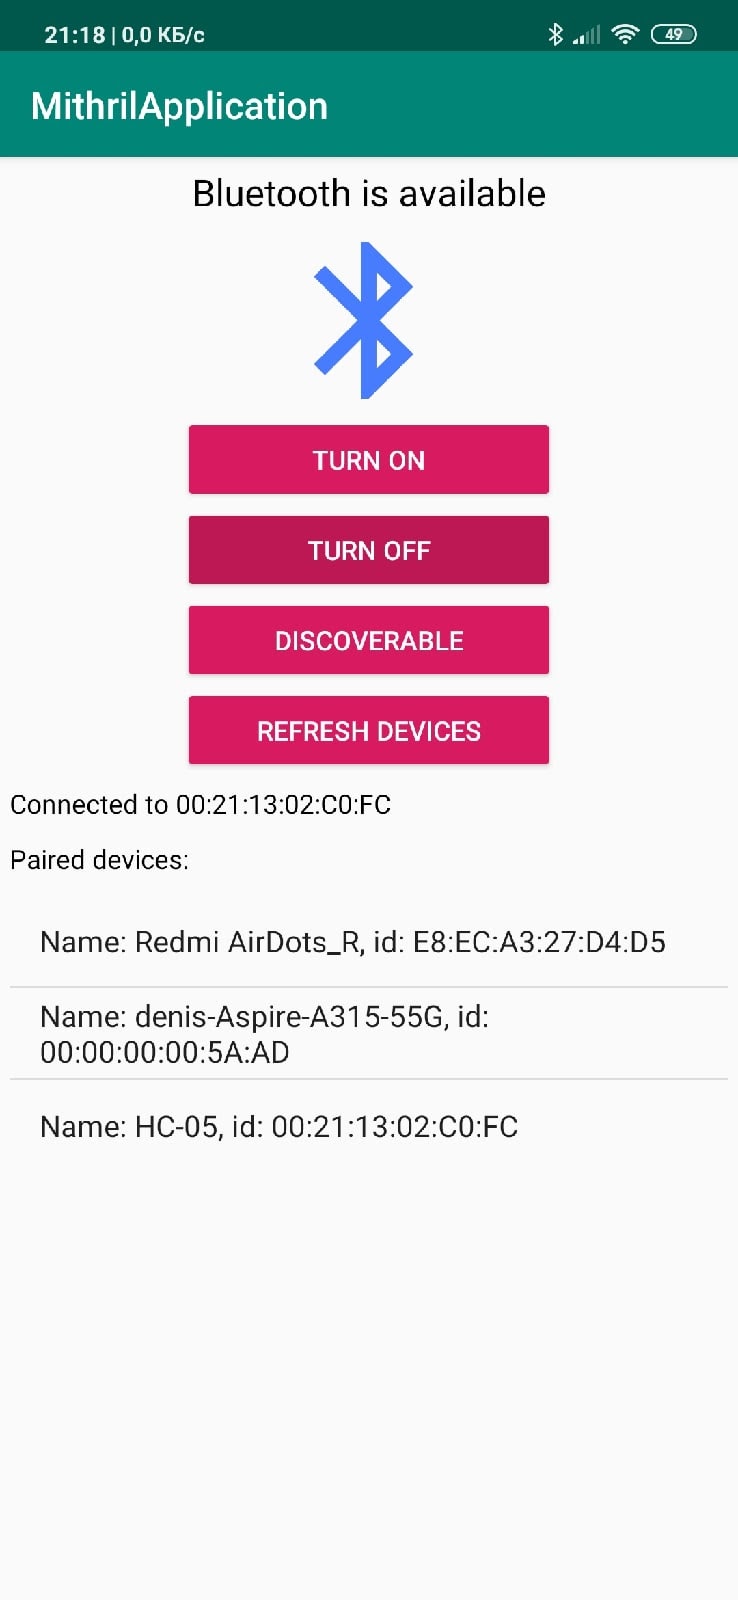
Tab for Bluetooth connection
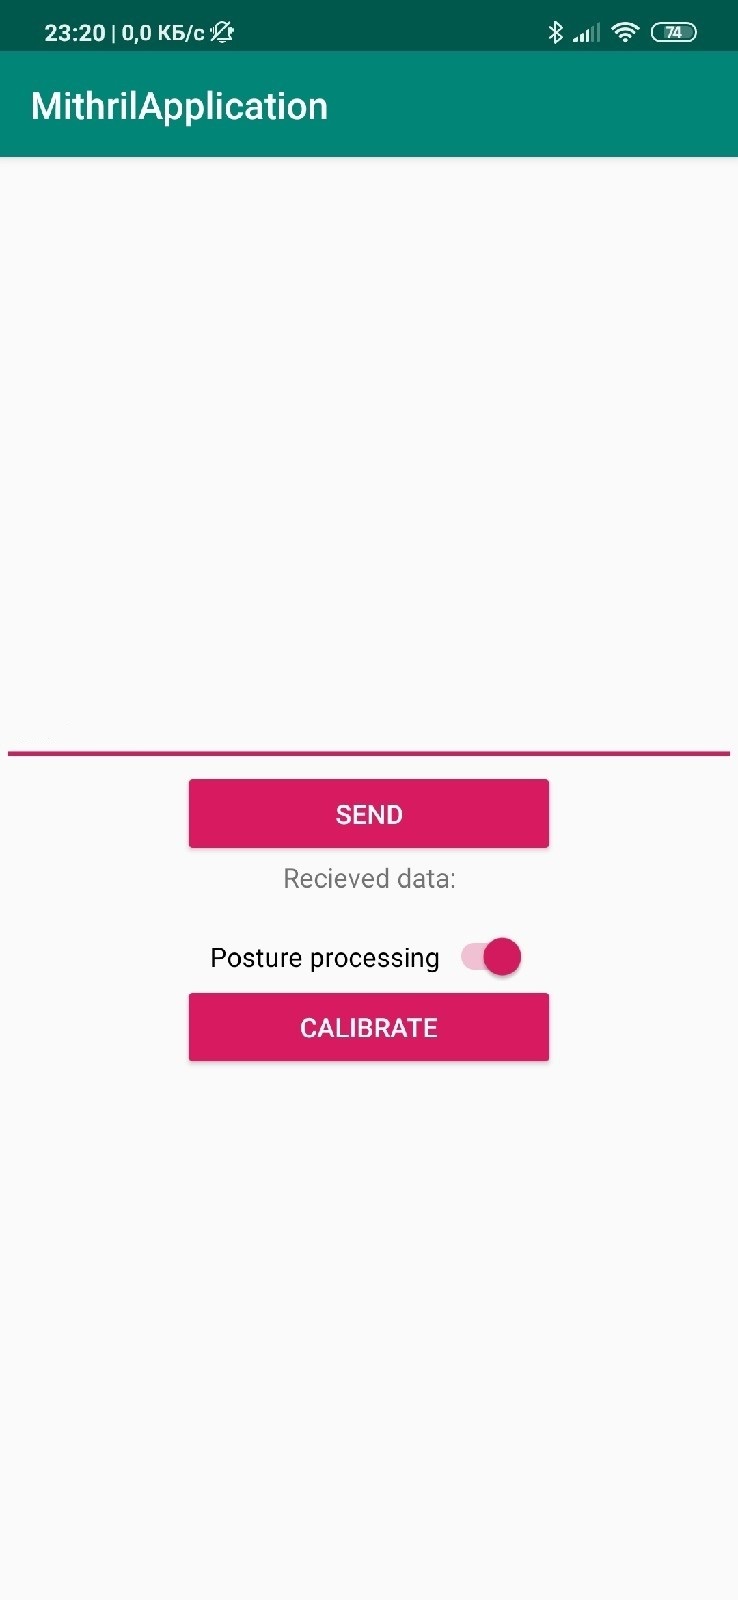
Tab for data exchange
Posture treatment
We came up with two different ways to handle posture: with and without data analysis methods.
Posture Treatment Using Data Analysis Techniques
In the previous version, the T-shirt had only one sensor, according to the data from which a decision was made about the correct posture of a person: it depended on the angle of rotation of the sensor. Obviously, this approach cannot provide high accuracy, because we have no data on the position of most of the back. Our version has 4 sensors. It was quite difficult to figure out how to interpret their readings, so we decided to resort to data analysis methods. Due to problems with prototypes, a lot was not done by the deadline.
First, we took the data from ourselves: twist angles and accelerometer readings from each of the sensors. We got about 2000 measurements: about 1000 positive and 1000 negative. The sensor configuration was as follows (two sensors are located on the shoulder blades and two on the spine):
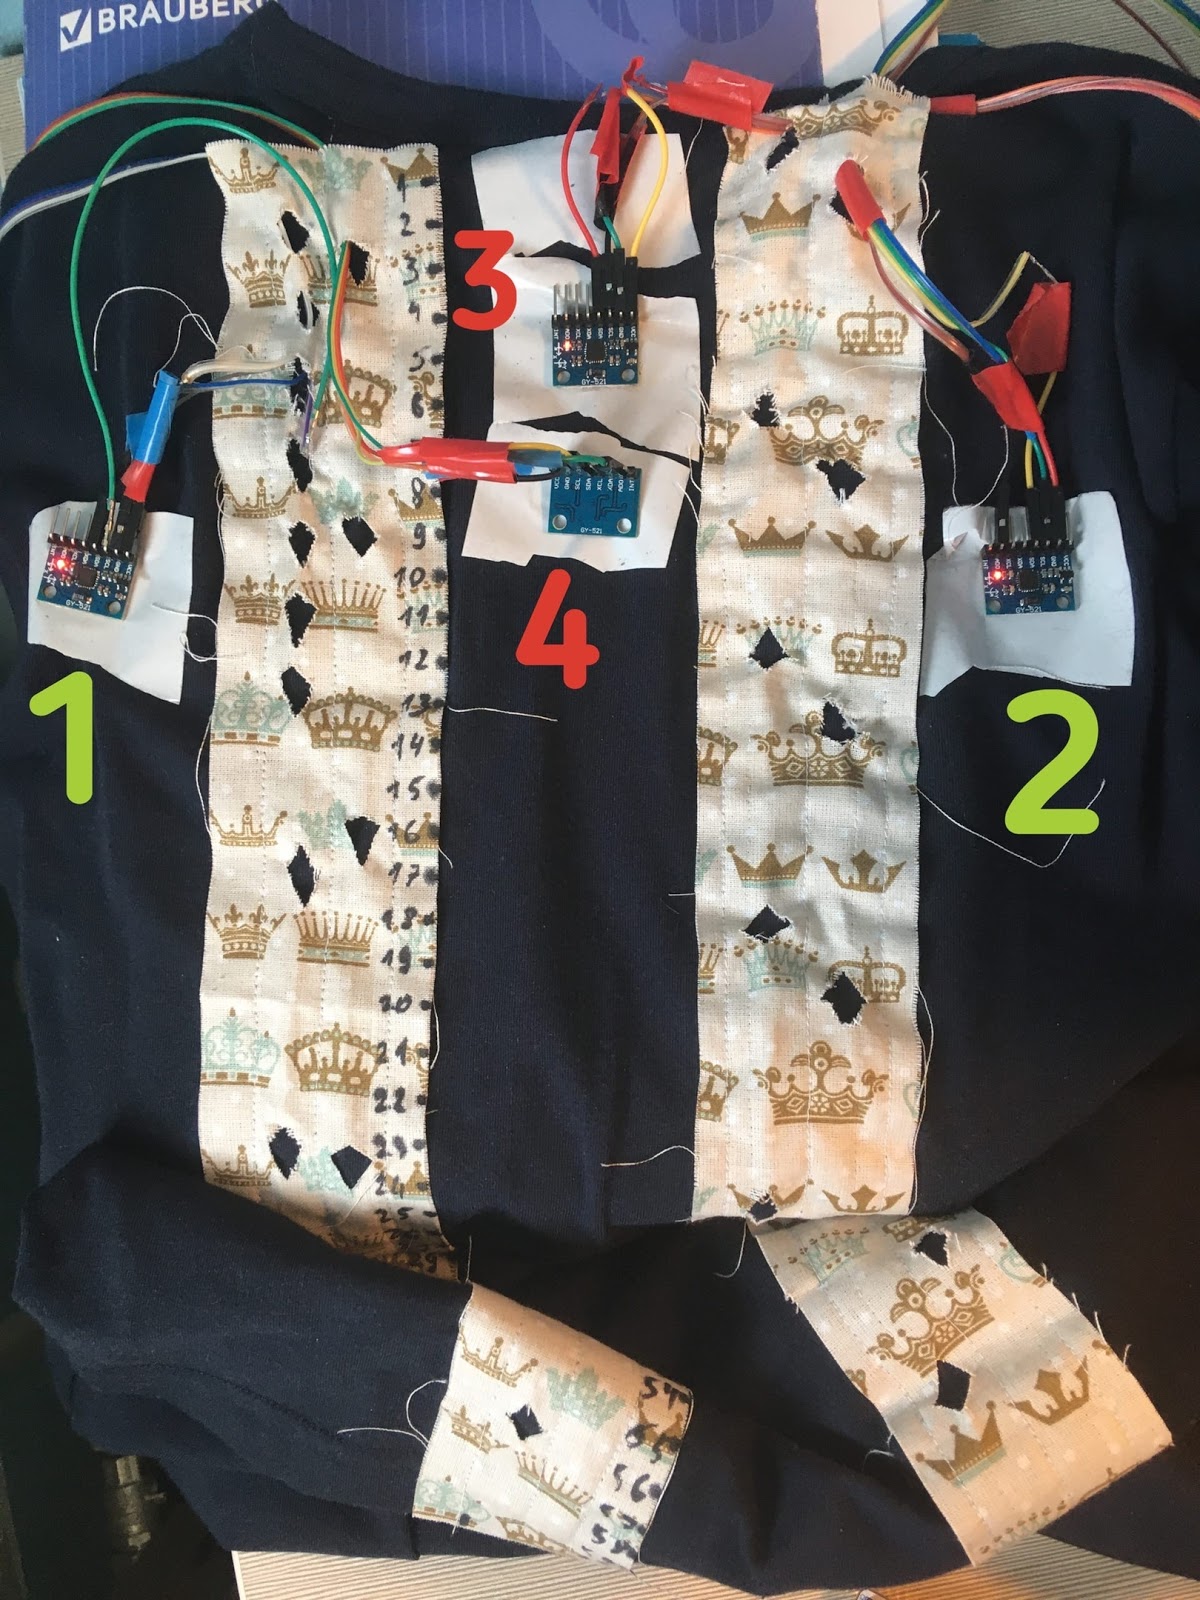
Unfortunately, on both prototypes, there were problems with one of the four sensors, so sensor number 3 was not used. We placed them intuitively: we wanted to track the position of the shoulder blades and the spine near the neck.
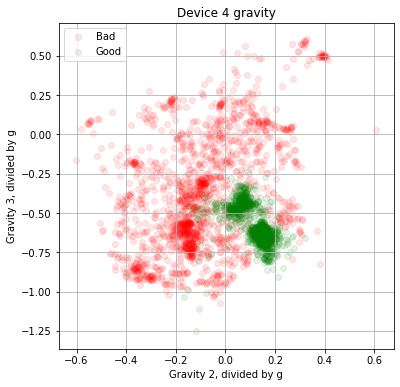
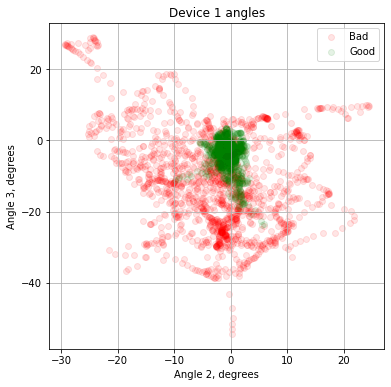
Data projection into two-dimensional space.
Here, the areas of correct posture are highlighted in green, the areas of incorrect posture in red. In the projection onto three-dimensional space, it is seen that the correct positions and incorrect ones are easy to separate from each other.
Next, it was necessary to select models for prediction. We decided to try linear regression, or rather its Ridge modification, support vector machine (SVM) with a linear kernel, and a decision tree. The choice is due to the simplicity of transferring the models to the microcontroller: the first two are described by a certain number of coefficients, and the latter is a set of if-else conditions. The models were taken from the scikit-learn library. Linear regression carryover example:
bool isPostureCorrect =
           (a11 * deviceAngles1[0] + a12 * deviceAngles1[1] + a13 * deviceAngles1[2] +
           g11 * deviceGravity1[0] + g12 * deviceGravity1[1] + g13 * deviceGravity1[2] +
           a21 * deviceAngles2[0] + a22 * deviceAngles2[1] + a23 * deviceAngles2[2] +
           g21 * deviceGravity2[0] + g22 * deviceGravity2[1] + g23 * deviceGravity2[2] +
           a41 * deviceAngles3[0] + a42 * deviceAngles3[1] + a43 * deviceAngles3[2] +
           g41 * deviceGravity3[0] + g42 * deviceGravity3[1] + g43 * deviceGravity3[2]) > bias;
the values a ??, g ??, bias are taken from the trained model.
The accuracy of models with different configurations on the test sample can be seen in the table:
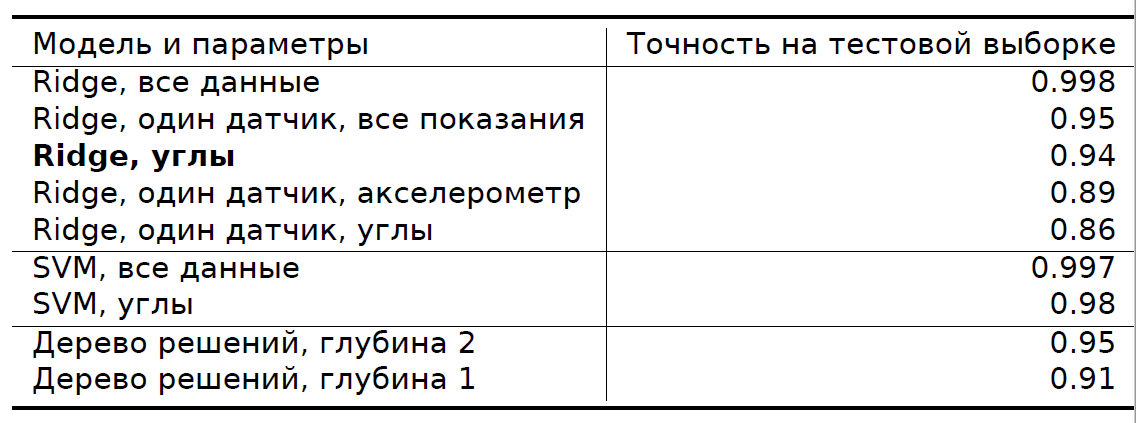
The test sample size was 33% of all data. Such high rates are most likely due to the small amount of data, because the predictions are too good.
In real life, the models that we tested (decision trees and some linear regression configurations) did not work so well, so they had to be adjusted a little to make them behave more appropriately. The best Ridge is the one trained in twist angles.
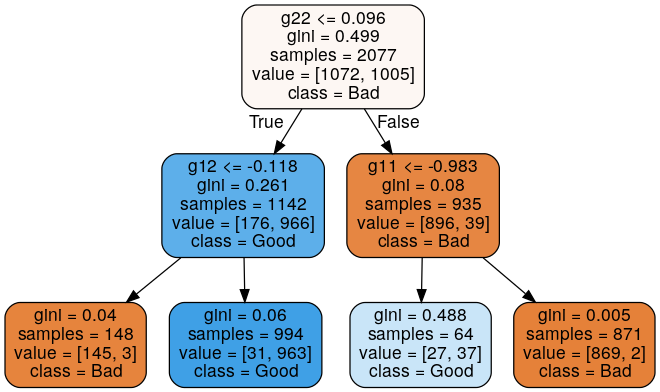
An example of a decision tree.
In a pandemic and with only two prototypes, we were unable to collect a large amount of data from different people, which is bad for the models. Also, the current solution uses only one measurement to determine the correct posture, which, of course, is not enough. A person can simply bend over the object, and the T-shirt will begin to vibrate. To solve such problems, you should try models that make predictions from a sequence of input data, but such models will be more difficult to transfer to the microcontroller in the way that was in the current solution.
Reverse posture without data analysis methods
In order to handle posture without ML, many medical articles about posture had to be studied first. I really wanted to find information about quantitative characteristics that could be measured and compared with the norm: that is, to know the "normal" range of values.
We studied many articles, but most of them either lacked quantitative characteristics, or the characteristics could not be measured with the means at our disposal. Only one article turned out to be useful to us (by the way, many other studies related to human posture refer to it). It described various angles, the values of which can be used to determine the correct posture.

Posture metrics in people with major depressive disorder before (A) and after (B) treatment from J. Canales et al (2010) The
only thing left to do is to measure these angles. To measure, you can approximately depict the normal position of the spine using some function, and then take the necessary points on the graph and search for the values of various angles from them.
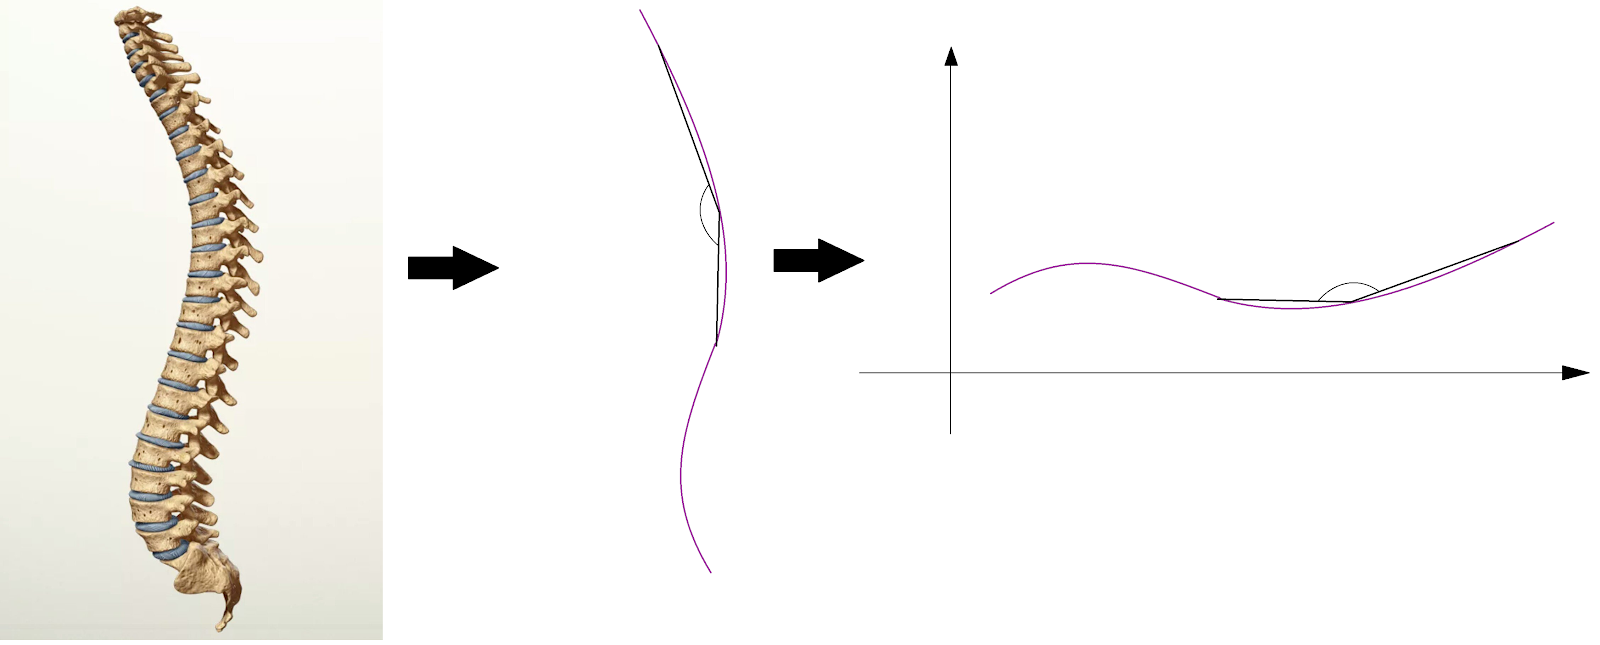
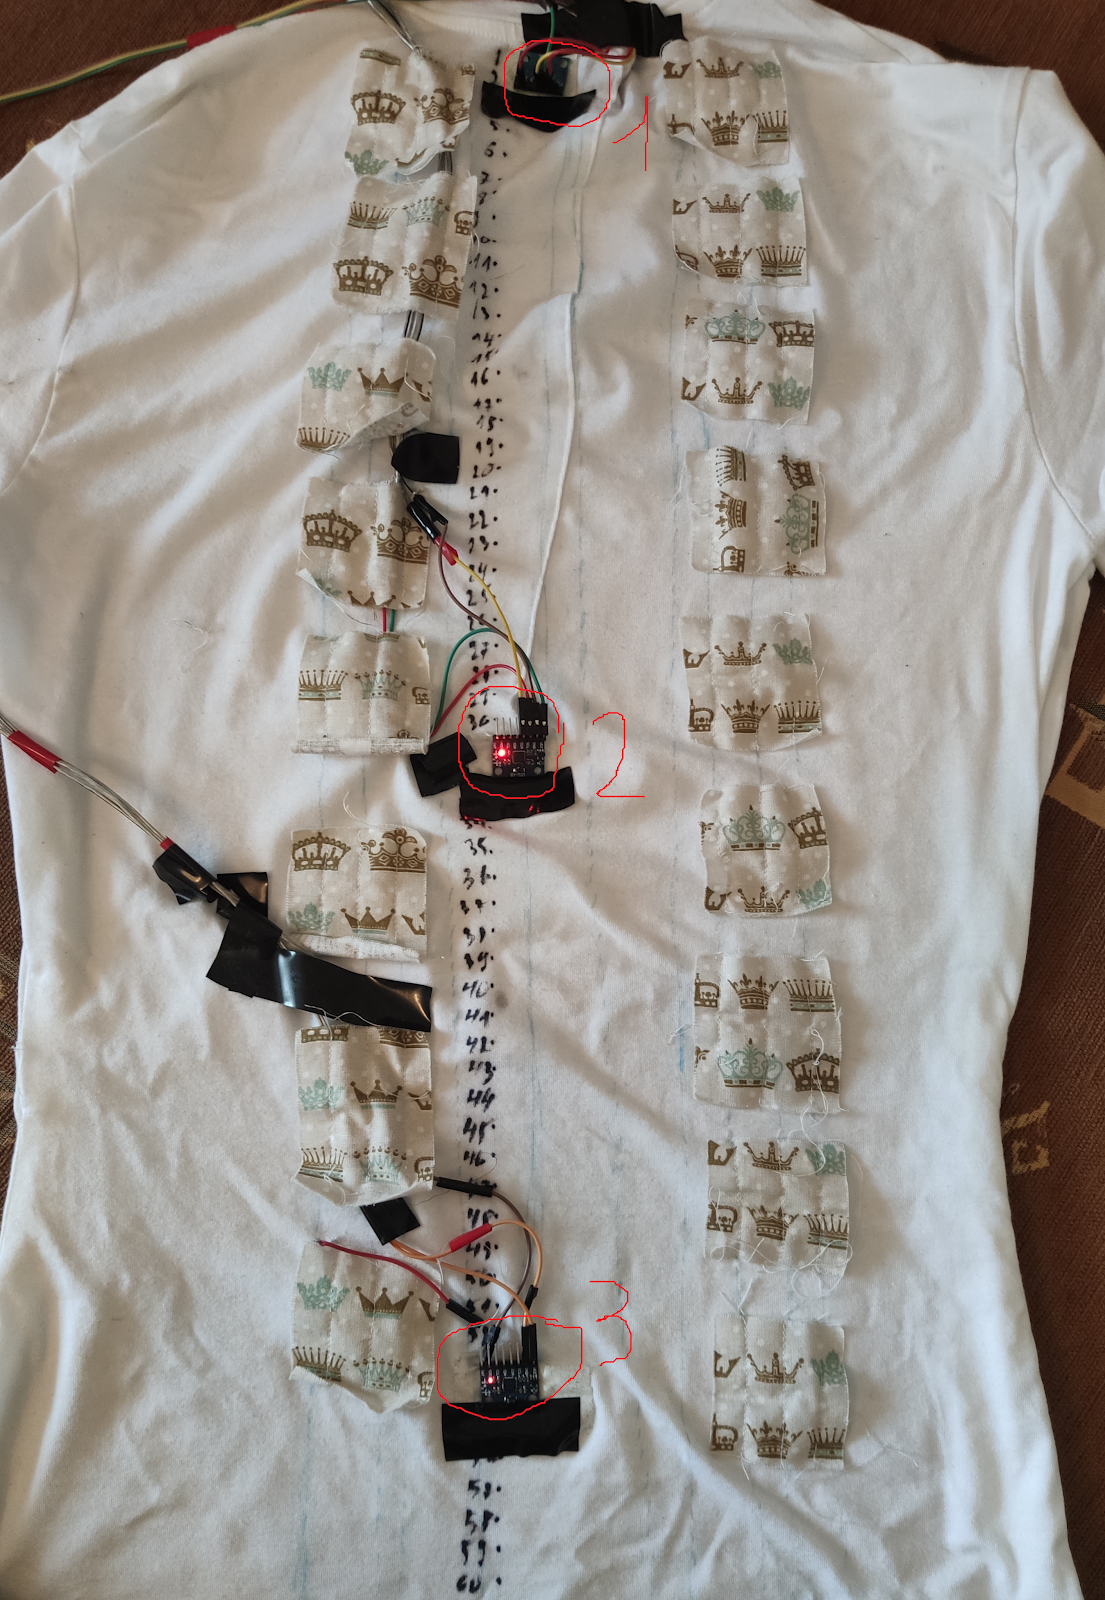
Sensor configuration
The sensors are located along the spine. At the points where they are located, you can get the angles of inclination of the tangents, and therefore find the value of the derivative (which is equal to the tangent of the angle of inclination of the tangents). As the spine bends, the coordinates of the points change all the time. Because of this, it is impossible to apply, for example, Hermite interpolation. In this case, the distances between points along the curve are known: they can be physically measured. Initially, using this data, we wanted to try to find a smooth function, for example, some polynomial. But, firstly, this requires more points at which the derivatives are known, and secondly, the task is not quite simple from the mathematical and computational points of view. Therefore, at this stage of development, it was decided to approximate the spine using a piecewise linear function.

As a result, out of the two angles that we tried to measure (angles 3 and 4 in the image from the article), one was measured correctly, and the other was not. Angle 3 values coincided with the normal values indicated in the article. Angle 4 was poorly measured due to design features. Most likely, the problem is that the T-shirt does not fit snugly against the body in some places, which is why the angle of inclination of the tangents is calculated incorrectly.
Demo video
Here is a demo video of the t-shirt and the app working:
Posture processing starts first, then calibration starts, and then messages about correct posture begin to arrive.
Conclusion
As a result, we managed to process the posture in two ways, deal with programming for Android, write an application for Android, and at the same time understand a little about the programming of the STM32 microcontroller.
Of course, our shirt cannot be considered finished - but so far we have been working on it for one semester of the first year. There is still a lot to be done, and next year we plan to continue!
Now a little about our plans for the future. We want:
- Refine the approximations of the spine with a function to more accurately measure the angles associated with the spine.
- Collect more data for posture processing. At the moment, the data has been taken only from the two of us and our prototypes are slightly different.
- Expand functionality. For example, add an electrocardiogram recording so that it can be used to identify various diseases, abnormalities, etc.
- Improve the application: expand its functionality. For example, calculate statistics, analyze them, draw graphs.
- Create a prototype of a T-shirt that will have a more marketable appearance. At the current stage, prototypes are intended solely for testing functionality. I want to put together a T-shirt ready for full use.
Links to the project's github:
github.com/DT6A/Mithril microcontroller firmware,
github.com/DT6A/MithrilAppー android application,
github.com/DT6A/MithrilDataー work with data.