You will need a camera from an old laptop, polystyrene and thin plexiglass

We've been making more video calls lately than ever before. And this situation probably won't change anytime soon.
Over the past few months, I've formed an obvious observation: different people have different attitudes towards their own species. The worst option is when the interlocutor sits down at the window, forcing the others to look at their silhouette. In such situations, it seems to me that I am not at a business meeting, but in a shadow theater.
I try to avoid such obvious mistakes during video conferencing. However, there is one fundamental awkwardness that no strategic positioning of the laptop will solve - I am unable to make eye contact with the other participants, as they, like me, are not looking at the camera, but at the monitor. All participants look downward, as if they are bored or lying. This annoying trend is almost impossible to avoid without taking some drastic measures.
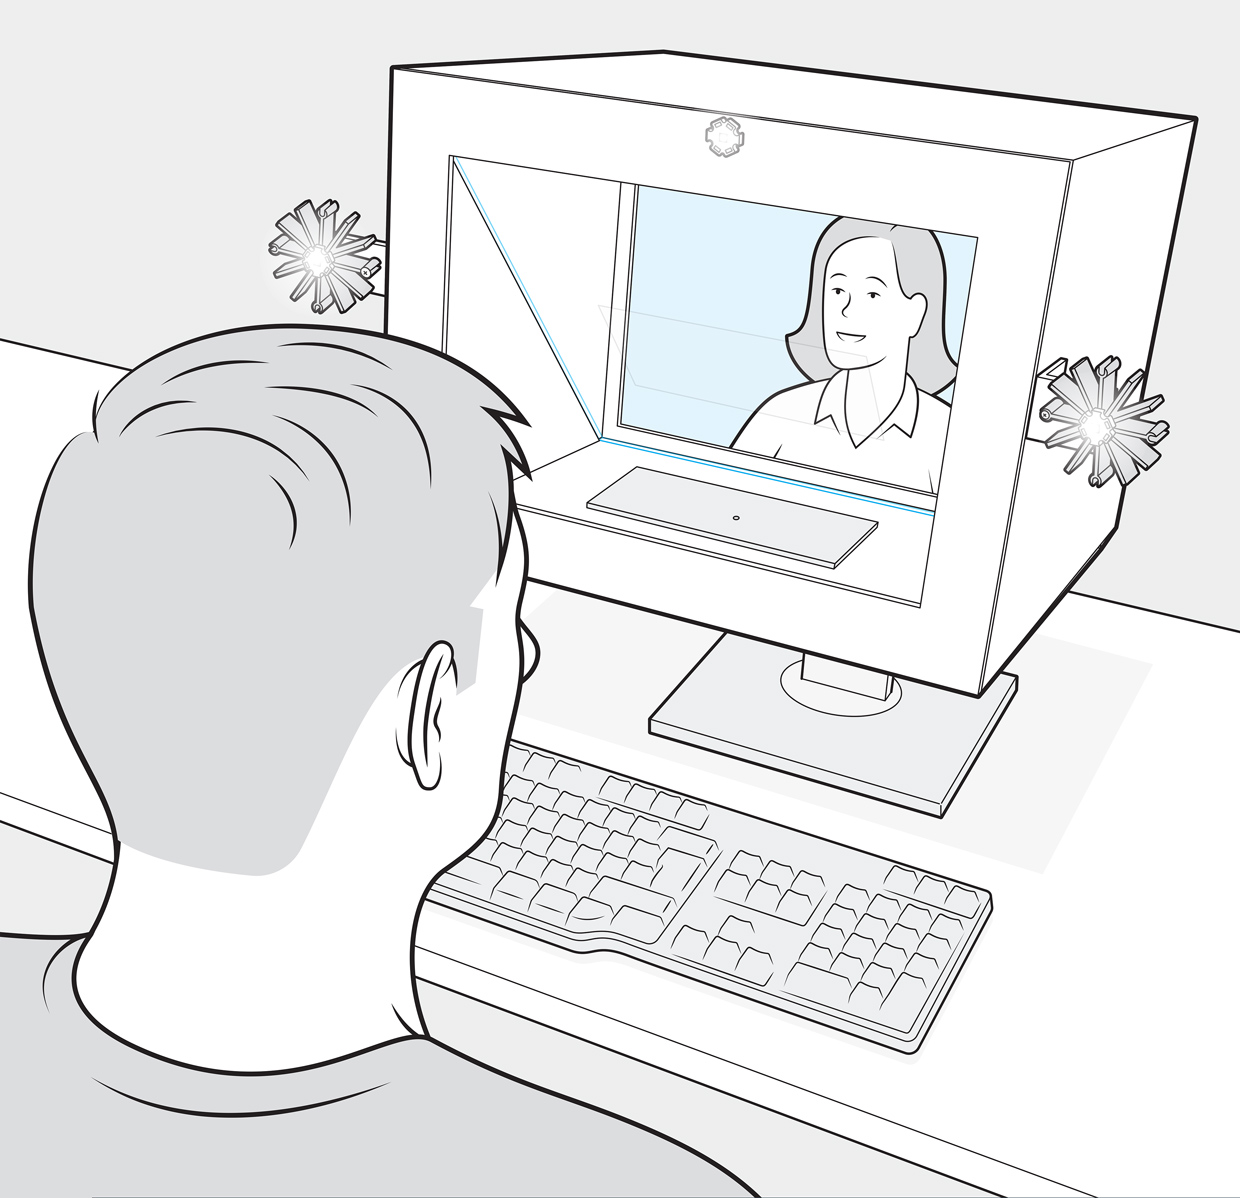
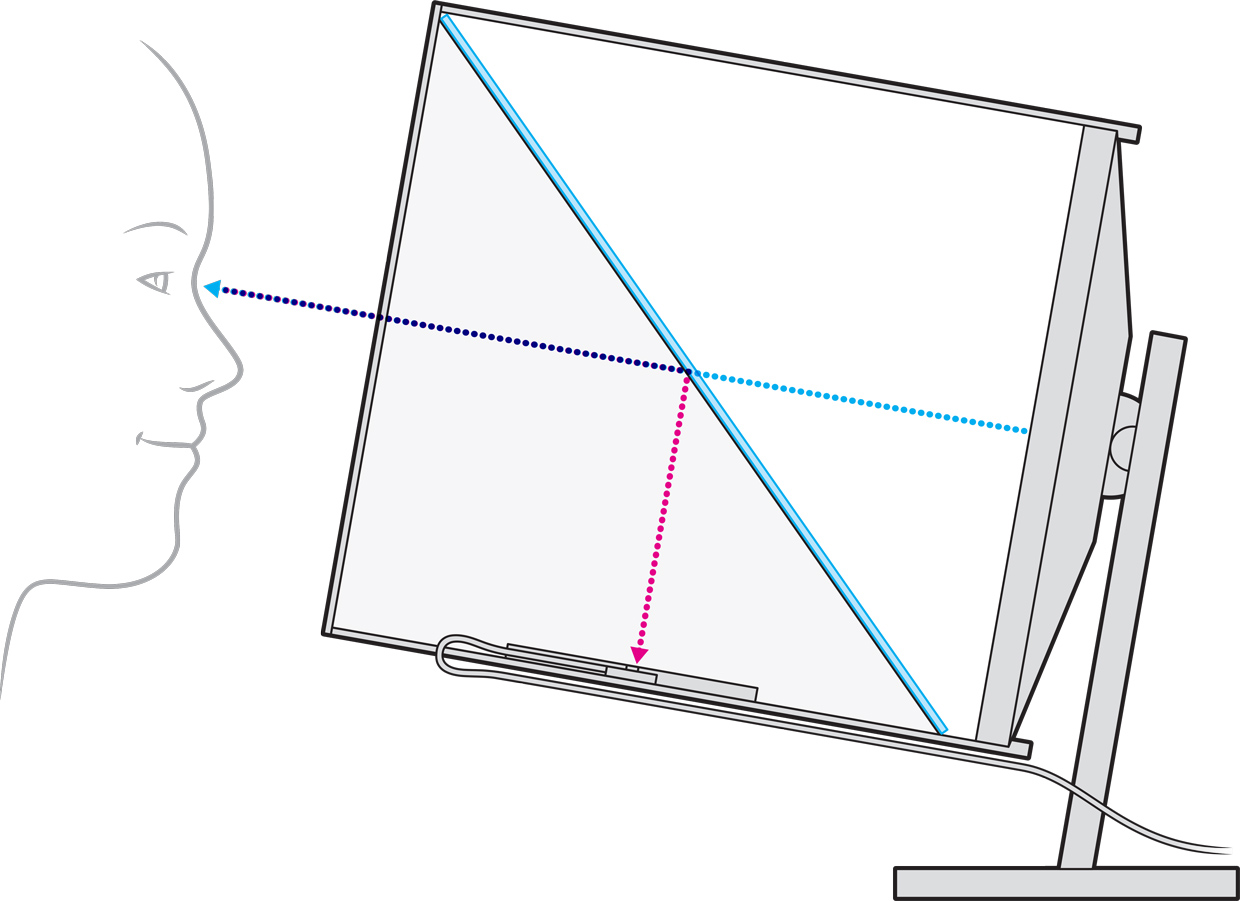
In my case, such a measure was the construction of one of the projects from the Hackaday site - a device developed by one video blogger and cleverly using the effect of a translucent mirror. In fact, a similar technology is used to make teleprompters , only in this case it comes out much cheaper and from scrap materials. With such a mirror, you can see the screen and look at the camera at the same time. I called this the Zoom Box, and it helps me look other people in the eye during Zoom or Webex conferences.
The assembly of the device began ... with disassembly. The dead laptop that disappeared in the closet finally met its fate. I took apart his screen and took out the built-in HD webcam. I just wanted an external camera as flat as possible. Before starting this project, I did not even think about the fact that cameras removed from a laptop can be adapted to perfectly working external USB webcams. I was convinced that the board of the camera I removed had the inscription USB5V.

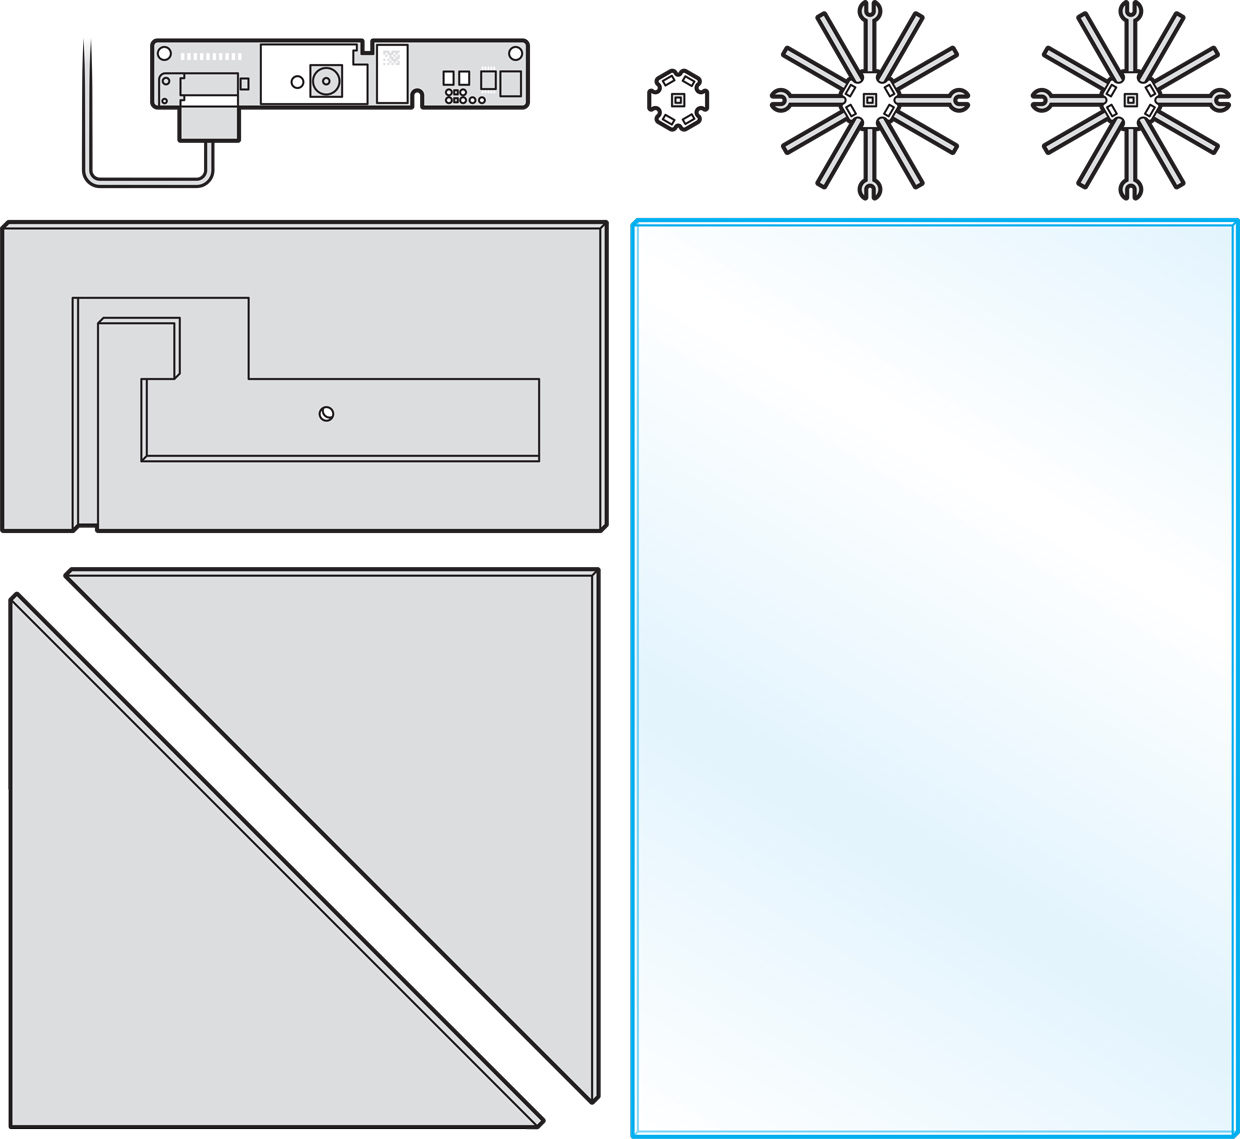
What to blame on the mirror: the device is a polystyrene box. Some of its components are shown here (not to scale). In one of the walls, you need to cut a recess for a webcam taken from a broken laptop. Other components include “washer” LEDs, radiators for them, and translucent plexiglass.
There are two microphones on the board of my camera, so it's easy to get tangled in the cut off bundle of wires coming from it. It turned out to be easy enough to find the ground - I just checked for contact with the copper plate of the board. It was harder to find the +5 V power supply - first you had to find the voltage regulator to which it connects, and then check a few more contacts.
Finding the two signal wires from USB is easy enough - it's a single pair of twisted wires. When connecting to the USB-connector, it remained only to guess which one is data + and which one is data–. I was lucky - the camera worked when connected to all the computers I tested it with, including two Windows machines and one Mac.
Other components and materials required for assembly included black duct tape., black polystyrene plates and translucent plexiglass . I ordered the glass from Amazon, its thickness is only 1 mm, which is both good and bad. Good, because it is very easy to cut it - just mark and break it. Bad because it's too flexible. To keep a flat surface, it must be well fixed on all four sides.
This is done by strategically prepared pieces of polystyrene attached to the inside of the box I assembled. Everything is held together with adhesive tape. There is a ledge on the back of the box, behind which it can be hung on the monitor using paper clips.

See Through: If you look at your computer screen during a video conference, everyone else feels like you are looking down, as if you are trying to avoid direct gaze. Translucent glass avoids this phenomenon. The webcam looking up from the bottom of the box is aimed directly at the reflection of the face. And since the monitor is shielded from ambient light by the box, it is clearly visible through glass, despite the inevitable loss of luminance.
I had quite a few pieces of polystyrene left over, so I cut out the webcam housing to a suitable shape and made a hole in it opposite the lens. A second piece of polystyrene is glued to the back and holds the camera.
As a final decoration, I have added lighting to my box to help guide conferences even at night. Ordinary ceiling lighting can often distract from conversations by giving strange shadows or making it difficult to choose the right exposure. I used three high-power white LEDs, one of which had a lower color temperature. I connected them in series and powered them from a 9V power supply through an inexpensive PWM board designed to control the motors. I fixed them on the radiators, one of which is on top, and two on the sides.
Perhaps this whole project will seem too expensive just to slightly improve my appearance during conferences. However, we may still have a long time to communicate via video. And it is very difficult to read the social characteristics of people by looking at their tiny images on the screen. I decided that the least of all I can do for friends and colleagues is to really highlight my face and look them directly in the eyes.