Introduction
It all started with the fact that I was somewhat frustrated by the inability to boot from a floppy drive on an old Socket 3 board. CD drives were not yet common at that time, and the BIOS developers did not even think about providing such an option. And operating systems were distributed on floppy disks. A little later, when it became more convenient to install the OS (mainly Windows, of course) from a disk than from a couple of dozen floppy disks, so-called boot floppies were invented, which contained a floppy driver and transferred control to it directly. But in my opinion this is a crutch and ugly. I started looking for a more elegant solution and even at some point was going to buy a SCSI controller for a lot of money and a drive for it, but there was an alternative.
Plop Boot Manager
This alternative was Plop. In fact, I hadn't even thought about using bootloaders, but when they told me about Plop, I thought it was a pretty sane idea. It can boot from a bunch of sources and boot almost any device except for USB drives. Moreover, it has a user-friendly interface and many settings. You can read more about it on the official website .

All that remained was to decide where to download Plop from. The most obvious option was a floppy disk, but that's again a crutch. And the more the computer (not counting the disk, of course) is not able to boot from anything. And here, oddly enough, a network card came to the rescue.
BootROM and what it is eaten with
, , . , BIOS. Realtek rtl8139.
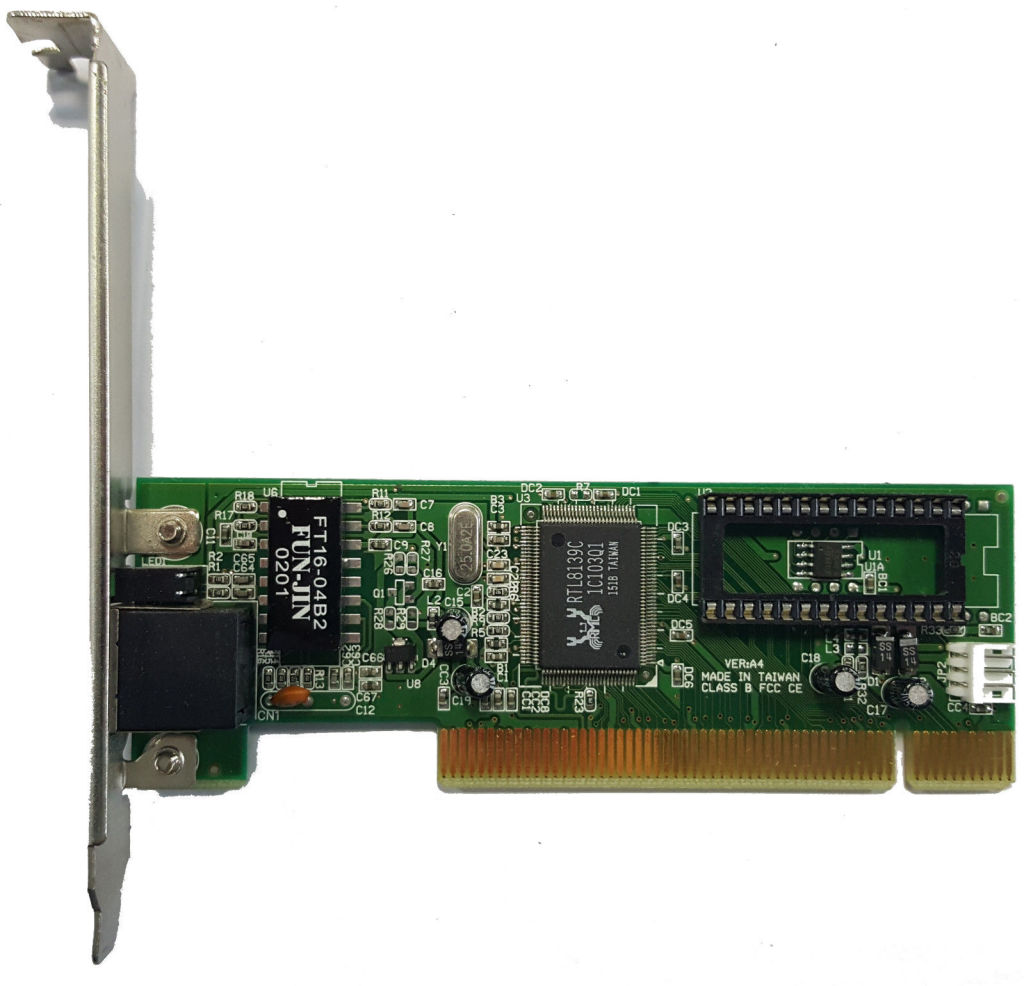
64 . BootROM, . BIOS. , Plop , .
. , . GUI-. , OptionROM. ( ), . INT19 Startup Hotkey. Plop Ctrl+A, Boot Menu . .
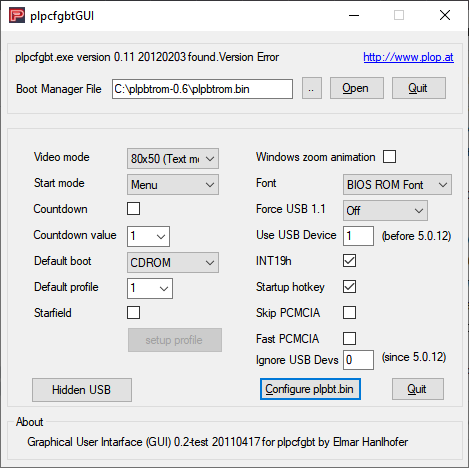
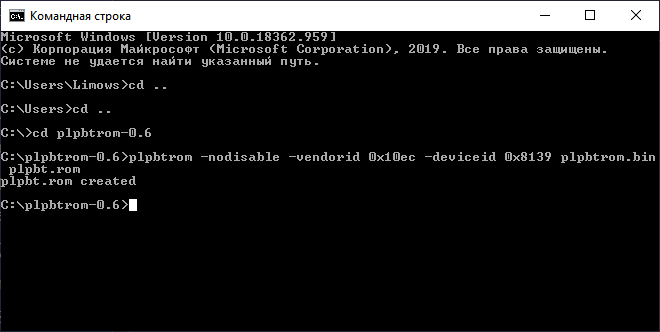
«Configure plpbt.bin» . ROM-. c . . , . . rtl8139. BootROM -grabid. -nodisable. Plop , , .
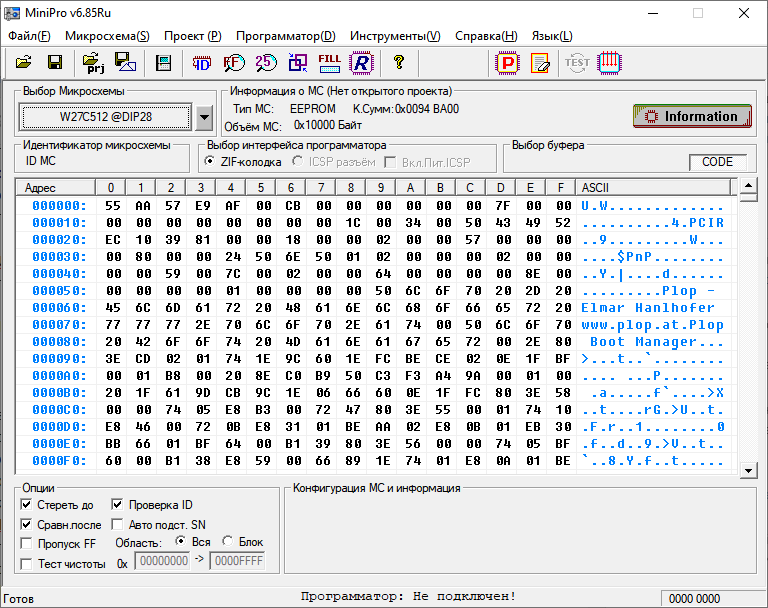
Now you can go to the firmware. I use a MiniPro programmer, but any other that supports EEPROM and Flash up to 64 kilobytes will do. ROM you can take 27, 28 or 29 series of the required volume. The firmware process runs as usual. Select a microcircuit, select an image and click on the record button.
After all these actions, it remains to insert the memory chip into the socket on the card, and insert the card into the slot on the motherboard. The only thing you may need to enable BootROM in the configuration of the card itself. I did this using the DOS program that came with the driver.

If everything is done correctly, after defining the disks and floppies, a line will appear informing that BootROM has been successfully loaded and an offer to press Ctrl + A to boot into the menu.