→ Vue.js beginners lesson 1: instance Vue
→ Vue.js for beginners, lesson 2: binding attributes
→ Vue.js beginners lesson 3: conditional rendering
→ Vue.js beginners lesson 4: lists rendering
→ Vue .js for beginners lesson 5: event processing
→ Vue.js beginners lesson 6: binding classes and styles
→ Vue.js beginners lesson 7: calculated properties
→ Vue.js beginners lesson 8: components
The purpose of the lesson
Our main goal is to display the data described by the properties of the data object
brandand product, as a single line.
Initial code
Here is the code found in the
index.htmltag <body>we will start with:
<div id="app">
  <div class="product">
    <div class="product-image">
      <img :src="image" />
    </div>

    <div class="product-info">
      <h1>{{ product }}</h1>
      <p v-if="inStock">In stock</p>
      <p v-else :class="{ outOfStock: !inStock }">Out of Stock</p>

      <ul>
        <li v-for="detail in details">{{ detail }}</li>
      </ul>
      <div
        class="color-box"
        v-for="variant in variants"
        :key="variant.variantId"
        :style="{ backgroundColor:variant.variantColor }"
        @mouseover="updateProduct(variant.variantImage)"
      ></div>

      <button
        v-on:click="addToCart"
        :disabled="!inStock"
        :class="{ disabledButton: !inStock }"
      >
        Add to cart
      </button>

      <div class="cart">
        <p>Cart({{ cart }})</p>
      </div>
    </div>
  </div>
</div>
Here is the code
main.js:
var app = new Vue({
    el: '#app',
    data: {
        product: 'Socks',
        brand: 'Vue Mastery',
        image: './assets/vmSocks-green.jpg',
        inStock: true,
        details: ['80% cotton', '20% polyester', 'Gender-neutral'],
        variants: [
          {
            variantId: 2234,
            variantColor: 'green',
            variantImage: './assets/vmSocks-green.jpg'
          },
          {
            variantId: 2235,
            variantColor: 'blue',
            variantImage: './assets/vmSocks-blue.jpg'
          }
        ],
        cart: 0
    },
    methods: {
      addToCart() {
        this.cart += 1
      },
      updateProduct(variantImage) {
        this.image = variantImage
      }
    }
})
Notice that a new property named has been added to the data object
brand.
Task
We want what is stored in
brandand in productto be combined into one line. In other words, we need to display the <h1>text in the tag Vue Mastery Socks, not just Socks. To solve this problem, you need to wonder how you can concatenate two string values stored in a Vue instance.
The solution of the problem
We will use computed properties to solve this problem. Since these properties do not store values but compute them, let's add a property to the options object used when instantiating Vue
computedand create a computed property named title:
computed: {
  title() {
    return this.brand + ' ' + this.product;
  }
}
We believe that everything is arranged very simply and clearly. When the method is called
title(), it performs string concatenation brandand productthen returns the resulting new string.
Now we just have to display it
titlein the tag of <h1>our page.
Now this tag looks like this:
<h1>{{ product }}</h1>
And now we will make it like this:
<h1>{{ title }}</h1>
Let's take a look at the page and check the functionality of what we just did.

The page title has changed
As you can see, the title is displayed
Vue Mastery Socks, which means that we did everything right.
We took two values from the Vue instance data and created a new value based on them. If the value is
brandever updated, for example, a string is written to this propertyVue Craftery, then there is no need to make any changes to the code of the computed property. This property will continue to return the correct string, which will now look likeVue Craftery Socks. The computed propertytitlewill still use the propertybrandjust like before, but now thebrandnew value will be written to.
This was a very simple example, but an example that is quite applicable in practice. Let's now look at a more complex use of computed properties.
More complex example
We are now updating the image displayed on the page using the
updateProduct. We pass to it variantImage, and then write to the property imagewhat got into the method after hovering the mouse over the corresponding colored square. The relevant code looks like this:
updateProduct(variantImage) {
  this.image = variantImage;
}
This mechanism works fine, but if we need to change not only the image, but also something else, based on which color square the mouse is hovering over, this will mean the need to refactor this code. Let's get down to it.
Namely, instead of storing a property in the data
image, we will replace it with a property selectedVariant. We initialize it to 0.
selectedVariant: 0,
Why 0? The point is that we plan to set this property based on the index (
index) of the element that the mouse pointer is over. We can add an index to the construct v-for:
<div
  class="color-box"
  v-for="(variant, index) in variants"
  :key="variant.variantId"
  :style="{ backgroundColor:variant.variantColor }"
  @mouseover="updateProduct(variant.variantImage)"
></div>
Note that where the construct used to be
v-for=«variant in variants»is now the code v-for=»(variant, index) in variants».
Now, instead of passing
variant.variantImageto updateProduct, let's pass to this method index:
@mouseover="updateProduct(index)"
Now let's get into the code of the method
updateProduct. This is where we get the index. And, instead of writing the new value to this.image, write indexto this.selectedVariant. That is, the selectedVariantvalue indexcorresponding to the square on which the mouse pointer was hovered will fall into . Also, for debugging purposes, we will put a command to log the value into this method index.
updateProduct(index) {
  this.selectedVariant = index;
  console.log(index);
}
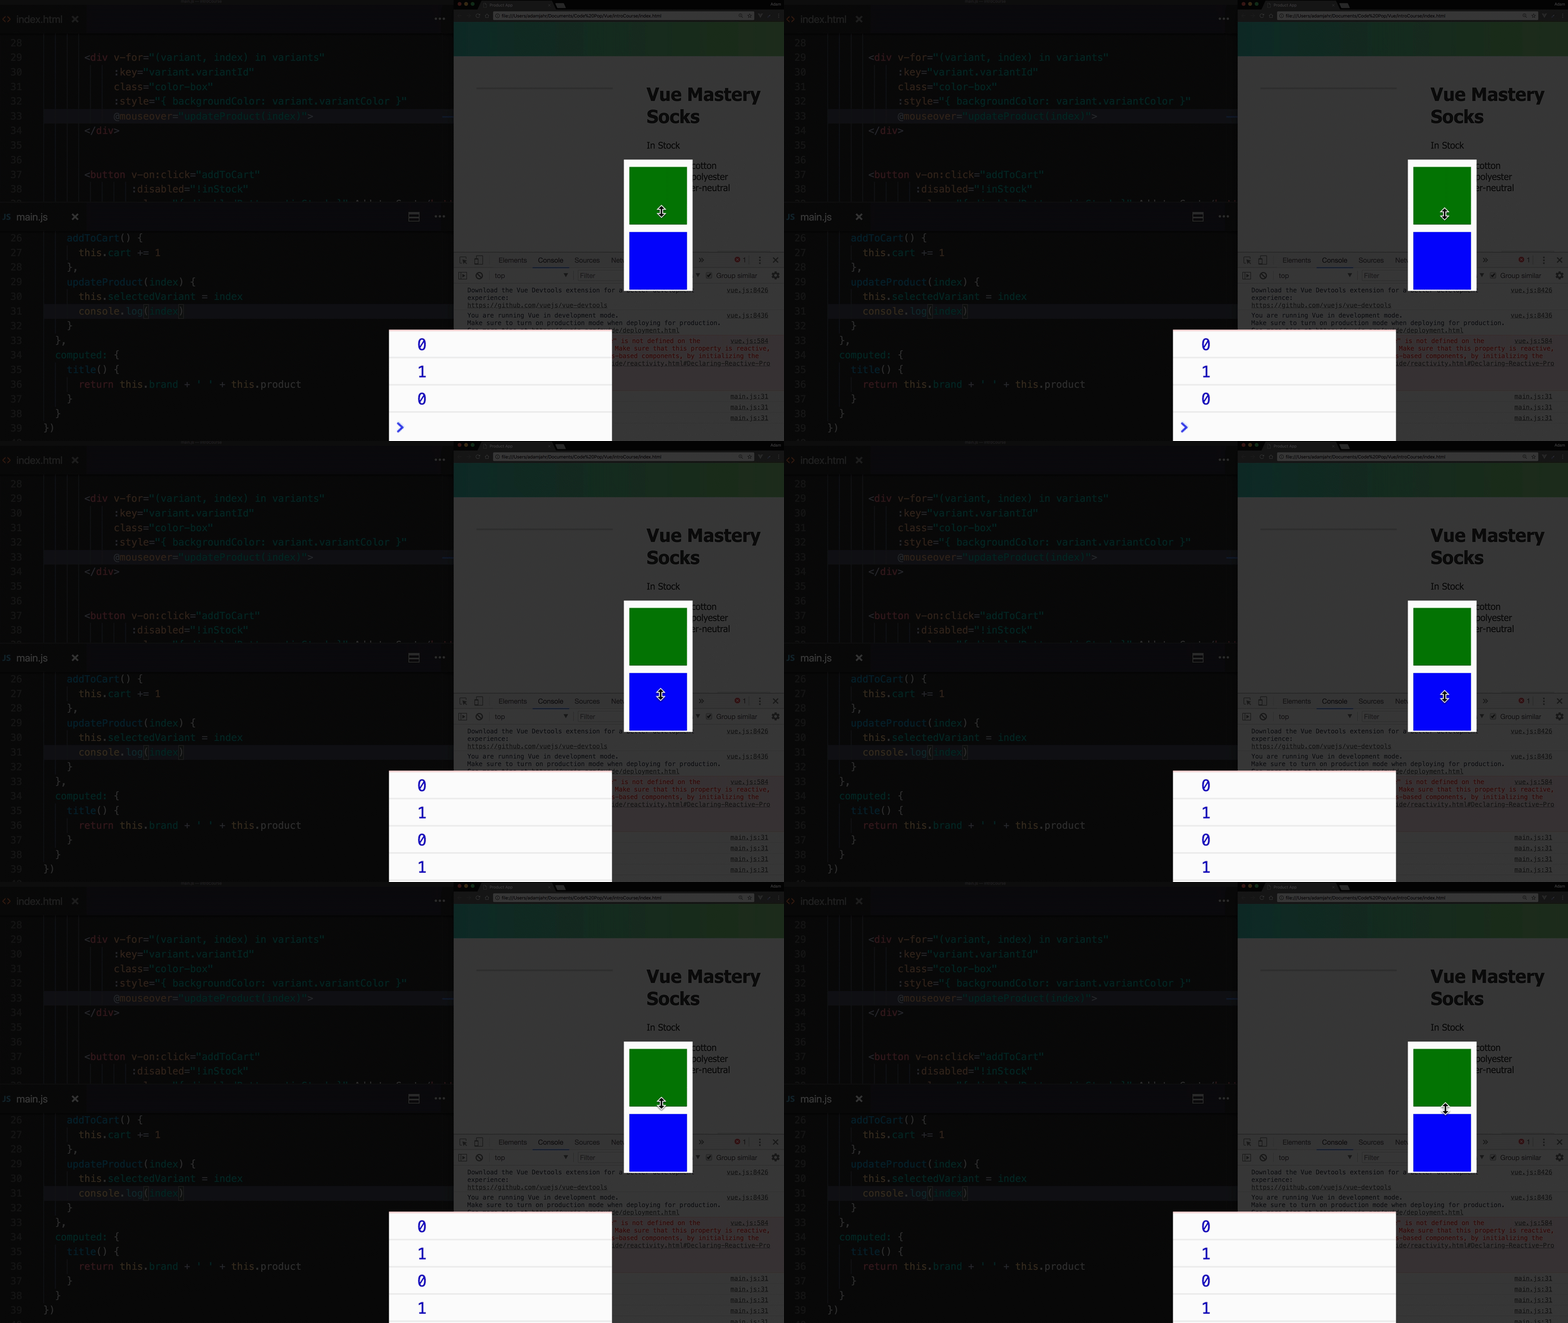
If we now refresh the page and open the developer tools console, we can make sure that when we hover over the squares, the values 0 and 1 are in the console.

Checking the functionality of the mechanism we have created
However, the image is no longer displayed on the page. A warning appears in the console.

Console Warning
The point is that we removed the property
imageand replaced it with a propertyselectedValue, but this property is still used in our application. Let's fix the problem by returning itimageto a Vue instance, but this time as a computed property. The corresponding code will look like this:
image() {
  return this.variants[this.selectedVariant].variantImage;
}
Here we return the property
variantImageof the array element this.variants[this.selectedVariant]. As the index by which the array element is accessed, a property is used this.selectedVariantthat equals 0 or 1. This, respectively, gives us access to the first or second array element.
If you now refresh the page, the image will be displayed and will respond to mouse hover over the colored squares. But now this mechanism is implemented using a computed property.
Now that we've refactored the code for the method
updateProductthat now updates the state of the property selectedVariant, we can work with other data stored in objects from the array variants, such as the field variantQuantitywe'll now add to the objects:
variants: [
  {
    variantId: 2234,
    variantColor: 'green',
    variantImage: './assets/vmSocks-green.jpg',
    variantQuantity: 10
  },
  {
    variantId: 2235,
    variantColor: 'blue',
    variantImage: './assets/vmSocks-blue.jpg',
    variantQuantity: 0
  }
],
Let's get rid of the normal property
inStockand, as with working with a property image, create a new computed property with the same name, whose return value will be based on selectedVariantand variantQuantity:
inStock(){
  return this.variants[this.selectedVariant].variantQuantity
}
This property is very similar to a computed property
image. But now we take from the corresponding object not a property variantImage, but a property variantQuantity.
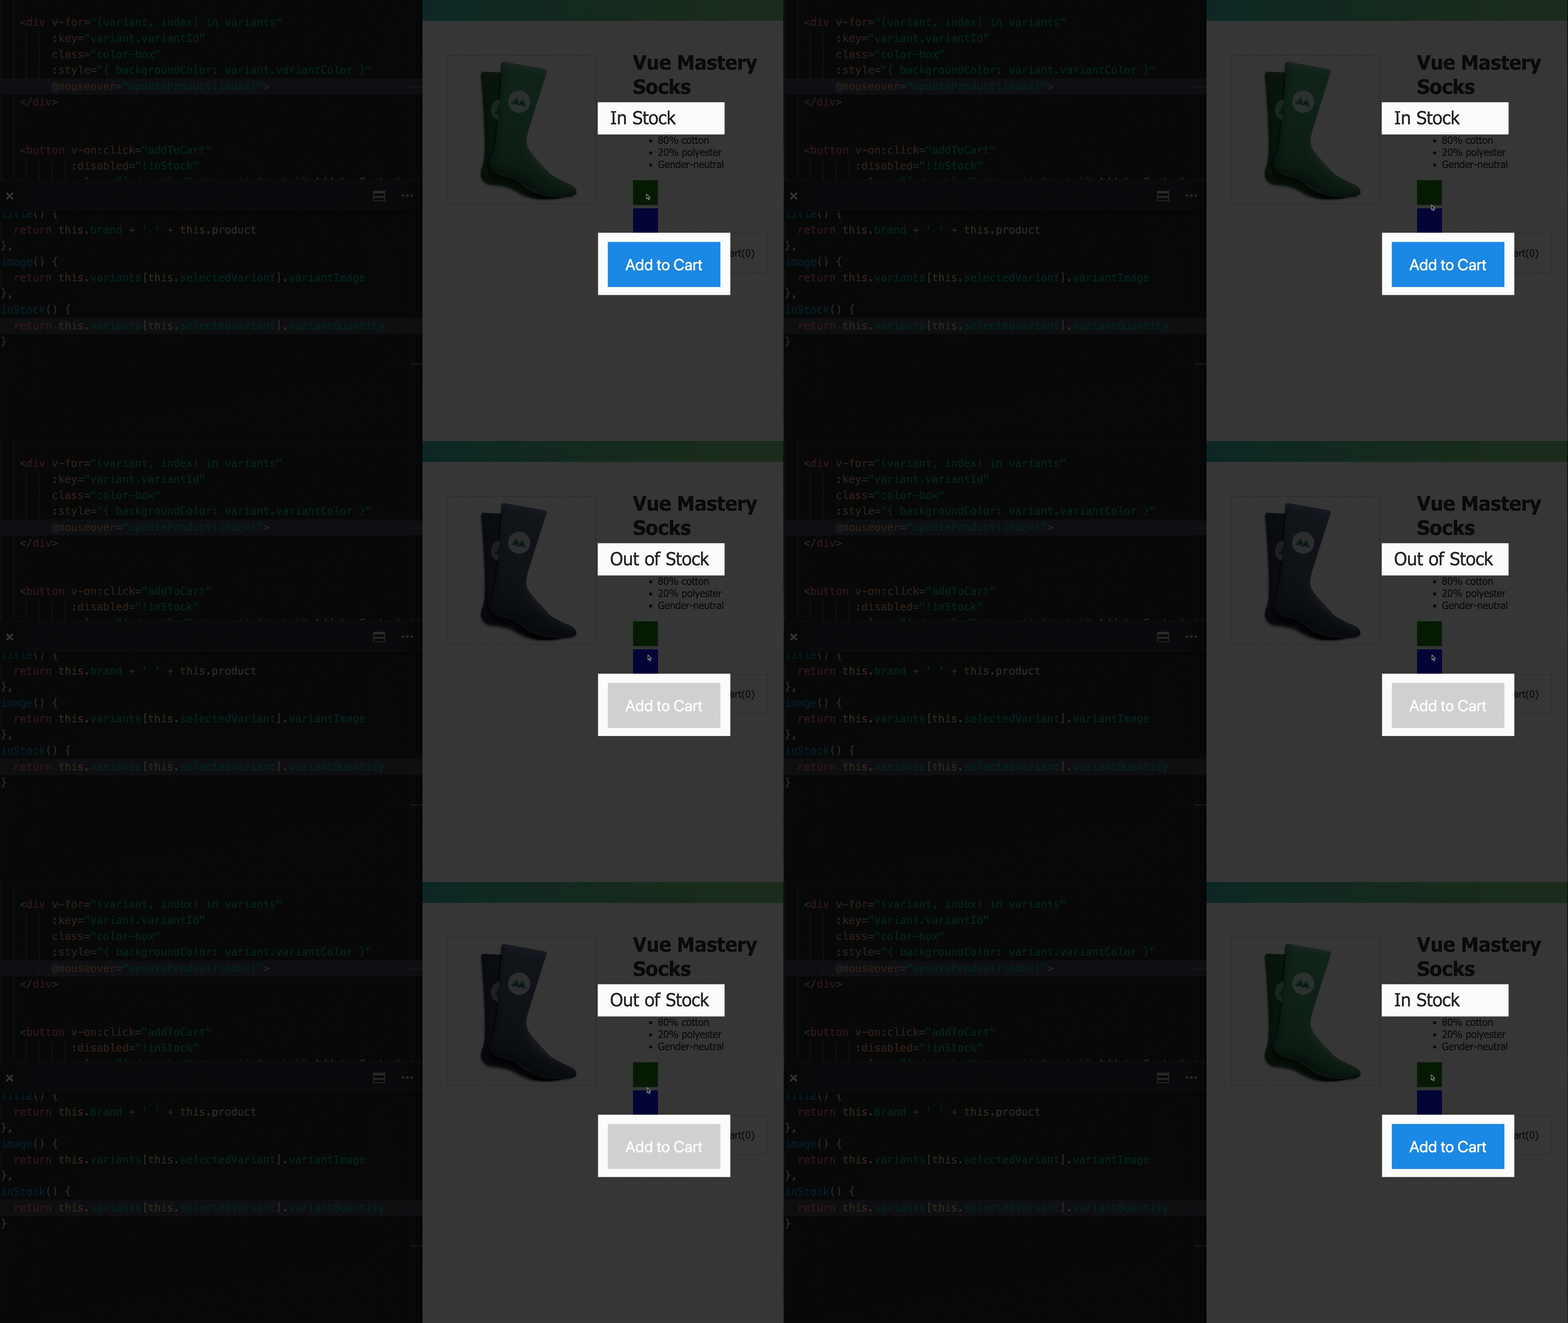
If you now hover the mouse over a square, the quantity of goods corresponding to which is equal to zero,
inStock0 will fall into , and 0 is in JavaScript a value that can be converted to a boolean value false. Because of this, a message will be displayed on the page Out of Stock.
Note that the button also reacts correctly when set
inStockto 0 as before .

The button and label depend on the quantity of each product.
Why does everything continue to work correctly? The point is,
inStockit's still used to bind a classdisableButtonto our button. The only difference between the new version of the application and its previous version is that itinStockisnowa computed property, not a regular property.
Learn more about computed properties
Computed properties are cached. That is, the results of calculating these properties are stored in the system until the data on which these results depend is changed. As a result, when it changes
variantQuantity, the cache will be cleared. And the inStocknext time it is accessed, the property will return a new result, which will be placed in the cache.
Taking this into account, we can say that if resource-intensive calculations are required to obtain a certain value, then it is more advantageous to use a computed property to perform them, rather than a method. The method will have to be called every time the corresponding value is needed.
Also, it's important to remember that you shouldn't change the data stored in the Vue instance in your computed property code. In this code, all you need to do is perform calculations based on existing data. These functions should be clean and free of side effects.
Workshop
Add a new boolean property to the data object used to create the Vue instance
onSale. It will indicate if the sale is in progress. Create a calculated property salethat is based on brand, productand onSaleforms a line, it was reported that there are now carried out the sale or not. Output this line in the product card.
→ Here is a template that you can use to solve this problem
→ Here is a solution to the problem
Outcome
In this lesson, we learned about computed properties. Here are the most important things we learned about them:
- Computed properties calculate values, not store them.
- Computed properties can use the data stored in the application to create new data from it.
If you are doing your homework for this course, tell me if you are doing exclusively what is offered to you, or are you going further?
→ Vue.js beginners lesson 1: instance Vue
→ Vue.js for beginners, lesson 2: binding attributes
→ Vue.js beginners lesson 3: conditional rendering
→ Vue.js beginners lesson 4: lists rendering
→ Vue .js for beginners lesson 5: event processing
→ Vue.js beginners lesson 6: binding classes and styles
→ Vue.js beginners lesson 7: calculated properties
→ Vue.js beginners lesson 8: components
