We continue to study the new Check Point Management Platform for managing the security tool for user computers - SandBlast Agent. In the previous article, we described the main components of the SandBlast Agent, got acquainted with the Check Point Infinity architecture and registered the SandBlast Agent Management Platform application on the Infinity Portal. Today we will study in detail the web interface of the agent management system - this article will become a convenient guide to all the functions and capabilities of the cloud console. And as preparation for the next article, we will install SandBlast Agent and get acquainted with its interface.
Management Platform Cloud Management Console Structure
The SandBlast Agent Management Platform interface can be roughly divided into three components:
- — : , Check Point ;
- — , , .;
- — ó , (, ) .
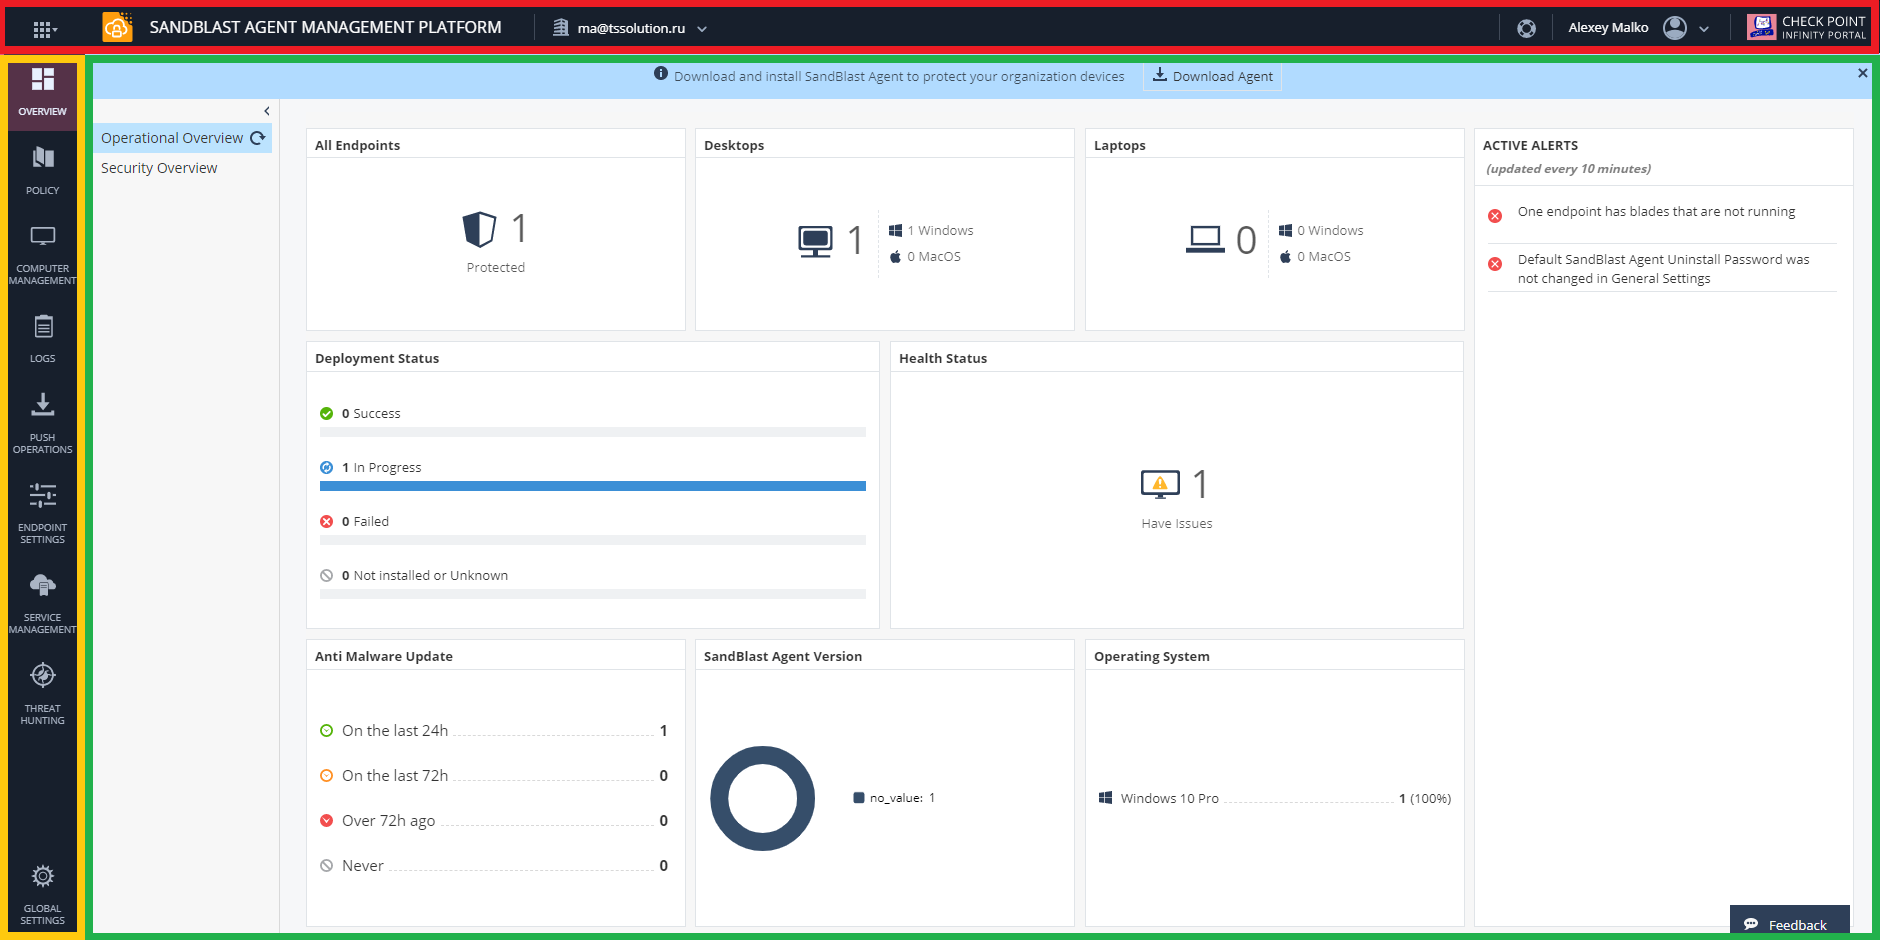
Let's take a closer look at each element of the SandBlast Agent Management Platform system. The workspaces will be described in detail for all components of the navigation bar, but for now let's start with the capabilities of the control panel.
Control Panel
The control panel includes 6 components, let's look at them from left to right. The first is the Menu button, which, when clicked, displays your current portal services and allows you to add new services from the Cloud Protection, Network Protection and Endpoint Protection categories to your account. This is followed by the name of the current application in which you are working - in this case, it is SandBlast Agent Management Platform. By clicking on the application icon, you can always get to the "OVERVIEW" section of the navigation bar. The third element is the account management icon, which allows you to quickly switch between accounts of companies in which you are the administrator. The fourth component of the control panel is a help button that allows you to contact Check Point technical support directly from the console, go to

a site for monitoring the status of Check Point cloud and web resources, as well as accessing the Administrator's Guides for the SandBlast Agent Management Platform and Infinity Portal. The next element is your profile on the Infinity Portal, by clicking on which you can "fall through" the profile settings or exit the current profile. And finally, the last element of the control panel is the button for going to the Infinity Portal website .

Infinity Portal Profile Settings
Infinity Portal : , ( ) , . , Google Authenticator Twilio Authy . — QR-, 2FA.


Navigation bar

The SandBlast Agent Management Platform contains 9 sections in the navigation pane, as shown in the figure below, that allow you to perform many tasks for deploying and administering agents, as well as managing web console settings. Let's briefly consider each of the sections, and for detailed information, click on the spoiler with the name of the section of interest. Let's get started:
- OVERVIEW is a section consisting of several dashboards that display the current state of client machines and agents from the point of health (the number of protected machines, their operating system versions, agent status, error messages, etc.) and from the security point of view (data on attacked and infected machines , active and blocked attacks, attack timeline, etc.);
OVERVIEW section: in detail
: Operational Overview Security Overview. , Operational Overview, : , ( — /, — Windows/MacOS), , « » , , SandBlast Agent , (Alerts). SandBlast Agent.

, Security Overview, ( ). , . Security Overview — , . Excel/PDF. SandBlast Agent.
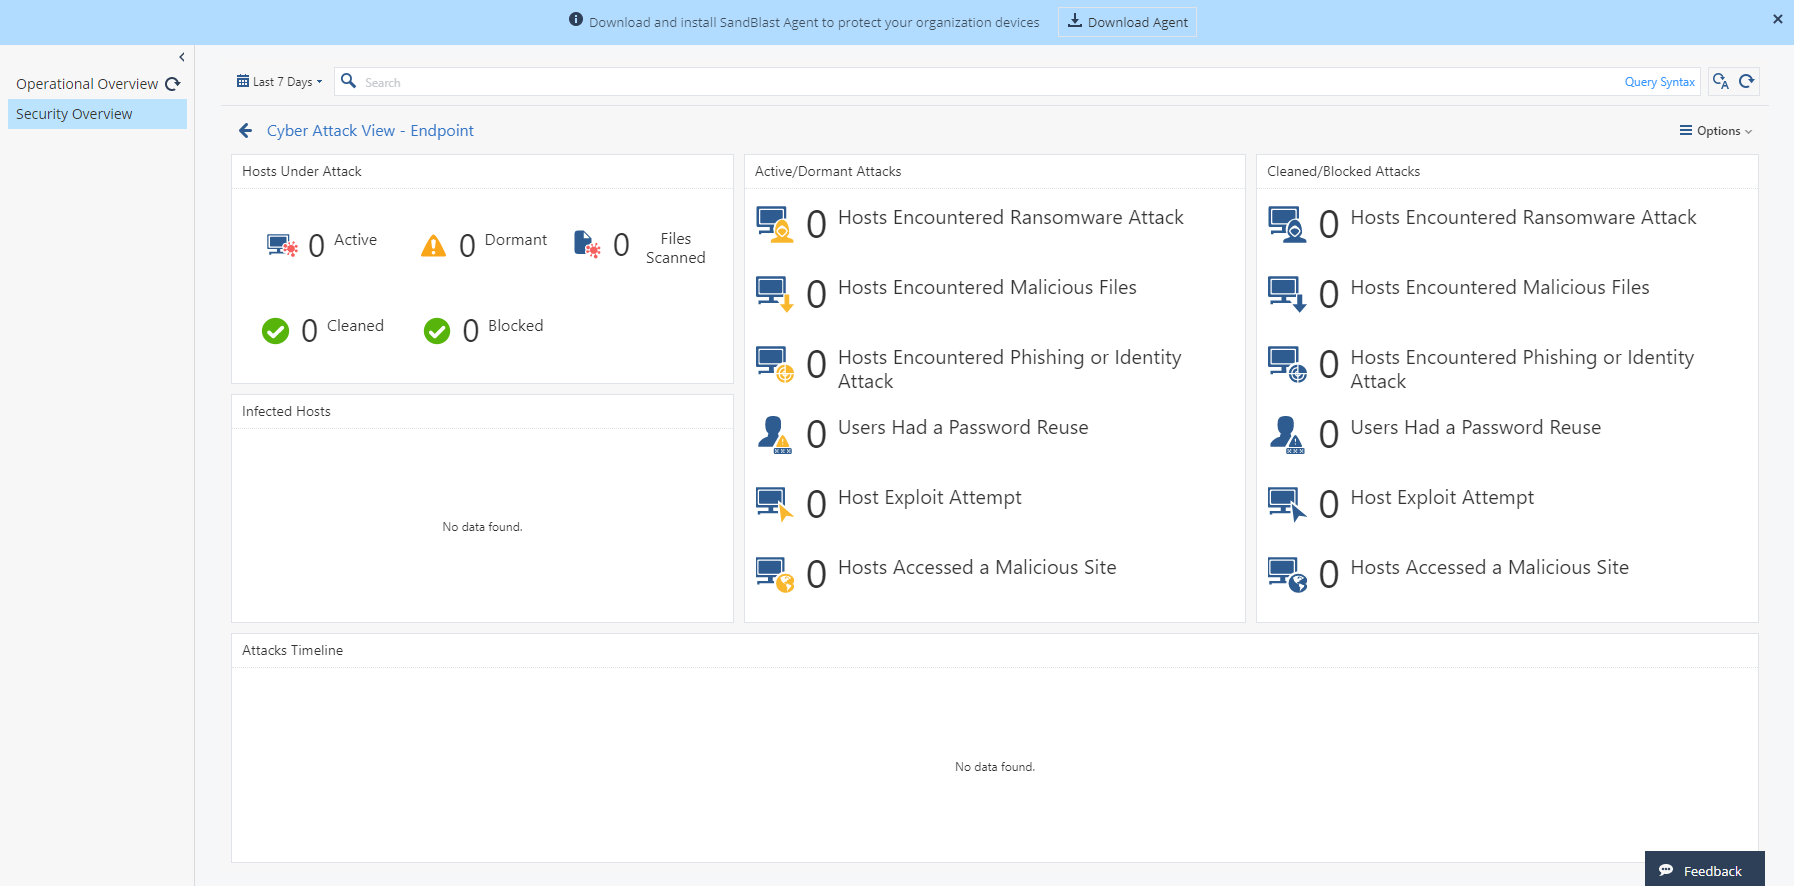

, Security Overview, ( ). , . Security Overview — , . Excel/PDF. SandBlast Agent.

- POLICY — , ( Unified Policy), ;
POLICY:
, Threat Prevention, , , . Threat Prevention: Web & Files Protection, Behavioral Protection, Analysis & Remediation. Web & Files Protection URL Filtering, Download protection, Credential protection, Files Protection. Behavioral Protection Anti-Bot, Behavioral Guard & Anti-Ransomware, Anti-Exploit. Analysis & Remediation Automated attack analysis (forensics), Remediation & Response.
3 , : Tuning ( Detect), Recommended ( Detect) Default ( URL Filtering Detect). Threat Prevention ( Exclusions Center) .

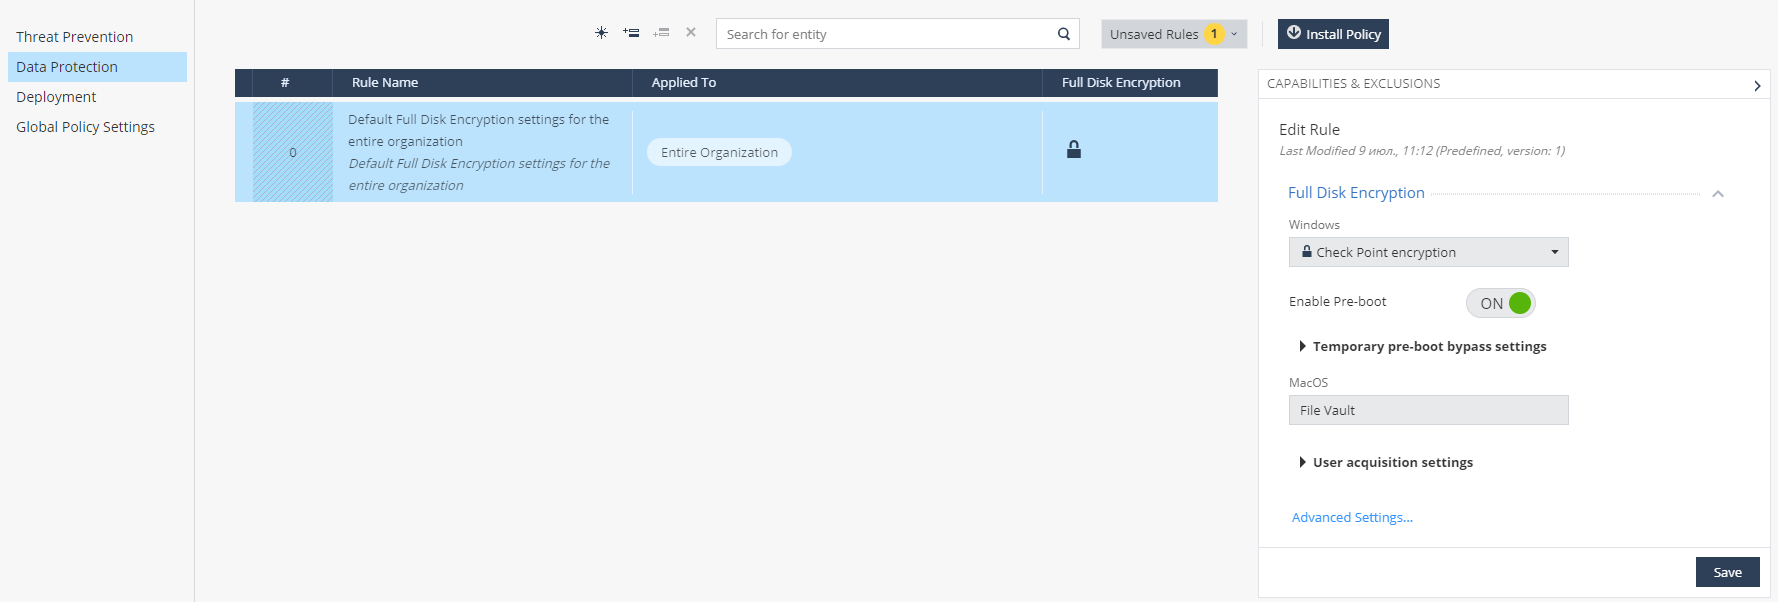
— Data Protection, Full Disk Encryption. Check Point encryption BitLocker encryption Windows, File Vault MacOS. , , Pre-Boot Authentication, Windows Authentication.
— Deployment, SandBlast Agent . .
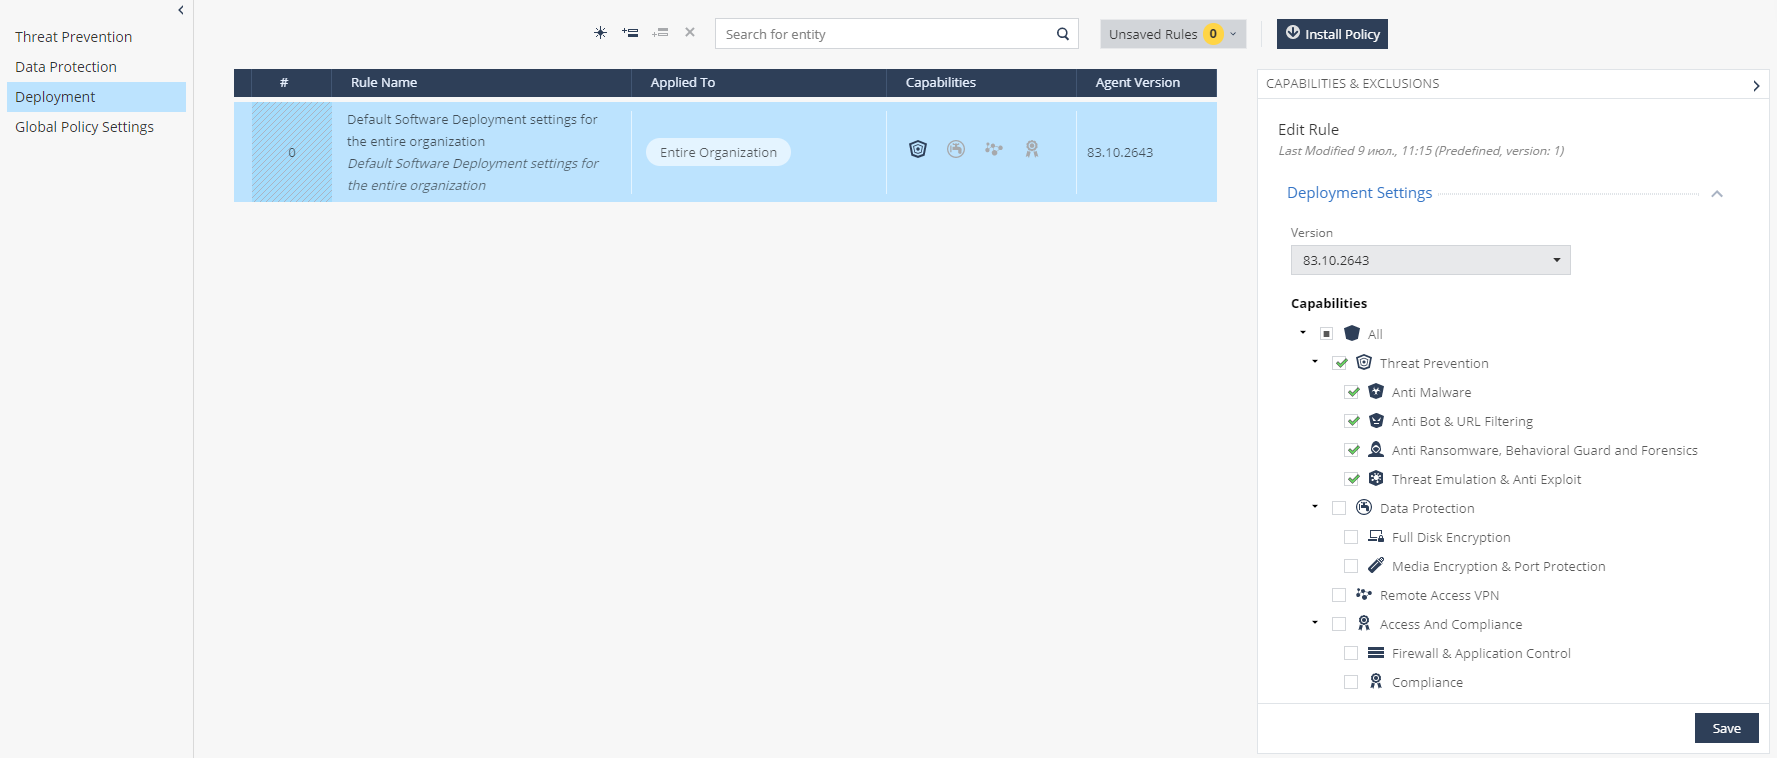
, Global Policy Settings, SandBlast Agent , Check Point, Full Disk Encryption.

3 , : Tuning ( Detect), Recommended ( Detect) Default ( URL Filtering Detect). Threat Prevention ( Exclusions Center) .

— Data Protection, Full Disk Encryption. Check Point encryption BitLocker encryption Windows, File Vault MacOS. , , Pre-Boot Authentication, Windows Authentication.

— Deployment, SandBlast Agent . .

, Global Policy Settings, SandBlast Agent , Check Point, Full Disk Encryption.

- COMPUTER MANAGEMENT — , , , (Push Operation) (Full Disk Encryption Actions);
COMPUTER MANAGEMENT:

COMPUTER MANAGEMENT : , , . : ; CSV; Directory Scanner , , Active Directory; (//); ; ; Push Operation ( ); (Full Disk Encryption Actions).
. Active Directory, AD. , , , Desktops, Laptops, Servers .
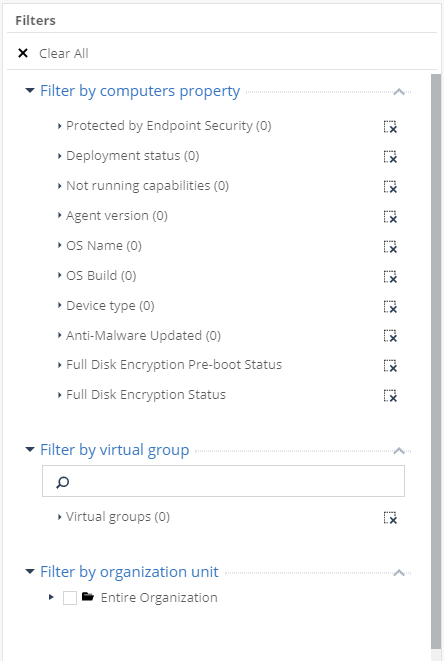
, . (by computers property) , SandBlast Agent. (by virtual group) , (by organization unit) — Active Directory.

COMPUTER MANAGEMENT : , , . : ; CSV; Directory Scanner , , Active Directory; (//); ; ; Push Operation ( ); (Full Disk Encryption Actions).
. Active Directory, AD. , , , Desktops, Laptops, Servers .

, . (by computers property) , SandBlast Agent. (by virtual group) , (by organization unit) — Active Directory.
- LOGS — , (, , .), ;
LOGS:
. , LOGS 4 : ; ; ; . (Hide Identities) Excel-.


- PUSH OPERATIONS — , , ( , , / .);
PUSH OPERATIONS:
: , .

, : Anti-Malware Scan for Malware, Update malware signature Database, Restore files from quarantine; Forensics And Remediation Analyze by Indicator, File Remediation; Agent Settings Collect Client Logs, Repair Client, Shutdown Computer, Restart Computer. .

, : Anti-Malware Scan for Malware, Update malware signature Database, Restore files from quarantine; Forensics And Remediation Analyze by Indicator, File Remediation; Agent Settings Collect Client Logs, Repair Client, Shutdown Computer, Restart Computer. .
- ENDPOINT SETTINGS — , Active Directory, (Alerts), Syslog, (user-based computer-based);
ENDPOINT SETTINGS:
, AD Scanners, Active Directory . Organization Distributed Scan, SandBlast Agent COMPUTER MANAGEMENT. Full Active Directory Sync, Active Directory . : Active Directory root, , .

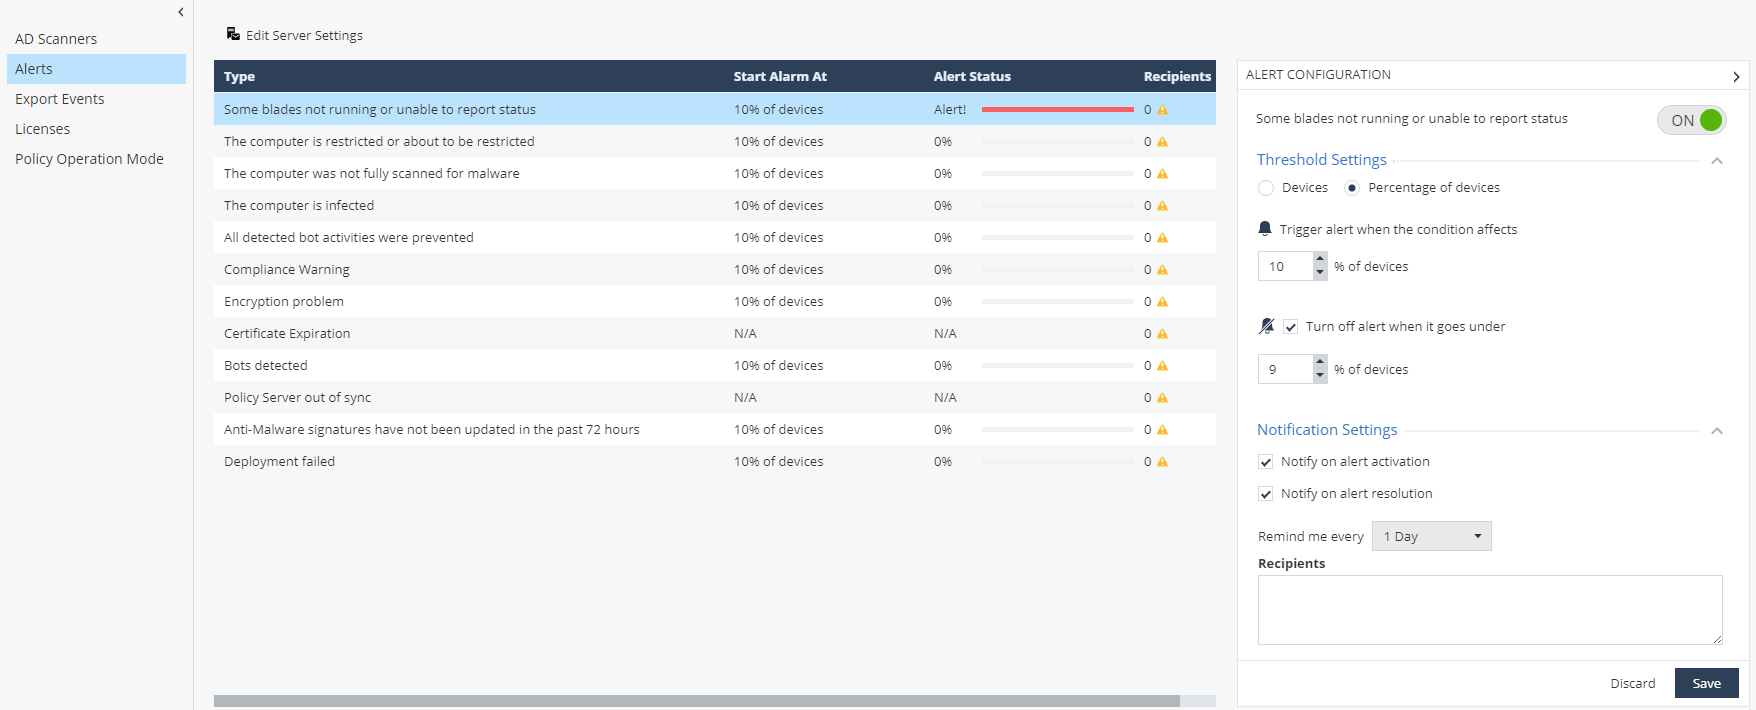
Alerts, , , . 12 , . .
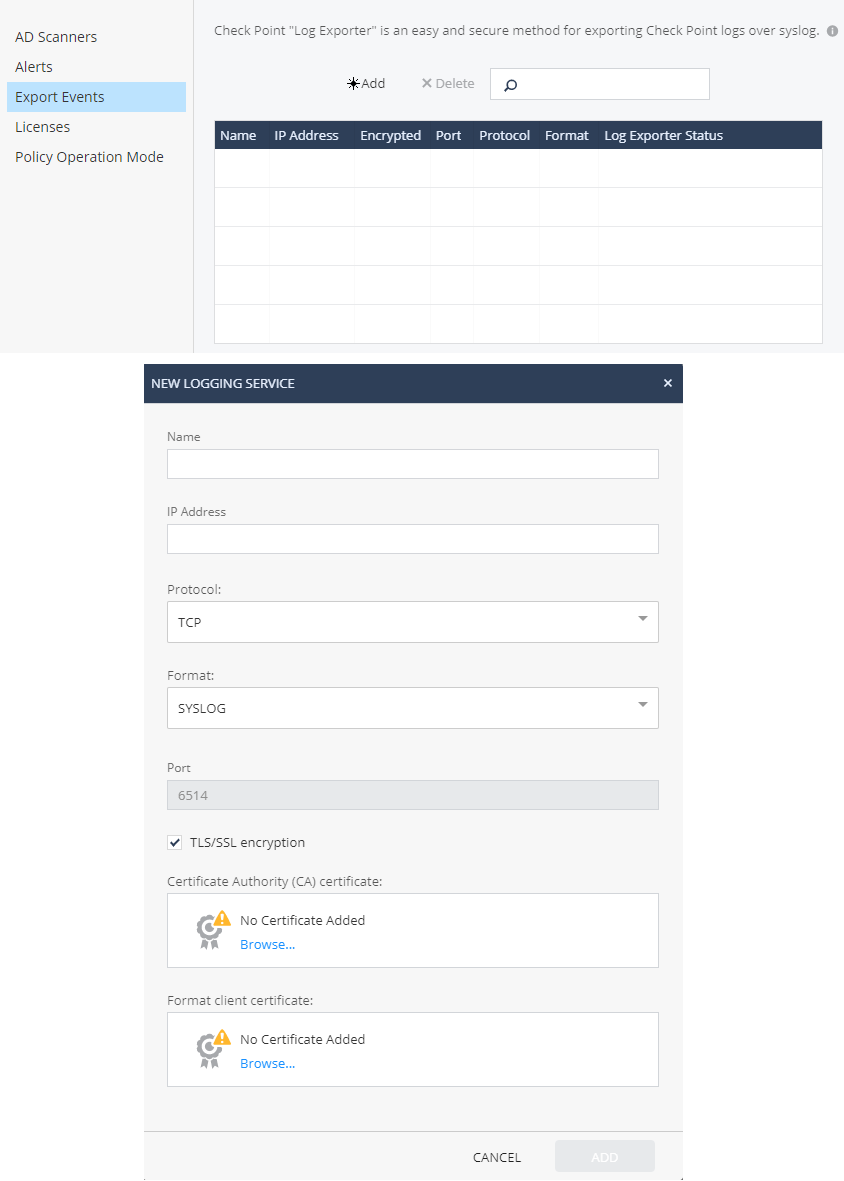
Export Events, (Syslog, CEF, LEEF, Generic) -. SIEM-, Syslog-.
— Licenses, : , , . GLOBAL SETTINS.

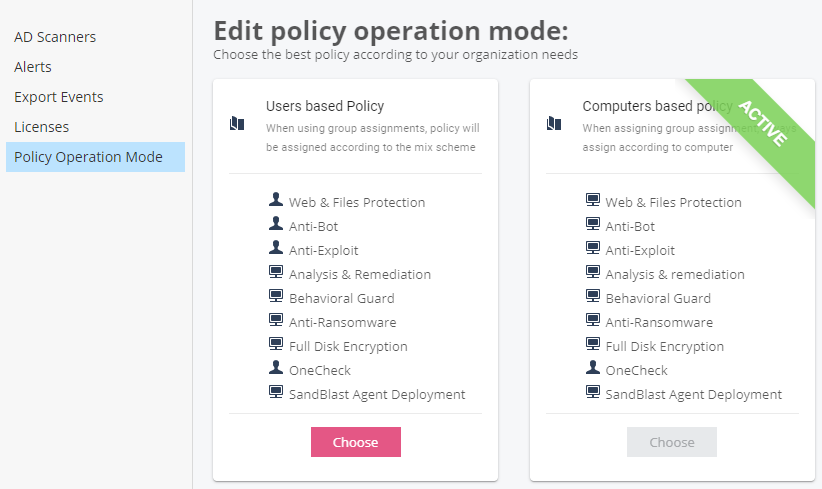
Policy Operation Mode, : Users based Policy Computers based Policy. — , .

Alerts, , , . 12 , . .

Export Events, (Syslog, CEF, LEEF, Generic) -. SIEM-, Syslog-.

— Licenses, : , , . GLOBAL SETTINS.

Policy Operation Mode, : Users based Policy Computers based Policy. — , .

- SERVICE MANAGEMENT — , Endpoint Management Platform SmartView , SmartConsole SandBlast Agent;
SERVICE MANAGEMENT:
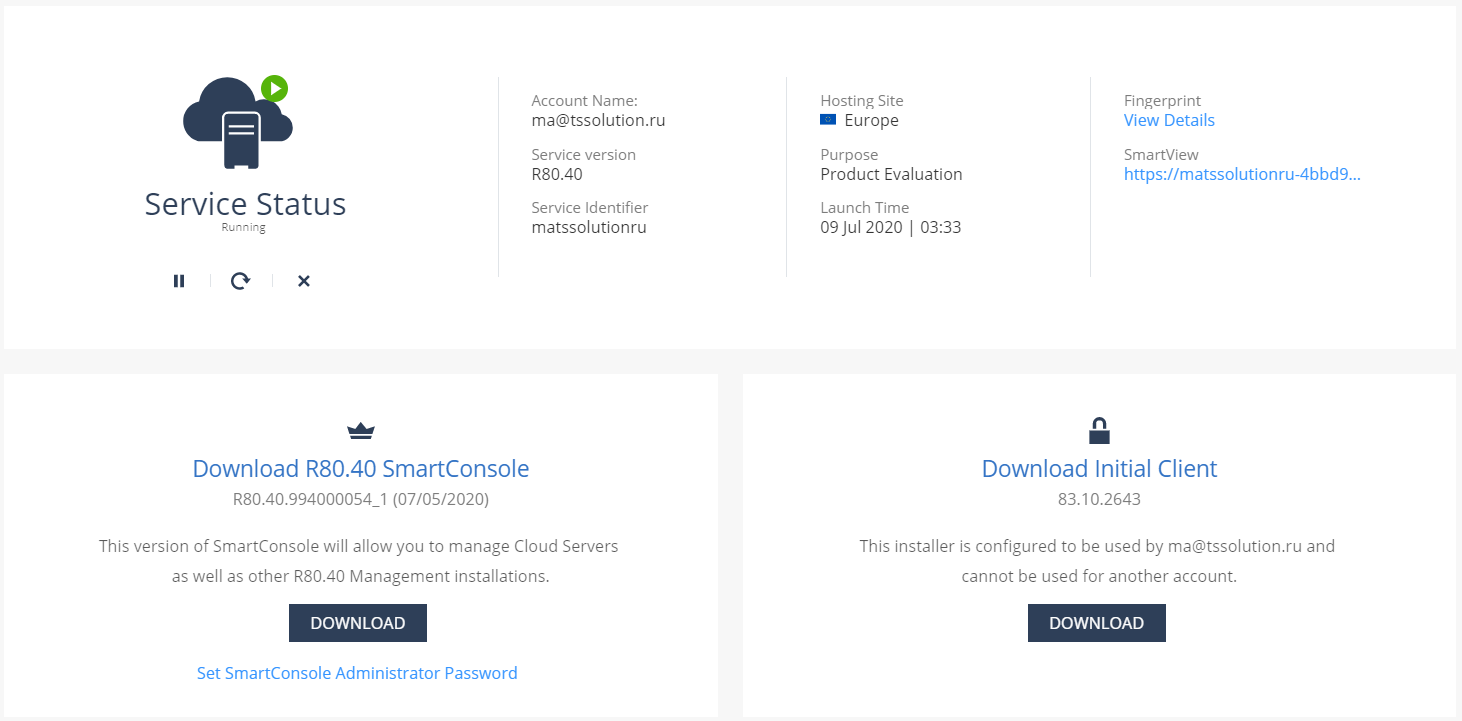
SERVICE MANAGEMENT : , SmartView ( ) ; SmartConsole R80.40 — Check Point, SandBlast Agent; SandBlast Agent.


SERVICE MANAGEMENT : , SmartView ( ) ; SmartConsole R80.40 — Check Point, SandBlast Agent; SandBlast Agent.

- THREAT HUNTING — , ( Beta-);
THREAT HUNTING:
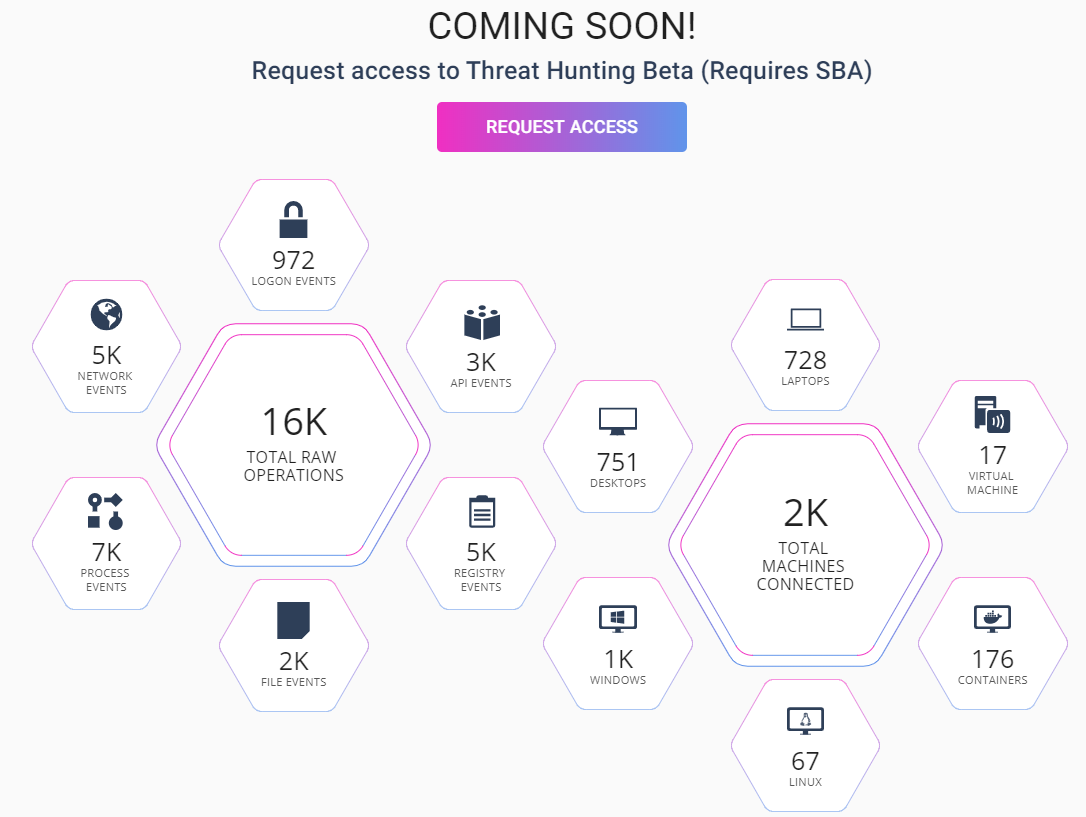
Threat Hunting SandBlast Agent — , Check Point , , WMI, . , . Check Point ThreatCloud — , , Check Point. Threat Hunting Beta- Check Point. .

- GLOBAL SETTINGS — Infinity Portal, , , , API CloudGuard SaaS -.
GLOBAL SETTINGS:
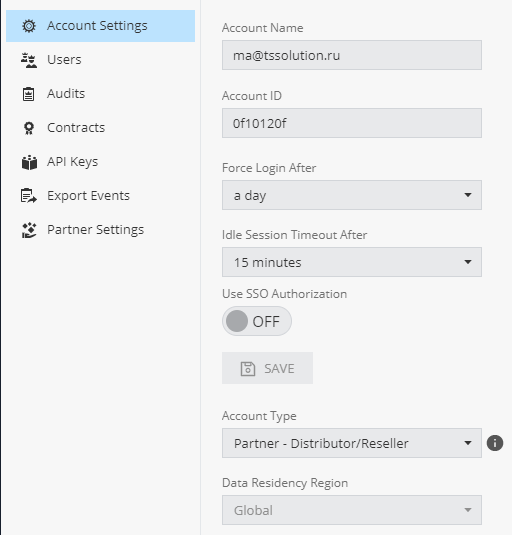
, Account Settings, Account ID, . , SSO (, Distributor/Reseller MSSP).
, Users, — , . — Read-only-.

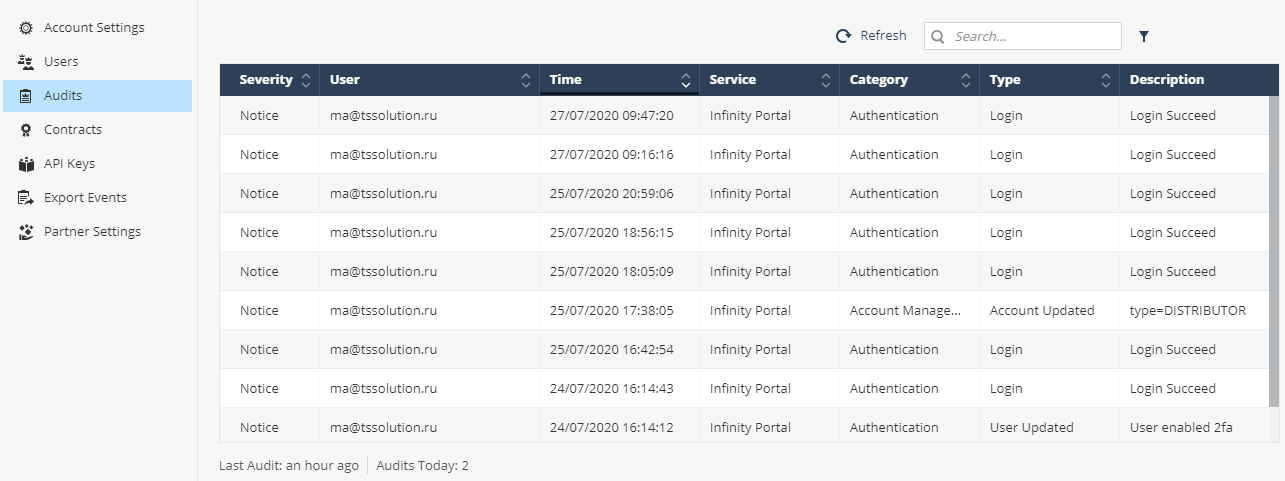
Audits, . — , , , , . , (Login), (Account Updated) “Distributor”, (User Updated).
Contracts, — , ( ). Check Point ASSOCIATED ACCOUNTS.

— API Keys, API Infinity Portal. Client ID Secret Key, .

— Export Events Partner Settings, CloudGuard SaaS -, ( Partner).


, Users, — , . — Read-only-.

Audits, . — , , , , . , (Login), (Account Updated) “Distributor”, (User Updated).

Contracts, — , ( ). Check Point ASSOCIATED ACCOUNTS.

— API Keys, API Infinity Portal. Client ID Secret Key, .

— Export Events Partner Settings, CloudGuard SaaS -, ( Partner).


SandBlast Agent:
Check Point : . — (Initial Client) (, Active Directory) . — Threat Prevention / Data Protection, . , Initial Client , , , . , — SandBlast Agent.
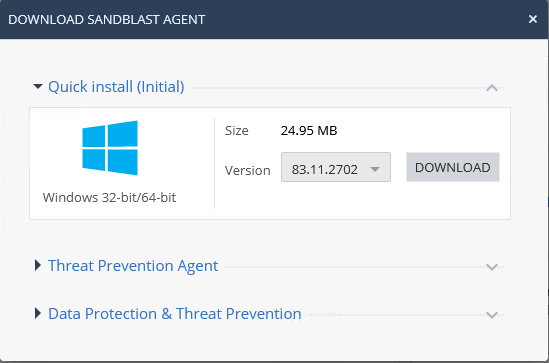
Let's use automatic agent deployment. The Initial Client version can be downloaded from two sections of the console: Service Management and Overview. In the Service Management section, selecting the Download Initial Client option downloads the initial client. When loaded from the Overview section, there are three SandBlast Agent build options: Quick Install (Initial), Threat Prevention Agent, and Data Protection & Threat Prevention. The second and third options are suitable for manual deployment, and the first is the Initial Client assembly. The downloaded EPS.msi file is transferred to the user's machine, after which it is necessary to start the installation process. When a successful installation is completed, the Check Point Endpoint Security icon appears in the Taskbar, indicating that the agent has been disconnected from the management server.
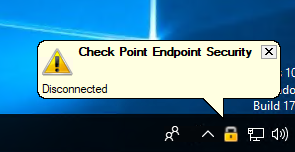
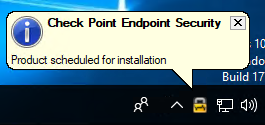
At this time, the client automatically tries to connect to the cloud management server using the built-in address. This is a fairly quick process, and after a couple of minutes, a new alert indicates a planned installation of the agent. This message indicates a successful connection between the agent and the cloud management server. If you right-click the Endpoint Security icon, you can get more detailed information about the connection established with the management server, for example, the name of the management server to which the client connected and the current connection status.
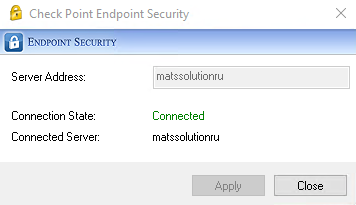
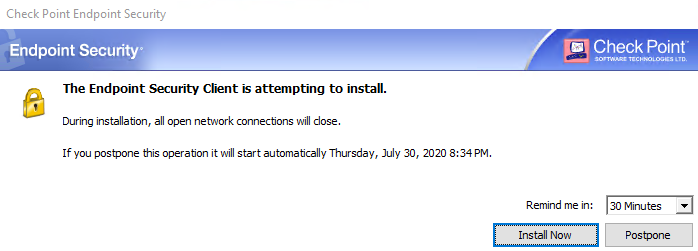
After a successful connection to the management server, the process of downloading the necessary components (in accordance with the security policy) to the user's machine begins. The administrator can monitor the status of the agent installation process in the Computer Management section of the Web Management Console - after the user machine has successfully connected to the cloud management server, its status in the Computer Management section changes from Scheduled to Downloading. After downloading and checking all components, the user is prompted to install the agent immediately, or postpone the installation process. If the agent is not installed by the user within 2 days from the start of the process, the agent will be installed forcibly, which is reported in the window suggesting to start the installation.
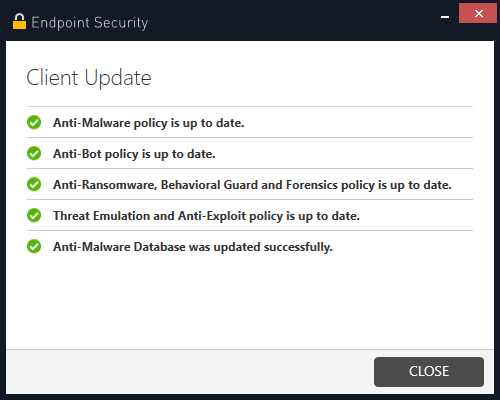
After the agent installation starts, the user machine in the Computer Management section of the management console changes to the Deploying status. When the agent installation process is complete, you can open its interface by right-clicking the Endpoint Security icon and selecting Display Overview. After installation, it is recommended to click "Update now" to initiate the process of updating policies and databases on the agent. The first update of the Anti-Malware database may take some time. As soon as all databases are updated, an automatic first scan of the system will start. At this point, the client machine in the management console should display the Completed status, which indicates that the agent has been successfully installed.
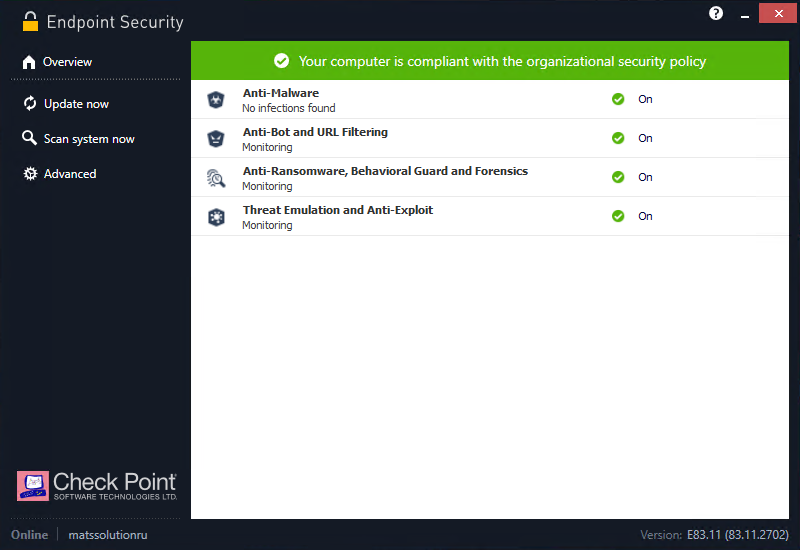
Let's start exploring the agent interface. In the lower left corner, the agent status (Online / Disconnected) and the name of your cloud management server are displayed - in our case, this is the “Online” status and the name of the management server “matssolution”. The current version of the agent is indicated in the lower right corner - we have version E83.11 (83.11.2702) installed. The agent navigation panel consists of several sections:
- Overview is the main section that displays information about the status of all blades and the compliance of the user's computer with the security policy. Also from this section, you can "fall" into each blade to get more detailed information about the status and security events;
- Update now - allows you to start the process of checking the relevance of the security policies and databases in effect on the agent;
- Scan system now - initiates the process of scanning the system for malicious software or files;
- Advanced - advanced agent settings that allow you to view the installed policy, view or collect logs, and also use the user's computer as a Deployment Agent.
Since no changes were made to the initial policy, the agent currently contains only Threat Prevention policy blades with default values. The content of the initial Threat Prevention policy will be discussed in more detail in our next article in this series.
Conclusion
It's time to take stock of the work done: in this article, we got acquainted in detail with the interface of the SandBlast Agent Management Platform web management console, installed the agent on the user machine and studied its interface.
In our next article in this series, we will examine the standard Threat Prevention policy and test it against the most popular attacks. We will also create our own policy rules to increase the security level of the user's machine.
A large selection of materials on Check Point from TS Solution . In order not to miss the following publications on the SandBlast Agent Management Platform - follow the updates on our social networks ( Telegram , Facebook , VK ,TS Solution Blog , Yandex.Zen ).