
What's coming in this series of posts:
- 1: - ;
- 2: S2I HTTP-, NGINX, OpenShift -;
- 3: OpenShift .
First of all, we need OpenShift installed. We will be using minishift, which allows you to run OpenShift in a virtual machine on Windows, Mac or Linux computers. To get your hands on minishift, download the Red Hat Container Development Kit (CDK) and follow these instructions to install and run it. More information can be found in the CDK documentation and in the documentation on the OKD.io site .
After minishift is launched, you need to log in and configure the project, which is done in just two commands:
$ oc login

$ oc new-project web-apps
This assumes you have Node.js 8+ and npm 5.2+ already installed.
If you opened this article just to find out what these two such magic commands are, skip to the final part. Otherwise, go further along the text!
What is a modern web application?
First of all, we need to decide what we mean by "modern web application" and how it differs from the so-called "pure" Node.js application.
For us, a modern web application is something like React, Angular or Ember, with a build step that generates static HTML, JavaScript, and CSS. During the build phase, several tasks are usually performed, such as concatenation, transpilation (Babel or Typescript), and file minification. Each of the major frameworks has its own build process and pipeline, but tools like Webpack, Grunt, and Gulp also fall into this category. And all of these tools use Node.js to run build processes.
However, the static content generated (compiled) at this stage does not necessarily need a node process to serve it. Yes, you can use something like the serve module here , which is great for development as it allows you to quickly see what the site looks like. But for production deployments, it is usually recommended to use something like NGINX or Apache HTTP Server.
On the other hand, a "pure" node application will use the Node.js process to start and can be something like an Express.js application (i.e. a REST API server) - it usually does not have a build step (yes yes, we are aware of Typescript). Development dependencies are usually not installed, since we only need those that are used to run the application.
You can read about how to deploy a "clean" node application on OpenShift using our Node.js S2I image, for example, here .
Deploying a web application on OpenShift
Now that we've outlined the difference between a modern web app and a Node.js app, let's show you how to actually deploy our web app to OpenShift.
Here we will deploy both a React app and a modern Angular app. Both of these projects can be created fairly quickly using the appropriate CLI tools: create-react-app andangular/ cli. This will be one of the two commands that appear in the title of this article.
React app
If create-react-app is already installed globally, great. If not, then just run the appropriate command with npx, like this:
$ npx create-react-app react-web-app
Note: npx is a one-off command runner that is included with npm 5.2+, see here for details .
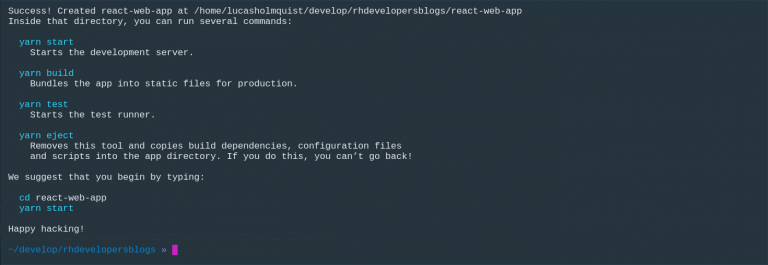
This command will create a new React app, and you should see something like this on the screen:
Assuming you are in the newly created project directory, you can run the second command to deploy our application to OpenShift:
$ npx nodeshift --strictSSL=false --dockerImage=nodeshift/ubi8-s2i-web-app --imageTag=10.x --build.env YARN_ENABLED=true --expose
Now the OpenShift console will look something like this:

And this is the web console after launching the application:

Before moving on to the Angular app, let's take a look at what our last command does.
It starts with npx nodeshift - here we run the nodeshift module using npx , which makes it easy to deploy node applications to OpenShift.
Now let's look at the options that are passed to nodeshift. The first is --strictSSL = false.
Since we have a minishift and it uses a self-signed certificate, we need to tell nodeshift this so that there are no security errors (in fact, we say this to the request library hidden under the hood).
Next comes the long option --dockerImage = nodeshift / ubi8-s2i-web-app --imageTag = 10.x. She tells nodeshift to use the new Web App Builder image with a 10.x tag.
Now we tell the S2I image that we want to use yarn: --build.env YARN_ENABLED = true. Finally, the --expose flag tells nodeshift to create an OpenShift route for us so that we can get a web-accessible URL to our application.
As this is an article in the OpenShift Fast Track series, the S2I image here uses the serve module to serve the generated static files. In the next post, we will show you how to use this same S2I image with NGINX.
Angular app
Now let's create an Angular app. The first step is to create our new application using the Angular CLI. Again, if you don't have it installed globally, you can start it with npx:
$ npx @angular/cli new angular-web-app
This command will create a new Angular project, and we, as is the case with the React application, then just run another command to deploy it:
$ npx nodeshift --strictSSL=false --dockerImage=nodeshift/ubi8-s2i-web-app --imageTag=10.x --build.env OUTPUT_DIR=dist/angular-web-app --expose
Similar to the React case, the OpenShift web console will look something like this:

And this, respectively, is the web console when you launch the application:

Now let's take a look at the deployment command. It is very similar to React, but there are important differences.
The differences lie in the build.env flag: for Angular we write --build.env OUTPUT_DIR = dist / angular-web-app, and there are two points here.
First, we removed the YARN_ENABLED variable as we are not using yarn for our Angular project.
Second, we added the OUTPUT_DIR = dist / angular-web-app variable. Therefore, the S2I image will by default look for your compiled code in the build directory. React uses build by default, so we didn't configure this parameter in the previous example. But Angular uses other things for its compiled output. Therefore, we write that the ist / <PROJECT_NAME> parameter in our case is equal to dist / angular-web-app.
Conclusion
For those who skipped the parsing of the examples above and went here right from the beginning of the article, we show the two commands with which deployment is performed:
React:
$ npx create-react-app react-web-app

$ npx nodeshift --strictSSL=false --dockerImage=nodeshift/ubi8-s2i-web-app --imageTag=10.x --build.env YARN_ENABLED=true --expose
Angular:
$ npx @angular/cli new angular-web-app

$ npx nodeshift --strictSSL=false --dockerImage=nodeshift/ubi8-s2i-web-app --imageTag=10.x --build.env OUTPUT_DIR=dist/angular-web-app --expose
Additional Resources
Today you saw how to quickly and effortlessly deploy a modern web application on OpenShift using the new S2I Web App Builder image. Our examples use the community version of this image, but Red Hat has already released the Red Hat Openshift Application Runtime (RHOAR) , so be careful.
In the next post, we'll show you how to use a new S2I image along with an existing HTTP server image such as NGINX, using the OpenShift build chain to organize production deployments.
The third part of this series will focus on how to organize a development workflow for an application on the OpenShift platform.
We also recommend downloading and reviewing the free e-book Deploying to OpenShift .