
This is the longest lasting craft in my life. It took 12 years from idea to final realization, so that it could be used! During this time, a colossal number of events happened: relocations, births, deaths, but the idea was with me and no matter what, I completed it. And I want to tell you about the paths, thorns, aspirations that accompanied this craft and what came of it as a result.
Idea
I saw the very idea of a Wi-Fi radio based on a router a long time ago in this project . If anything, this is 2009. It was a router based radio, Linux and mpd daemon. Then these were not entirely clear terms for me, but I really wanted to have such a radio. And I fired up this idea. Plus, I was very inspired by any lamp technology: amplifying lamps, indicator lamps (6E1P, which is on my profile picture), CRT screens . And VFD-displays (VFD - Vacuum Fluorescent Display or in Russian Vacuum-luminescent indicator (VLI), or cathodoluminescent indicator (CLI) are also very pleasing.
Therefore, I decided to use a cash display. Then I did not even know what it was called buyer display.
So the idea: a buyer's display, some single-board computer or router, Linux + mpd, a vacuum-fluorescent indicator and some kind of controls for this stuff. Similar to the project that inspired me.
I understand that I was very late with this craft, as there are a bunch of different options for Wi-Fi radio. But still it differs conceptually, even today, from the rest, and I think it will be interesting to read about the creation of such a device. Moreover, I did it for the soul, and not for sale.
Basic concept and design
This radio in those years (about 2010) had another project goal. In those years I was studying the Serbian language and I wanted to have a simple device, where I would receive a Serbian radio station by “flipping the switch”. Phones, computers were not an option, since they themselves greatly distracted me: by the time you open it, you will forget what you did. Second, I really wanted the piece of iron to remain as similar as possible to an ordinary familiar radio and even an elderly person could use it. And lastly, I wanted the controls to be minimalistic: one button.
I was very inspired by the design solutions of the 30-40s of the 20th century in architecture, interior and, in particular, in the design of radio receivers. This style is called Art Deco. In our country, a striking representative of this style is the building of the Lenin Library, the Aeroport metro station, Mayakovskaya, Krasnoselskaya (more precisely, it has the influence of this style). If we talk about the receivers (the design of which they already received from the architecture), then the most interesting options were those with the scale at the top.
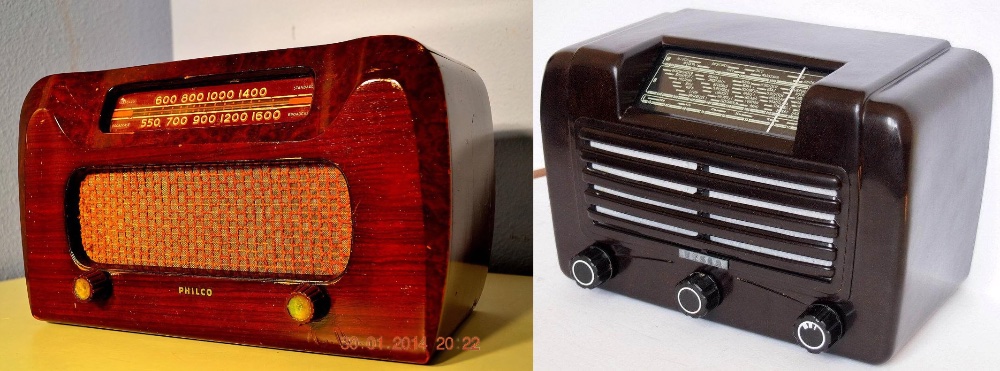
Design decisions that strongly inspired
Of course, initially the body of this radio was planned to be made of precious wood, like a receiver on top. And even once here on Habré I met a designer who was doing a similar project (I don't remember which one, sorry); and we even made some sketches, thought about the project, but still then I did not dare to take such a serious path, but in vain ... In general, there were many all sorts of strange dreams and desires. But it all came down to a cruel reality.
First steps of implementation
The basis of all Wi-Fi radio is the buyer's display. I selected the display for a very long time, stupidly went shopping and looked what I like best. I liked the Posiflex PD-2700 display the most . I stopped at it.
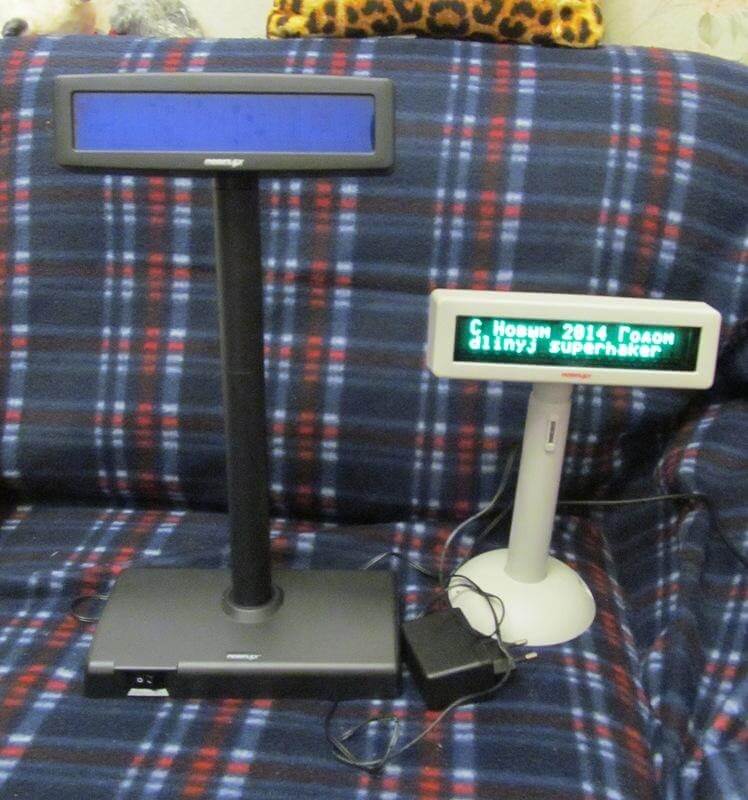
Turning on for the first time and displaying an image on the screen.
I wrote a separate article on working with these displays. You can read it here . Therefore, I will not dwell on the principle of their work in detail.
The TP-Link 3020 router, Nokia N800 (yes, don't be surprised, N800), various laptops, industrial computers of all stripes, cash registers, Raspberry Pi of various generations, single-board devices and much more were tried on as the "brains" of this radio. Everything speaks about the universality of the decisions made. And looking ahead, some decisions were made for the sake of portability, and not to reduce the cost of construction.
But in general, I did not like all these solutions, either they were excessive in terms of capabilities for such a task, or, on the contrary, they were too low in performance and had problems with sound reproduction (for example, routers). Next, I will tell you the main paths that I followed in the implementation of the project. No dead-end branches, like Nokia N800 (for all the romance of this approach).
Working prototype
The first working prototype, which was autonomous and even played a radio and stood in the kitchen, I implemented on the basis of a TP-Link 3020 router and a Chinese USB sound card for 100 rubles. This router is a great thing for such crafts, its main advantage is that you can buy at the nearest computer store, unlike any other single board. The main OS was OpenWRT, the sound was played through the most deshman speakers, for 500 rubles, powered by USB. In general, everything is at the bottom. And it even worked! In short, it is better to see once than to read a thousand times.
After that, it became clear that how to control the video from the tablet is not an option. The meaning of radio is lost when you can use the same tablet. Therefore, I decided to add control using an encoder. Initially, the encoder was connected to the GPIO of this router (yes, it has a GPIO on board), but I didn't really like its work and such a solution was not portable, so in the future I made a separate encoder controller based on arduino, which is connected via UART.


The encoder is connected to GPIO TP-Link 3020.
After that, it was necessary to "configure" the radio station, and I wanted to make it look like in old radios when you turn the knob and the slider runs across the screen. For this, a vertical stick font was implemented, five pieces. And I overloaded it every time, read about how to download fonts in my article . The result was such a solution.
Well, it remains to cross the radio itself with these experiments and as a result we get convenient control. He said in a nutshell, but in fact several months have passed, but the result is important to me.
It seems like everything, but as usual with all my friends radio amateurs - the device has no case, and began to think about what to do. I was very inspired by the open vintage receivers of the 30s, where there is just a corner with a shield and handles, and all the guts are free.
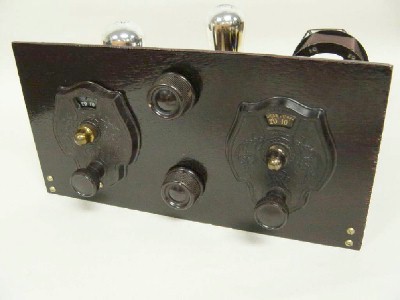
A variant of the prototype
I decided to repeat it. To do this, he ripped apart the column, removed the dimensions from it and made a prototype out of cardboard.
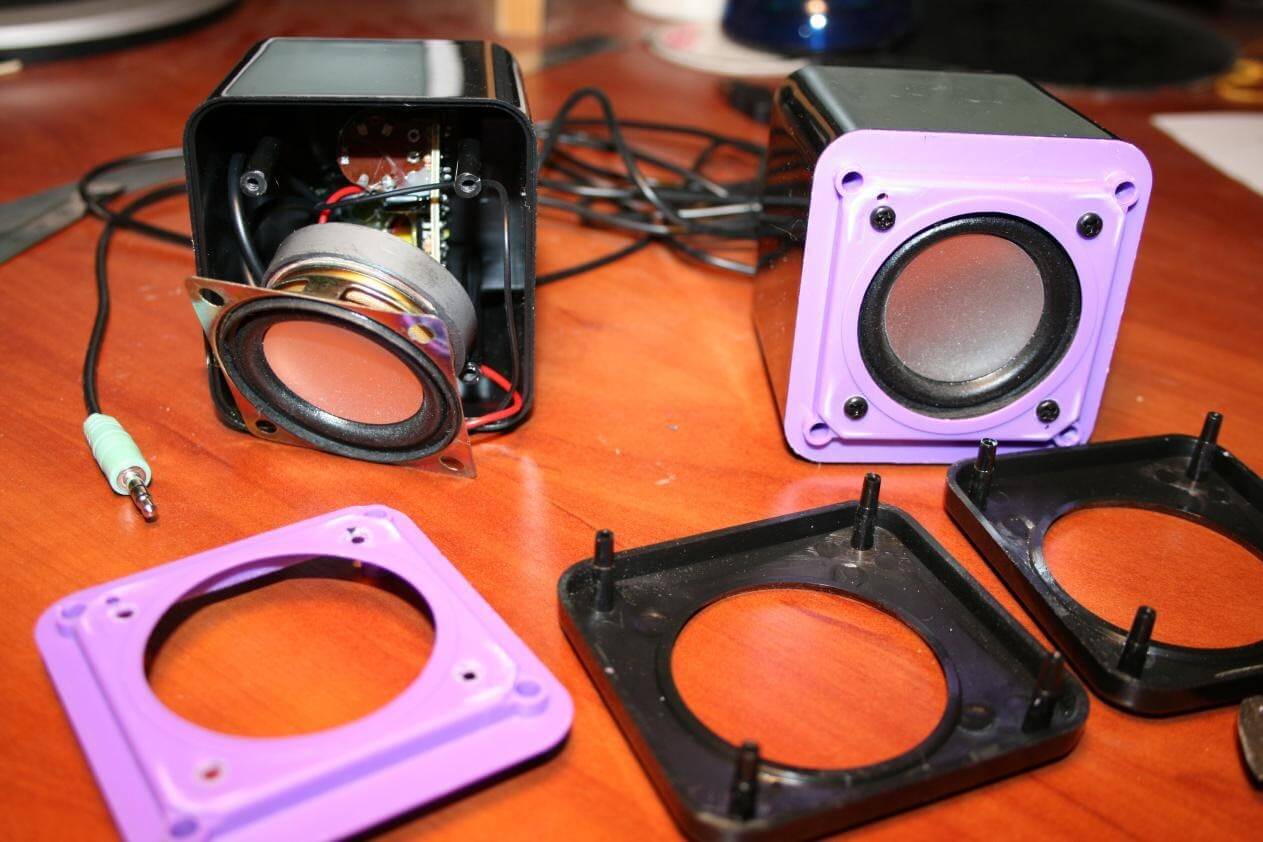
I gut the speakers, take out the amplifier and take measurements of the dimensions
After I disassembled the column, I took out the amplifier from there, then I took off all the dimensions of the case, the amplifier and encoder knobs, and marked everything on the cardboard as it would look.
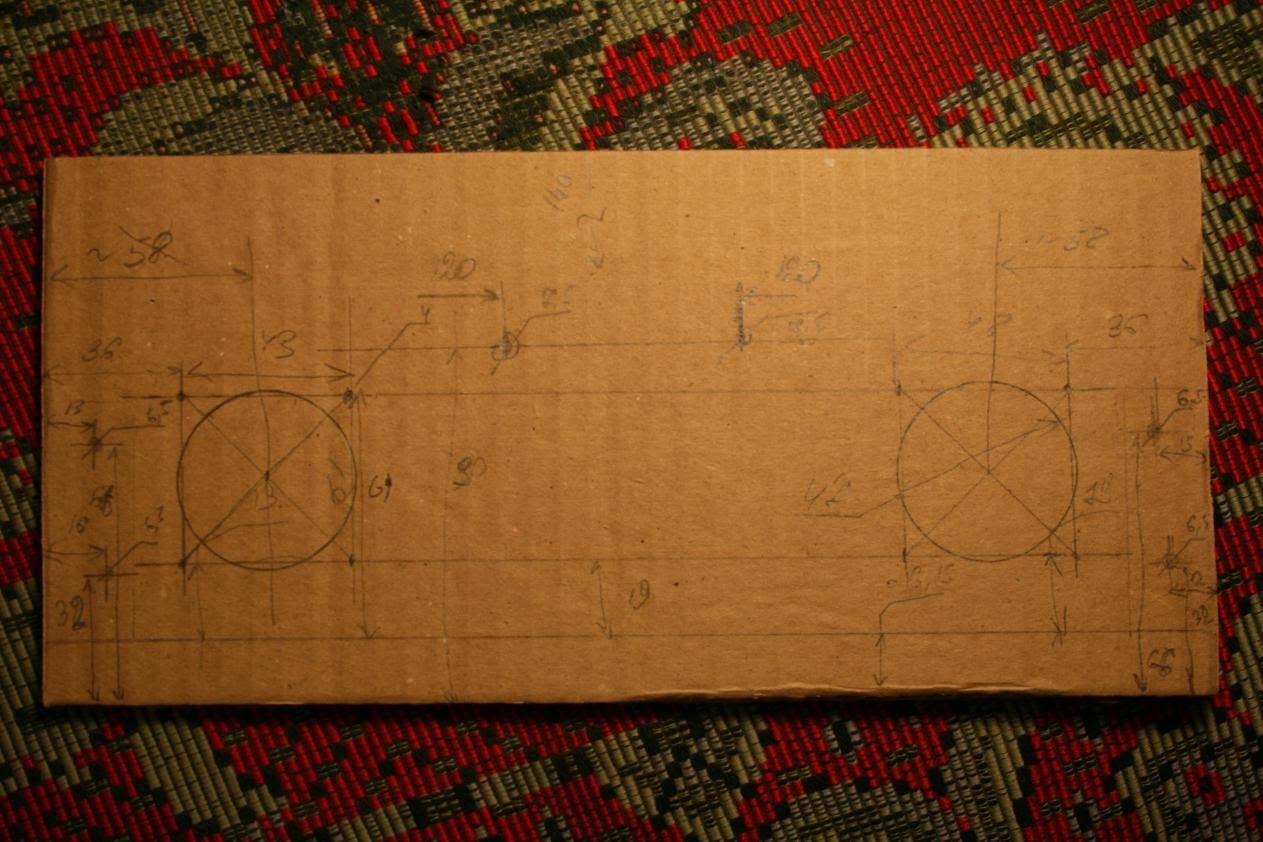
Size markings I
thought, what the hell is joking, let me see how it will look in cardboard, a kind of cardboard prototype.

Cardboard radio
And it even works!
Then he copied all the dimensions, drew and sent them to laser cutting.
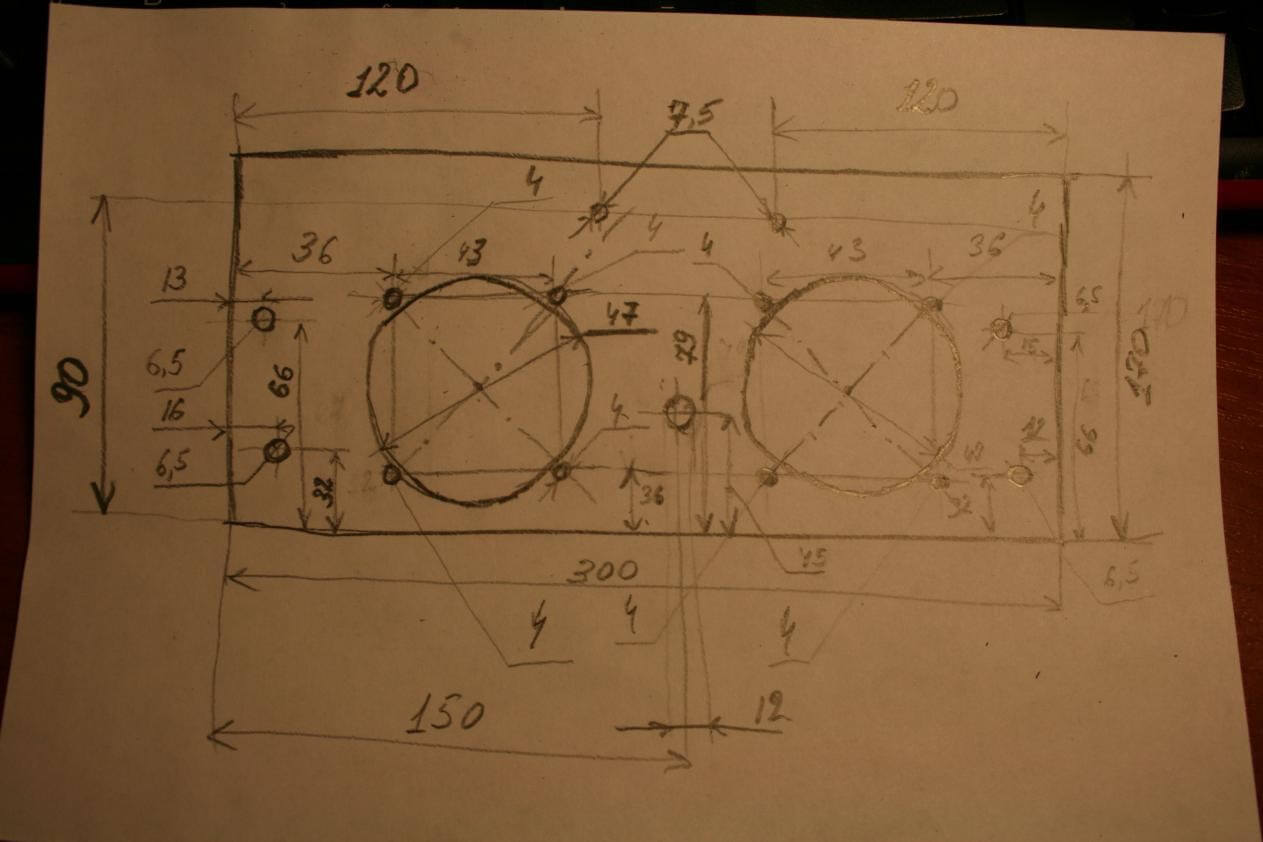
Dimensions The
cut acrylic came after, and this is how it looks after assembly.
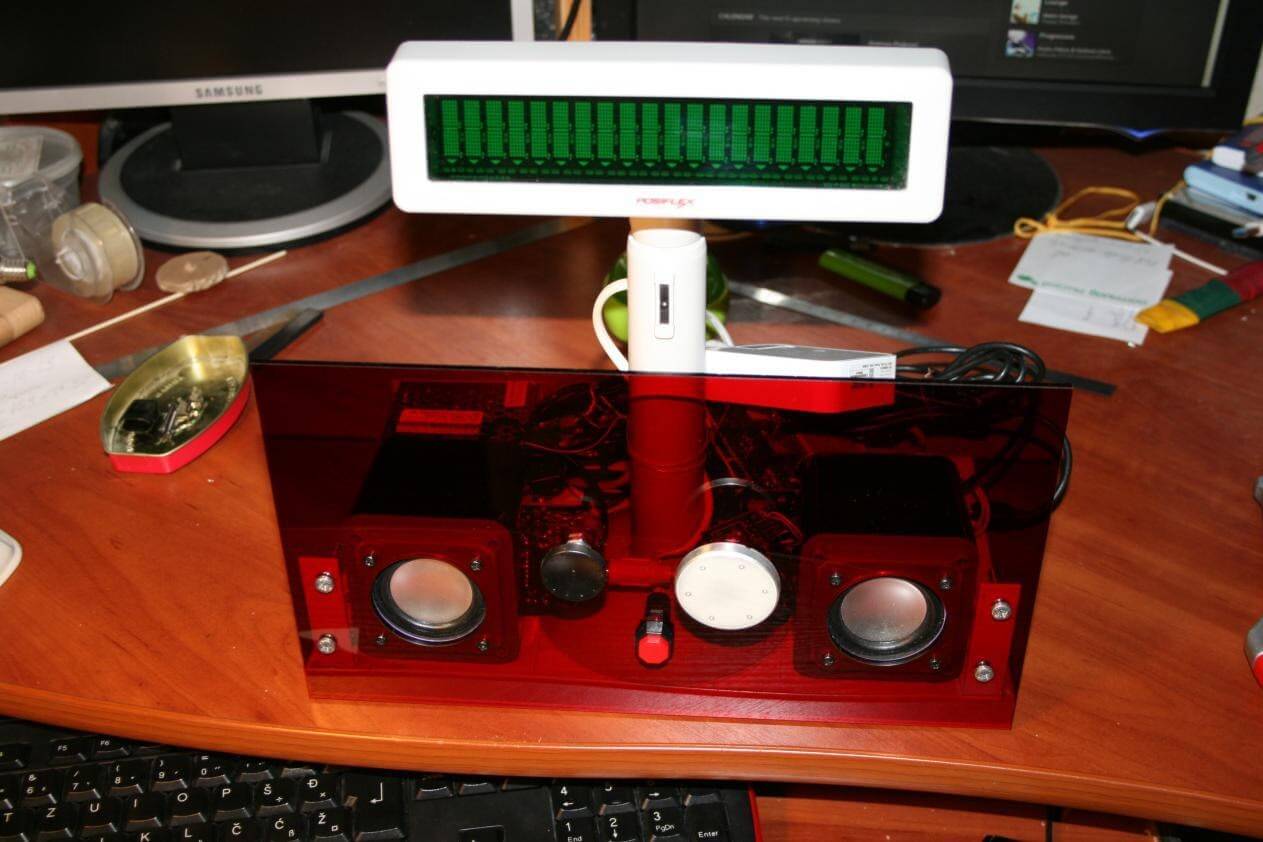
On the front panel there is a power button, an encoder, a volume knob. Inside, you can see that there is an independent power supply, a bunch of hubs, well, let's be honest, it doesn't look very good.
As many may notice, acrylic is transparent. Initially, I wanted to place the display behind it so that it shines through it (the display is already white, it shines through a green filter). But I didn't like the color and contrast.
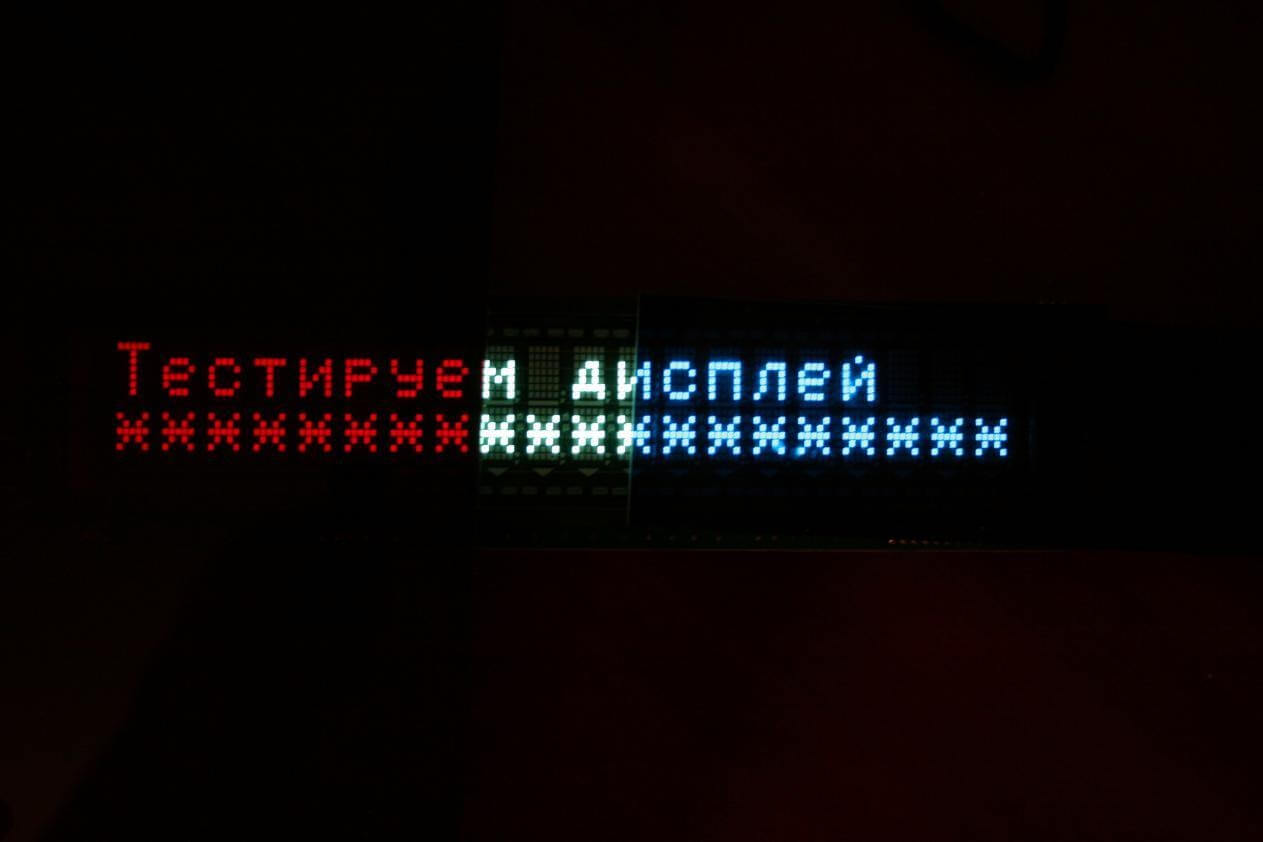
In the photo, there is light through orange acrylic, an honest display color (in real life it is white), and a blue filter of one of the displays (I have green in my radio now).
The resulting design is cool of course, but I won't lie to myself, not practical. Of course, it worked and I even listened to this product for some time, but a number of problems were revealed. Firstly, it was completely impossible to use it in this form: it collects dust, you cannot put anything on top, it takes up a lot of space. Secondly, TP-Link 3020 turned out to be rather weak for radio, and many faced the problem of implementation on it. OpenWRT does not have hardware support for floating point, and therefore mpd loads the processor by 100% and you can hear it in the sound (there are unpleasant digital clicks). That, in general, put an end to such an implementation. Plus, a number of circumstances in my life did not allow me to engage in this project anymore, and this radio was disassembled and put away literally in a box.
Final decision
But don't think that I just gave up. No, the idea continued to live. And now, after a while, I decided to finish off this radio. And it turned out so well that I had a case that I bought in China. As a brain, I took beaglebone black, with which I worked in one project and I know its good and bad sides. The scarf is of course old, but it fits perfectly for this task. Initially, I wanted to put OpenWRT as the main OS, but got a bunch of problems with Wi-Fi drivers there. I took the sound card on the popular PCM2704 DAC. She is easily searched for on this request at a popular auction, such a white scarf. I am very pleased with the sound card, but in general it was possible to put any, even the SoundBlaster.
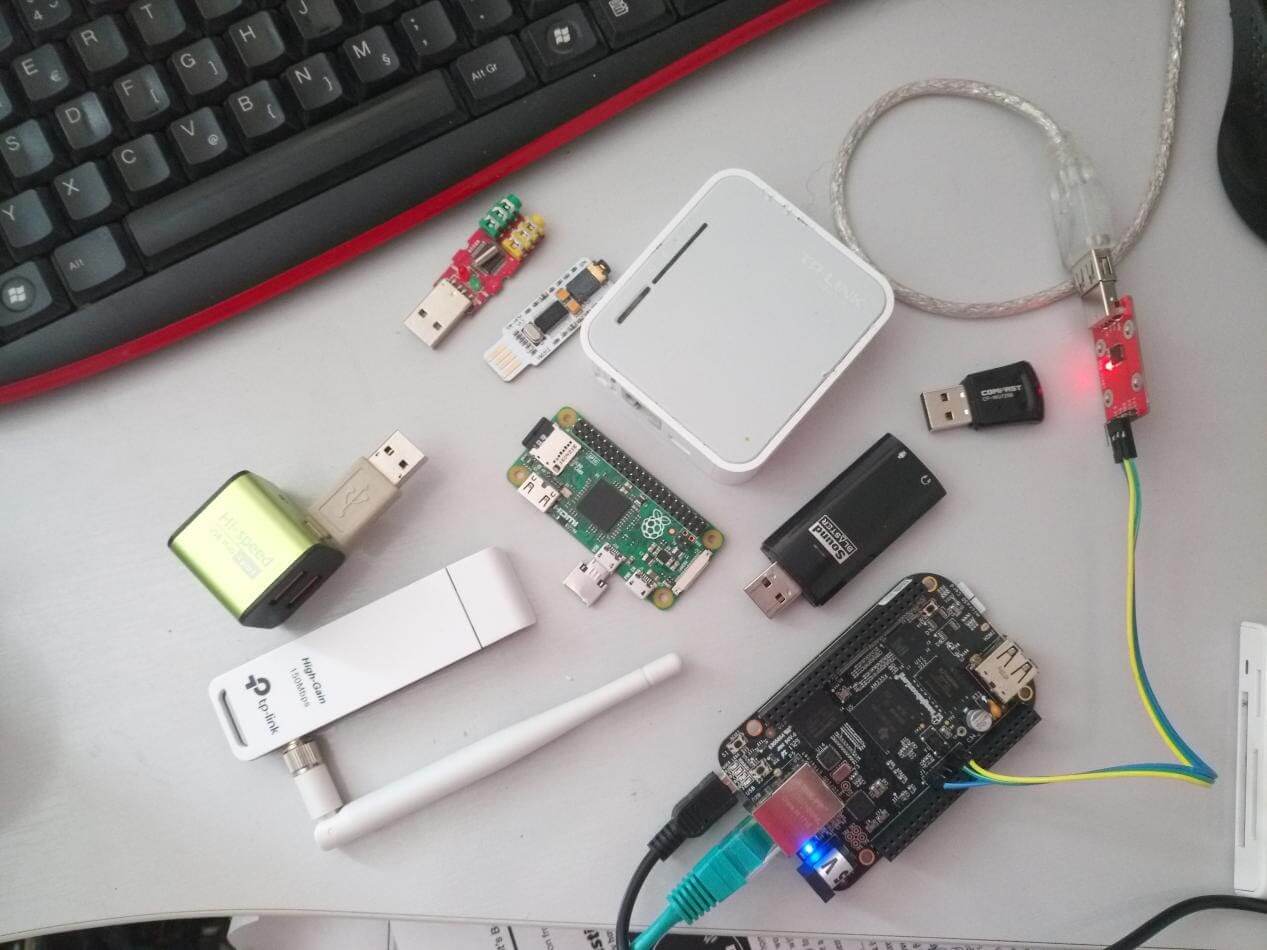
Prototyping stages, trying different sound cards, single-board devices, Linux images, Wi-Fi adapters and choosing the most optimal solution
In my last article I talked about spending time on choosing components, otherwise there will be a headache. It happened the same way, I wanted a Linux-enabled USB Wi-Fi card. And without hesitation he took TP-Link N150 for himself. In short, don't do this. She drank tons of blood from me, spent a week on her. I didn't manage to get it under OpenWRT, on Ubuntu I started it with some fierce dances with a tambourine. In short, I installed it according to this manual (there is an instruction somewhere in the middle). The startup script (/etc/rc.local) looks something like this for me (after a bunch of experiments).
#!/bin/sh
PATH="/sbin:/bin:/usr/bin"

ps -ef|grep wpa|awk '{print $2}' |xargs -i kill {}

#in case you want to test the script
ifdown wlan0
sleep 0.1
ifup wlan0
sleep 0.1
ifup wlan0
sleep 0.1
ifup wlan0
sleep 0.1
echo "nameserver 8.8.8.8" >> /etc/resolv.conf
#END
sleep 30
#
In general, after all the ordeals, all this started up and all this was assembled and put into the building. I will not describe all the details, because everyone will have their own. But I made new bushings for the legs, the bottom was made of plywood from below and I attached everything to it. The display was mounted on wooden frames.
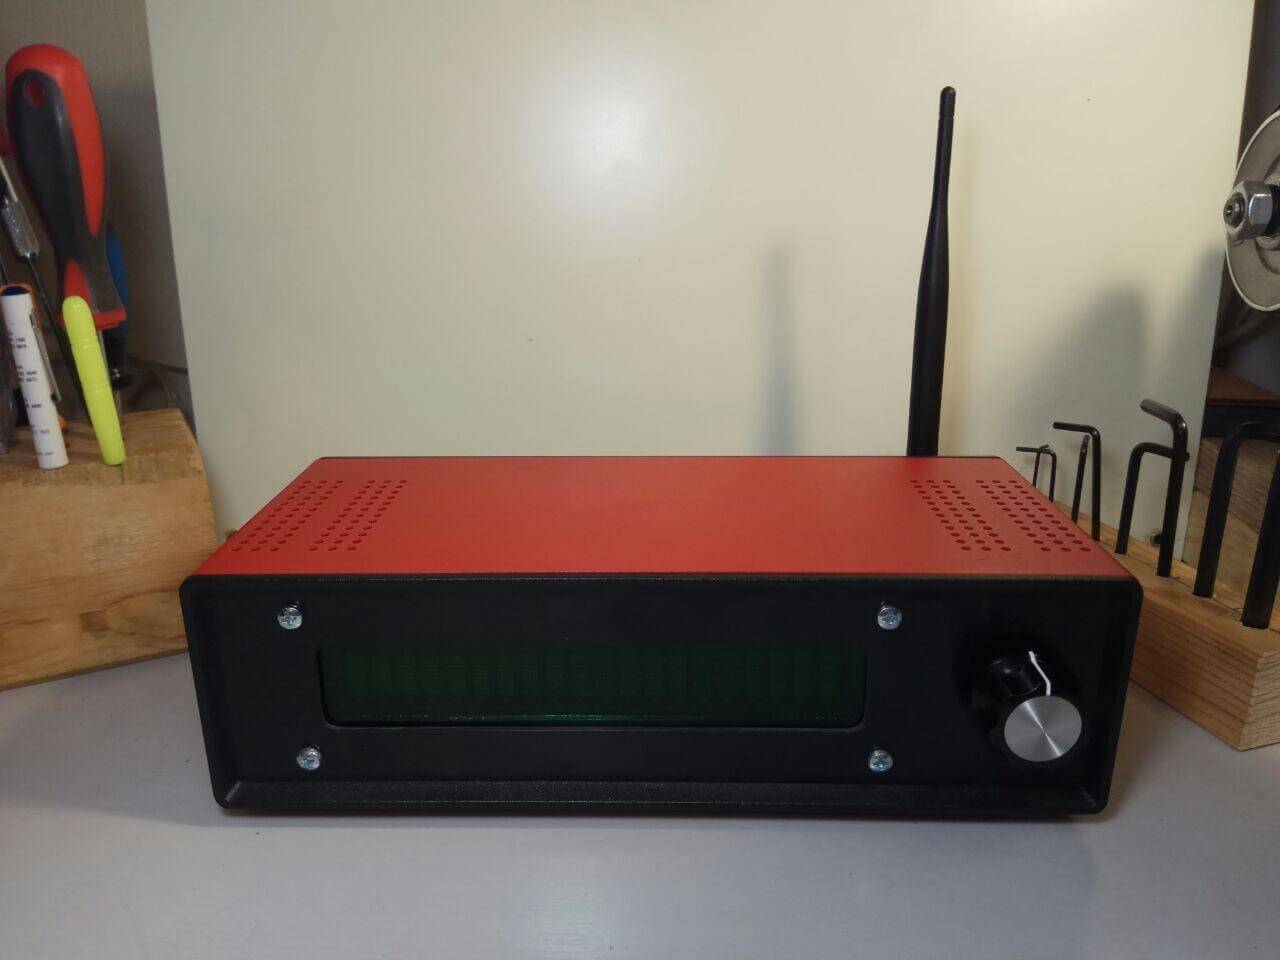
Front panel
Everything is controlled by an encoder. Left-right - station selection, pressing the encoder button - pause; double short press on the button - display of time and date (works like a clock).
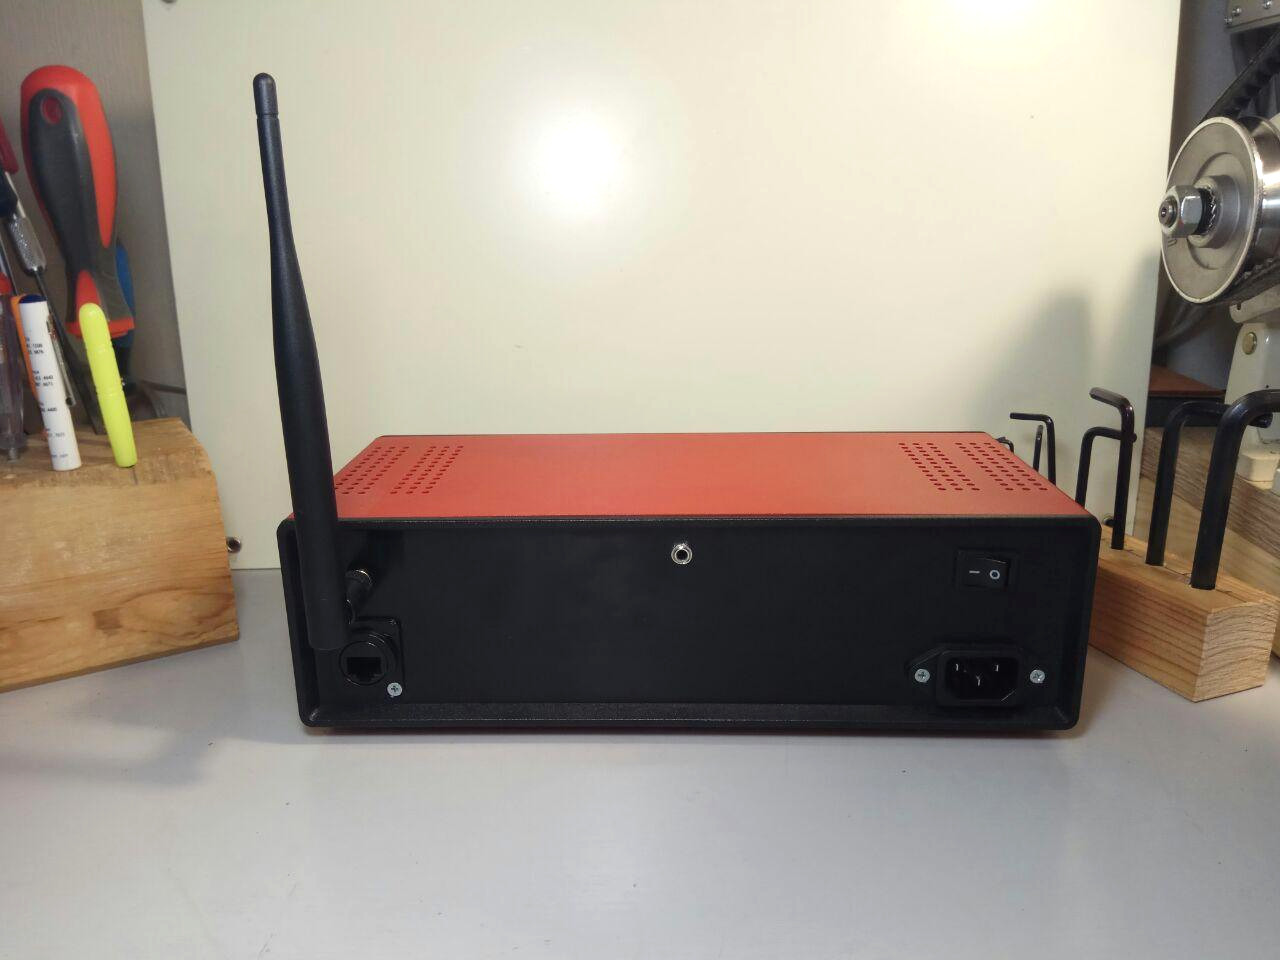
Rear panel
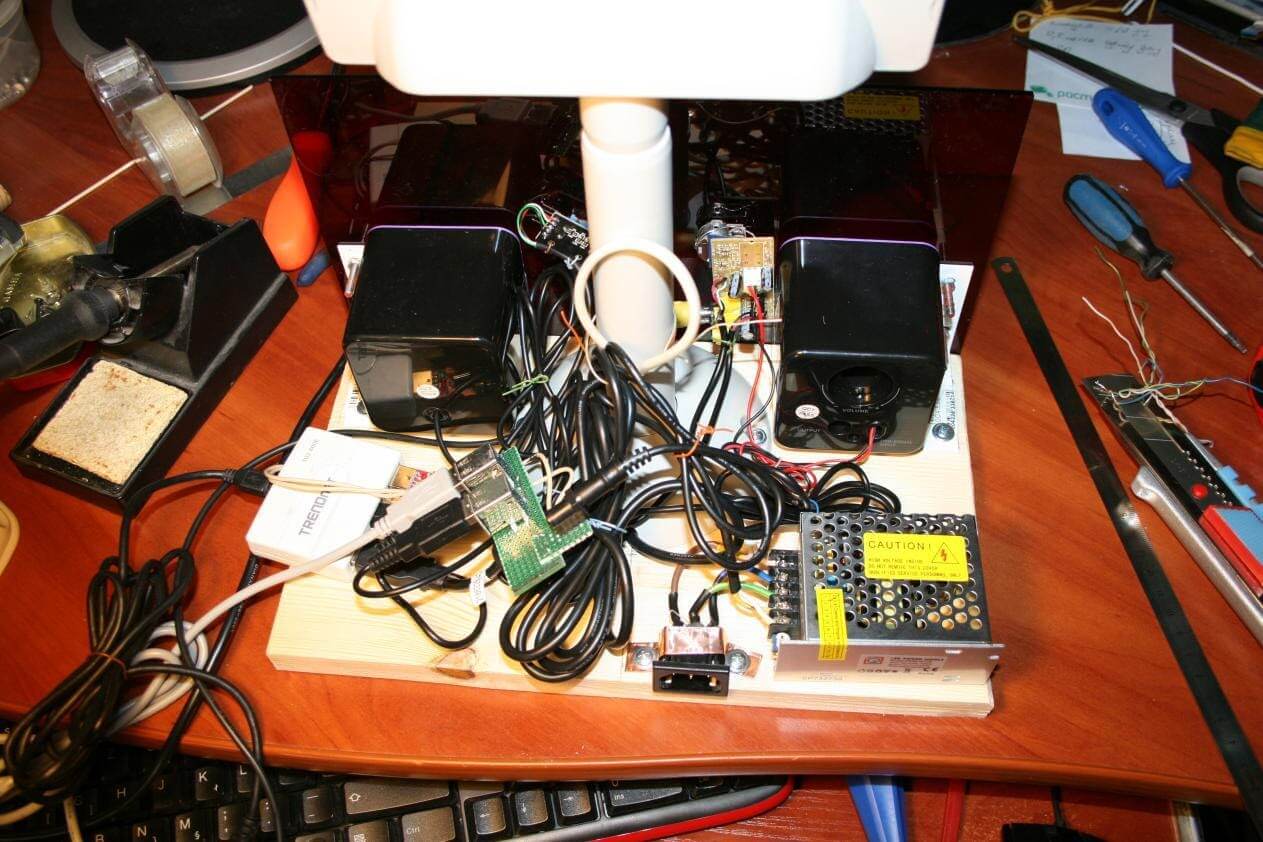
Despite the fact that this is exactly a Wi-Fi radio, it left the possibility of connecting via Ethernet for diagnostics and debugging. Just as you can see there is no amplifier in the case now. Only a line-out, which, in my opinion, is even more convenient. Let's take a look inside.
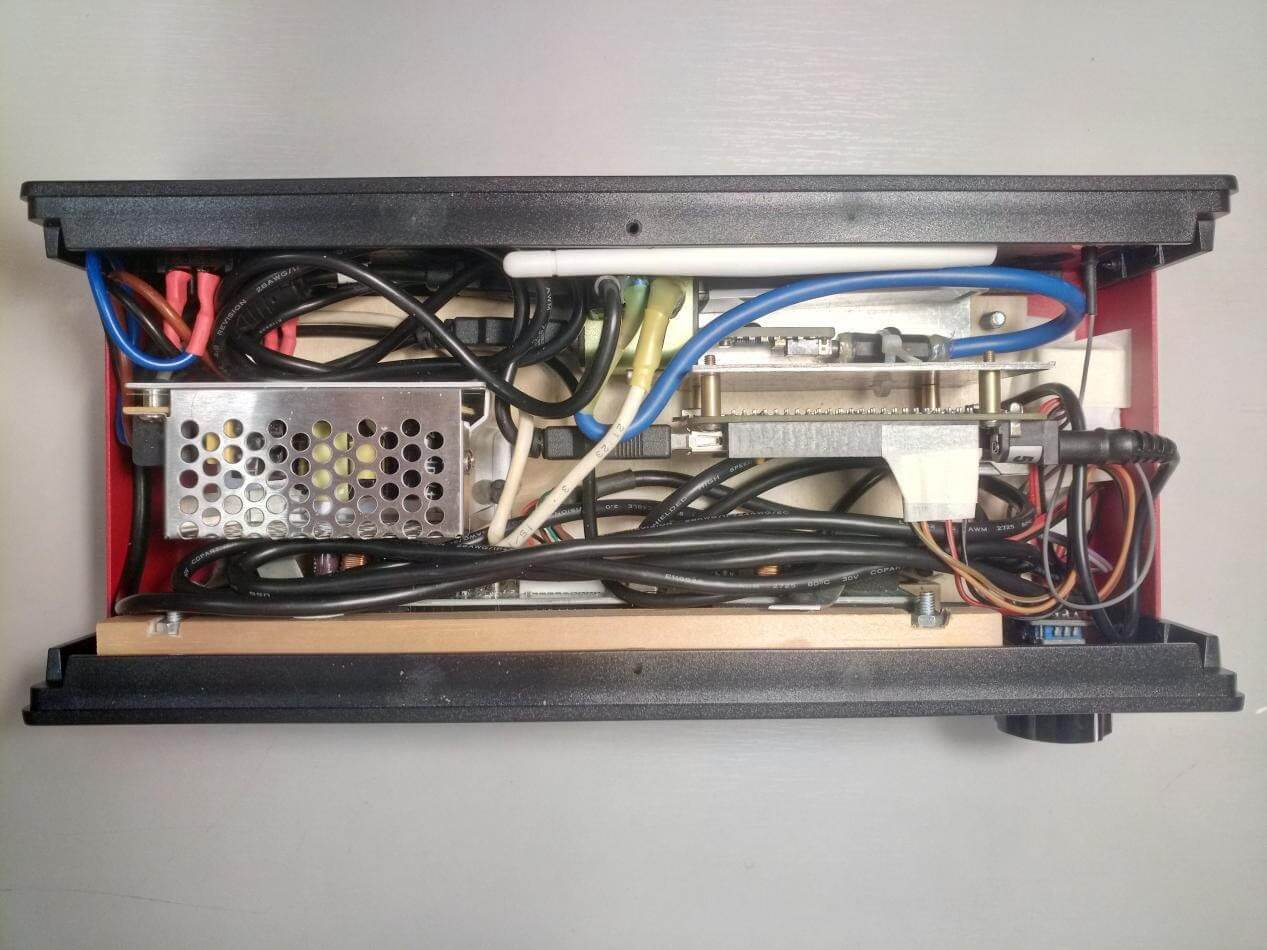
Inside on the left we see the power supply, below on the face is a display in a wooden frame, on the right on the face there is an encoder. At the top of the USB hub, into which the power is plugged in, the display is also powered from it, a sound box is also inserted into the hub; the single-board itself stands on an aluminum corner on racks, screwed to plywood. The encoder controller is hidden on the right, it looks like this.
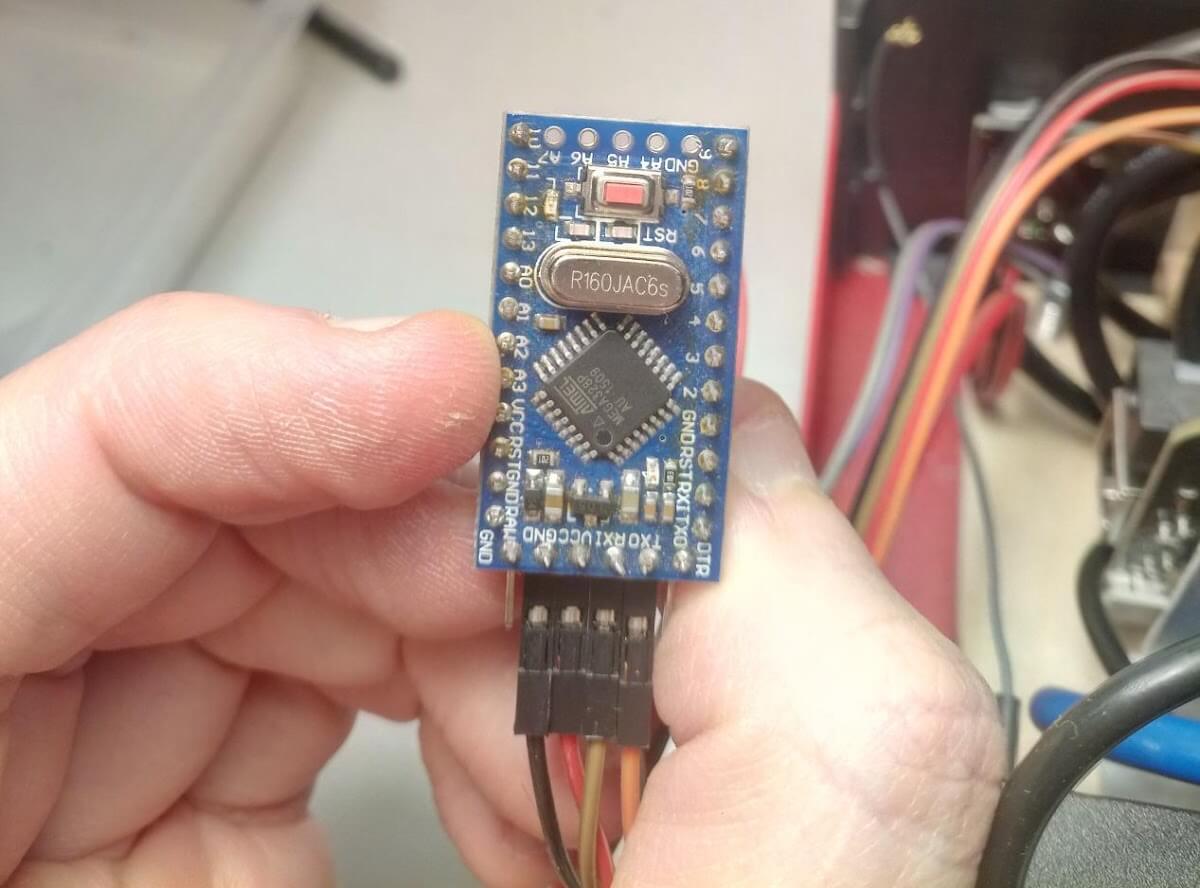
Encoder controller
This is a common arduinka that is connected via UART to the Beaglebone.
A few words about the source code and settings
I noticed that if a code description is added to an article, then its readability is immediately reduced by half. Therefore, in this article there will be very little code, although two articles can be devoted only to the description of the code. I will not describe the setting of the mpd daemon, there are thousands of articles, including those on Habré, and the manual itself is usually exhaustive on it. I will omit Linux setup on Beaglebone. Unless I had to turn on the UART to connect the Arduino. But this is also easily googled. The source code of the entire project lives on github and is available to everyone.
I will not analyze all the points of the code. Work with the display was previously covered in the article. I'll go over the files.
The arduino_encoder folder contains the arduino encoder project. Everything is intuitively clear there and I see no reason to sort it out somehow. In the Linux folder the source codes of the radio itself, it was this code that wandered from project to project.
- Makefile
This is an assembly of the project itself, nothing new here.
- control.c
This is the master program where all the magic happens.
- uart.c
- uart.h
Here is the ready-made UART initialization code. For everyone who works on C with UART in Linux, I recommend looking into these two files. Well, I also recommend everyone who watched my webinars on working with UART under Linux once or twice to look into them.
- display.c
- display.h
- output.h
As you might guess, this is the code for working with the display. Plus, I had to screw the character conversion code to it.
- charset_coverter.c
- charset_coverter.h
The display works in CP866 coding. And even in order to display a message in Russian from the console, you have to use the following trick:
echo -en " \n dlinyj" | iconv -f UTF-8 -t CP866 > /dev/ttyACM0But, there is a nuance: there are no letters "e", the hard sign "" and the soft sign "b" are reversed. So after decoding, you need to decode.
- mpc.c
- mpc.h
Working with mpd daemon. In general, there are libraries for working with it, but since I do not need a very large number of functions, I decided to write everything from scratch on sockets. Perhaps it will be useful to someone.
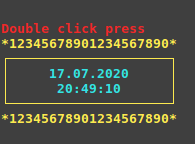
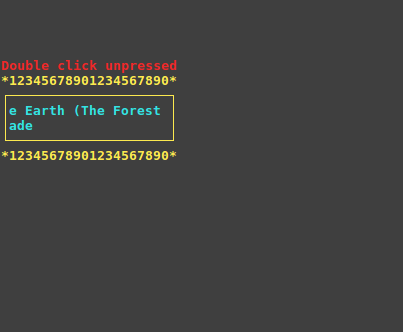
- term.c
- term.h
Oh, that's the great part. Since I sometimes had to debug the code without a display, I made myself a "simulator" of the display, with keyboard control instead of an encoder. It looks like this: on the first picture there is a date and clock, on the second a melody and a station.
For more details on how to write this, see the article "Terminal Graphics" .
Adding radio stations for me is the following script.
#! /bin/sh -
# Some configuration settings
VOLUME=60
#mpc volume $VOLUME	# adjust this to suit your speakers/amplifier
mpc clear	# clear current playlist

mpc add http://relay3.slayradio.org:8000/						#*Slay Radio
mpc add http://fr1.streamhosting.ch:8080						#*lounge-radio.com
mpc add http://us-tx1.streams.bassdrive.com:9000/				#*DnBHeaven.com
mpc add http://uk2.internet-radio.com:31491						#*AmbientRadio.org
mpc add http://www.partyvibe.com:8010/							#*PARTY VIBE RADIO
mpc add http://streamer.psyradio.org:8120						#*psyradio chillout

mpc add http://live.coolradio.rs/cool128
mpc add http://big2.bigportal.ba:8100/big2
If you have any streaming radio stations that you can recommend, especially for electronic music, then write in the comments :)
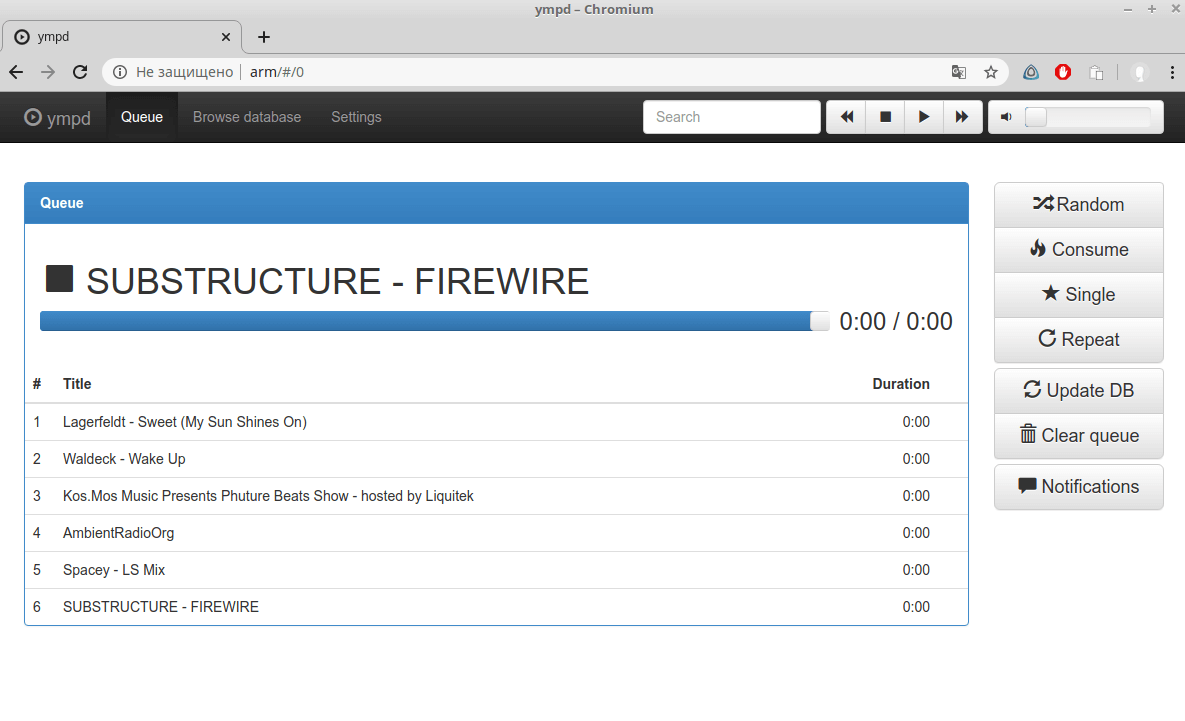
For ease of management and configuration, I added a web interface from the ympd project . It looks like this.
As a result, the /etc/rc.local file at the end looks like this:
sleep 30
/home/ubuntu/addradio.sh > /dev/null 2>&1 &
/home/ubuntu/wifi-radio/Linux/control > /dev/null 2>&1 &
/home/ubuntu/ympd --webport 80 > /dev/null 2>&1 &
Yes, yes, I know that on Ubuntu systemd and rc.local are bad to use and other blah, blah, blah. But I use it because I want to and I can.
Outcome
Of course, the radio turned out to be not as beautiful and pretentious as it was originally intended, but I decided that a bird in my hand is better than a pie in the sky. It is better to do so than to prolong the pleasure for several more years with unclear results. Nevertheless, although unprepossessing, it makes me very happy. So what to read a bunch of text, it's time to watch a video of how it all looks and functions.
The video is a little old, now the antenna and Ethernet are connected and even work quite well.
Where to grow?
And there is room to grow. One of the offshoots of this project that I have exploited for a long time is the Volumio project . It is a delightful player aggregator that lets you listen to radio stations from all over the world, streaming and more. Everyone is good, perfectly docked with my project and displayed all stations on the screen. Unless the controls were completely useless. You can also add voice control, there is a wonderful Rhasspy project , about which there was even an article on Habré. It allows you to make voice control without connecting to an external server!
The only thing worth ditching mpd is the bottleneck. If there is no station, he hangs up waiting for it. No pre-buffering of other stations, etc. That is, there is soil for growth. And the topic is insanely interesting, with a bunch of ideas. Thanks for reading!
