
→ Vue.js beginners lesson 1: instance Vue
→ Vue.js for beginners, lesson 2: binding attributes
→ Vue.js beginners lesson 3: conditional rendering
→ Vue.js beginners lesson 4: lists rendering
→ Vue .js for beginners lesson 5: event processing
→ Vue.js beginners lesson 6: binding classes and styles
→ Vue.js beginners lesson 7: calculated properties
→ Vue.js beginners lesson 8: components
The purpose of the lesson
The first goal of the lesson is to have a button on the product card, clicking on which will increase the number of products in the cart.
The second goal is to make the product image change when you hover the mouse over the color names of the product variants.
Initial code
The project file
index.htmlwill contain the following code:
<div id="app">
  <div class="product">
    <div class="product-image">
      <img :src="image" />
    </div>

    <div class="product-info">
      <h1>{{ product }}</h1>
      <p v-if="inStock">In stock</p>
      <p v-else>Out of Stock</p>

      <ul>
        <li v-for="detail in details">{{ detail }}</li>
      </ul>
      <div v-for="variant in variants" :key="variant.variantId">
        <p>{{ variant.variantColor }}</p>
      </div>

    </div>
  </div>
</div>
Here is the content
main.js:
var app = new Vue({
    el: '#app',
    data: {
        product: "Socks",
        image: "./assets/vmSocks-green.jpg",
        inStock: true,
        details: ['80% cotton', '20% polyester', 'Gender-neutral'],
        variants: [
          {
            variantId: 2234,
            variantColor: "green"
          },
          {
            variantId: 2235,
            variantColor: "blue"
          }
        ]
    }
})
Task
We need a button to assign an event listener to when it is clicked. On click, a method should be launched that performs an increase in the number of items in the cart.
Decision
To begin with, add, to the
main.jsobject data, a new property that will symbolize the number of items in the cart:
cart: 0
Now, in
index.html, add an element <div>that describes the shopping cart. This element will use a tag <p>that will display the number stored in the property on the page cart:
<div class="cart">
  <p>Cart({{ cart }})</p>
</div>
We will also create a
index.htmlbutton in the code that allows you to add a product to the cart:
<button v-on:click="cart += 1">Add to cart</button>
Note here
cartthat we are using the directive to increment the value stored in v-on.
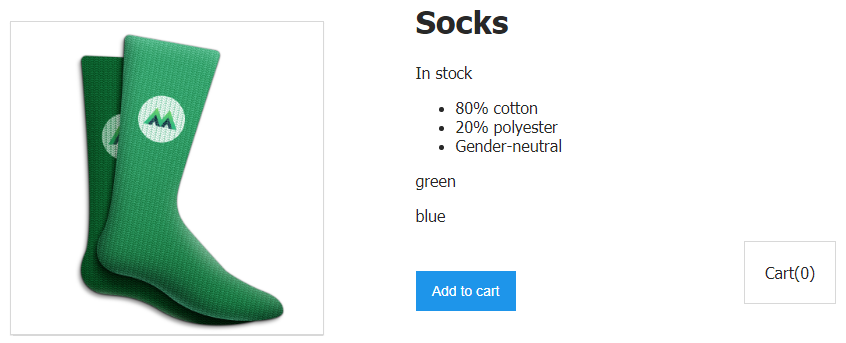
A page with a shopping cart and a button for adding an item to the cart
If you click on the button now, the number of items in the cart will increase by 1.
How does it all work?
Let's take a look at the construction presented here. Using a directive
v-ontells Vue that we want to listen for events on the button. Then comes a colon, after which the specific event we are interested in is indicated. In this case, it is an eventclick. The quotes contain an expression that adds 1 to the value stored incart. This happens every time the button is clicked.
This is a simple but not entirely realistic example. Instead of enclosing the expression
cart += 1, let's make it so that clicking the button calls a method that will increment the value stored in cart. This is how it looks:
<button v-on:click="addToCart">Add to cart</button>
As you can see, here
addToCartis the name of the method that will be called when the event occurs click. But we haven't declared the method itself yet, so let's do it right now by equipping our Vue instance with it.
It uses a mechanism very similar to the one that we already use to store data. Namely, we are talking about the fact that the object with options used when creating an instance of Vue, may have an optional property named after
methods, which contains the object with methods. In our case, this will be just one method - addToCart:
methods: {
  addToCart() {
    this.cart += 1
  }
}
Now, when we click on the button, a method is called
addToCart, which increments the value cartdisplayed in the tag <p>.
Let's continue with the analysis of what is happening here.
The button listens for events
clickthanks to the directive v-onthat calls the method addToCart. This method is in the property of the methodsVue instance. The function body contains an instruction that adds 1 to the value this.cart. Since it thisstores a reference to where the data of the Vue instance we are in is stored, the function adds 1 to the value cart. A this.cartis the same as a property cartdeclared in a property of an dataobject with options.
If we just wrote something like
cart += 1then we would have encountered an error message cart is not defined. This is why we use construct this.cartand access cartfrom a Vue instance using this.
Perhaps you are now wondering that now we are simply increasing the number of items in the cart, but we are not adding the item itself to the cart. Maybe we are doing something wrong? This is the right question. We will implement this functionality later in one of the following tutorials.
So now that we've learned the basics of event handling in Vue, let's take a look at a more complex example.
To begin with, let's expand the array objects
variantsfrom the object databy adding there a property variantImagethat stores the path to the image of the desired product variant. Let's give the corresponding section of the filemain.js to this form:
variants: [
  {
    variantId: 2234,
    variantColor: "green",
    variantImage: "./assets/vmSocks-green.jpg"
  },
  {
    variantId: 2235,
    variantColor: "blue",
    variantImage: "./assets/vmSocks-blue.jpg"
  }
],
Now each product variant, green and blue socks, has its own image assigned.
Task
It is necessary that, on hovering the mouse over the name of the color of the variant of socks, in the field where the image of the product is displayed, the image
variantImagefor the corresponding color would be displayed .
Decision
This is where the directive comes in handy again
v-on. But this time we will use an abbreviated version of its notation, which looks like @. And we will listen to the event mouseover.
Here is the relevant code in
index.html:
<div v-for="variant in variants" :key="variant.variantId">
  <p @mouseover="updateProduct(variant.variantImage)">
    {{ variant.variantColor }}
  </p>
</div>
Note that we pass the method
updateProduct, in the form of an argument variant.variantImage.
Let's create this method in
main.js:
updateProduct(variantImage) {
  this.image = variantImage
}
This method is very similar to the one we recently created to increase the value
cart.
But here we are updating the value stored in
image. Namely image, what is stored in variantImagethe variant of the product on which the mouse pointer is hovered is recorded in . The corresponding value is passed to the function updateProductfrom the event handler itself, located in index.html:
<p @mouseover="updateProduct(variant.variantImage)">
In other words, the method
updateProductis now ready to be variantImagecalled with a parameter .
When this method is called, it is
variant.variantImagepassed to it as a view variantImageand used to update the value stored in this.image. We, by analogy with the previously considered construction this.cart, we can say that this.image- is the same as image. As a result, the value stored in imageis now dynamically updated in accordance with the data of the product variant that is being hovered over.
ES6 syntax
Here, when creating methods, we used the following constructions:
updateProduct(variantImage) {
  this.image = variantImage
}
This is an abbreviated version of the method description that appeared in ES6. An older version of writing such constructions looks like this:
updateProduct: function(variantImage) {
  this.image = variantImage
}
Workshop
Create a button and corresponding method that will decrease the value stored in
cart.
→ Here is a template that you can use to solve this problem.
→ Here is the solution to the problem.
Outcome
Let's summarize the results of today's lesson:
- The directive is used to organize the response of an element to events
v-on. - An abbreviated version of the directive
v-onlooks like@. - When used,
v-onyou can specify the type of event to listen to:
- click
- mouseover
- any DOM event
- The directive
v-oncan call methods. - The method called with
v-oncan take arguments. -
this, Vue. , , .
Did you complete your homework for this lesson?
→ Vue.js beginners lesson 1: instance Vue
→ Vue.js for beginners, lesson 2: binding attributes
→ Vue.js beginners lesson 3: conditional rendering
→ Vue.js beginners lesson 4: lists rendering
→ Vue .js for beginners lesson 5: event processing
→ Vue.js beginners lesson 6: binding classes and styles
→ Vue.js beginners lesson 7: calculated properties
→ Vue.js beginners lesson 8: components
