Formulation of the problem
The task was set as follows: write a telegram bot that would recognize questions about the weather today in a particular city and give out information about the weather.
DialogFlow
The DialogFlow framework, which already has ML built into it, is the best suited for human speech recognition. Let's get to work.
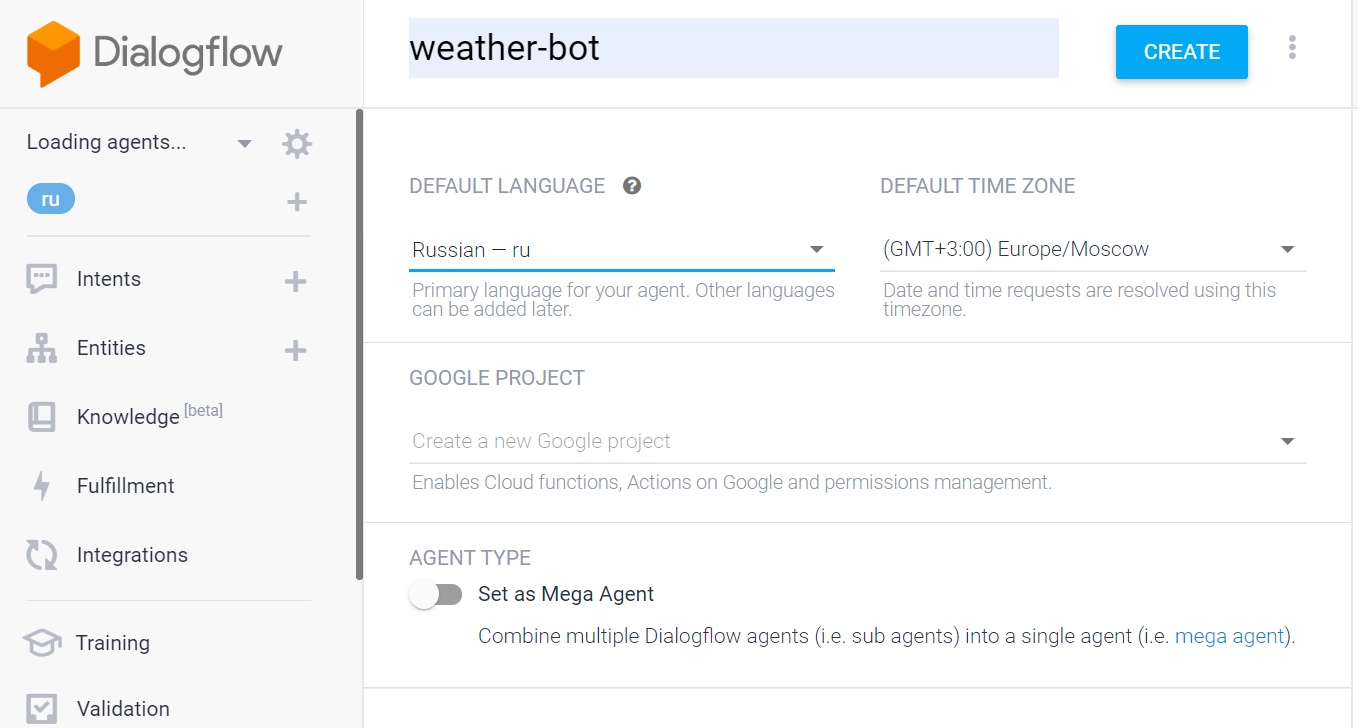
Follow the link https://dialogflow.cloud.google.com/ , log in to your Google account and go to the bot creation page. Click on "Create new agent" and enter the name for the agent: "weather-bot". We choose the default language Russian.
The main object that DialogFlow works with is intents or intents. When interacting with a bot, one or another intention always works, and the task of you as a developer is to accompany each intention with various training phrases so that the bot guesses this or that intent as correctly as possible each time.
So, go to the "Intents" tab. When creating a bot, two intents are automatically created: "Default Fallback Intent" and "Default Welcome Intent". Welcome Intent is called when the bot starts up or you write a welcome message to it. Fallback is called in all cases when the bot does not understand what you are writing to it, i.e. in all cases when no other intent works. Leave the default intents unchanged and click on "Create intent", calling it "get-weather". It is with this intention that we will continue to work in this article.

Go to our "get-weather" intent, then to the "Training phrases" tab and create several training phrases, for example, the following:
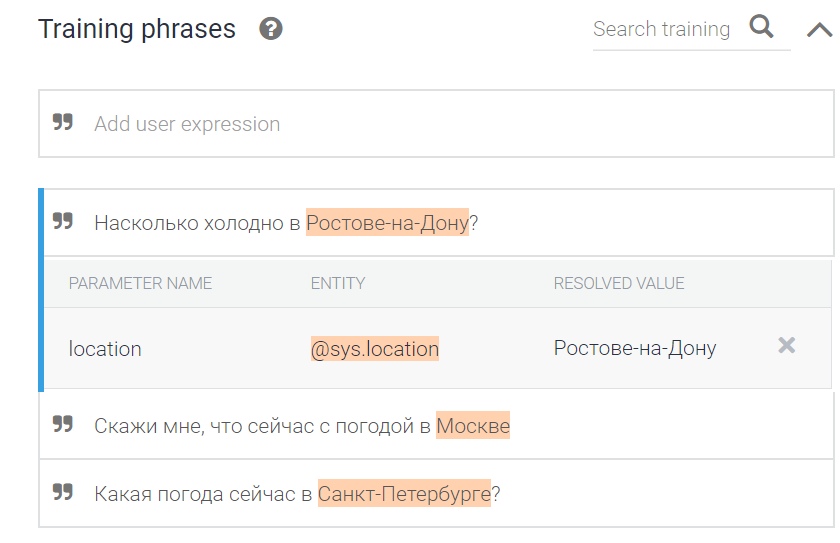
Note that DialogFlow automatically detects cities as location parameters. This is very convenient, since we will pass these very parameters to the backend of our application.
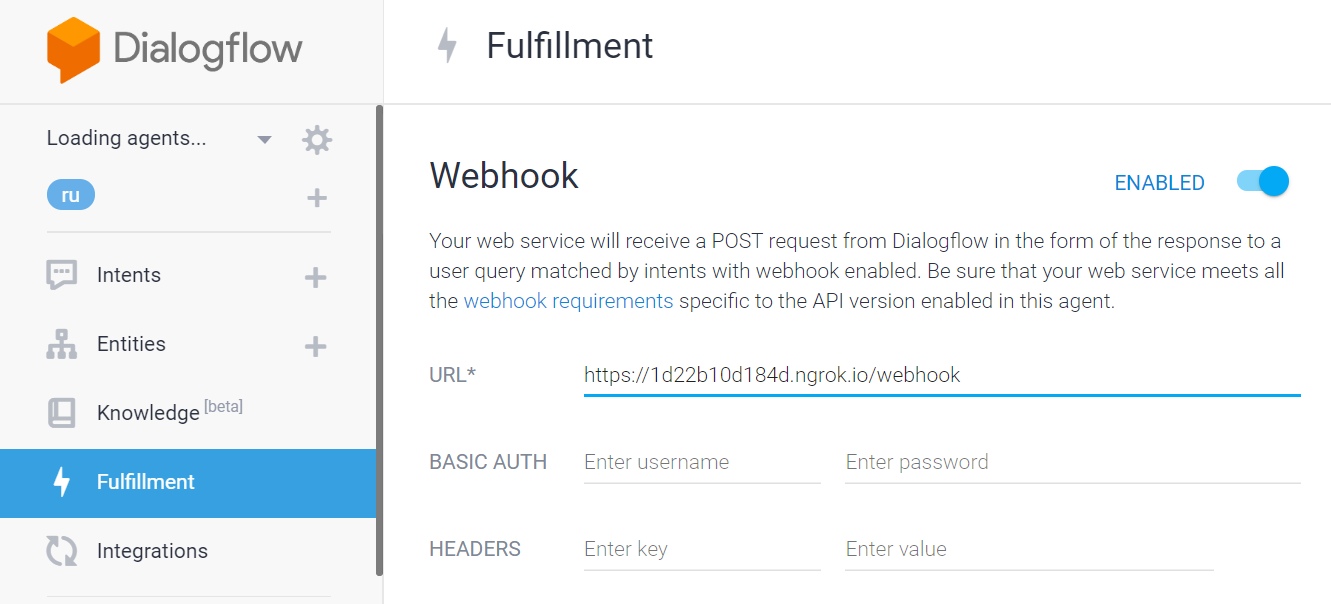
There is very little left to do in DialogFlow itself - to allow it webhooks to interact with the backend of our bot. To do this, scroll down to the bottom, expand the "Fulfillment" tab and put a tick on "Enable webhook call for this intent".
Back
Let's start writing the server side of our bot. We will write in Python in conjunction with Flask. The OpenWeather API was chosen to get weather information . Register on this site, then you will receive an API KEY by mail - it will be needed in our application. In addition, since information about the weather in this API is returned by the latitude and longitude parameters - width and longitude - we need to somehow transform the city into its width and longitude. The geopy Python library will help us with this.
We import everything we need:
from flask import Flask, request, make_response, jsonify
import requests
import json
from geopy.geocoders import Nominatim
Create Flask application:
app = Flask(__name__)and insert our API KEY into the API_KEY variable:
API_KEY = '<your_API_KEY_here>'We write a route for the "/" path:
@app.route('/')
def index():
    return 'Hello World!'
and then the results () function, in which all the logic of the program will be implemented:
def results():
    req = request.get_json(force=True)

    action = req.get('queryResult').get('action')

    result = req.get("queryResult")
    parameters = result.get("parameters")

    if parameters.get('location').get('city'):
        geolocator = Nominatim(user_agent='weather-bot')
        location = geolocator.geocode(parameters.get('location').get('city'))
        lat = location.latitude
        long = location.longitude
        weather_req = requests.get('https://api.openweathermap.org/data/2.5/onecall?lat={}&lon={}&appid={}'.format(lat, long, API_KEY))
        current_weather = json.loads(weather_req.text)['current']
        temp = round(current_weather['temp'] - 273.15)
        feels_like = round(current_weather['feels_like'] - 273.15)
        clouds = current_weather['clouds']
        wind_speed = current_weather['wind_speed']

    return {'fulfillmentText': '   - {} ,   {} ,  - {}%,   - {}/'.format(str(temp), str(feels_like), str(clouds), str(wind_speed))}
It remains to add the route through which the transition to our application will be, let's call it webhook:
@app.route('/webhook', methods=['GET', 'POST'])
def webhook():
    return make_response(jsonify(results()))
and run the application:
if __name__ == '__main__':
   app.run(debug=True)
We did it!
And it's all?
Not really. The program is on our local machine, but DialogFlow knows nothing about it. To turn our machine into a server that will become available on the Internet, we need a special utility. Ngrok meets these requirements . Download it, launch it and enter the following in the console: "ngrok http 5000". An https link will appear, which must be copied and placed in DialogFlow. Copy, go to Fulfillment in DialogFlow, put Webhook in the enabled state and paste the link into the resulting field. We add the route, i.e. "/ webhook". You should end up with something similar to the following:
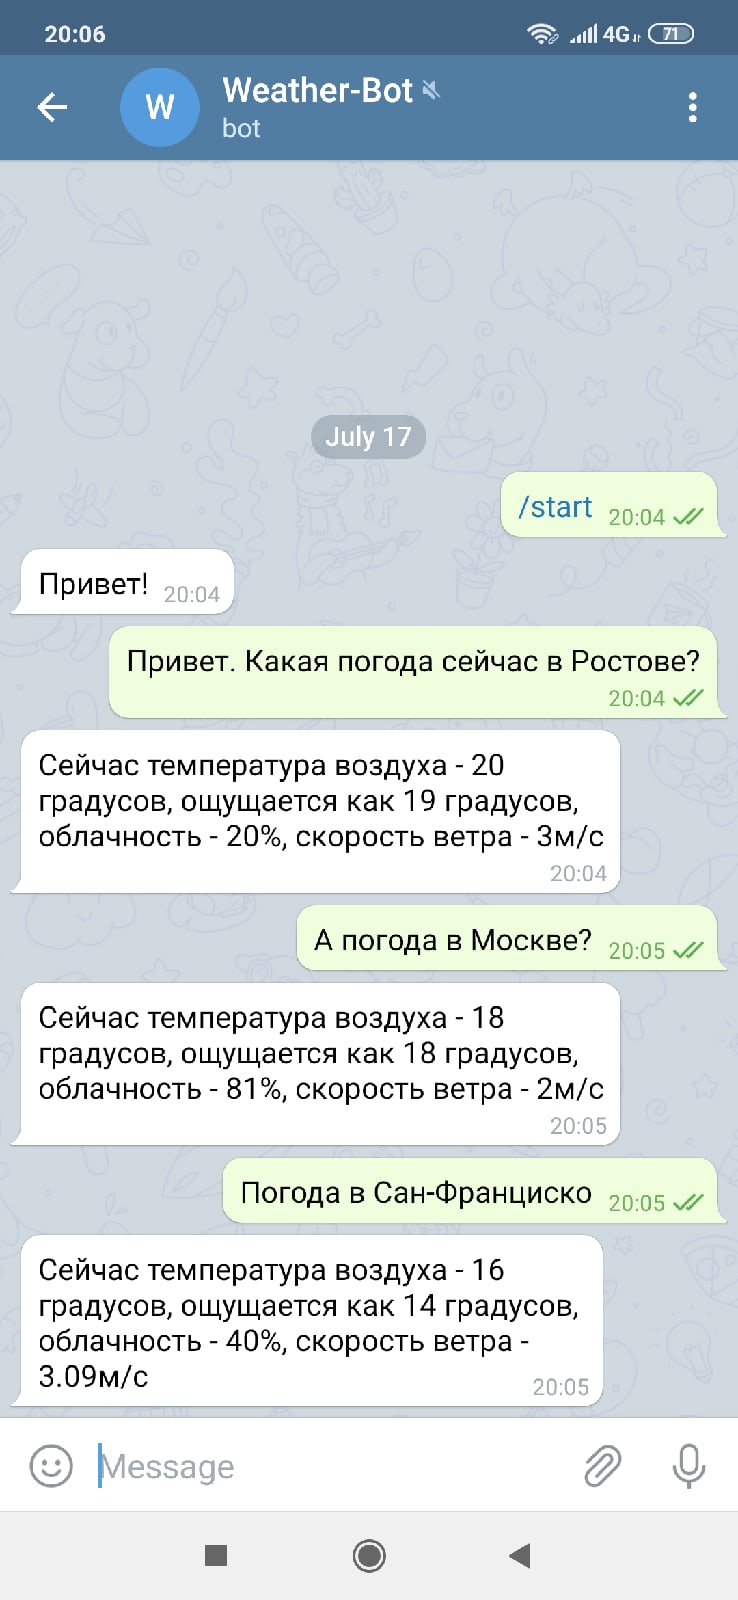
Now we launch our Python application. There is very little left - to connect the integration with Telegram. Go to the "Integrations" tab, select the telegram, then follow the instructions for obtaining a token, insert the token, and voila - the application is ready! It remains to test it:
I hope this article was useful to you and will encourage you to experiment on your own in this area. The project code is available here .