Python version: 3.8.2
discord.py version: 1.3.3
Greetings, Khabrovites and other Internet users. Today I will start a series of articles devoted to creating a Discord bot using the discord.py library. We will look at creating both a primitive bot and an "advanced" bot with modules. In this article, we will make a standard command and another small command. Let's get started!
Creating a bot and getting a token
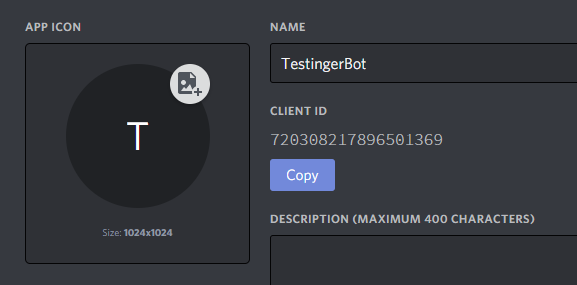
In order to add a bot to the server, you need to create your own application and copy the Client ID in the General Information tab.
Here we replace CLID with the previously copied Client ID.
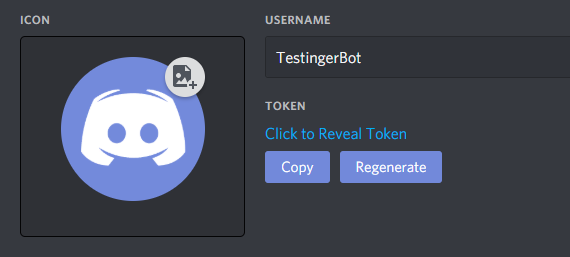
https://discordapp.com/oauth2/authorize?&client_id=CLID&scope=bot&permissions=8In the Bot tab, create a bot and copy the token.
Coding
Install the library itself.
pip install discordCreate a config.py file (this is more convenient), and create a dictionary there.
settings = {
    'token': ' ',
    'bot': ' ',
    'id': Client ID ,  ,
    'prefix': ' '
}
We create a main file, the name can be anything.
We import libraries and our config file:
import discord
from discord.ext import commands
from config import settings
Create a bot "body", the name can be any:
bot = commands.Bot(command_prefix = settings['prefix']) # settings, prefix.Let's start writing the main code.
@bot.command() #    pass_context,        .
async def hello(ctx): #      ctx.
    author = ctx.message.author #   author      .

    await ctx.send(f'Hello, {author.mention}!') #     ,    author.
At the end, start the bot with:
bot.run(settings['token']) # settings token, import discord
from discord.ext import commands
from config import settings
bot = commands.Bot(command_prefix = settings['prefix'])
@bot.command() # pass_context, .
async def hello(ctx): # ctx.
author = ctx.message.author # author .
await ctx.send(f'Hello, {author.mention}!') # , author.
bot.run(settings['token']) # settings token, It should look like this:

Bonus tutorial!
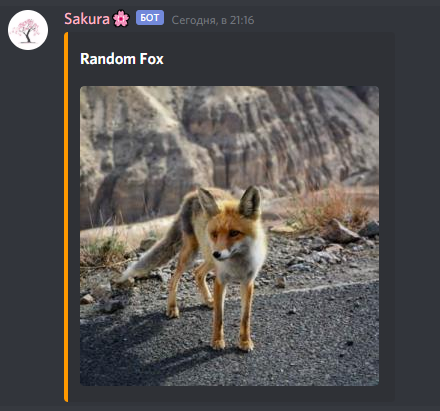
Let's make a conclusion of random pictures with foxes
To do this, we import a couple more libraries:
import json
import requests
Let's start writing the command.
@bot.command()
async def fox(ctx):
    response = requests.get('https://some-random-api.ml/img/fox') # Get-
    json_data = json.loads(response.text) #  JSON

    embed = discord.Embed(color = 0xff9900, title = 'Random Fox') #  Embed'a
    embed.set_image(url = json_data['link']) #   Embed'a
    await ctx.send(embed = embed) #  Embed
It should look like this:
the end
This completes Part 1. Part 2 coming soon.