In this article I will talk about my course project, which I worked on together with the Laboratory of Mobile Robot Algorithms JetBrains Research : About the Issue Checker I wrote for the Gym-Duckietown emulator . We will talk about the testing system and the integration of this system with educational online platforms that use the External Grader technology - for example, with the Stepik.org platform .
about the author
My name is Daniil Plushenko, and I am a first (second) year student of the Master's program " Programming and Data Analysis " at the St. Petersburg HSE. In 2019, I completed my Bachelor's degree in Applied Mathematics and Computer Science at the same university.
Duckietown platform
Duckietown is an autonomous vehicle research project. The organizers of the project have created a platform that helps implement a new approach to learning in the field of artificial intelligence and robotics. It all started as a course at MIT in 2016, but gradually spread throughout the world and across different levels of education: from high school to master's programs.
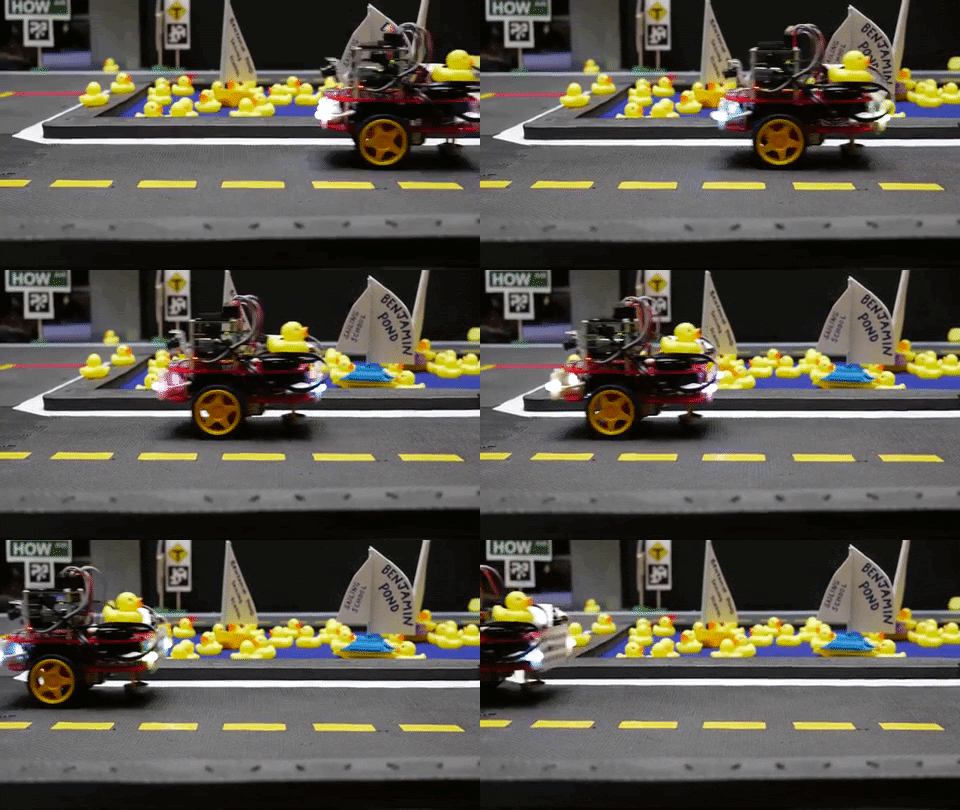
The Duckietown platform has two parts. First, it is a scaled-down model of an urban transport environment with roads, buildings, road signs and obstacles. Secondly, it is transport. Small mobile robots (Duckiebots) running a Raspberry Pi receive information about the world around them through a camera and transport the city's residents - yellow rubber ducks - along the roads.
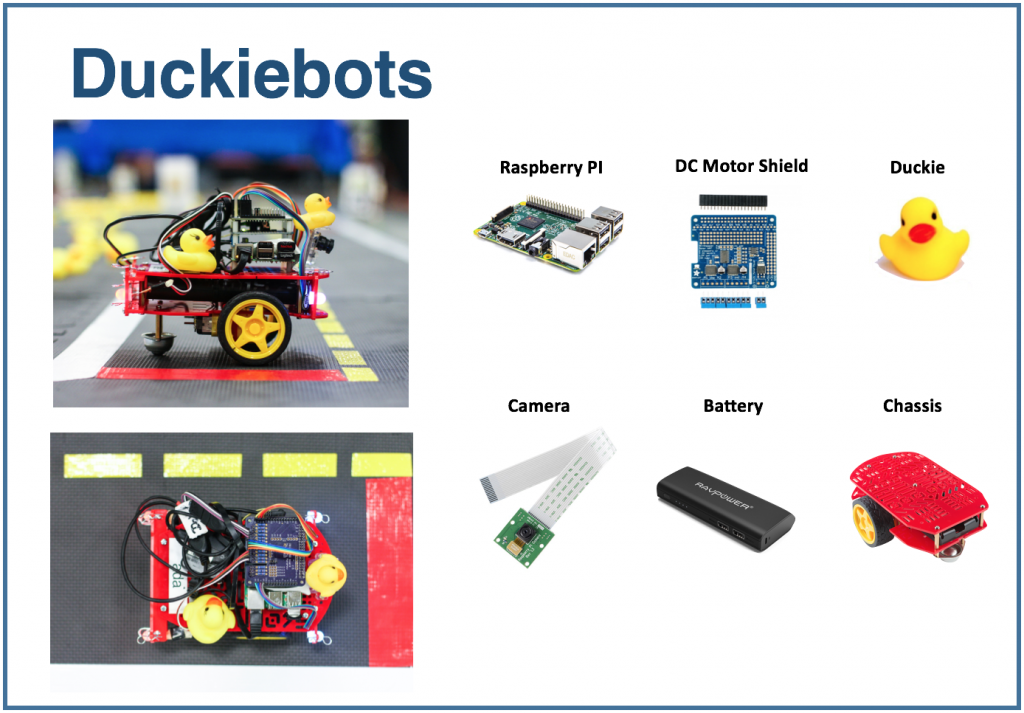
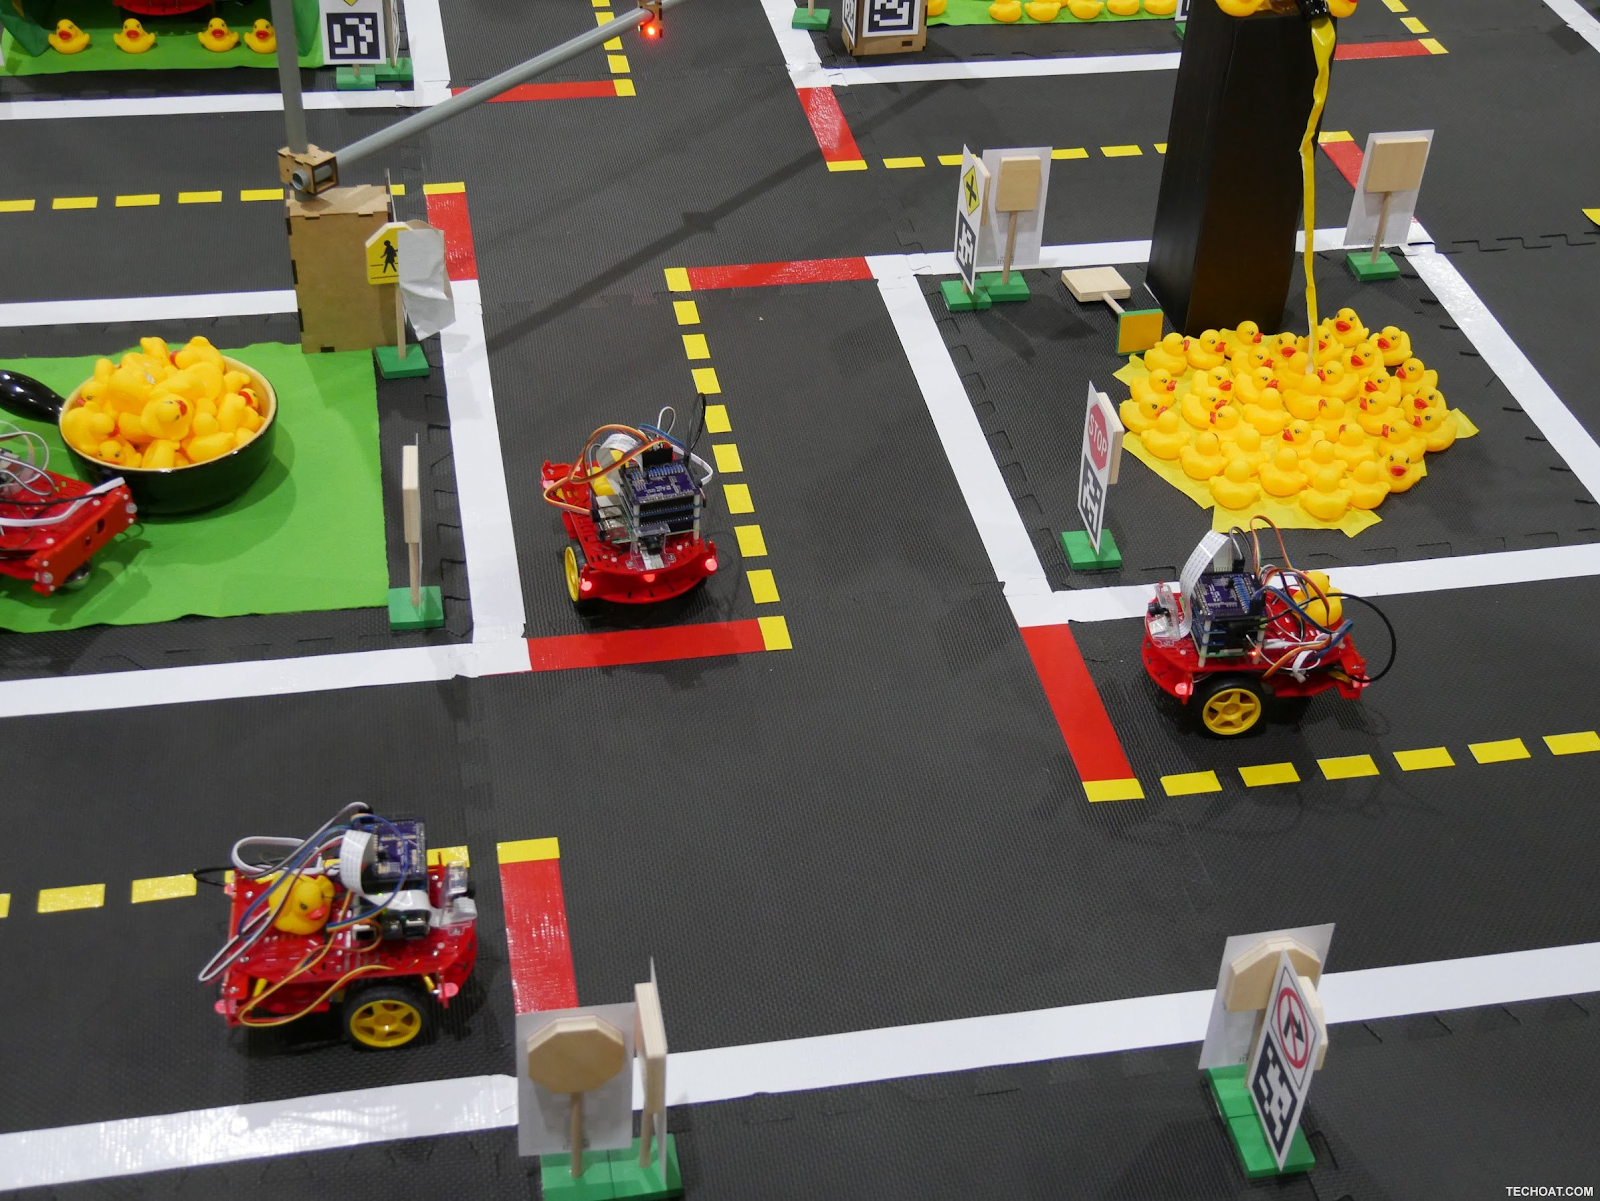
I have been working with Duckietown emulator. It is calledGym-Duckietown , and it is an open-source project written in Python. The emulator puts your bot inside the city, changes its position depending on the algorithm you are using (or on the button you pressed), redraws the picture and writes the current position of the bot to the logs.
If you are interested in trying, I recommend cloning your repository and running manual_control.py : this way the bot can be controlled using the arrows on the keyboard.
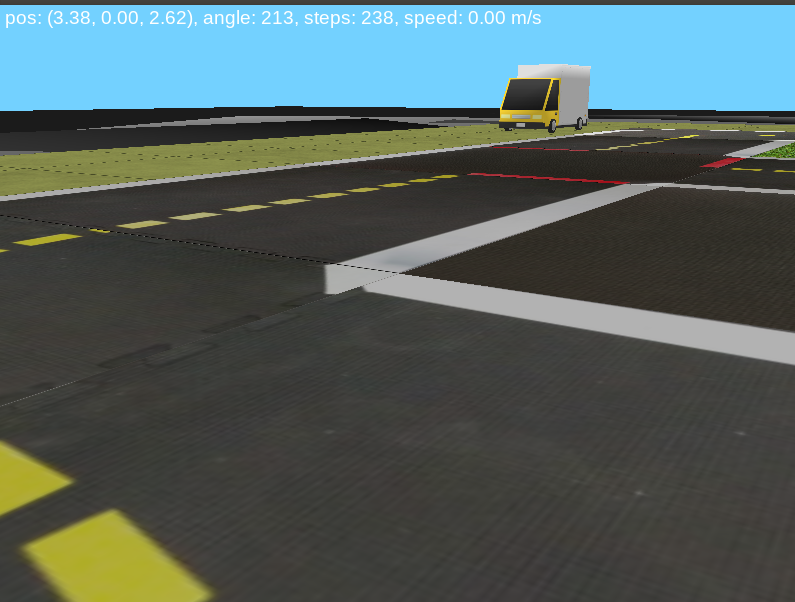
The emulator can be used as an environment for executing tasks. Let's set the following problem: on a given map, which consists of one lane, you need to drive one meter in a straight line.

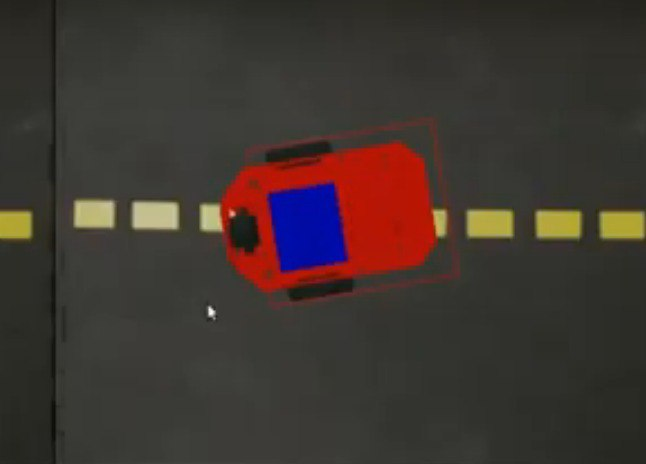
To solve the problem, you can use the following algorithm:
for _ in range(25):
    env.step([1, 0])
    env.render()
This variable
envstores the state of the environment.
The step method accepts as input
action: a list of two elements describing the bot's action. The first element sets the speed, the second - the angle of rotation. The method renderredraws the picture, taking into account the new position of the bot. The number of steps and the speed were chosen empirically: these are the values needed for the bot to travel exactly one meter in a straight line.
If you would like to use this snippet in manual_control.py, then paste it here . The code up to this point is busy loading the environment. For simplicity, you can reuse it, and then add the above solution to the problem.
Testing system
I would like to be able to check such tasks automatically: take the implementation of the bot control algorithm, simulate the trip and report whether the proposed algorithm correctly performs the task. Such a testing system would make it possible to use the environment during preparation for competitions in autonomous transport management, as well as for educational purposes: to issue a set of problems to students and check their solutions automatically. I was engaged in its development while working on a course project and below I will tell you about what I got.
The sequence of steps when checking the solution looks like this:

You can add tasks to the testing system yourself or refer to those that I did. Each task has a condition generator - a class that generates an environment state. It contains the name of the map and the starting position of the bot inside the starting cell. The target coordinates are also set: in this case, it is a point one meter from the starting position.
class Ride1MTaskGenerator(TaskGenerator):
    def __init__(self, args):
        super().__init__(args)

    def generate_task(self):
        env_loader = CVTaskEnv if self.args.is_cv_task else TrackingDuckietownEnv
        env = env_loader(
            map_name="straight_road",
            position_on_initial_road_tile=PositionOnInitialRoadTile(
                x_coefficient=0.5,
                z_coefficient=0.5,
                angle=0,
            ),
        )
        self.generated_task['target_coordinates'] = [[env.road_tile_size * 0.5 + 1, 0, env.road_tile_size * 0.5]]
        self.generated_task['env'] = env
        env.render()
        return self.generated_task
Here
TrackingDuckietownEnvand CVTaskEnvare wrapper classes that are used to store trip information for further analysis.
class TrackingDuckietownEnv:
    def __init__(self, **kwargs):
        self.__wrapped = DuckietownEnv(**kwargs)
    …
    …
    def step(self, action):
        obs, reward, done, misc = self.__wrapped.step(action)
        message = misc['Simulator']['msg']
        if 'invalid pose' in message.lower():
            raise InvalidPoseException(message)
        for t in self.trackers:
            t.track(self)
        return obs, reward, done, misc
Trackers collect information about the current state, such as the position of the bot.
CVTaskEnvit is used if a solution is required using only information from the camera ("computer vision"), and not the functions of the emulator: for example, if you need to know how far the bot is from the center of the strip or where the nearest visible object is. CVTaskEnvCalling emulator functions can simplify the solution of the problem, and the class limits the invocation of the emulator methods. It is used when the flag is displayed is_cv_task.
class CVTaskEnv:
    def __init__(self, **kwargs):
        self.__wrapped = TrackingDuckietownEnv(**kwargs)

    def __getattr__(self, item):
        if item in self.__wrapped.overriden_methods:
            return self.__wrapped.__getattribute__(item)
        ALLOWED_FOR_CV_TASKS = [
            'render', '_CVTaskEnv__wrapped', '_TrackingDuckietownEnv__wrapped',
            'road_tile_size', 'trip_statistics'
        ]
        if item in ALLOWED_FOR_CV_TASKS:
            return self.__wrapped.__getattr__(item)
        else:
            raise AttributeError(item + " call is not allowed in CV tasks")
After the execution of the decision is complete - provided that it has not been interrupted by a timeout - the trip information is passed through a sequence of checkers. If all checkers have worked successfully, the problem is considered solved correctly. Otherwise, an explanatory verdict is displayed - for example, a bot crashed, drove off the road, etc.
Here is one of the standard checkers. He checks that the bot has returned to the starting point at the end of the trip. This can be useful if, for example, in a task you need to drive to a certain point and then return back.
class SameInitialAndFinalCoordinatesChecker(Checker):
    def __init__(self, maximum_deviation=0.1, **kwargs):
        super().__init__(**kwargs)
        self.maximum_deviation = maximum_deviation

    def check(self, generated_task, trackers, **kwargs):
        trip_statistics = next(x for x in trackers if isinstance(x, TripStatistics))
        trip_data = trip_statistics.trip_data
        if len(trip_data) == 0:
            return True
        initial_coordinates = trip_data[0].position.coordinates
        final_coordinates = trip_data[-1].position.coordinates
        return np.linalg.norm(initial_coordinates - final_coordinates) < self.maximum_deviation
Such a testing system can be used in manual mode, that is, manually start a test, and then visually study the verdict. If we wanted, for example, to launch an online course on autonomous transport on Stepik.org , we would need integration with the platform. This will be discussed in the next part of the article.
Integration with online platforms
For testing tasks, the External Grader technology is often used, which was developed by the edX platform .
When using the External Grader, the educational platform does not check tasks on its own, but generates a queue of packages that are sent to another device. The queue connection functionality is implemented in the xqueue-watcher project . The Xqueue-watcher fetches the parcels and then they are tested by the validator (which usually does more non-trivial actions than text / number comparisons). After that, the verification verdict is sent back to the side of the educational platform.
Let's consider in more detail the moment of connecting to the queue. After the educational platform provides the connection data, they will need to be added toconfiguration files , and in the grade method, implement the verification launch directly. More detailed instructions can be found here and here .
The Xqueue-watcher calls endpoint get_submission , which will retrieve the package from the queue if possible. After that, she goes for testing. The xqueue-watcher then calls put_result to return the verdict.
You can start xqueue-watcher like this:
make requirements && python -m xqueue_watcher -d conf.d/Let's say we want to use the External Grader technology, but don't want to run the course on an online platform. Xqueue-watcher is implemented on the assumption that there is some file storage where files with solutions are uploaded (platforms have such storage). We can modify Xqueue so that file storage is no longer needed, and such systems can be run, in general, even on our laptop.
First you need to learn how to maintain the parcel queue itself. The queue functionality is provided by the xqueue project .
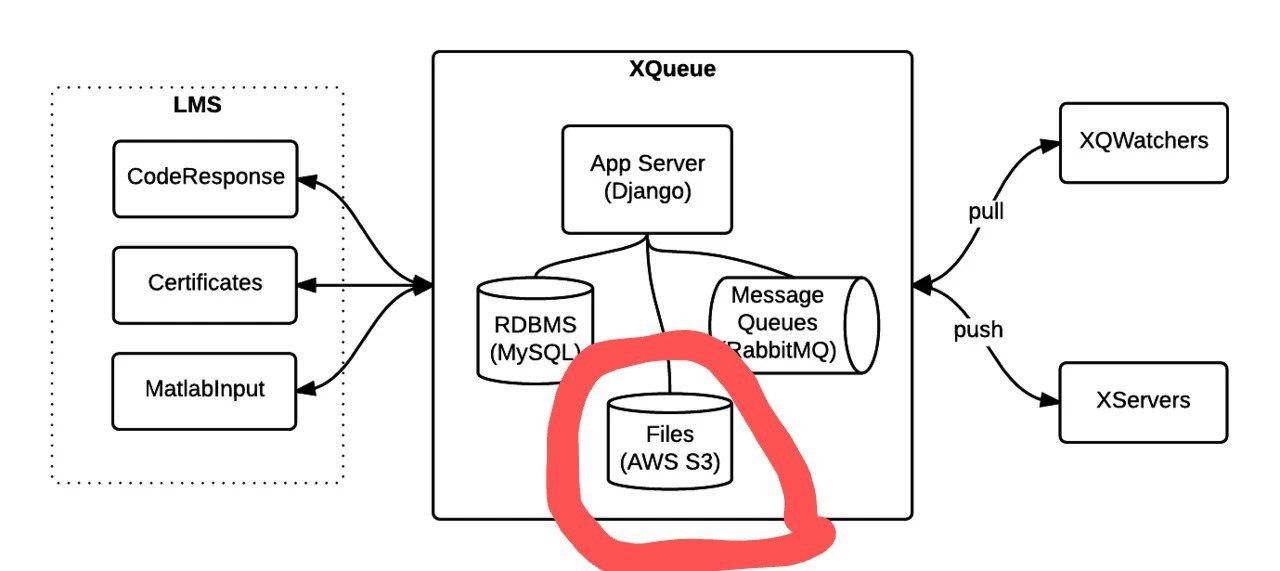
Picture taken from documentation .
You can run it like this:
apt-get install libaio1 libaio-dev
apt-get install libmysqlclient-dev
pip3 install -r requirements.txt
python3 manage.py migrate
python3 manage.py runserver $xqueue_address
You may need to create a file ~ / edx / edx.log
By default, xqueue gives xqueue-watcher not the contents of the packages, that is, files with the solution to the problem, but links to these files in the file storage. To be independent of file storage, you can make the files themselves be sent and store them on the same machine that xqueue-watcher is running from.
Here's how the source code needs to be modified to achieve this:
The implementation of the _upload method in lms_interface.py is replaced with this one:
def _upload(file_to_upload, path, name):
    '''
    Upload file using the provided keyname.
    Returns:
        URL to access uploaded file
    '''
    full_path = os.path.join(path, name)
    return default_storage.save(full_path, file_to_upload)
If no file storage was connected, then this method will save the file with the solution to the path $ queue_name / $ file_to_upload_hash.
In the implementation of get_sumbission in the ext_interface.py file, instead of this line, write:
xqueue_files = json.loads(submission.urls)
for xqueue_file in xqueue_files.keys():
    with open(xqueue_files[xqueue_file], 'r') as f:
        xqueue_files[xqueue_file] = f.readlines()
Let's transfer not links (paths) to files, but their contents.
Each solution is executed in a "one-time" docker container with limited resources, that is, a separate container is created for the execution of each solution, which is deleted after testing is over. To create such containers and execute commands in them, portainer-api is used (in fact, as a wrapper over the Docker API).
Outcome
In this article, I talked about how the testing system and tasks for autonomous transport were created, as well as the integration of this system with online educational platforms that use the External Grader technology. I hope that soon a course using this system will be launched, and the part about integration with online platforms will be useful for those wishing to create their own offline or online course.