Today we have prepared a translation of another article, this time by Andriy Haydash. This article is about creating custom functionality through plugins. You can find the previous article on October CMS vs WordPress comparison here .
If you enjoy writing object-oriented and easy-to-read code, then this article is for you. You will learn how to write your own plugin and why October can be a good option for your next project.
Last year, I did a little research on new PHP-based CMSs looking for a good WordPress alternative . Ideally, it should have been an open source solution with a modern codebase.
Then I was interested in October CMS . I tried it and I liked it almost immediately . October has a good code structure and is easy to write your own plugins for.
The purpose of this article is to help you understand what the platform is and what to expect from it before you decide to use it.
Why choose October as your CMS platform?
There are several main reasons why I decided to use October for my projects.
Written on the Laravel framework
October CMS is built on top of Laravel , the most powerful PHP framework for building modern web applications. I can say for sure that he is the best. The framework is very easy to use and extremely easy to understand. In addition, it has all the features required by a modern framework: routing (routing) , object-relational mapping (ORM), authorization, caching and many others, providing a nice and understandable structure in accordance with the Model-View-Controller concept. Since October CMS is written in the Laravel framework, it inherited all these features from its "big brother".
Clean code and documentation
Unlike many other CMSs, October has a very clean and well-documented codebase written using the object-oriented paradigm.
Instead of good old PHP, October uses Twig as its templating language, making the developer's job easier. The technical documentation is also well written and provides quick answers to most questions.
Great community
Although the October community is still small, its people are helpful and helpful. There channel Slack (At the moment, officially frozen, the community moved to Discord -. Note Trans..) , To which you can join, and the developers are happy to help solve your problem.
Large marketplace
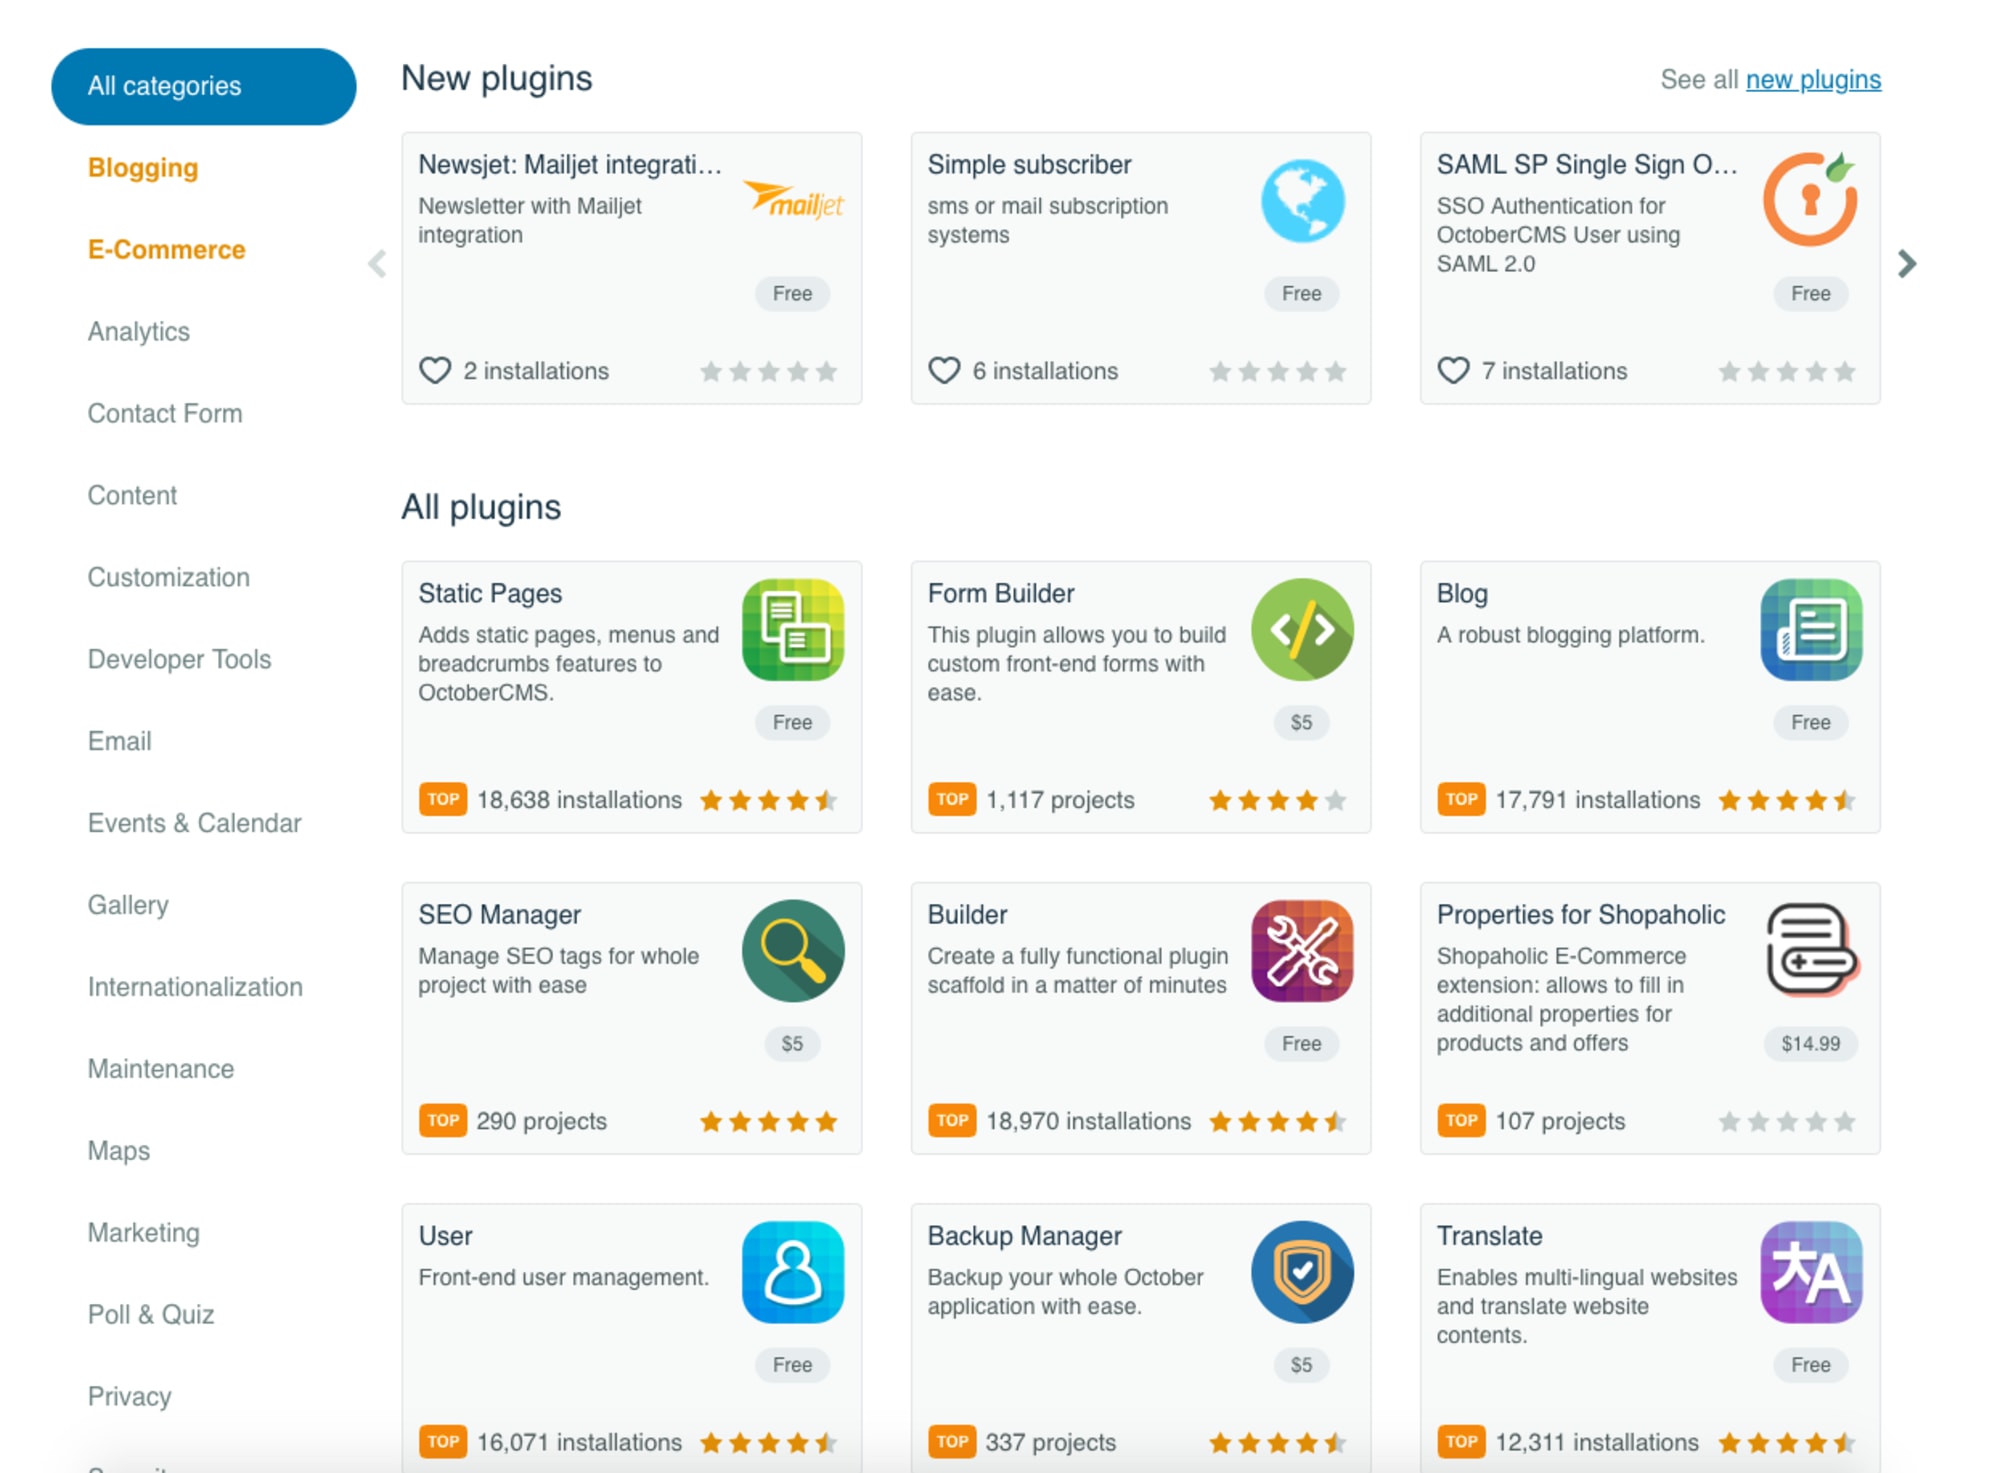
Like WordPress and other CMSs, October has a theme and plugin marketplace. The selection of good themes is not very large, but there are over 700 plugins (As of June 2020, there are over 900 plugins published and about 200 themes - approx. Transl.) , So it is likely that you can expand the functionality by simply searching and installing one of them. A distinctive feature of plugins is that they can be easily synchronized between all your projects by simply adding your project ID in the admin area.
Plugins and components
Plugins are the basis for adding new features to October CMS. A plugin can consist of several files and directories that are responsible for registering custom components, models, updating the database structure, or adding translations. A plugin is usually created in a project in the plugins / directory. Since many plugins are added to the marketplace for use by other people, each plugin must have its own namespace, which usually begins with the name of the company or developer who created the plugin. So, for example, if your name is Acme and you've created a great plugin called Blog, your plugin will be called Acme \ Blog.
Let me show you what a plugin directory structure might look like:
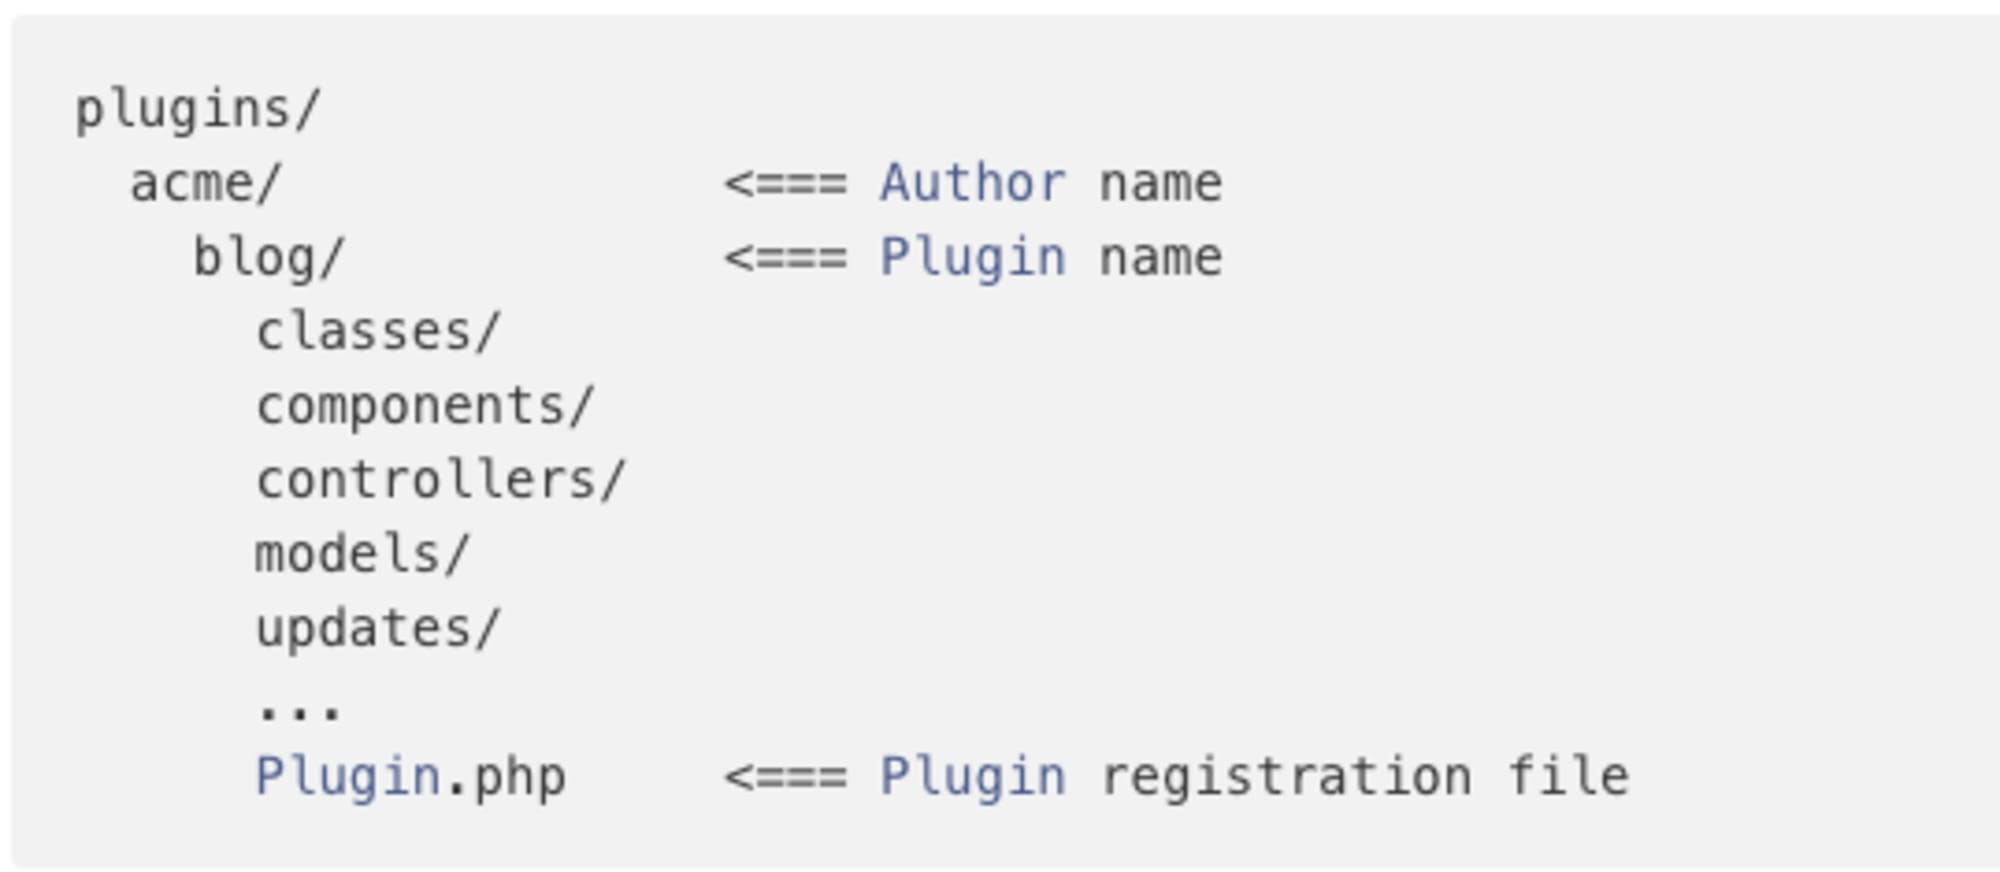
As you can see, there is a file called plugin.php that is responsible for registering the plugin and all its components in the October CMS.
It is worth mentioning that not all of the directories listed above are required to run the plugin. Your plugin can have the following structure and still work great:

More often than not, one plugin only adds one functionality. For example, the Translate plugin is designed to help you translate your site's content into different languages and provide multilingual user support.
October CMS has a large marketplace where you can find everything you need.
Unlike Wordpress and other popular CMS, October plugins can contain components. According to the October documentation, components are "custom modules that can be attached to any page, partial, or layout." For example, a feedback form, navigation, FAQ (a list of frequently asked questions and answers to them); in fact, everything that is logical to combine into one module that can be reused across multiple pages.
Components are created as part of the plugin and are located in the components / subdirectory :

Each component has a PHP file, for example componentName.php, which defines the component , as well as an optional subdirectoryfor partials. The partials folder for a component must have the same lowercase name as the component itself.
To understand how a component works, let's assume that our component is responsible for displaying blog posts.
namespace Acme\Blog\Components;

class BlogPosts extends \Cms\Classes\ComponentBase
{
    public function componentDetails()
    {
        return [
            'name' => 'Blog Posts',
            'description' => 'Displays a collection of blog posts.'
        ];
    }

    // This array becomes available on the page as {{ component.posts }}
    public function posts()
    {
        return ['First Post', 'Second Post', 'Third Post'];
    }
}
As you can see, the component has two main functions. The first, componentDetails (), provides information about the component to the administrator who will add and use the components in their web pages. The second function, posts (), returns empty posts, which can then be used inside a part of the component (blogposts / default.htm file), like this:
url = "/blog"

[blogPosts]
==
{% for post in blogPosts.posts %}
    {{ post }}
{% endfor %}
To make October CMS know that our component exists , we must register it using the main plugin file inside the registerComponents () function:
public function registerComponents()
{
    return [
        'October\Demo\Components\Todo' => 'demoTodo'
    ];
}<
How to create a contact form plugin
We will write a plugin to create a feedback form. This is how it should work:
- The form will contain the following fields: first name, last name, email address, message.
- The data will be sent to the server using Ajax.
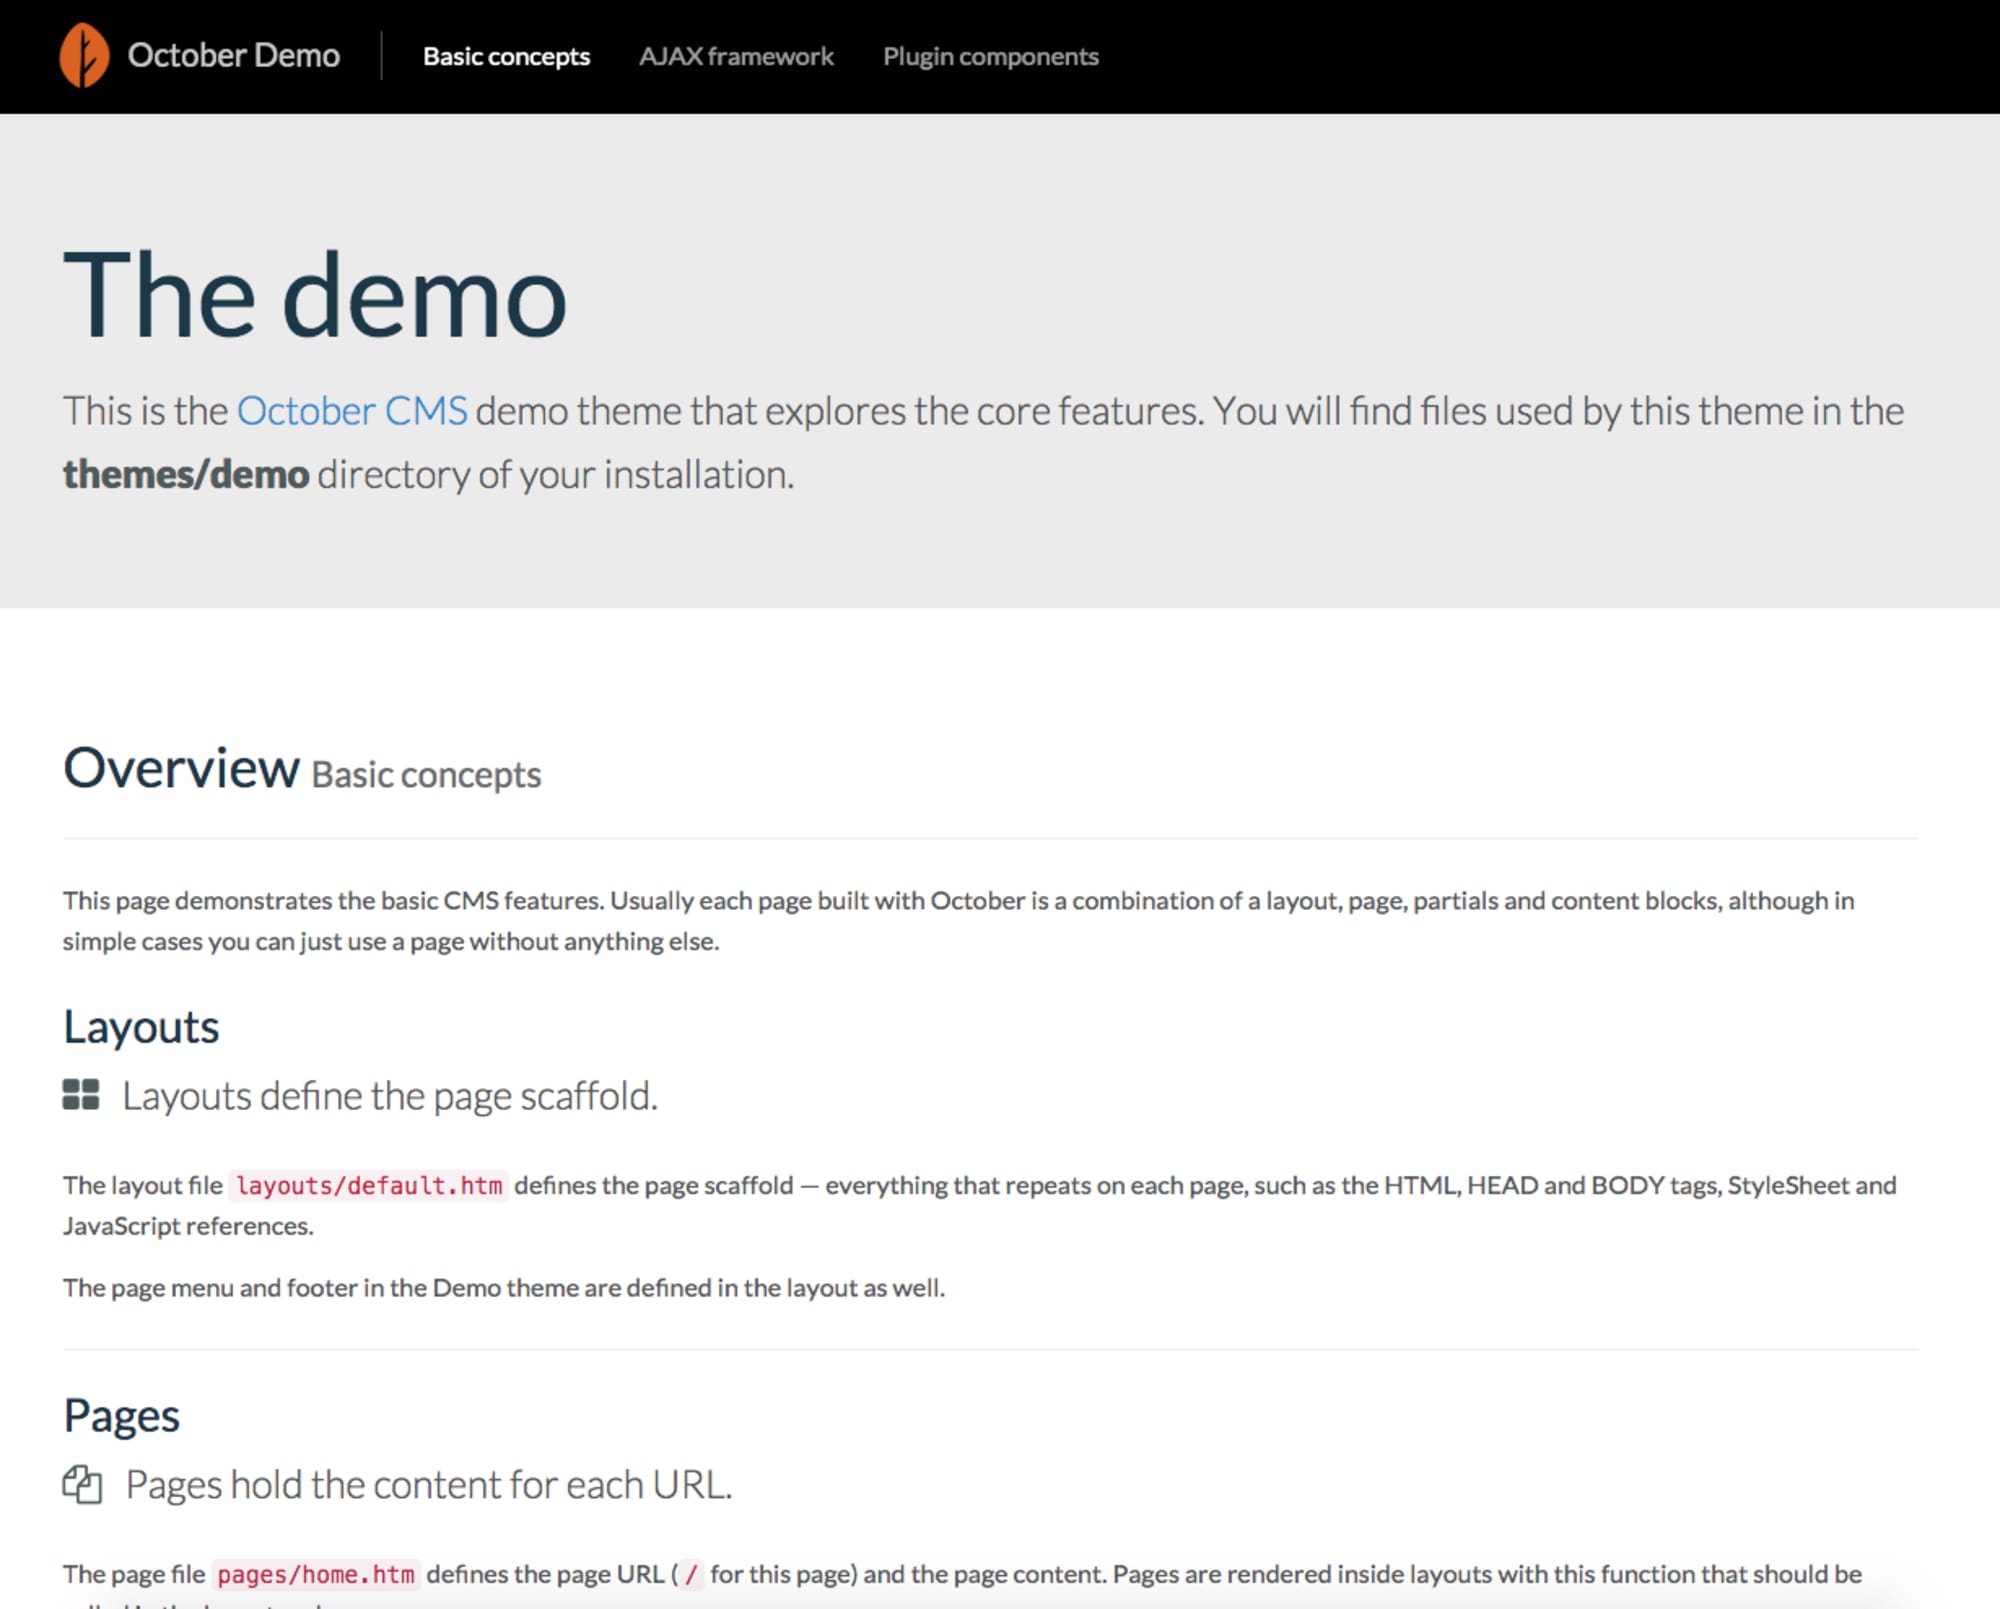
- After submitting the data, the administrator will receive an email with the message the user sent. In this article we will be using a clean install of October CMS:
Let's start building our plugin by running a command in a terminal that generates the plugin structure:
php artisan create:plugin progmatiq.contactform 
The progmatiq.contactform argument contains the author's name (progmatiq) and the plugin's name (contactform).
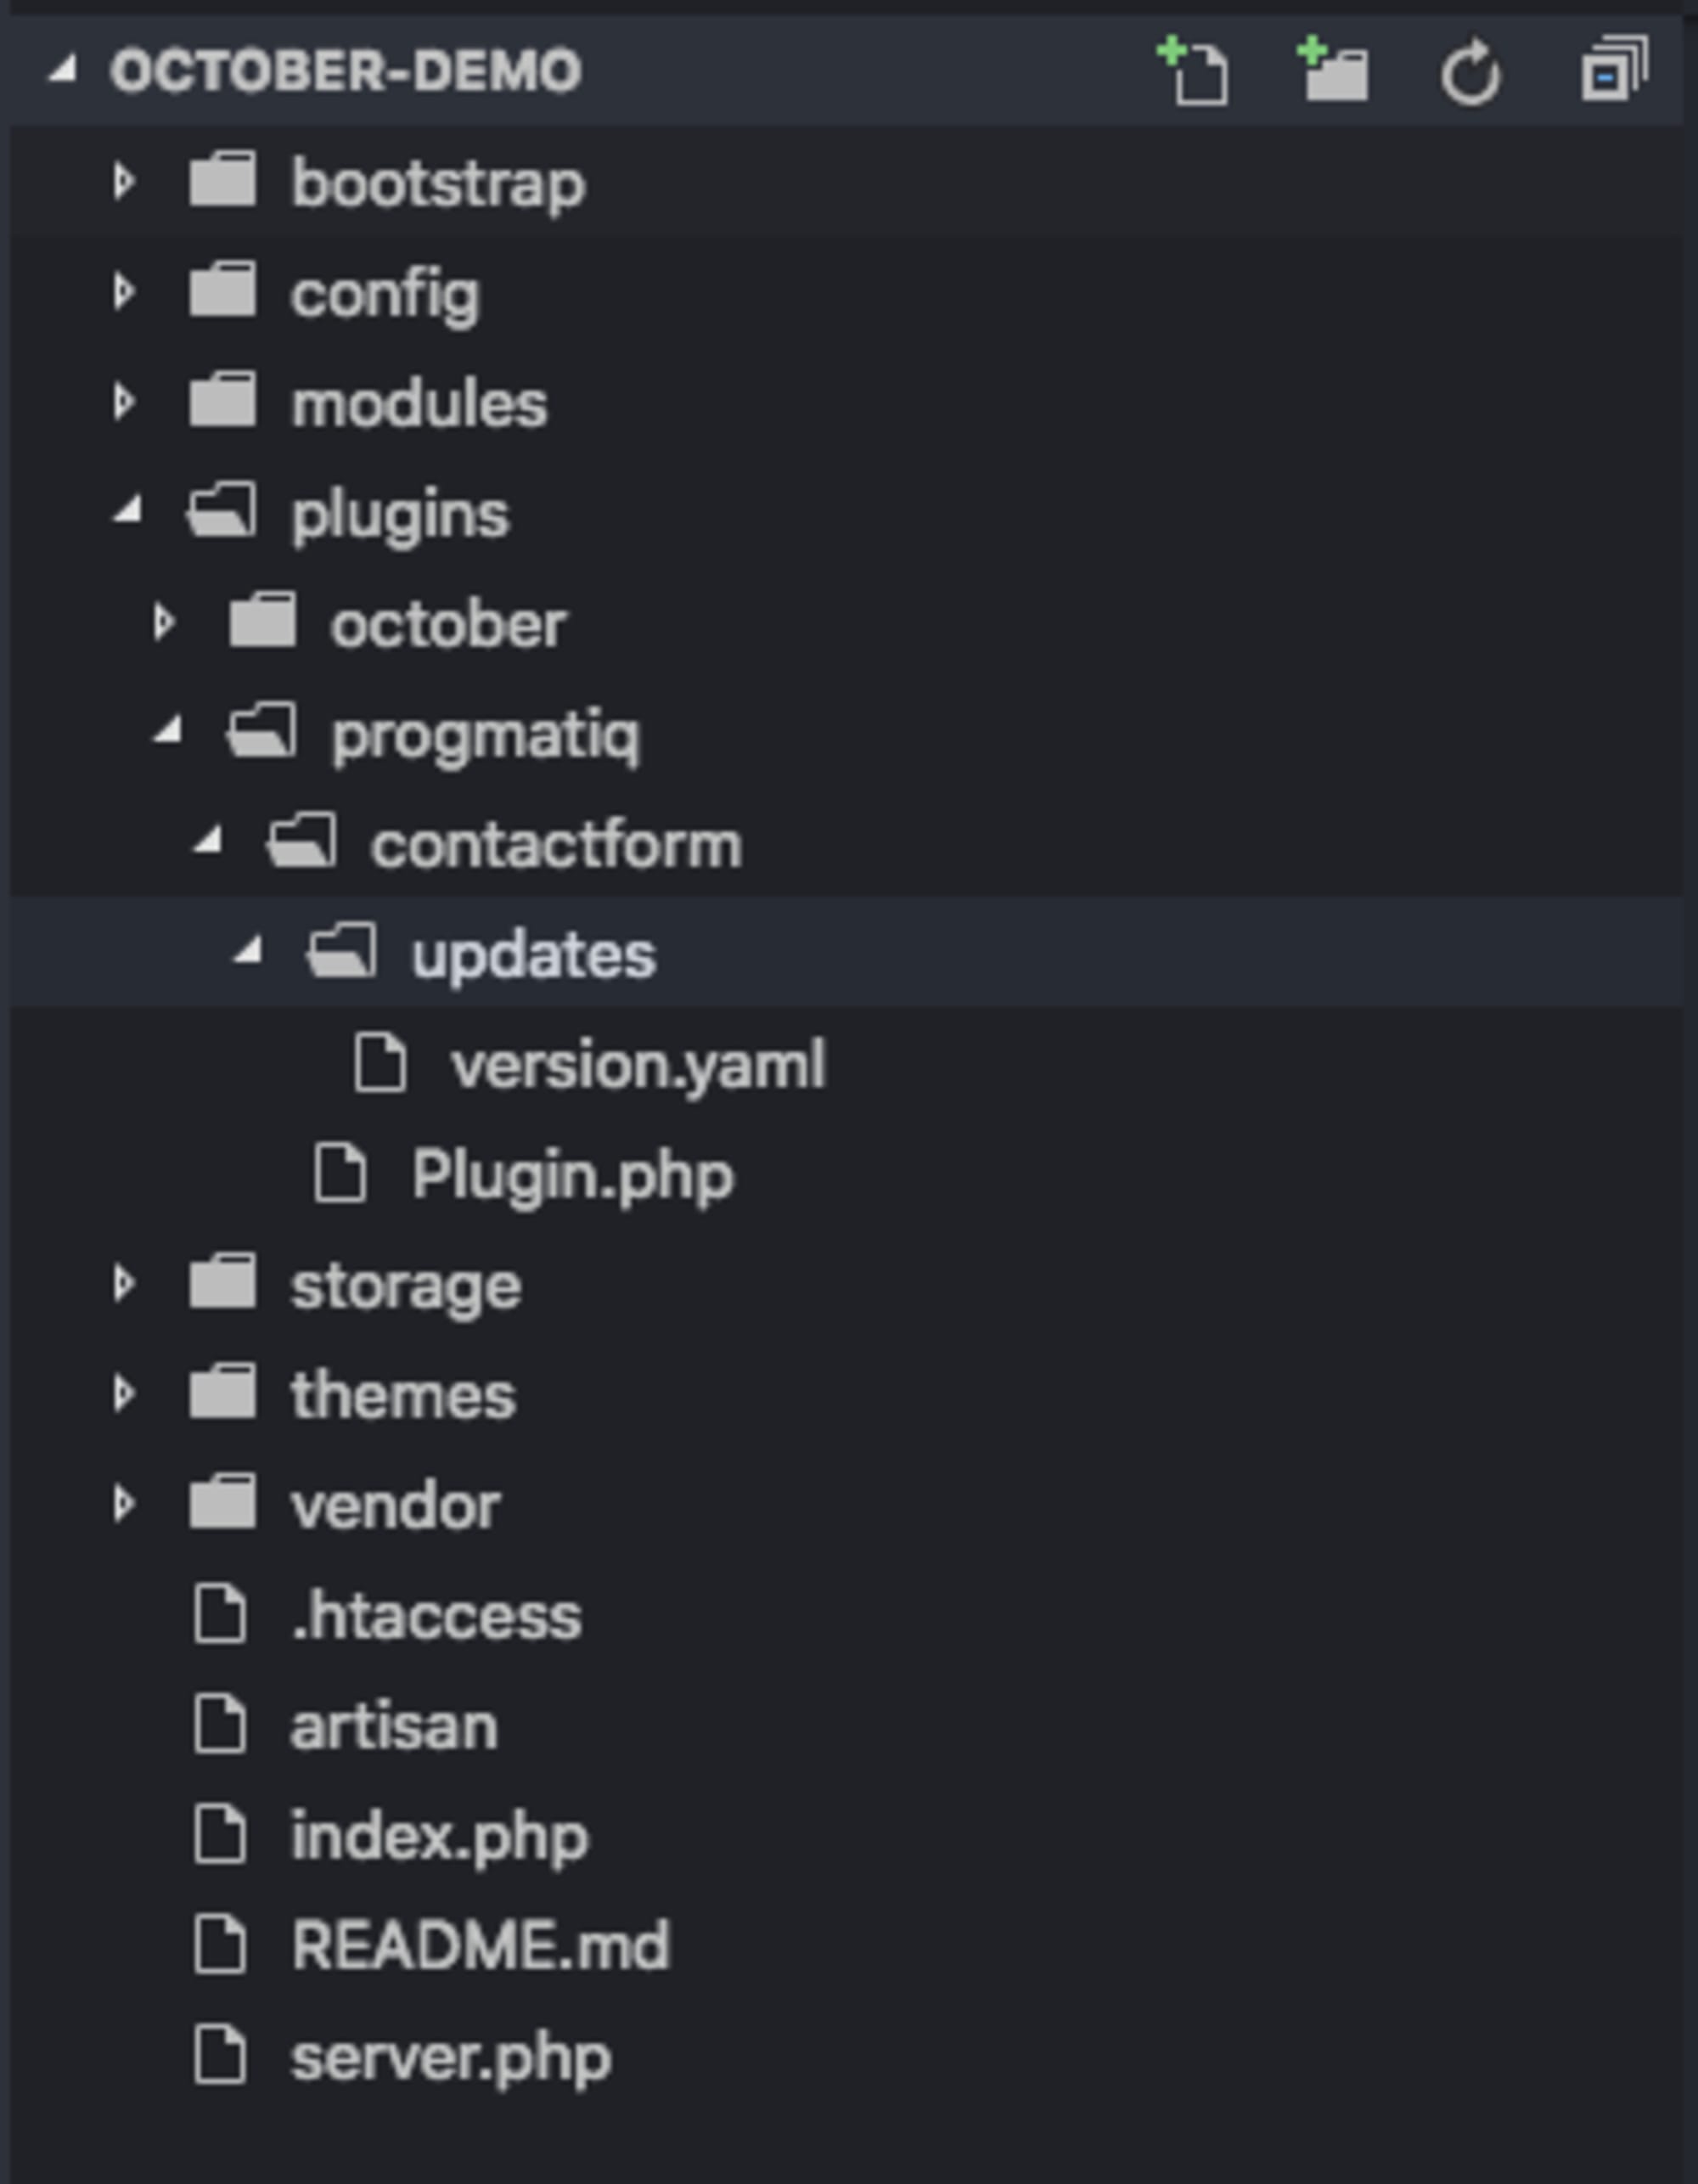
Now we need to open our plugin.php file and change the plugin information in the following way:
public function pluginDetails()
   {
        return [
            'name'        => 'Contact Form',
            'description' => 'A simple contact form plug-in',
            'author'      => 'progmatiq',
            'icon'        => 'icon-leaf'
        ];
    }
Here are a few other methods worth taking a look at:
- registerComponents ()
Here you can define an array of components that your plugin provides. - registerPermissions ()
You can register custom permissions, which you can then use in other areas of the application. - registerNavigation ()
You can add a custom url menu item to the admin menu.
Let's create a ContactForm component:
- Create a new components / folder in the root directory of your plugin.
- Create a contactForm.php file in the components / directory.
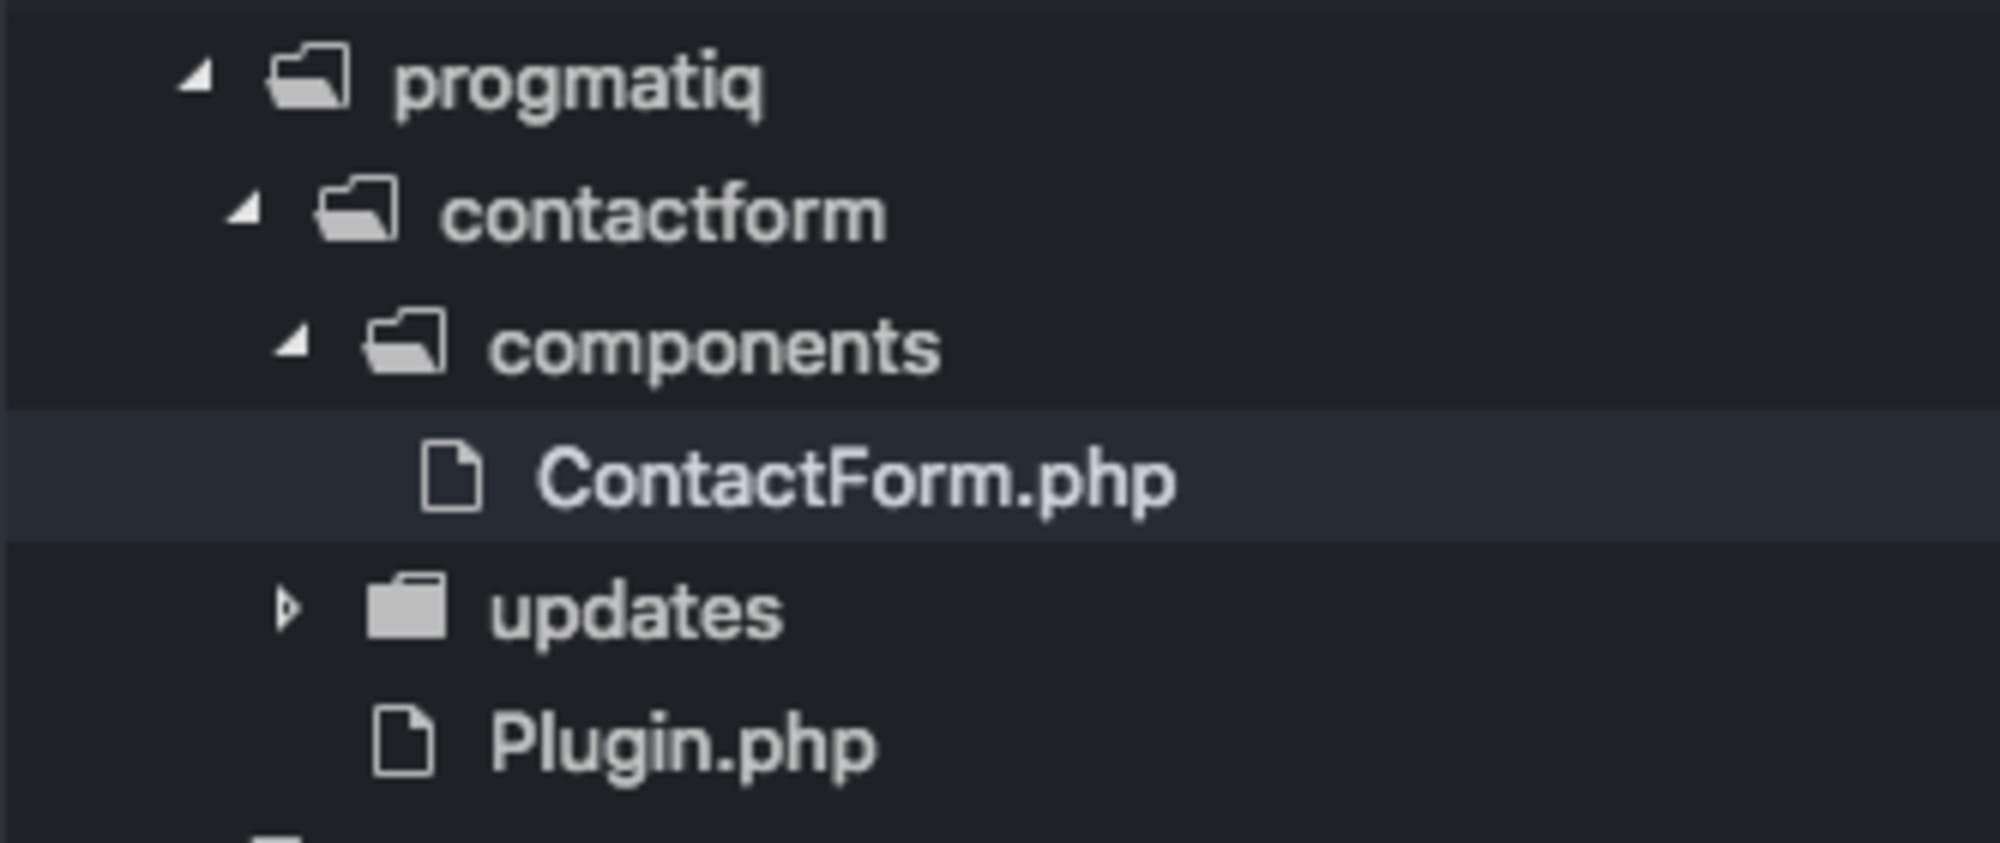
- Paste in the following code to tell October what our component is doing. We can do this by creating a componentDetails () method inside our component.
<?php

namespace Progmatiq\Contactform\Components;

use Cms\Classes\ComponentBase;

class ContactForm extends ComponentBase
{
    public function componentDetails()
    {
        return [
            'name' => 'Contact Form',
            'description' => 'A simple contact form'
        ];
    }
}
Now we need to register the component inside the plugin. To do this, we modify the registerComponents () method:
public function registerComponents()
    {
        return [
            'Progmatiq\Contactform\Components\ContactForm' => 'contactForm',
        ];
    }
This function returns an array of components that our plugin provides. The fully qualified class name of the component is the key in this method, and the value is the alias that we will use to reference our component in Twig templates.
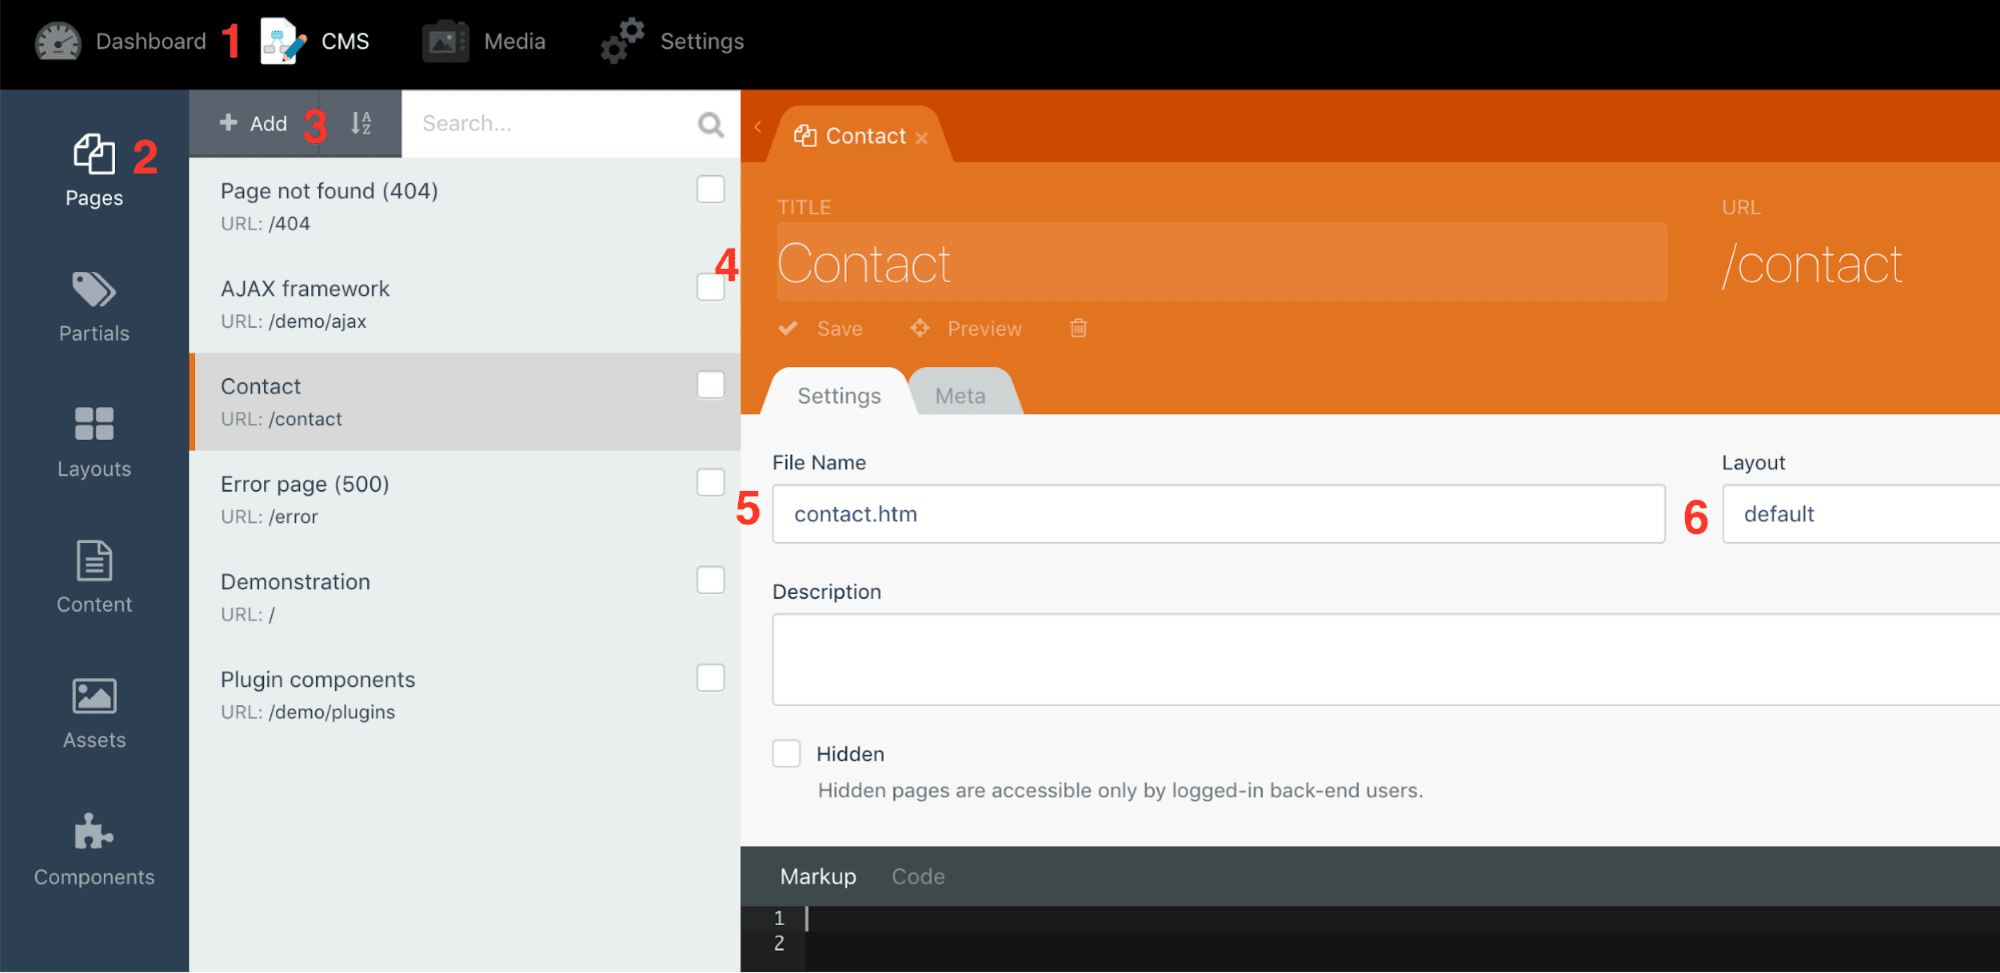
After we have registered the component, we can create a new contact page and add our component (the step number is the same as the illustration in the screenshot):
- In the admin panel go to CMS (1)> Pages (2) and click + Add (3).
- Give your page a name and URL (4).
- Name your file (5) and choose default layout (6).
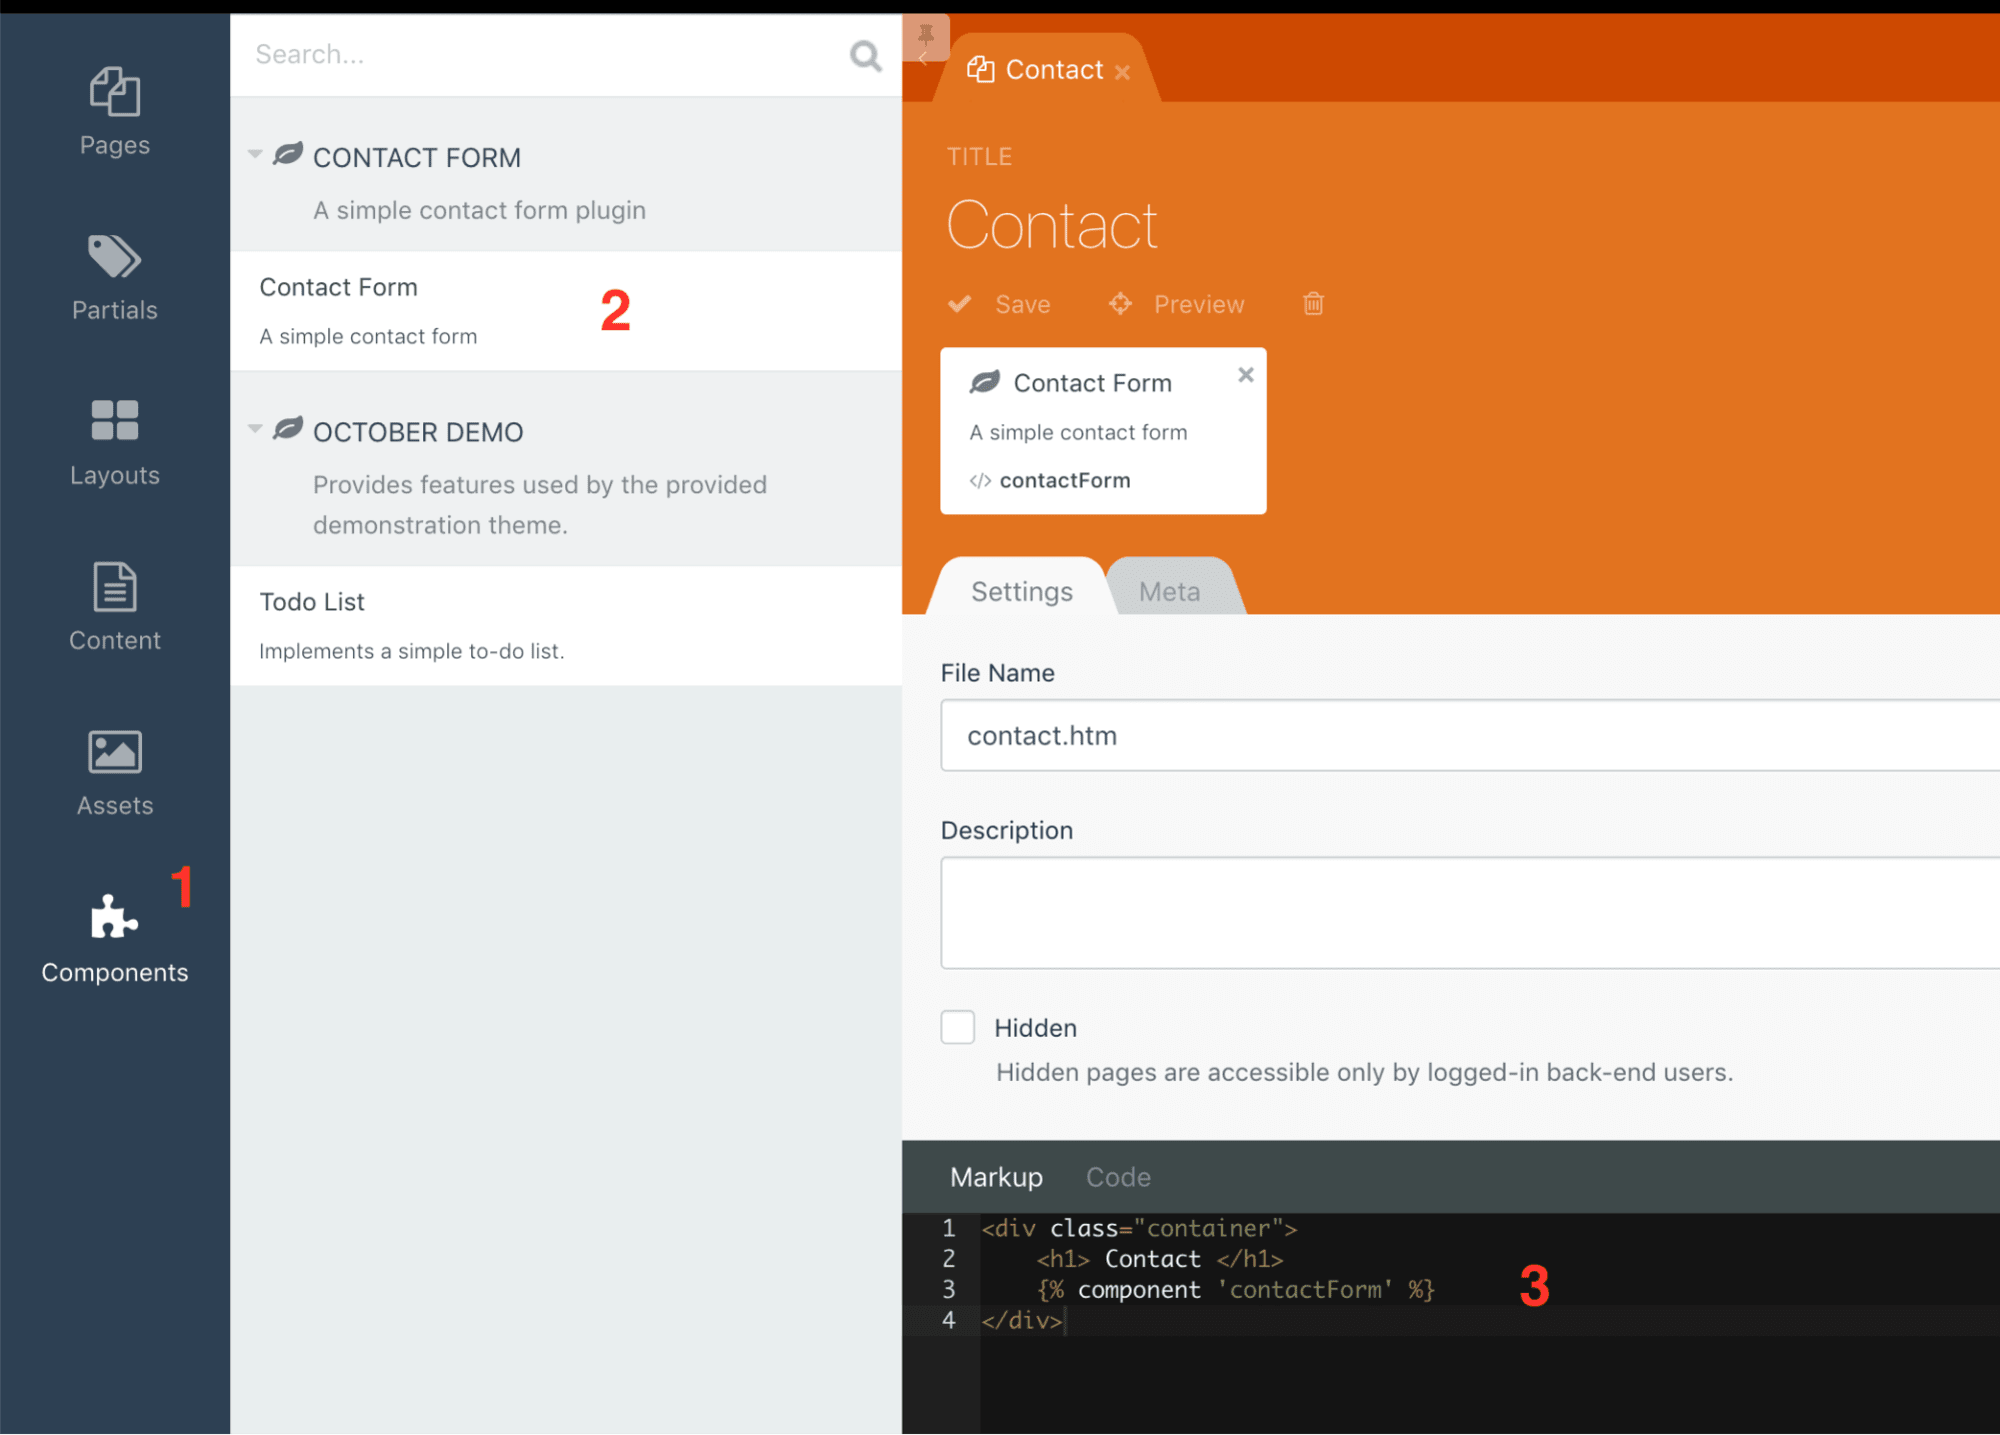
Let's add our new component to the page:
- Click Components in the left menu (1) and then select our Contact form component. Once you click on it (2), it should be added to the page.
- We need to place a piece of code that will add a title to our page, and also render the component using the Twig directive {% component 'contactForm'%}:
<div class="container">
    <h1> Contact </h1>
    {% component 'contactForm' %}
</dіv>
If you open the contacts page now, you will not see anything except a header that says "Contacts".
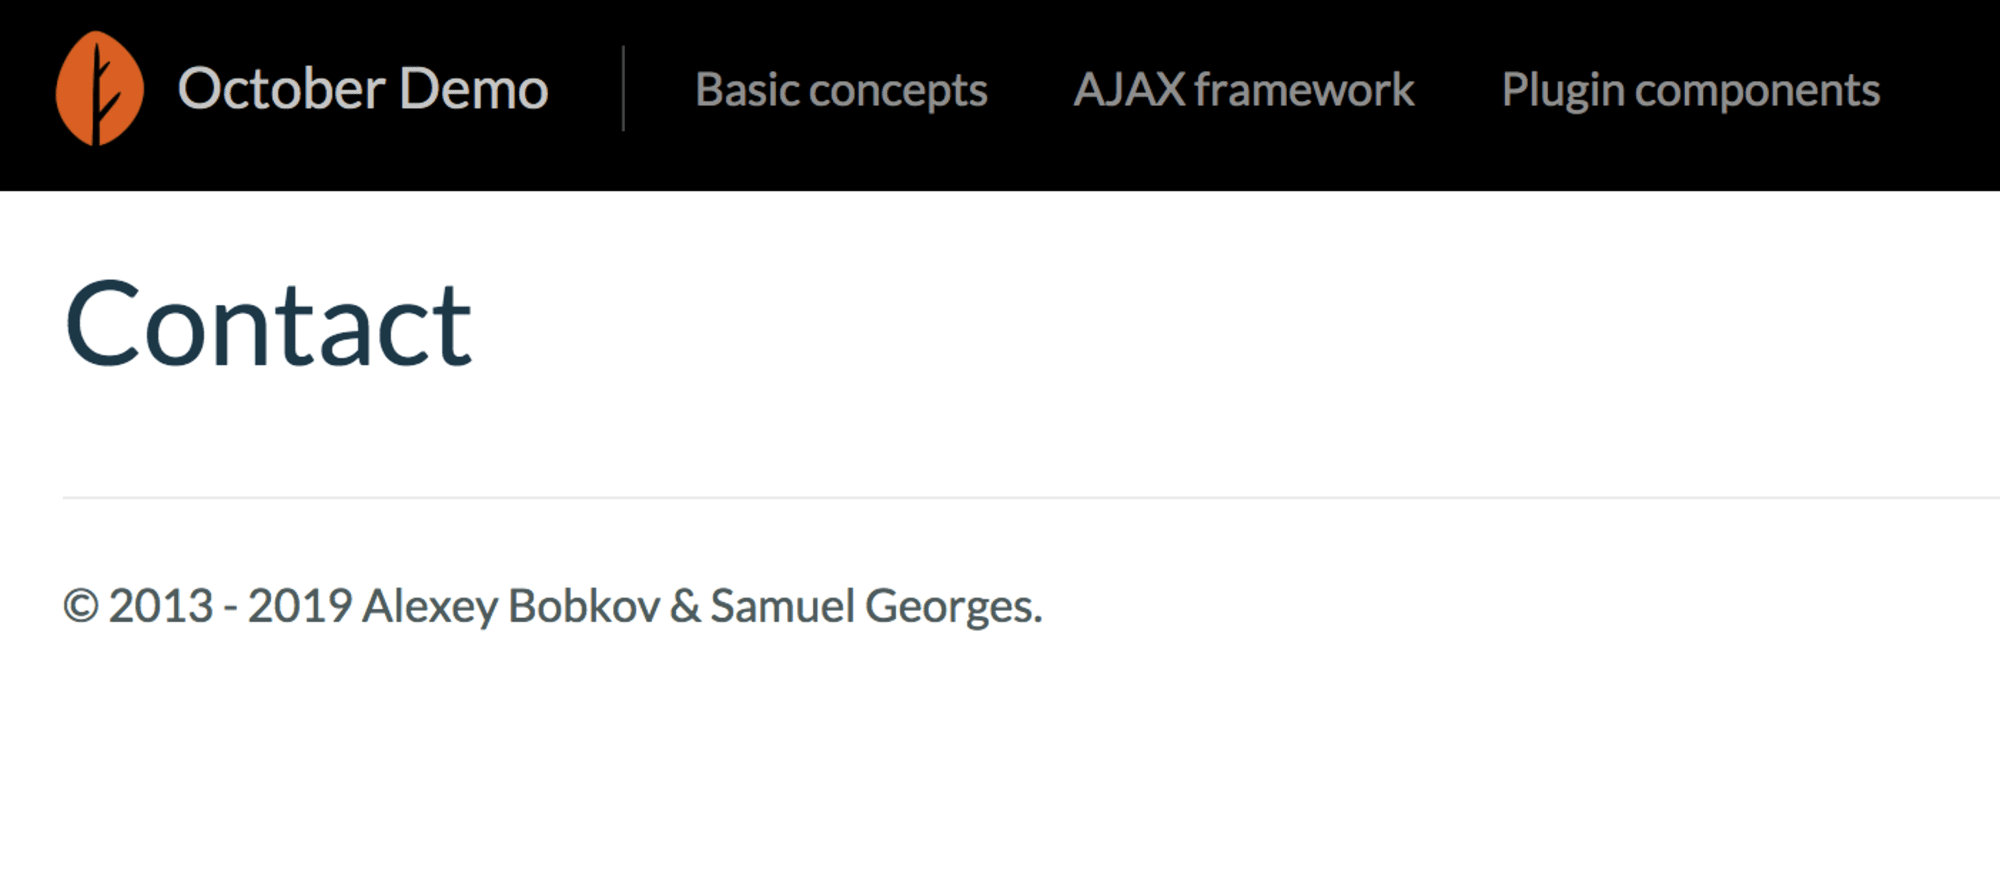
The thing is, our form doesn't have HTML to display.
We need to create a contactform / default.htm file in the components / folder.
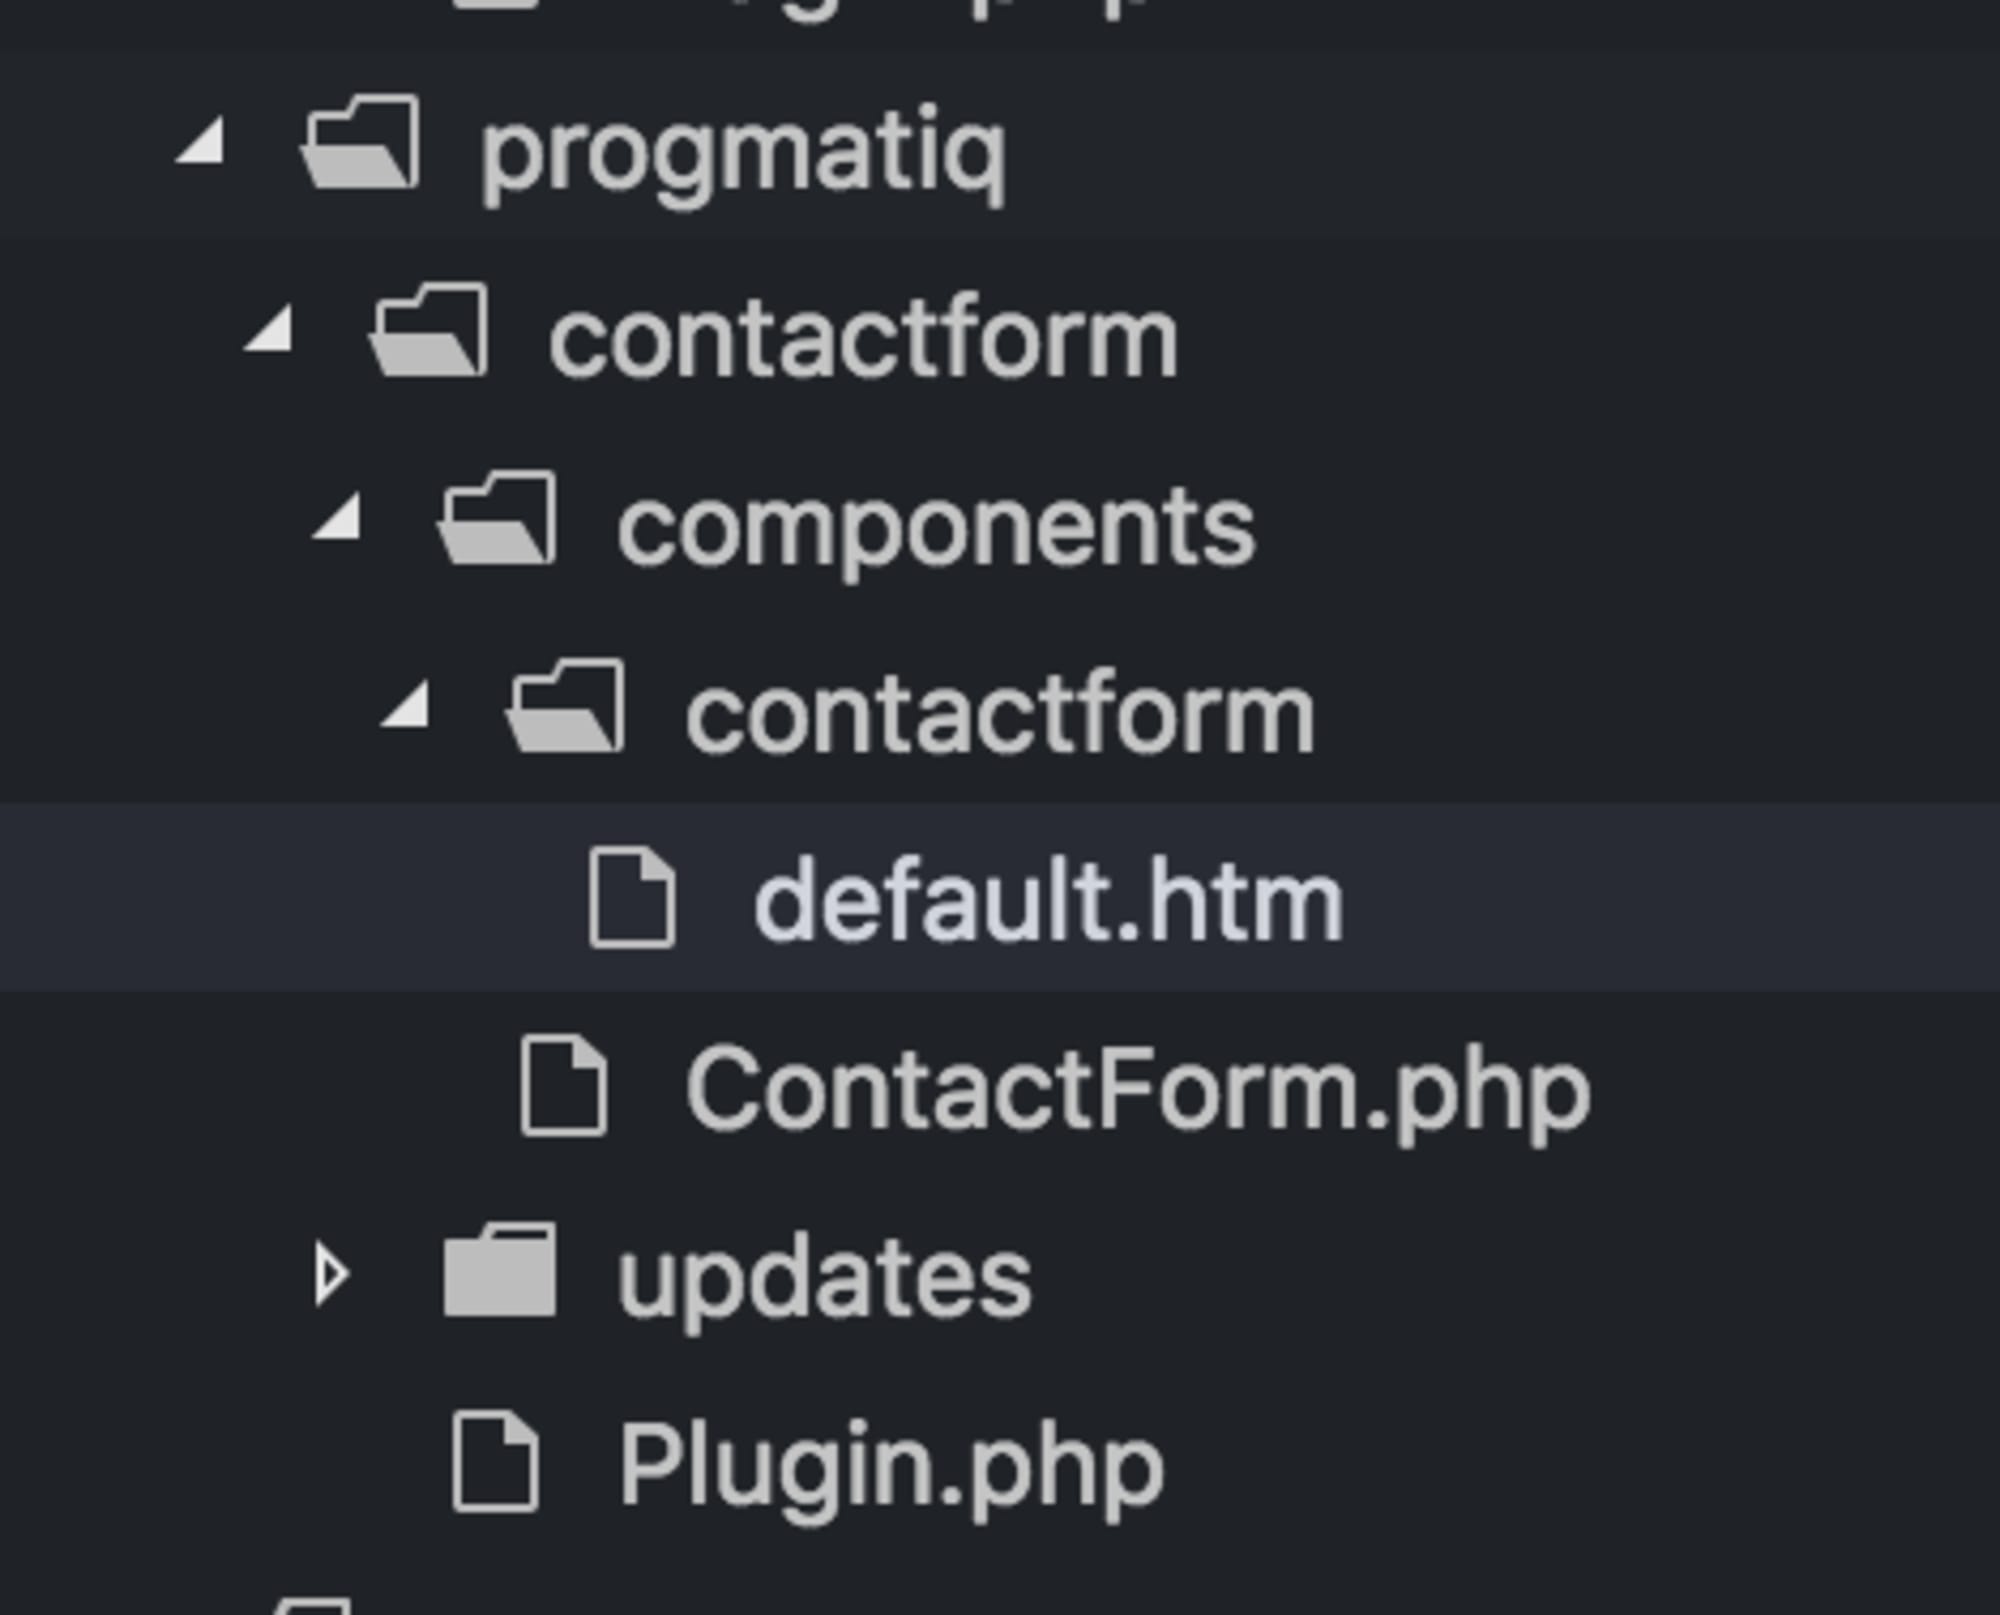
You also need to add the following HTML to the file:
<form method="POST"
    data-request="onSend"
    data-request-validate
    data-request-success="this.reset(); alert('Thank you for submitting your inquiry')"
>
    <div>

        <label for="first_name">First Name</label>
        <input type="text" name="first_name" class="form-control">
        <p data-validate-for="first_name" class="text-danger"></p>
    </div>

    <div>
        <label for="last_name">Last Name</label>
        <input type="text" name="last_name" class="form-control">

        <p data-validate-for="last_name" class="text-danger"></p>
    </div>

    <div>
        <label for="email">Email</label>
        <input type="text" name="email" class="form-control">
        <p data-validate-for="email" class="text-danger"></p>
    </div>

    <div>
        <label for="content">Content</label>
        <textarea rows="6" cols="20" name="content" class="form-control"></textarea>
        <p data-validate-for="content"  class="text-danger"></p>
    </div>

    <div>
        <button type="submit" class="btn btn-primary" data-attach-loading>Send</button>
    </div>
</form>
Most of the code is pretty simple. However, it has special data- * attributes that can be used in October:
The tag has three special attributes:
data-request="onSend"This attribute tells October that the onSend function from our component (which we are going to create next) should be called when the form is submitted using Ajax.
data-request-validatewill enable form validation via Ajax using errors that will be sent from the server if the form is invalid.
data-request-success="this.reset(); alert('Thank you for submitting your inquiry')"clears the form and then issues a message if the request was successful and there were no validation or server errors.
Each input has the following block, which is responsible for displaying validation errors returned by the server for a given input:
<p data-validate-for="content" class="text-danger"></p>The submit button has a data-attach-loading attribute, which adds a spinner and disables the button while the server is processing the request. This is to prevent the user from submitting the form again until the previous request has been processed.
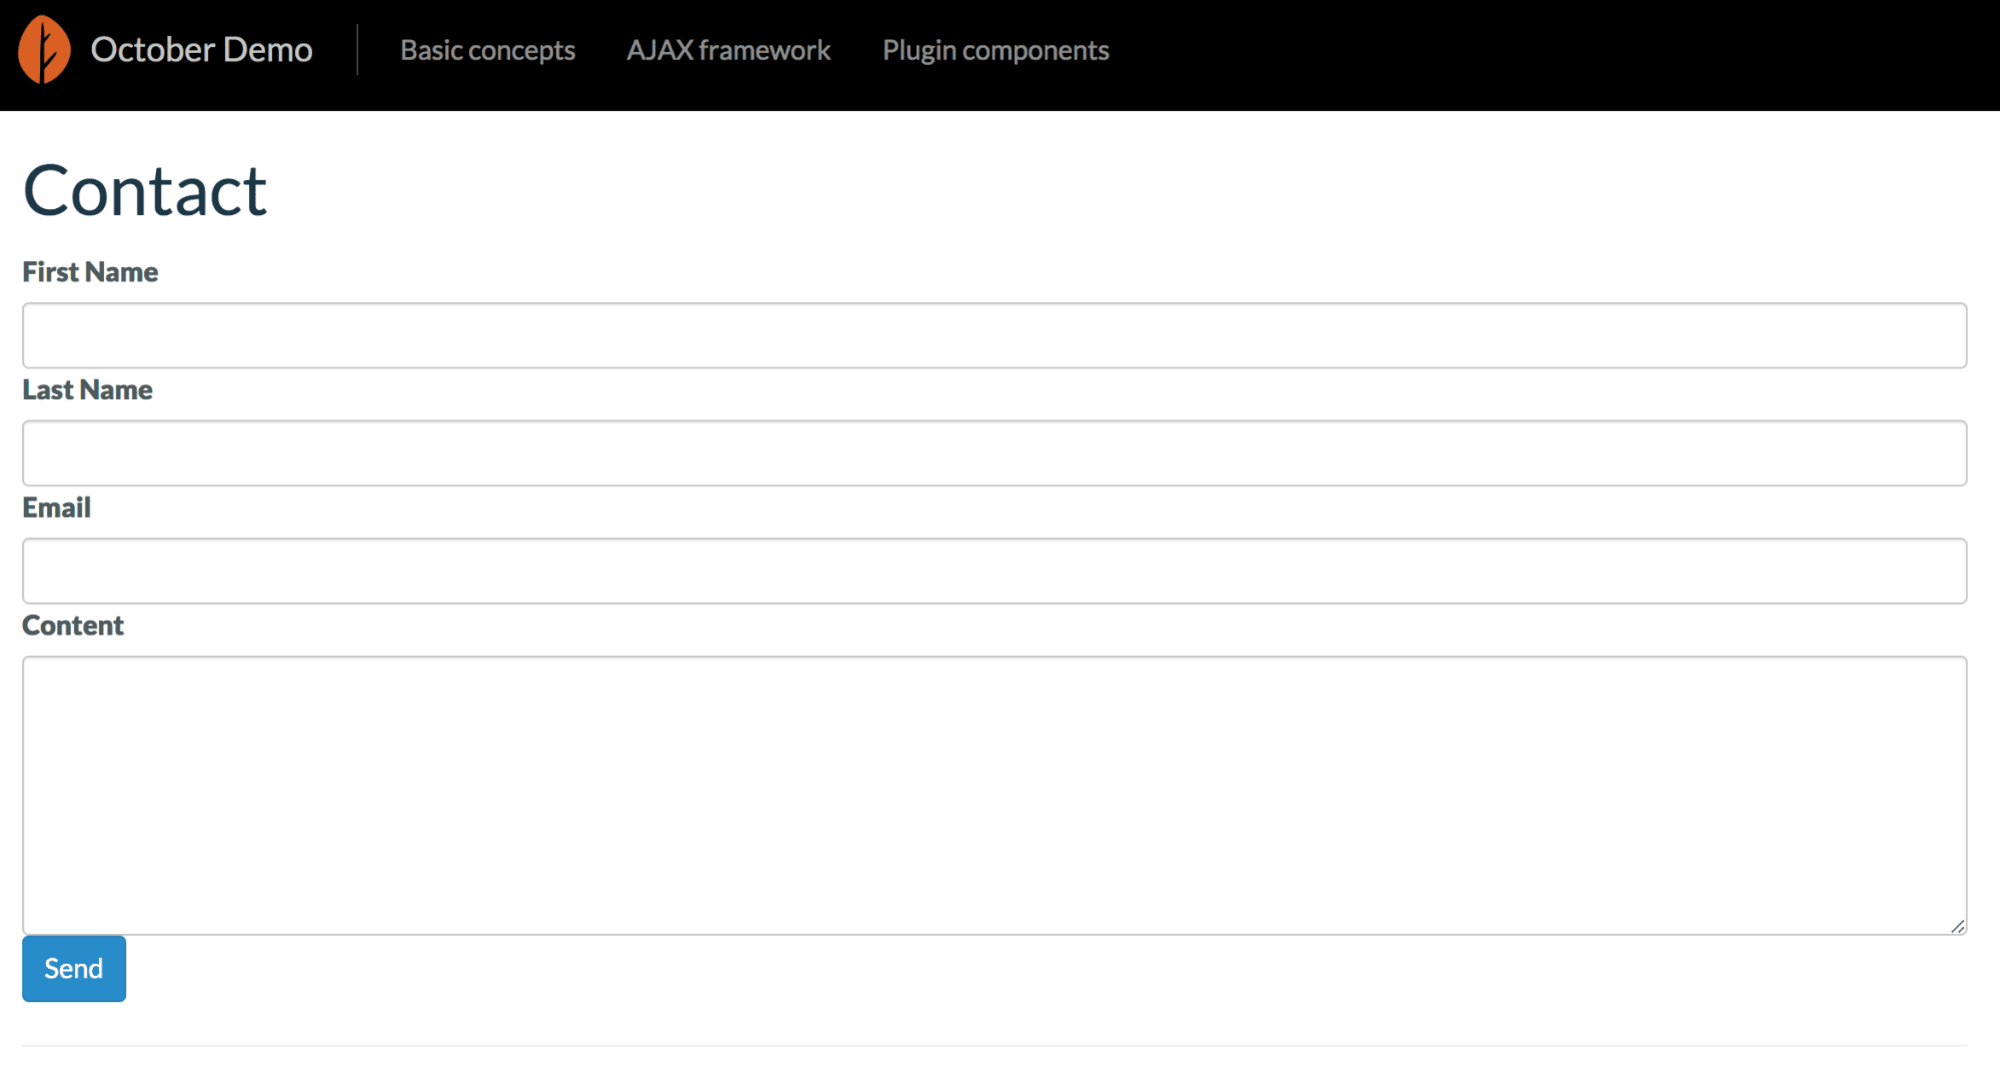
And this is how our page looks now:
Let's go back to our contactForm.php component and create the onSend () and validate () helper methods that will be responsible for submitting the form:
public function onSend()
    {
        // Get request data
        $data = \Input::only([
            'first_name',
            'last_name',
            'email',
            'content'
        ]);

        // Validate request
        $this->validate($data);

        // Send email
        $receiver = 'admin@gmail.com';

        \Mail::send('progmatiq.contact::contact', $data, function ($message) use ($receiver) {
            $message->to($receiver);
        });
    }

    protected function validate(array $data)
    {
        // Validate request
        $rules = [
            'first_name' => 'required|min:3|max:255',
            'last_name' => 'required|min:3|max:255',
            'email' => 'required|email',
            'content' => 'required',
        ];

        $validator = \Validator::make($data, $rules);

        if ($validator->fails()) {
            throw new ValidationException($validator);
        }
    }
The first thing we do is get the data from the request and validate it using the validate () helper method. All available validation rules that you can use can be found in the documentation . If the validation fails, the validate () method throws a ValidationException - code execution will stop, and the server will issue a 406 status code and a validation failure message.
If the validation is successful, we will send an email to our administrator.
Note: for simplicity, I assumed that the mail we want to send the request to is admin@gmail.com. Make sure to use your own email address!
Here is the complete code for your contactForm.php plugin:
<?php

namespace Progmatiq\Contactform\Components;

use Cms\Classes\ComponentBase;
use October\Rain\Exception\ValidationException;

class ContactForm extends ComponentBase
{
    public function componentDetails()
    {
        return [
            'name' => 'Contact Form',
            'description' => 'A simple contact form'
        ];
    }

    public function onSend()
    {
        // Get request data
        $data = \Input::only([
            'first_name',
            'last_name',
            'email',
            'content'
        ]);

        // Validate request
        $this->validate($data);

        // Send email
        $receiver = 'admin@gmail.com';

        \Mail::send('progmatiq.contact::contact', $data, function ($message) use ($receiver) {
            $message->to($receiver);
        });
    }

    protected function validate(array $data)
    {
        // Validate request
        $rules = [
            'first_name' => 'required|min:3|max:255',
            'last_name' => 'required|min:3|max:255',
            'email' => 'required|email',
            'content' => 'required',
        ];

        $validator = \Validator::make($data, $rules);

        if ($validator->fails()) {
            throw new ValidationException($validator);
        }
    }
}
As you can see, the first argument the Mail :: send () function takes is the name of the email template that will appear in the body of the message. We need to create it in the admin panel. Go to Settings> Email Templates and click the New Template button. Then fill out the form as shown on the screen below:
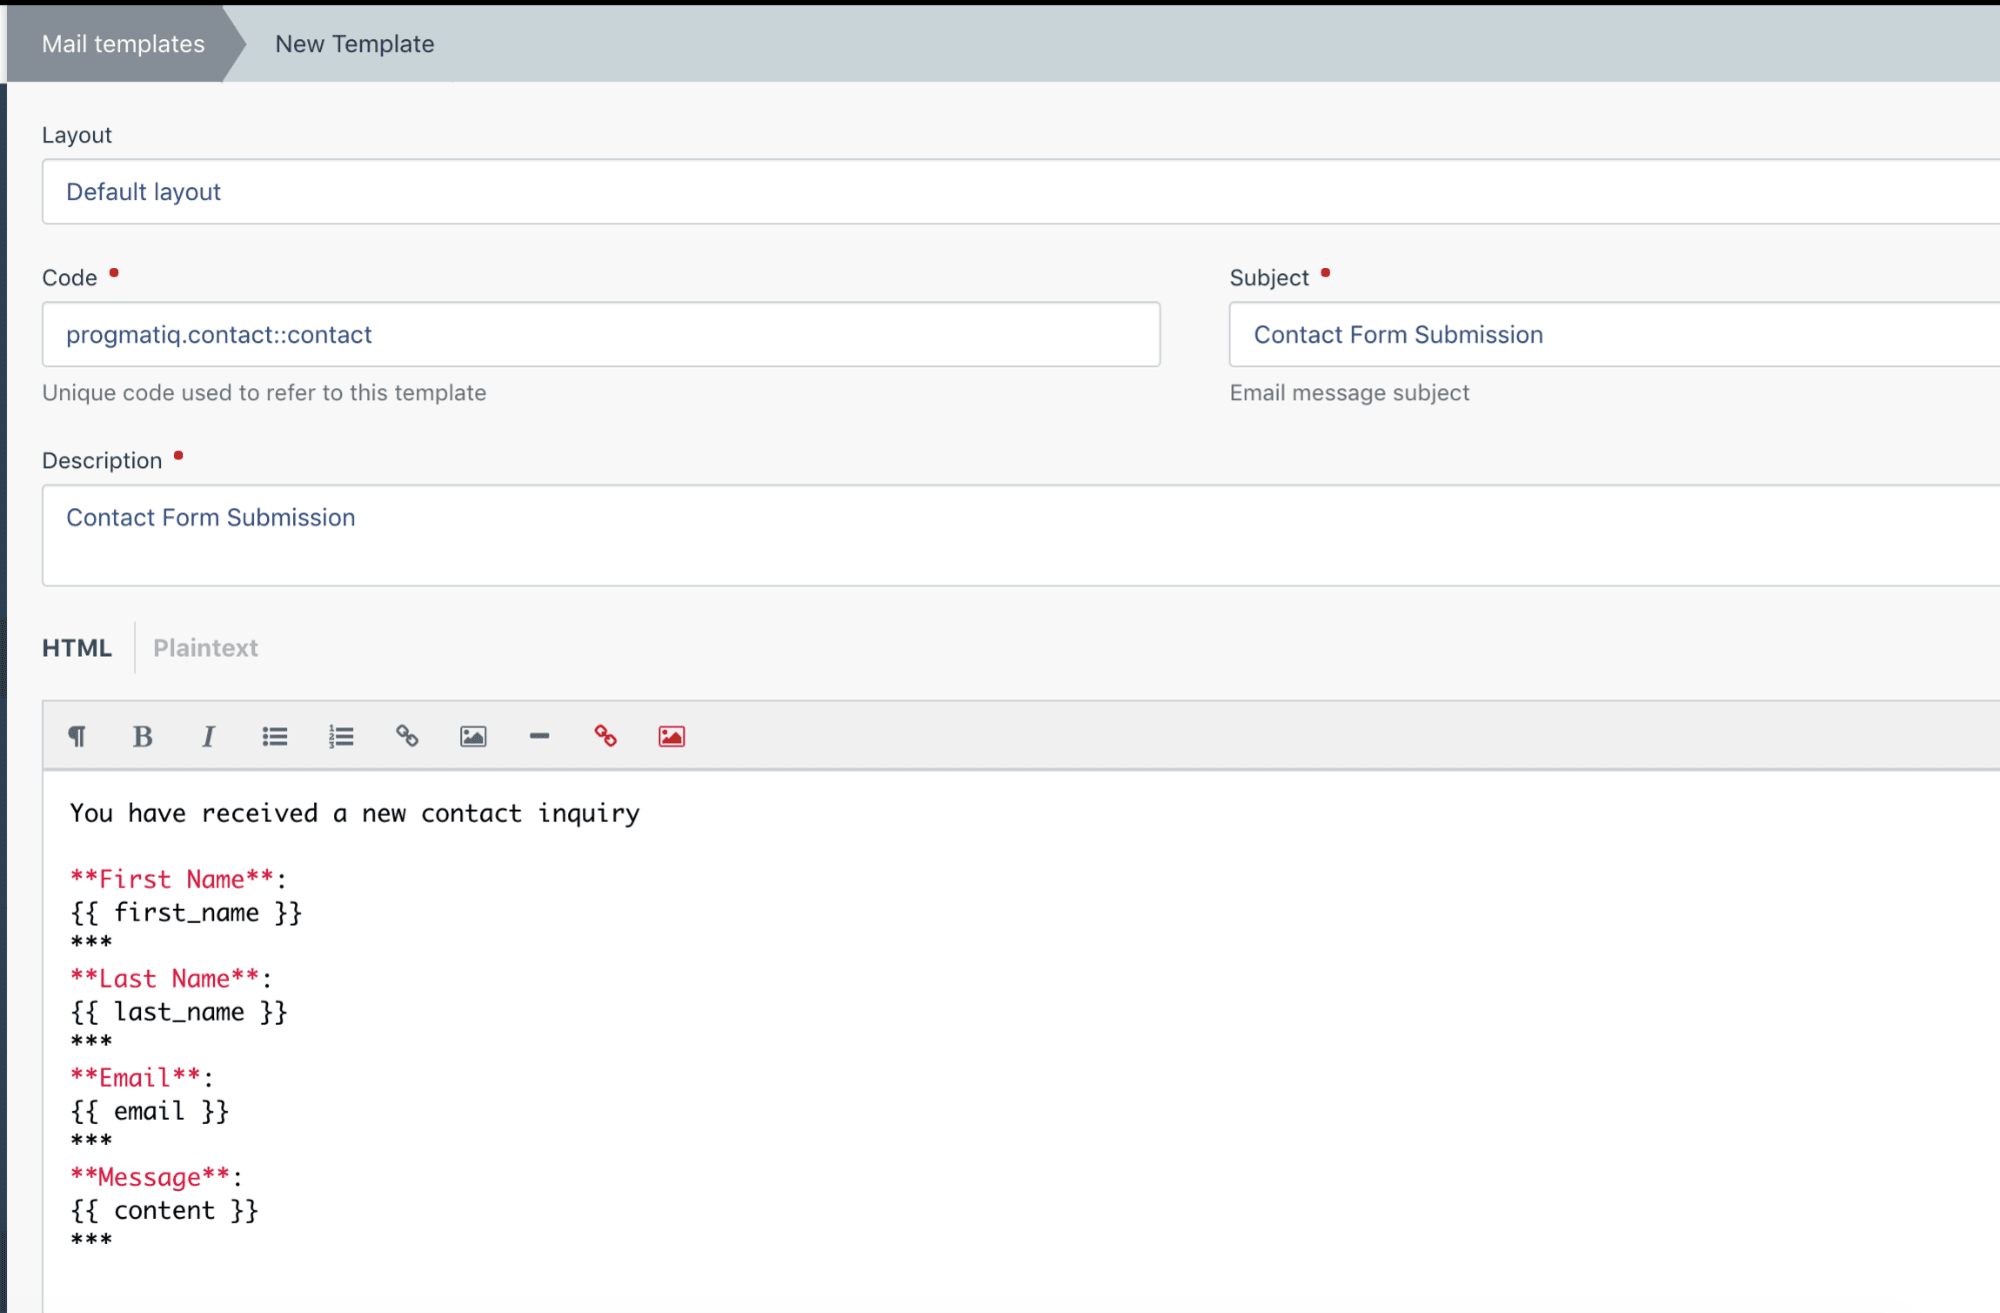
Here is the body of the email we are going to use:
You have received a new contact inquiry
** First Name **:
{{first_name}}
***
** Last Name **:
{{last_name}}
***
** Email **:
{{email}}
** *
** Message **:
{{content}}
***
Now save your email template. The next thing we need to do is set up an SMTP server that will send emails.
Go to Settings> Mail Configuration and fill in all the settings.
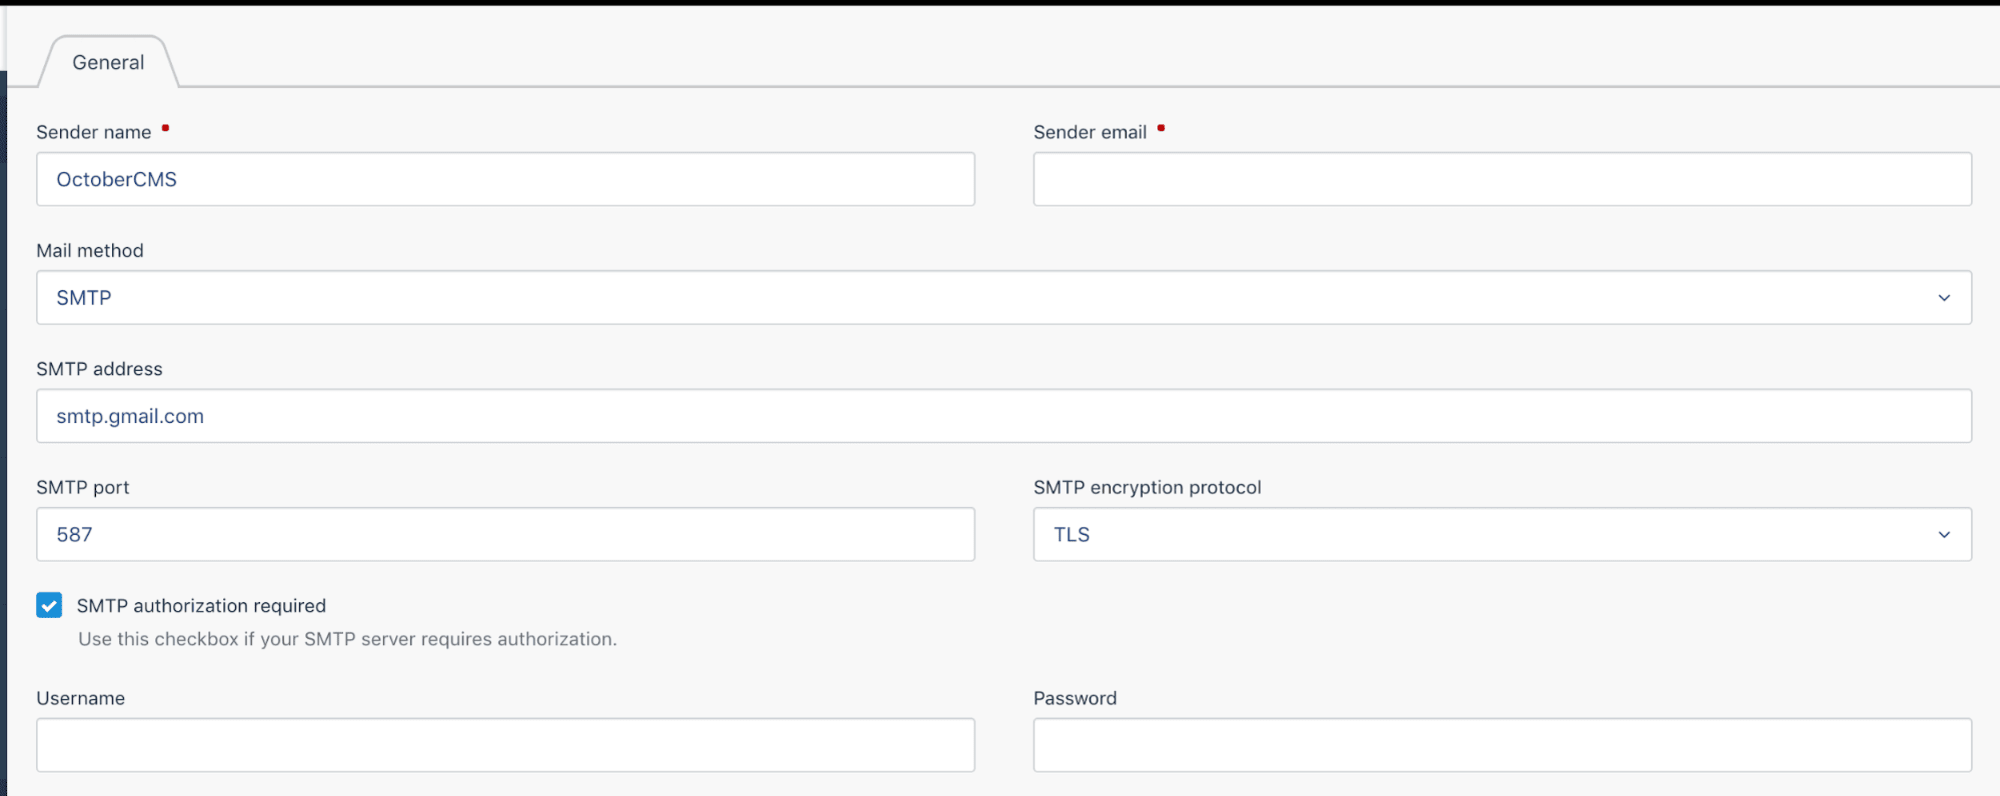
Of course, I won't share my config. Use your own settings.
At this stage, we are ready to start testing the feedback form component.
First, let's test if the validation is working when we leave the Content field blank and enter an invalid email address:
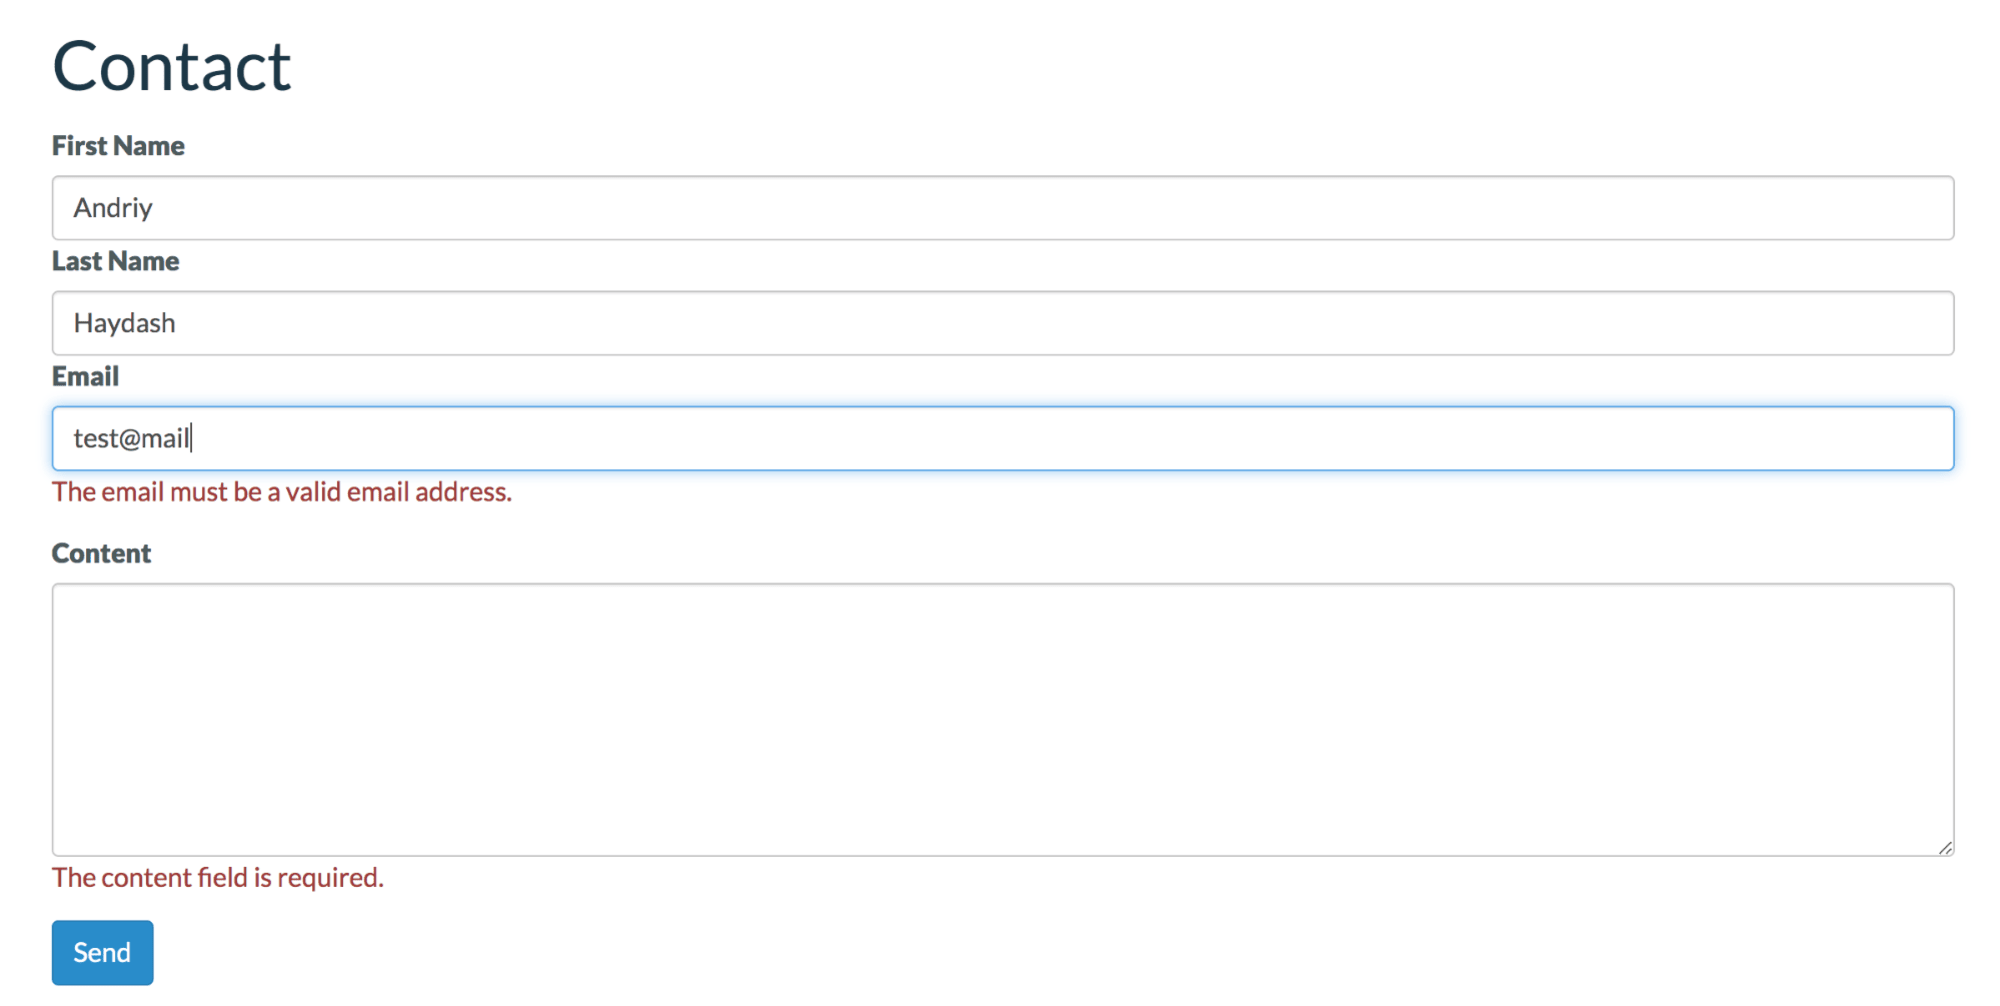
Validation works as expected. Now let's enter the correct details and see if the email is successfully sent to our administrator.
Here is the email that admin@gmail.com will receive:
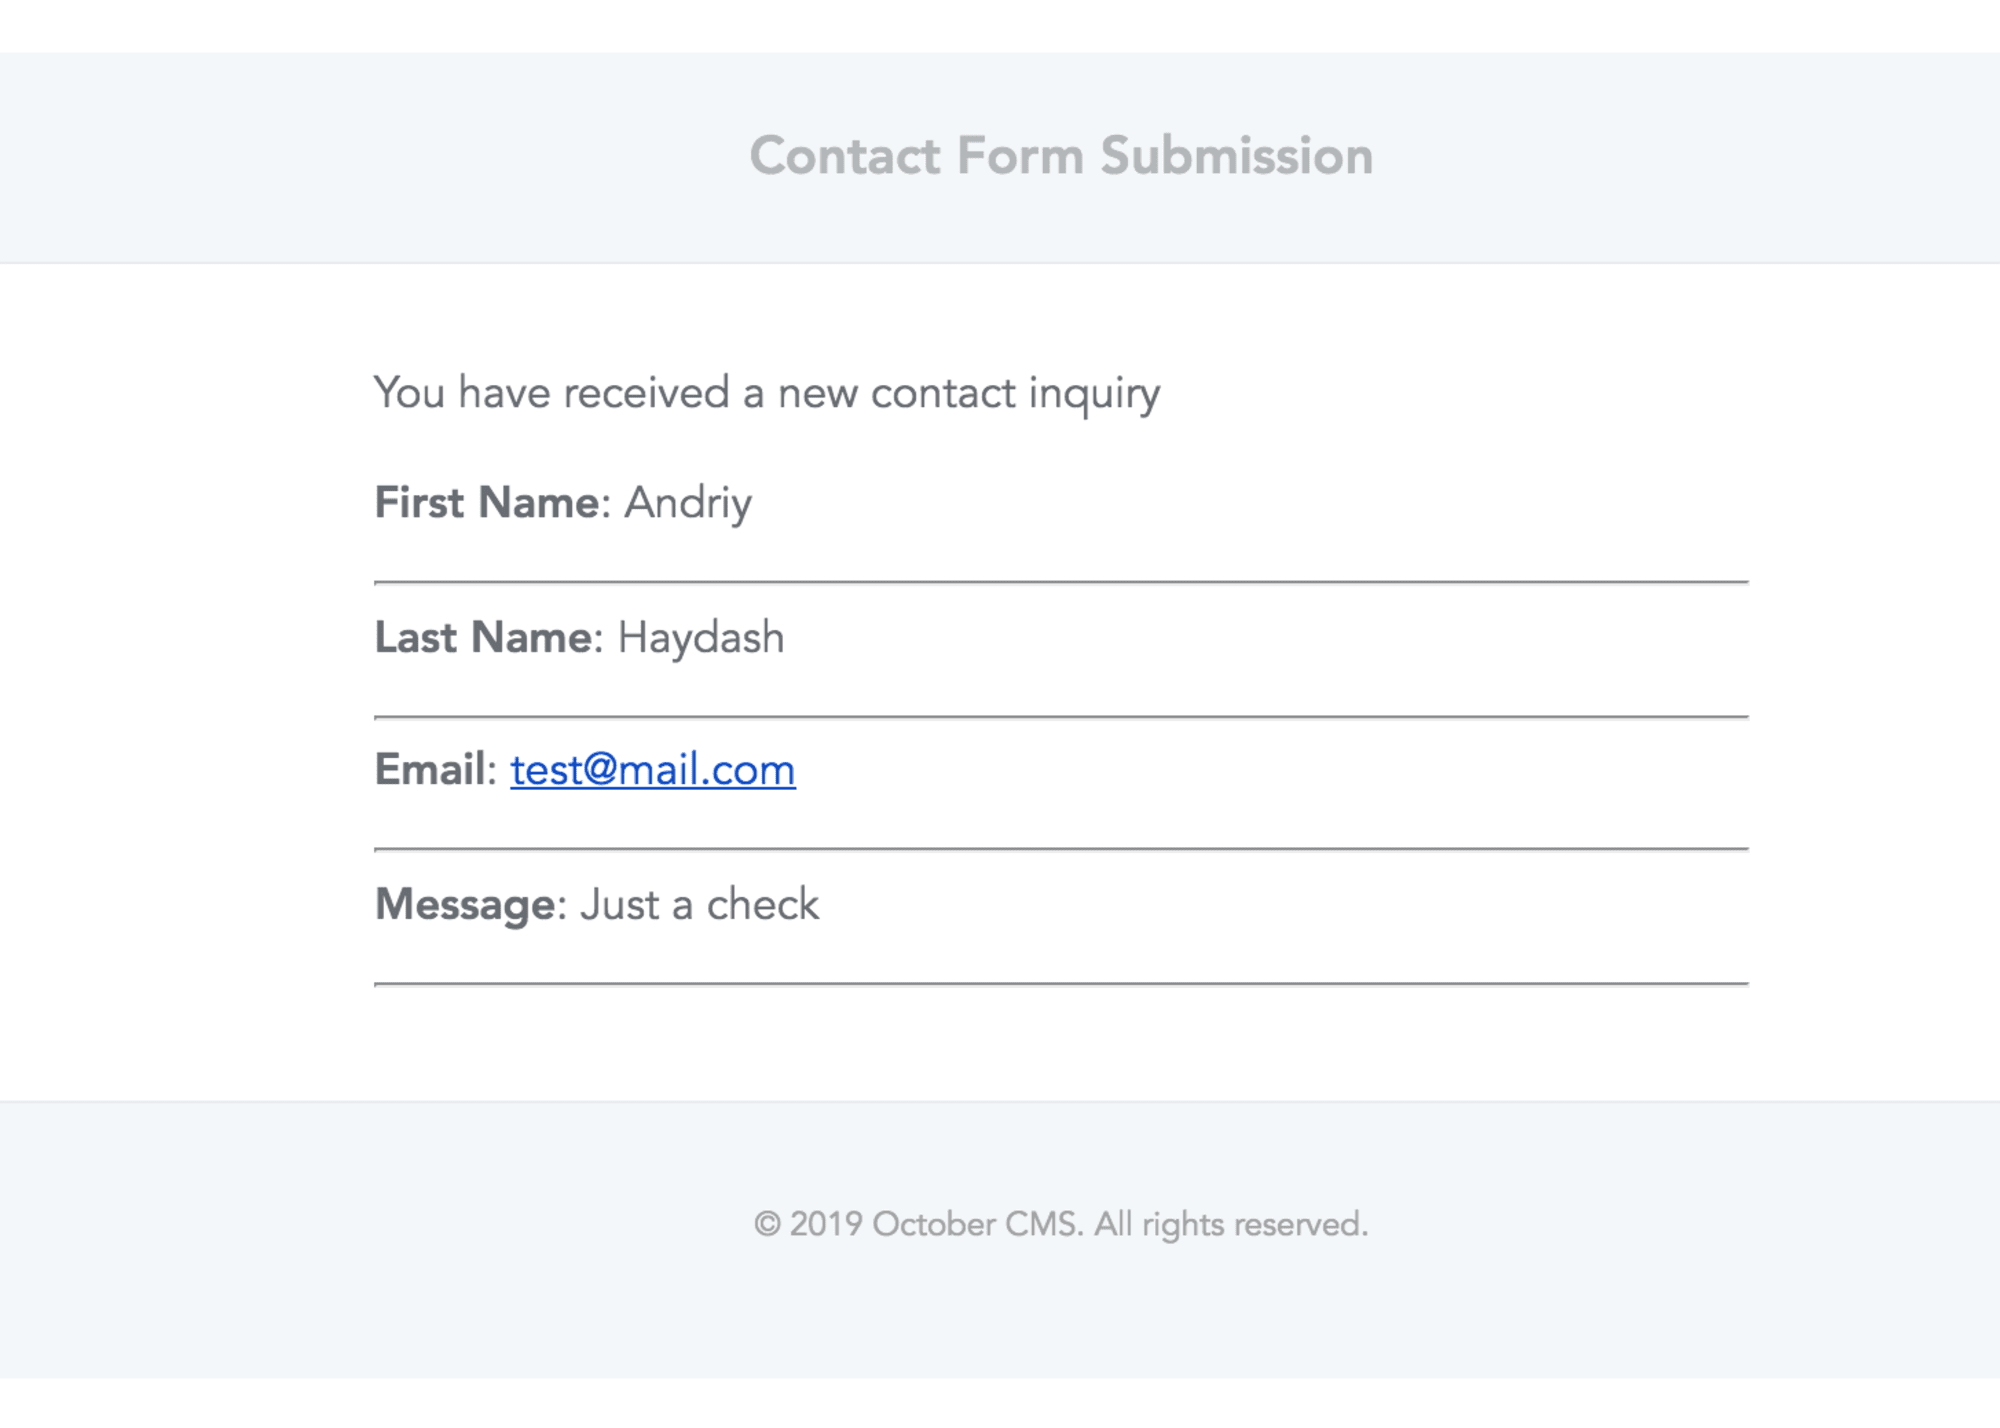
After successfully submitting the form, the user will see the corresponding message:
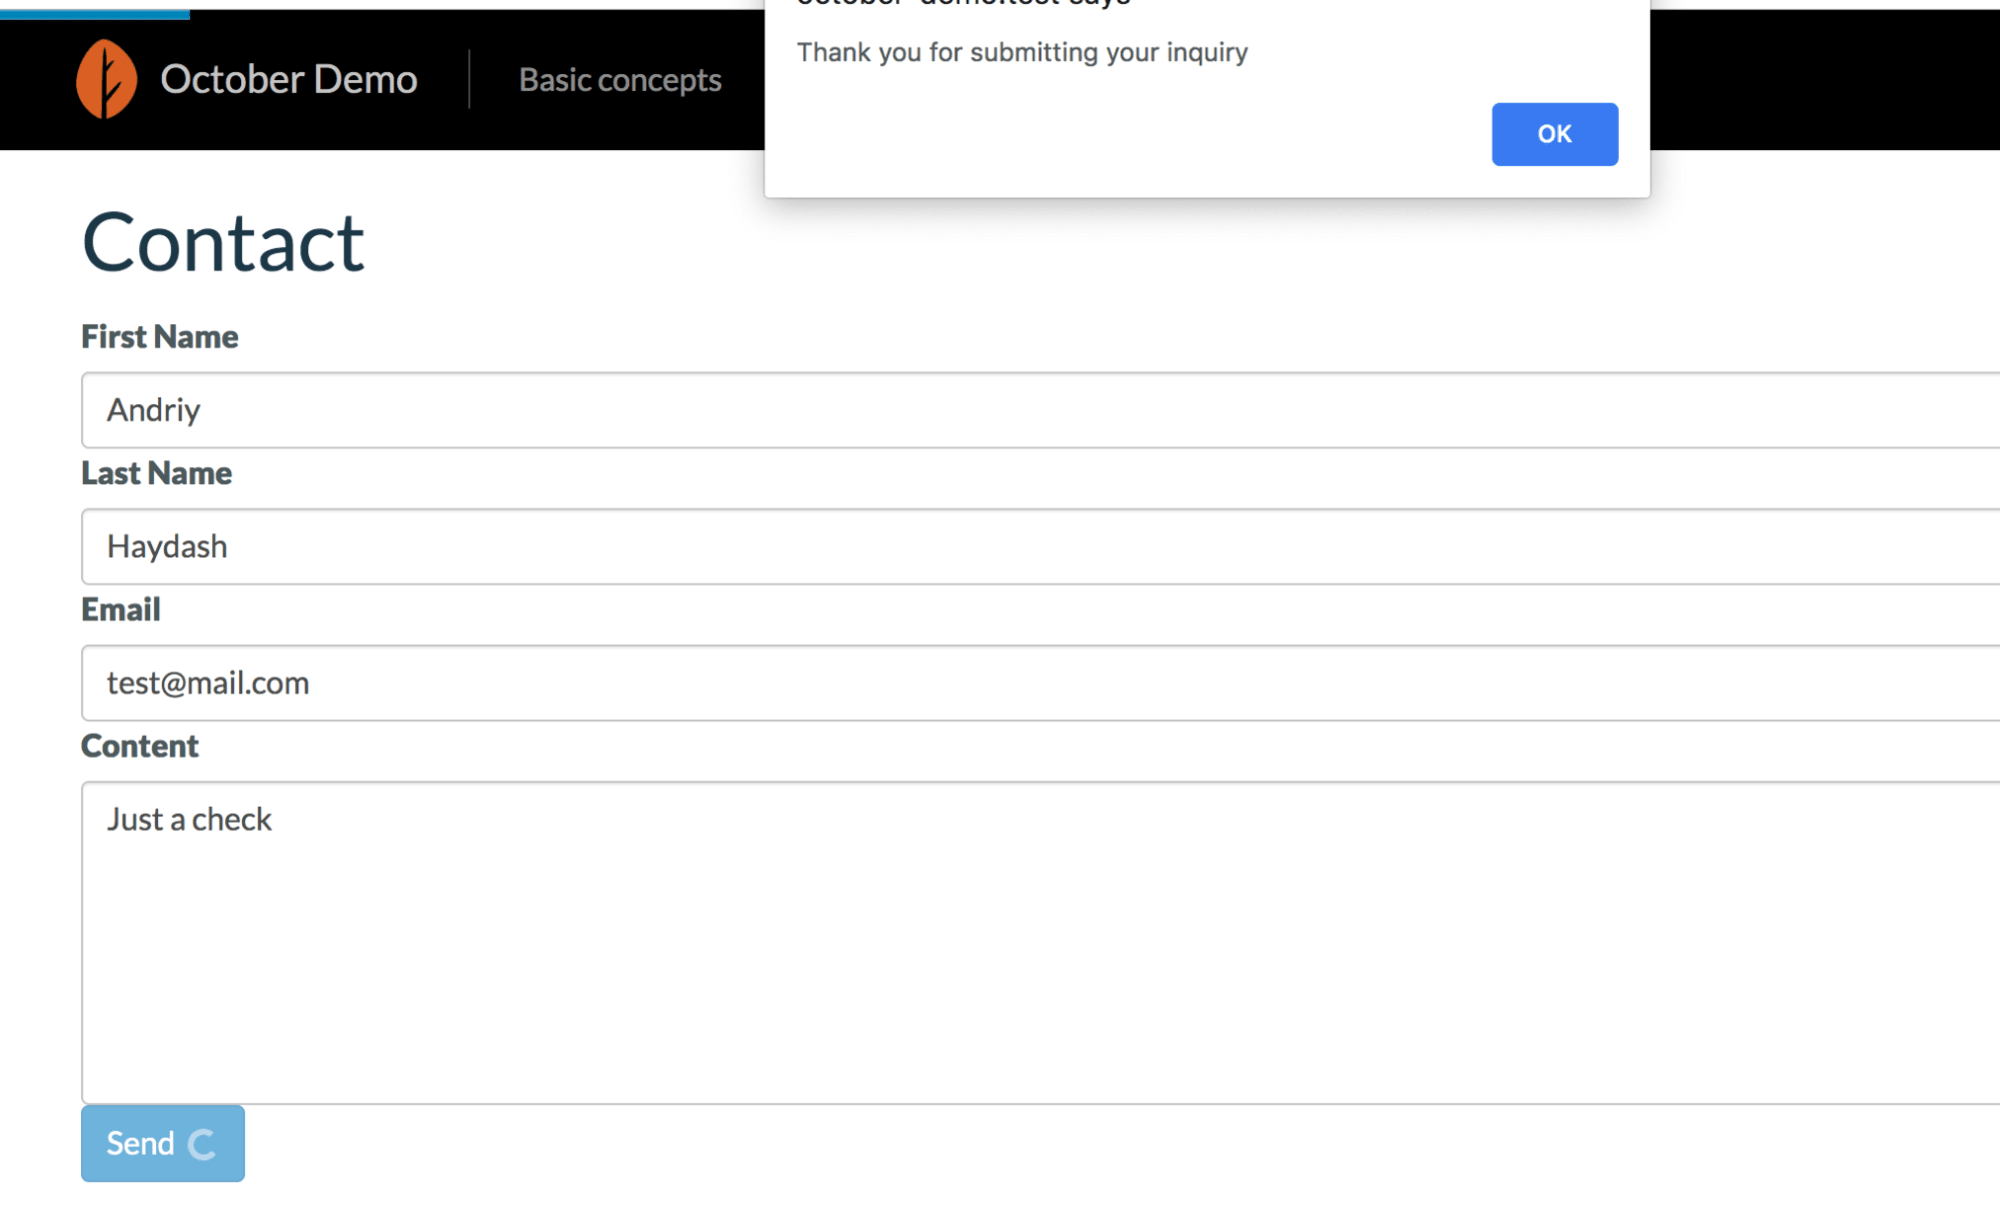
Output
In this article, we looked at what a plugin and component are and figured out how to use them in the October CMS.
Don't be afraid to create your own plugin for your project if you can't find an existing plugin that suits your needs. It is not that difficult and you can completely control it, update and expand it at any time. Even creating a plugin for a simple contact form, like what we did today, can be helpful if you want to integrate it with other services later, such as Mailchimp or HubSpot.
I hope this article was helpful to you. If you have any questions, do not hesitate to ask them in the comments.