In Metaphysical Philosophy Substance is the immutable essence of things
Let's talk about texturing. The quality and wow effect of any 3D image, from a simple render to cinematic special effects or virtual game worlds, directly depends on how well the textures are made, selected and applied. With textures - as with repairs: a good finisher will make a piece of candy from the most murdered room, a bad painter with a bucket of green or gray paint will turn any masterpiece of architecture into a dull nothing - remember the housing and communal services art around us. Therefore, talking about the importance of texturing is meaningless, but about methods and techniques - very useful.
Adobe has recently been offering a suite of complementary tools for texturing 3D models under the general name Adobe Substance. Substance? Yes, yes, somewhere we heard it before ... Oh wait! This is Allegorithmic, known since 2003, which in 2019 joined the galaxy of creative tools from Adobe.
The main feature of all this toolkit is procedurality, which makes the texturing process as flexible as possible. Adobe Substance includes:
- Substance Painter - a program for texturing by painting on a 3D model in realtime using prepared materials;
- Substance Designer - creating materials and texturing using nodes (nodes);
- Substance Alchemist - organizing collections of materials, working with ready-made textures and creating textures from photos and scans;
- Substance Source is a library of ready-made materials.
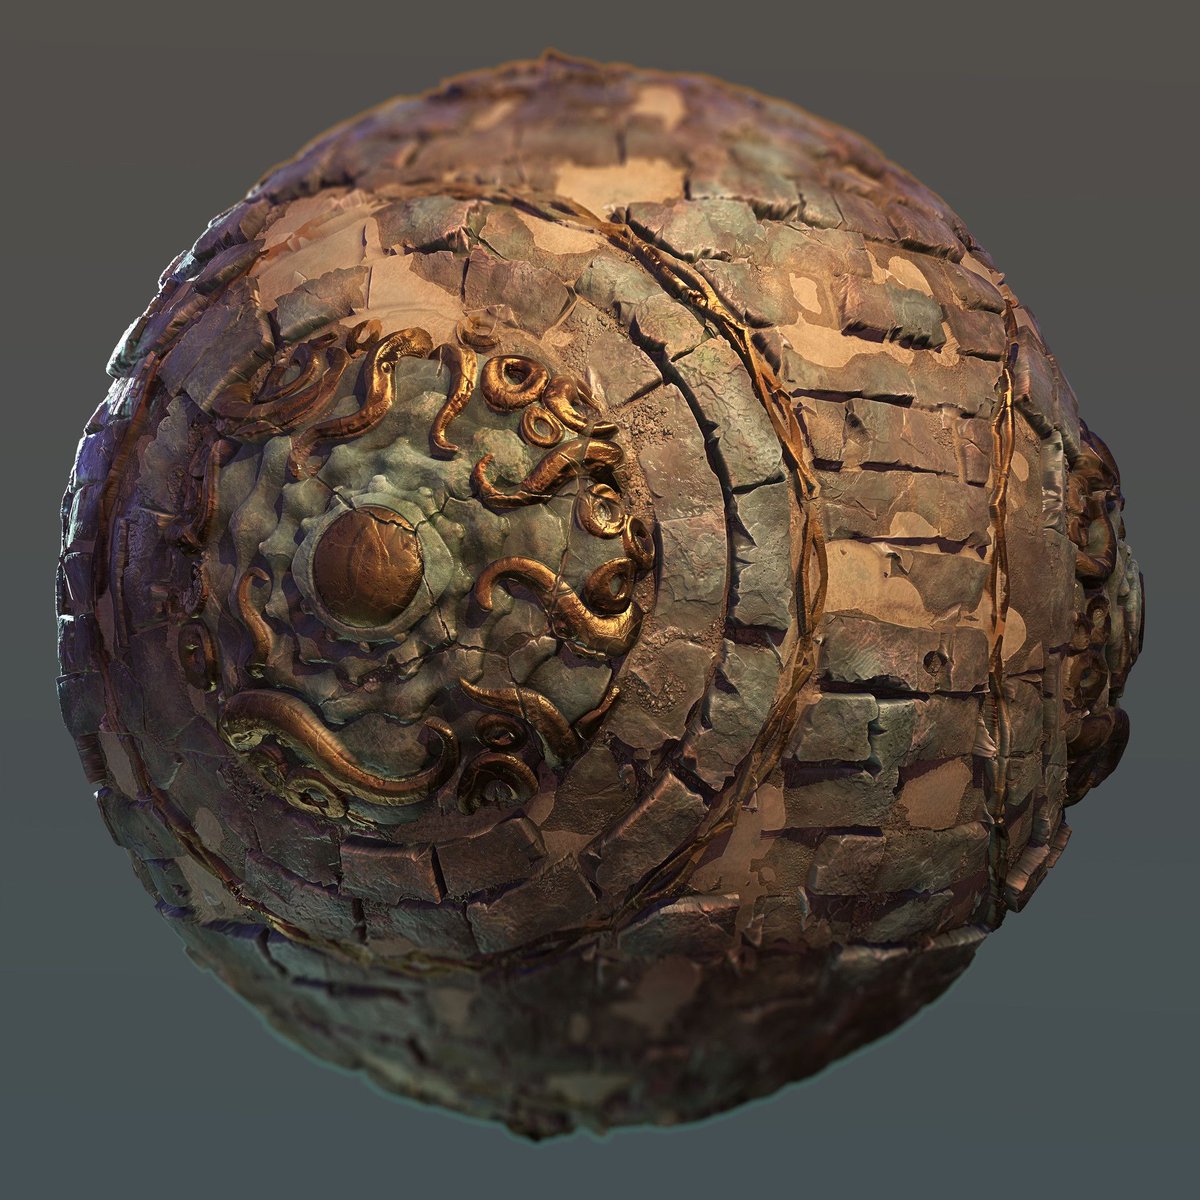
Today we will talk about the main tool for creating textures from scratch - Substance Designer - using the example of generating a rusty metal texture.
Substance Designer creates materials procedurally, which allows complete control and non-destructive editing of the finished material at any stage of the workflow. In addition, he is able to:
- "Bake" textures;
- Generate textures from photographs (scan-processing);
- Create HDRI;
- Texture models.
How does Substance Designer work?
Those who have tried texture in Photoshop know that almost everything there is built on layers and their property modifiers. In our case, the system of layers with modifiers has not gone anywhere, being transformed into nodes connected to each other in logical chains:
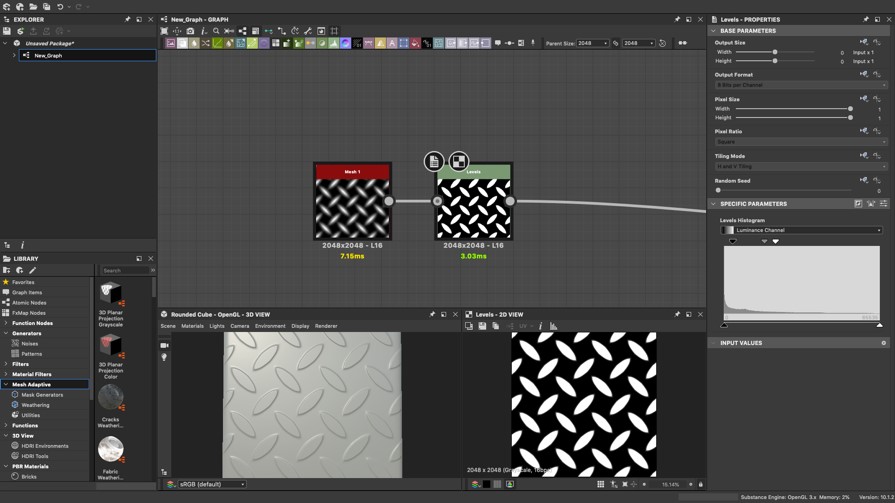
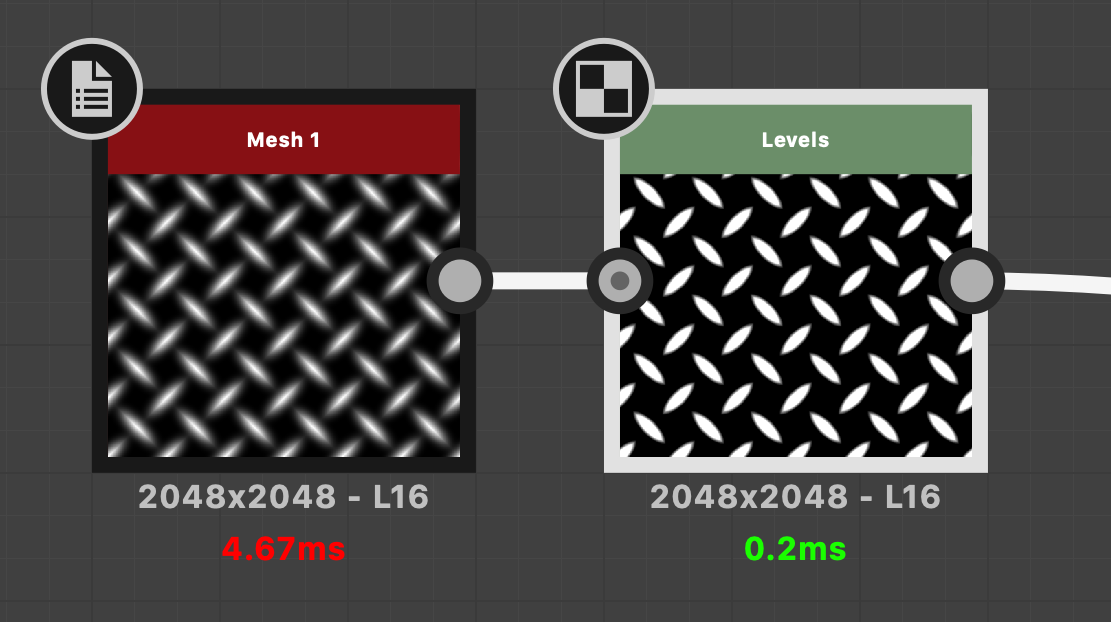
Do you recognize Levels from Photoshop?
Nodes are a schematic representation of the entire sequence of actions for generating a texture. Each node performs some action on the data passing through it. The result at the output of one node is fed to the input of another (or several), and we form a logical sequence of actions that leads us to the finished result. The node system is not at all as creepy as it might seem at first glance:

The main quality of the node system is non-destructive editing: the texture is generated in real time, and when any parameter of any node is changed, all subsequent ones are immediately rebuilt based on the changed input data. Thus, we manage the process in real time, making it incredibly flexible.
Nodes are divided into several types:
- Filters;
- Functions;
- Generators.
A lot of nodes is good, but how does this help to make the material?
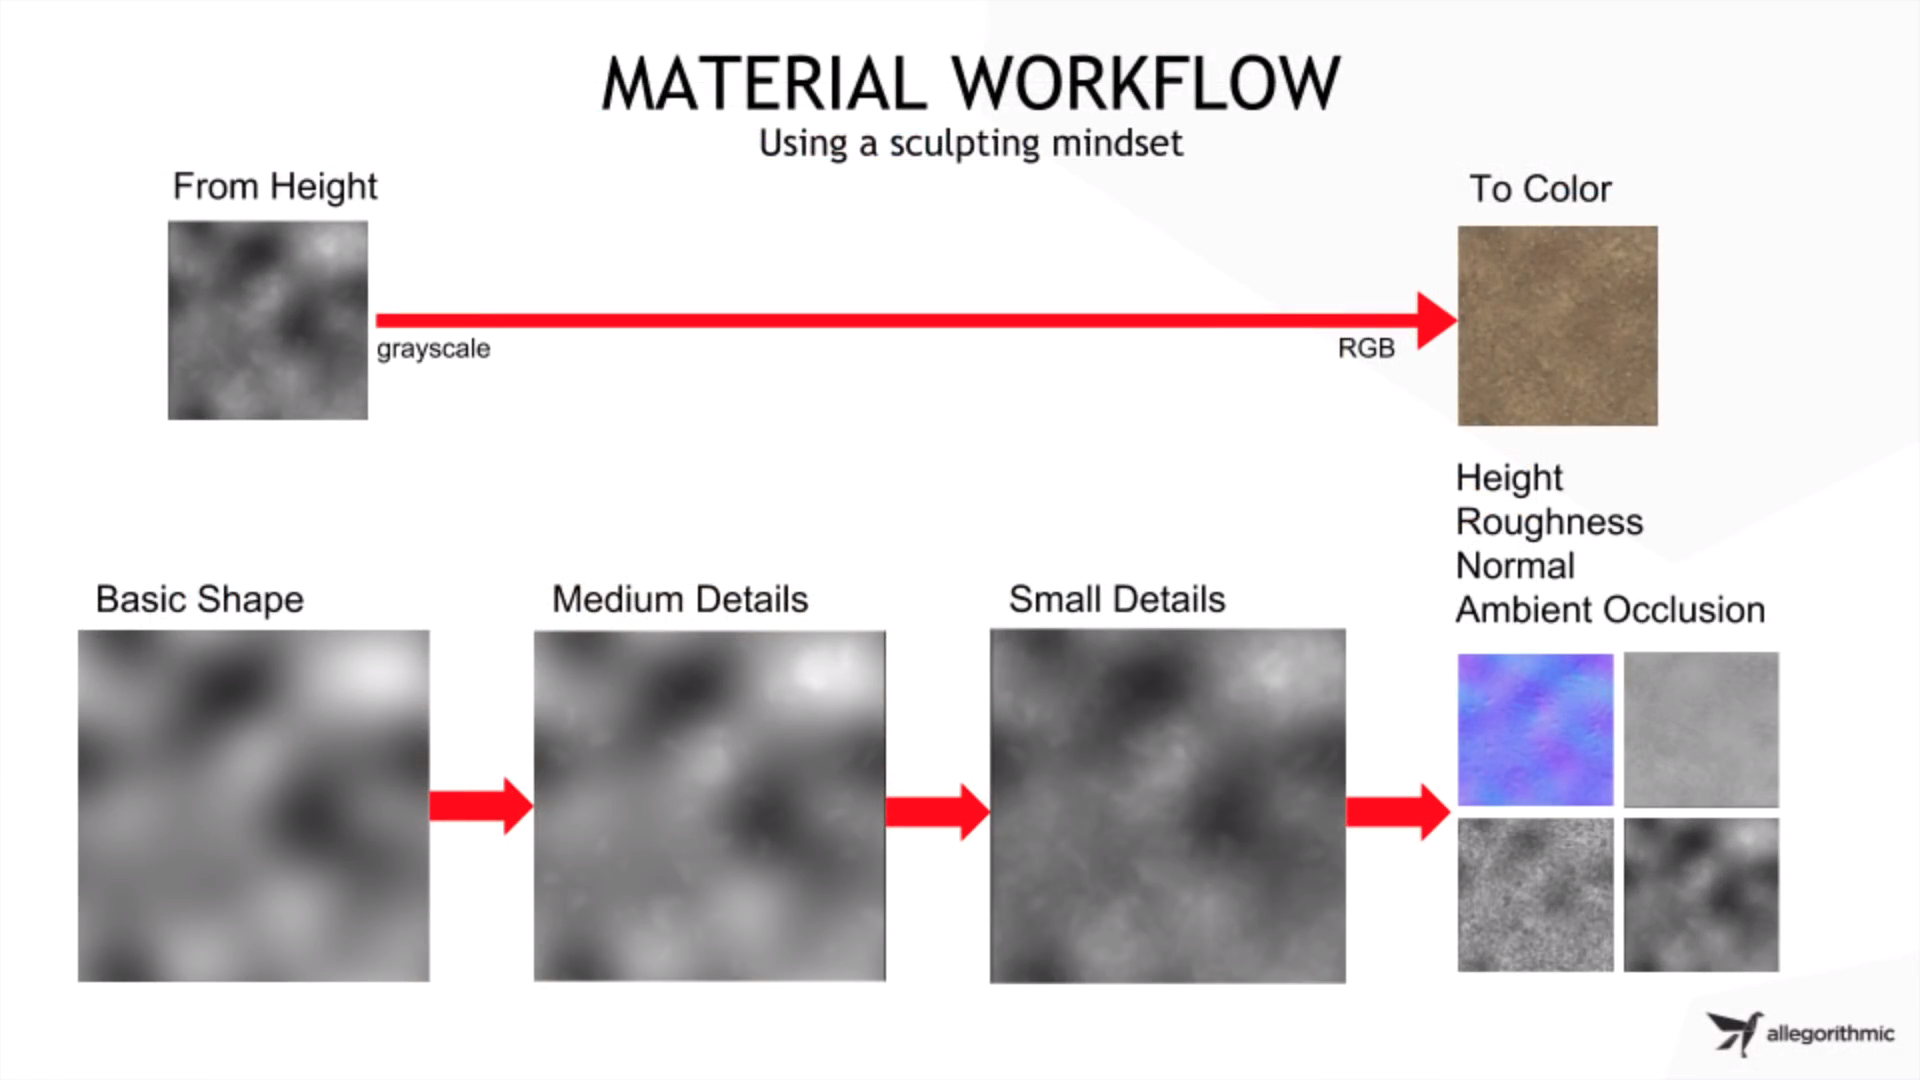
Knowing the variety and "behavior" of the nodes, we can display the groups that make up our structure:
- A pattern that defines the texture itself (pattern);
- Large details;
- Small parts;
Where to begin?
To work with Substance Designer, you will need a basic knowledge of PBR texture maps, a reference of what you will draw, and an understanding of node management tools. If texture maps and PBR types can be briefly described with the picture below, then it is worth dwelling on the tools in more detail.
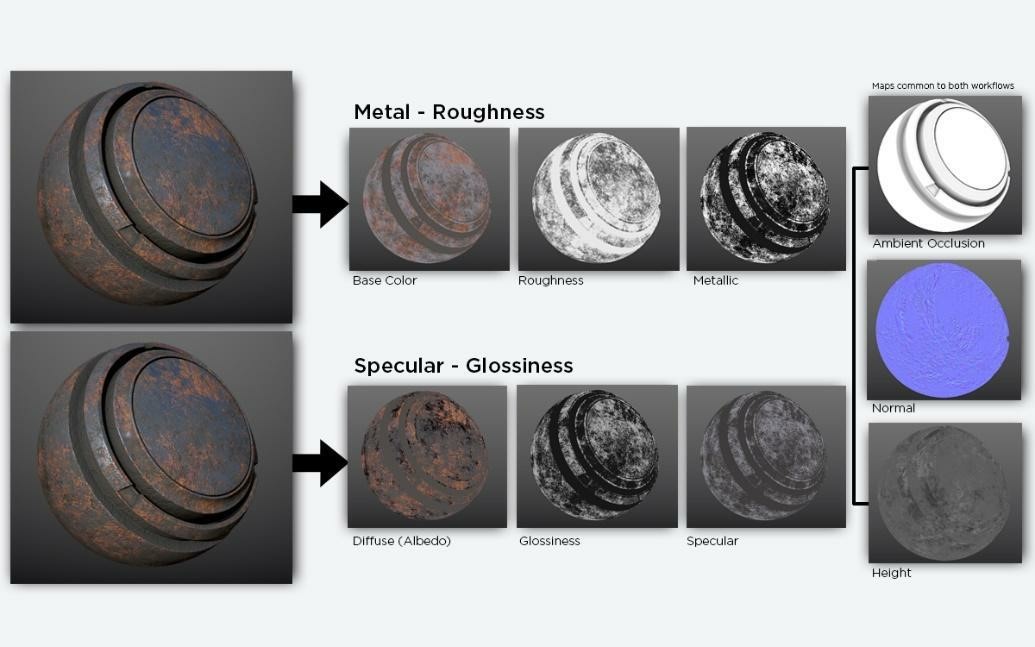
Source: www.substance3d.com/books/pbr-guide
What nodes do you need?
The first on our list is the already mentioned Levels node . It gives control over contrast.
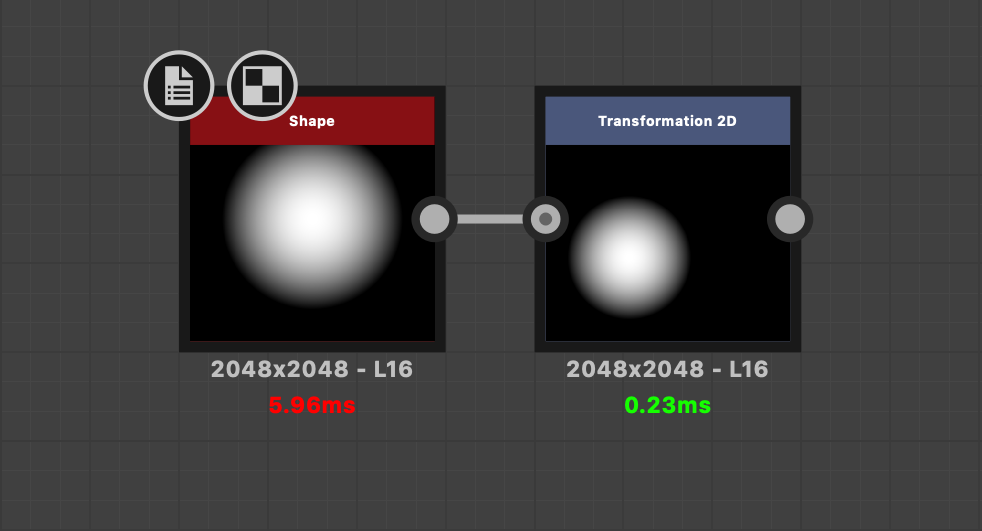
The Transformation 2D node allows you to move the pattern / pattern / texture.
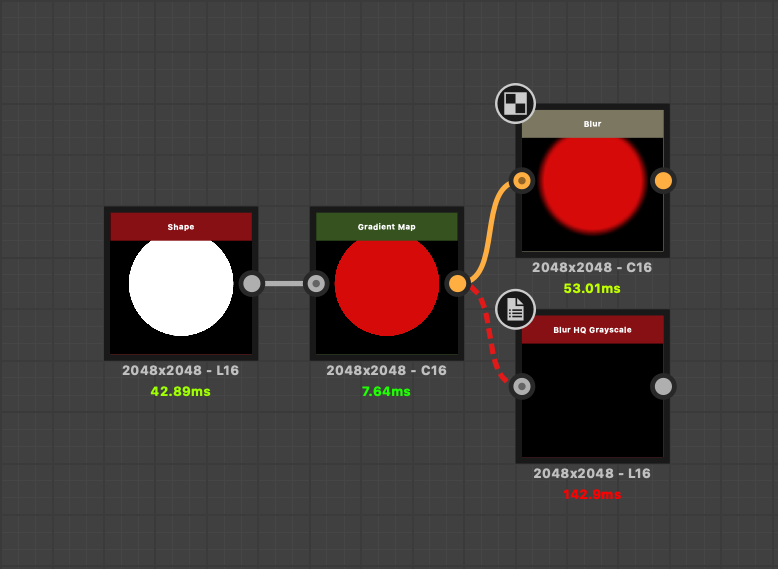
The Blur and Blur HQ Grayscale / Color nodes let you blur the image, which is very useful for creating chamfers ( blur + curve ). The differences can be seen from the name: if the banal "defocus" is enough, use the usual Blur , but if you need fine tuning, you cannot do without Blur HQ Grayscale / Color . Noda Grayscale not working with color! For full color data use Blur HQ Color .
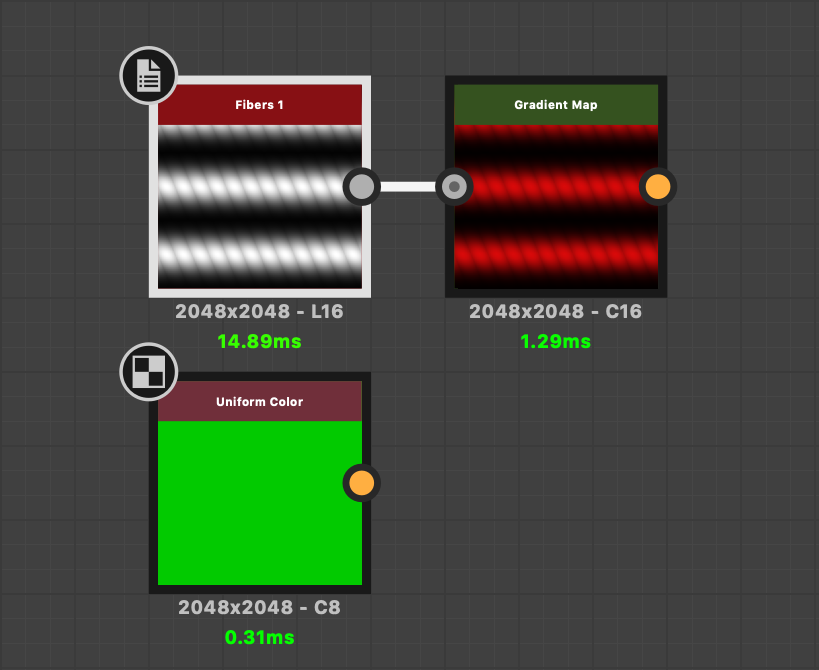
Noda Gradientand Uniform color . The first allows you to paint the heightmap in several colors with gradients, and the second creates a solid fill.
Well, the most essential tool is the Blend node . Receiving data from several sources as input, it allows you to mix them according to certain algorithms, forming your patterns and patterns. Functionally, it performs the same tasks as the layer blend modes in Photoshop.
Creating a Material in Substance Designer
First of all, you need to decide which method of generating the material will be used. In our case, we will select the PBR (Metallic / Roughness)
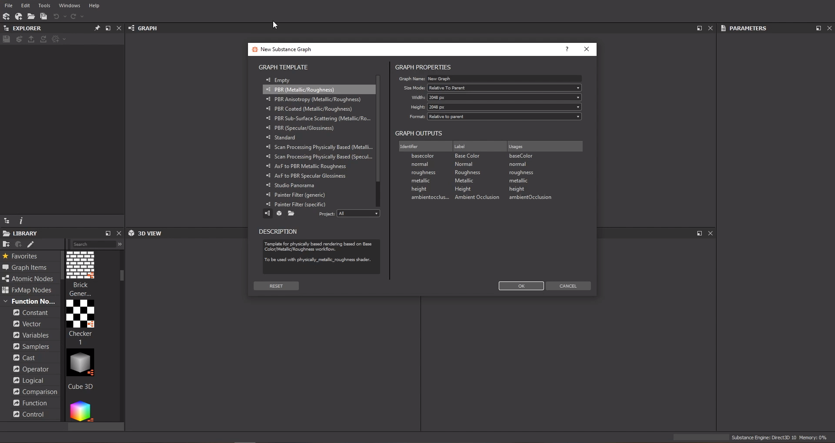
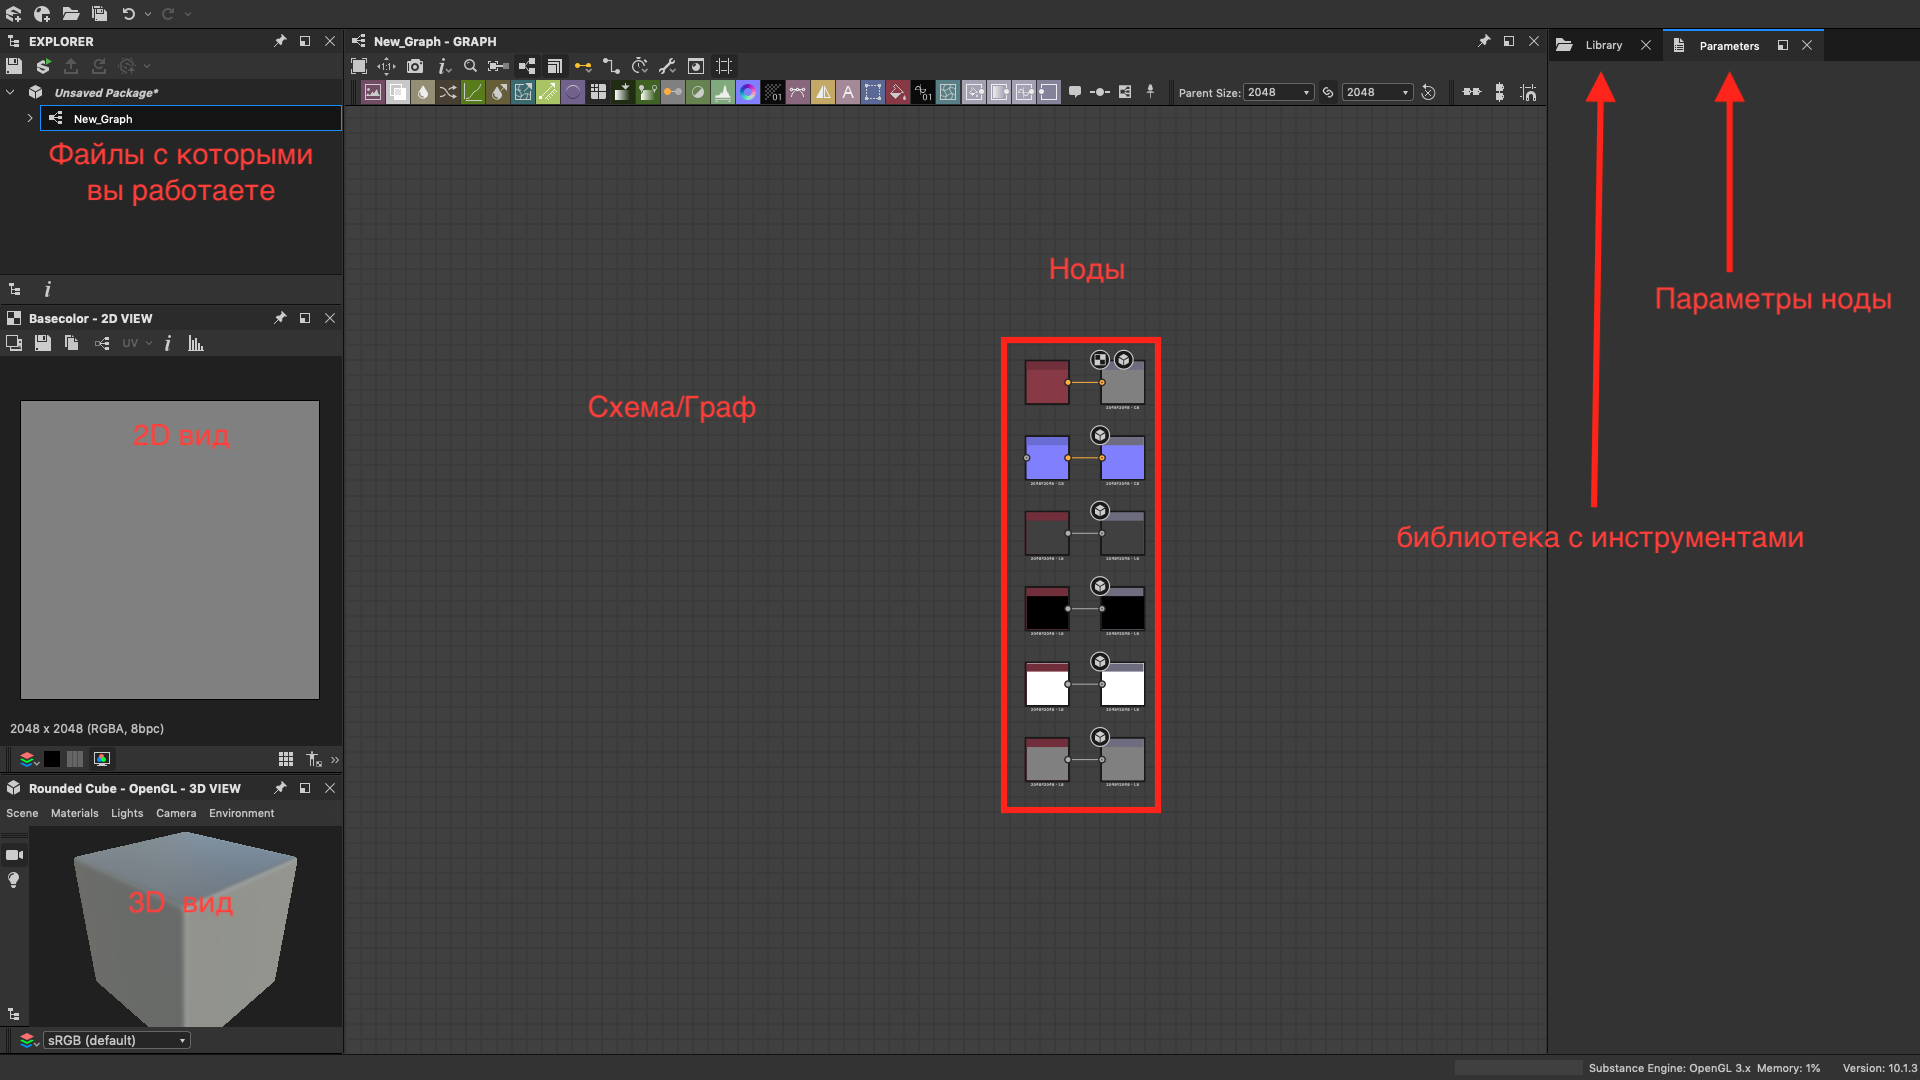
template : After selecting the template in the Graph window , nodes appeared that are responsible for the final appearance of the texture:
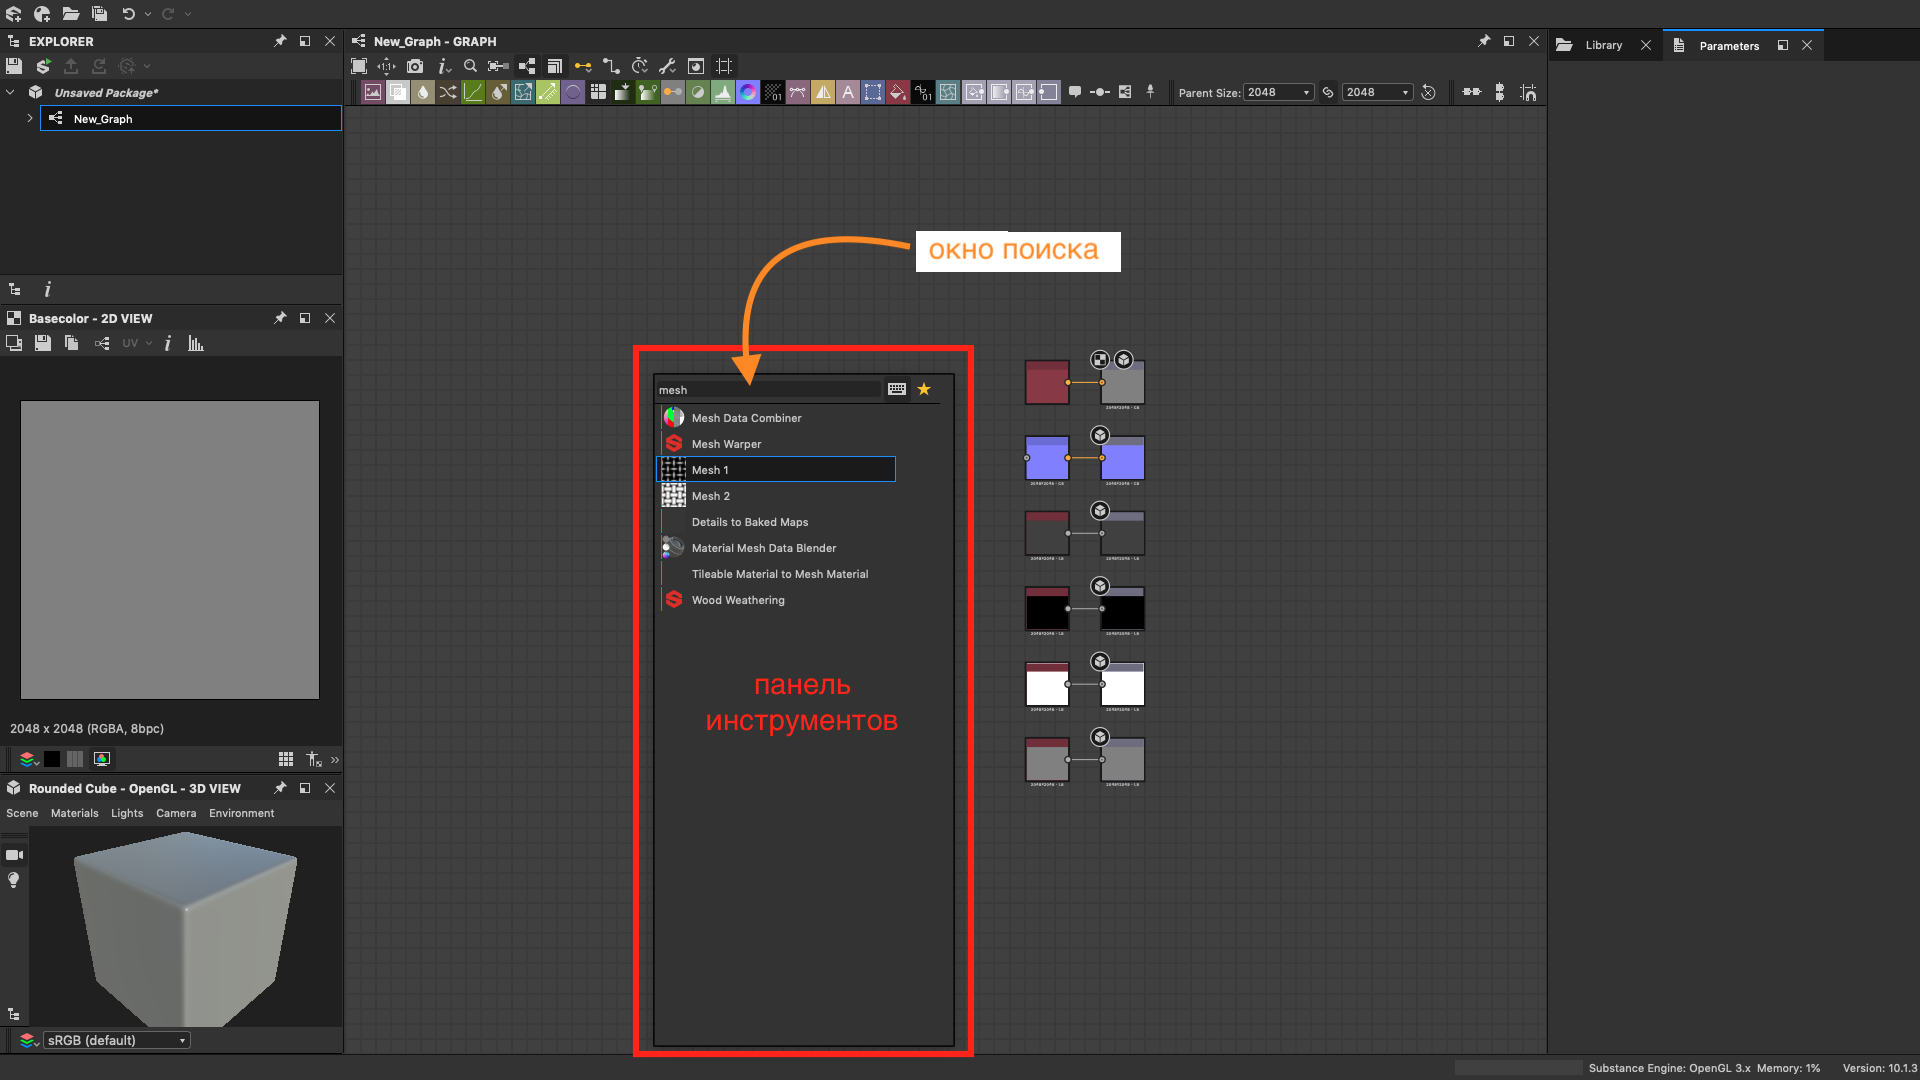
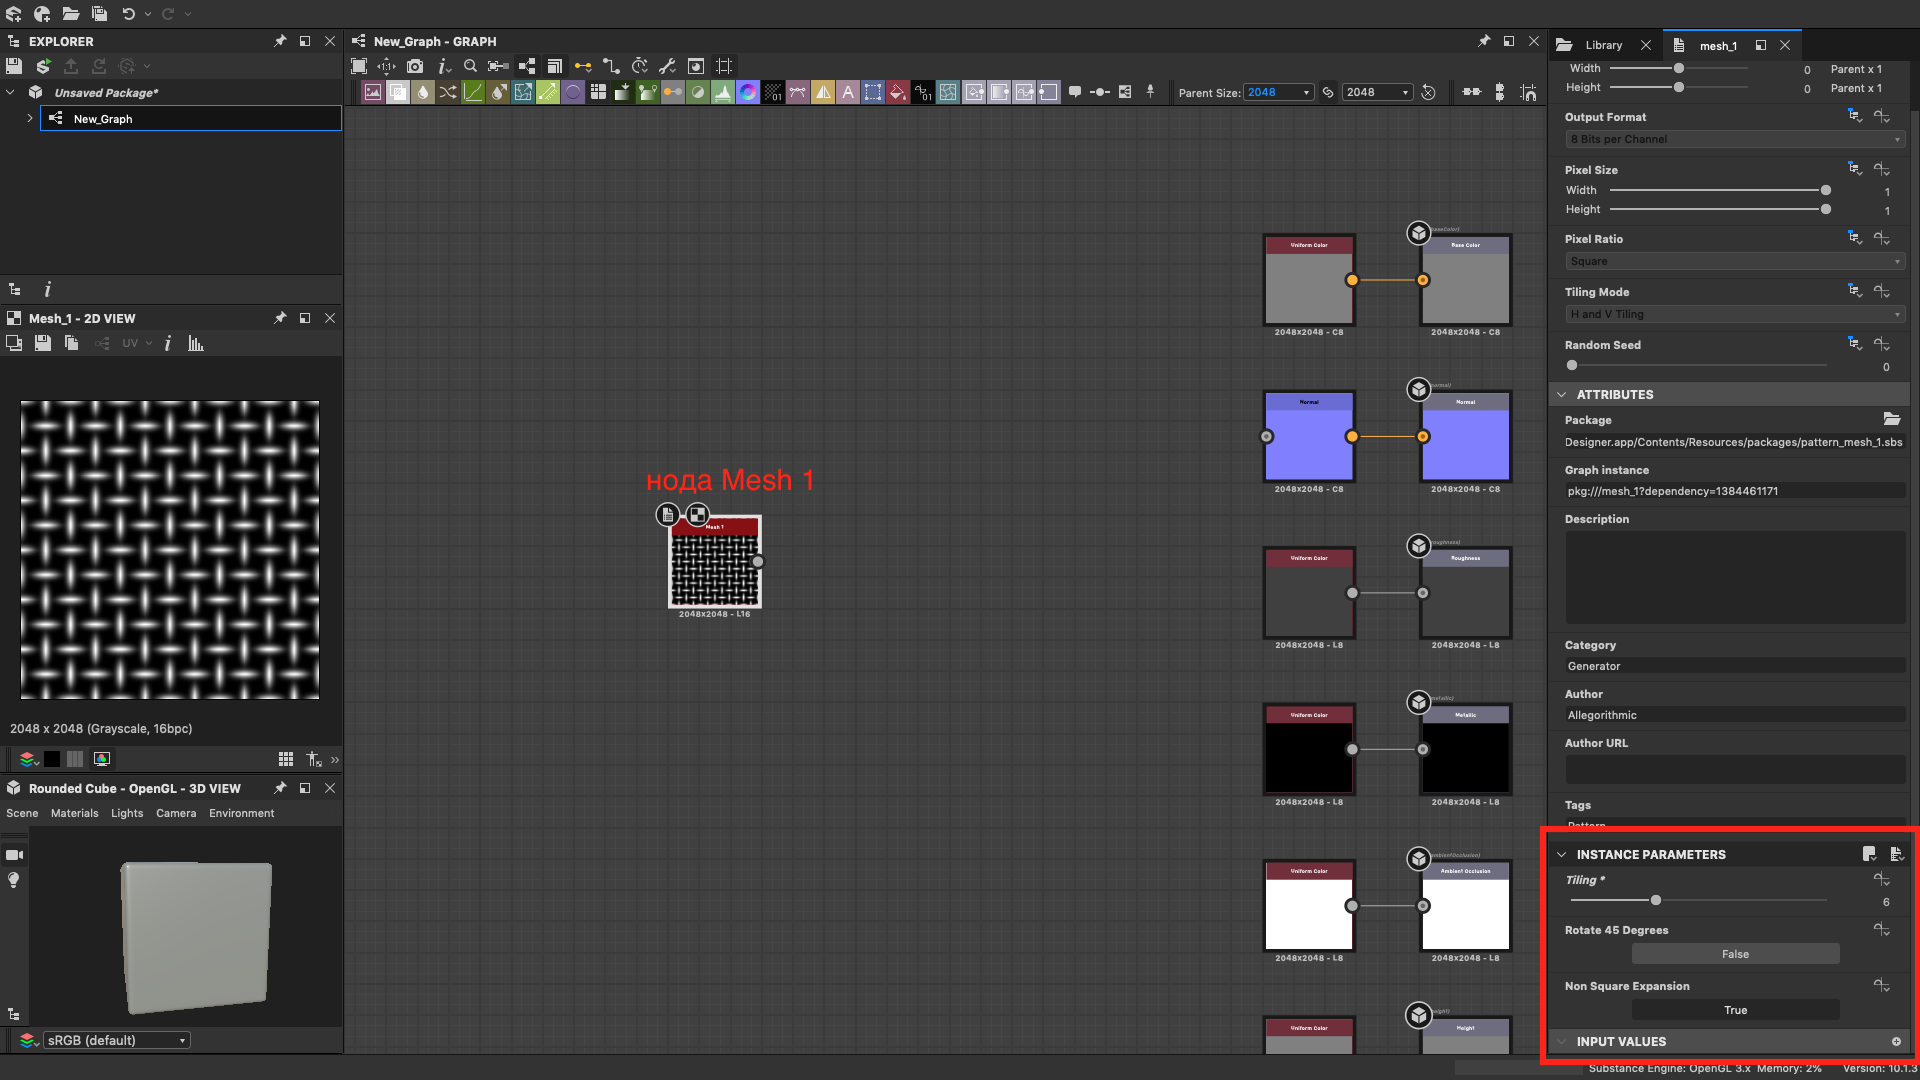
By hovering over the Graph window and pressing TAB or "space", you will get a menu with tools and a search bar ... Let's look for the Mesh 1 node in it : enter a name and press Enter.
Selecting the Mesh 1 node with a single click, we will see its parameters. If you double-click, the node will be displayed in the left column in the 2D Viewport. Edit the parameters: on the instance parameters tab, change the tiling to 6 and rotate 45 degrees totrue :
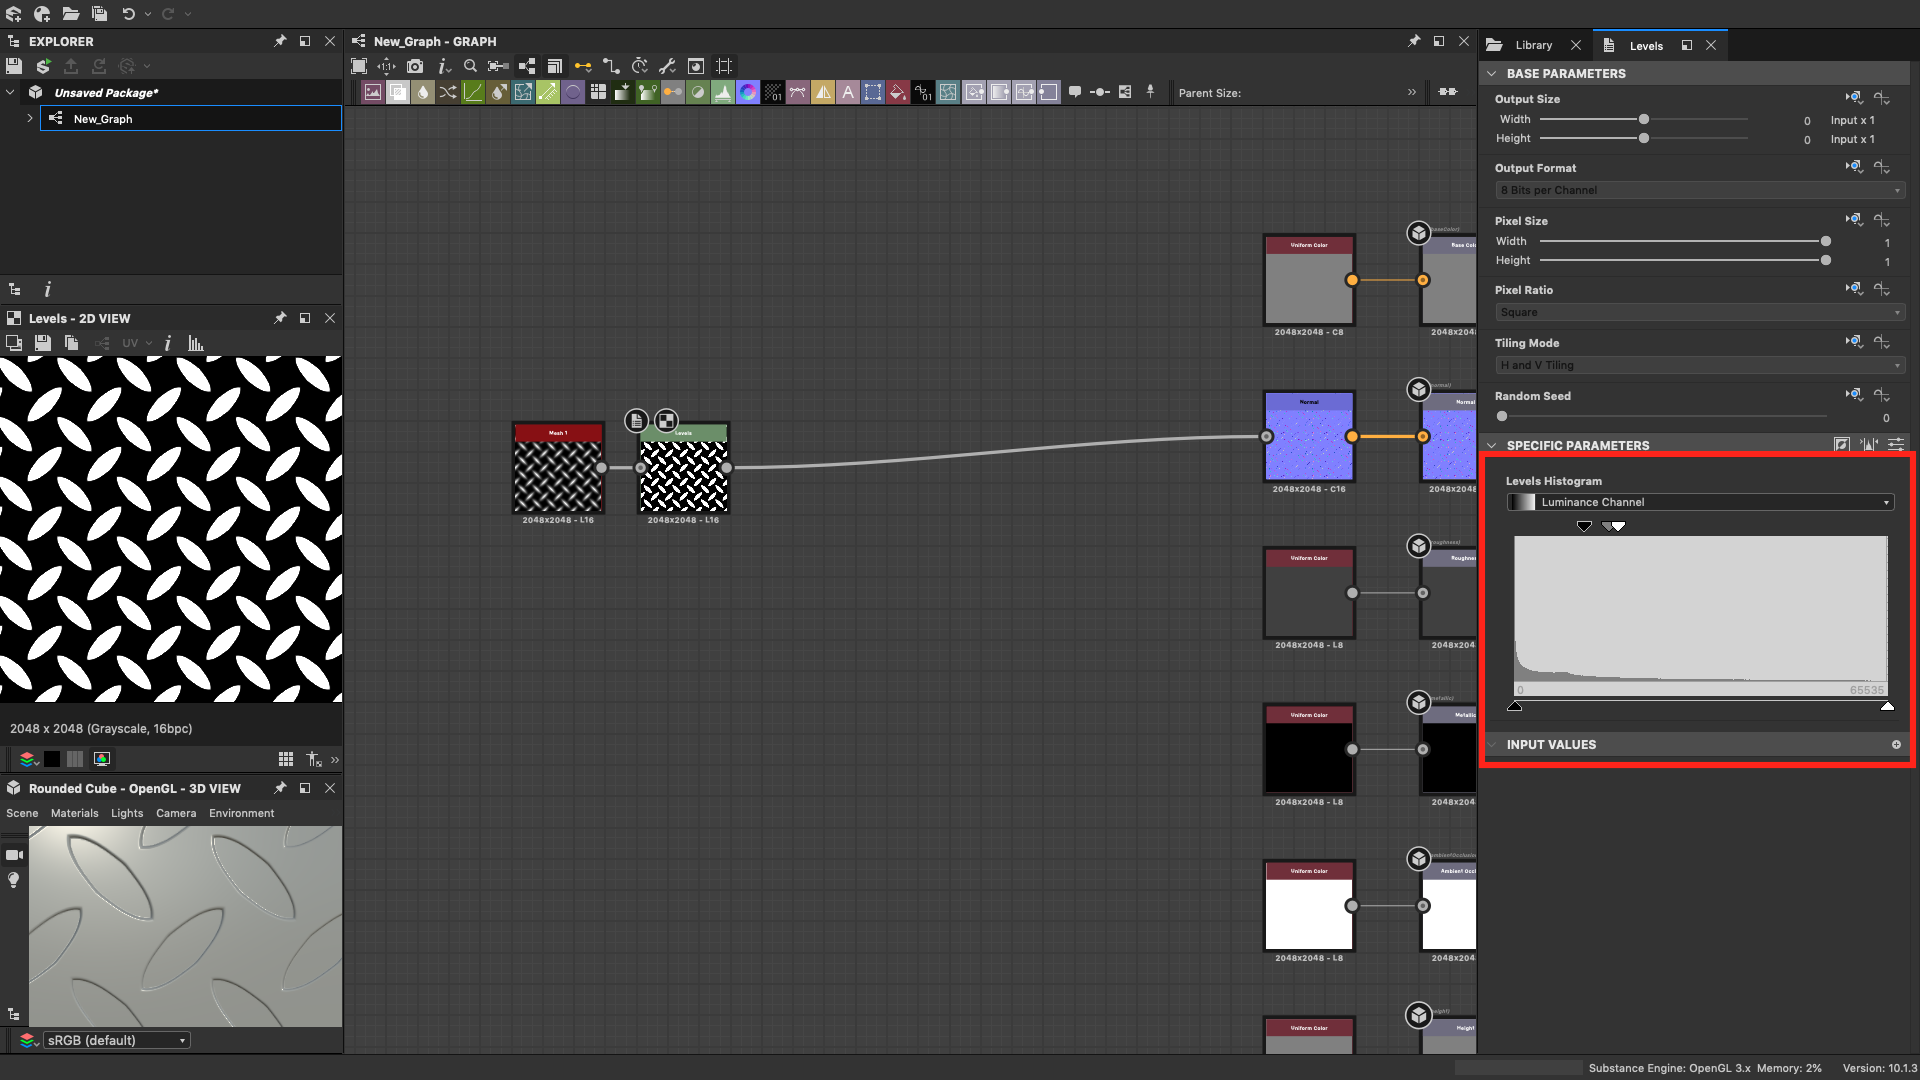
Add a Levels node to make our pattern less embossed. Its settings are shown in the picture below.
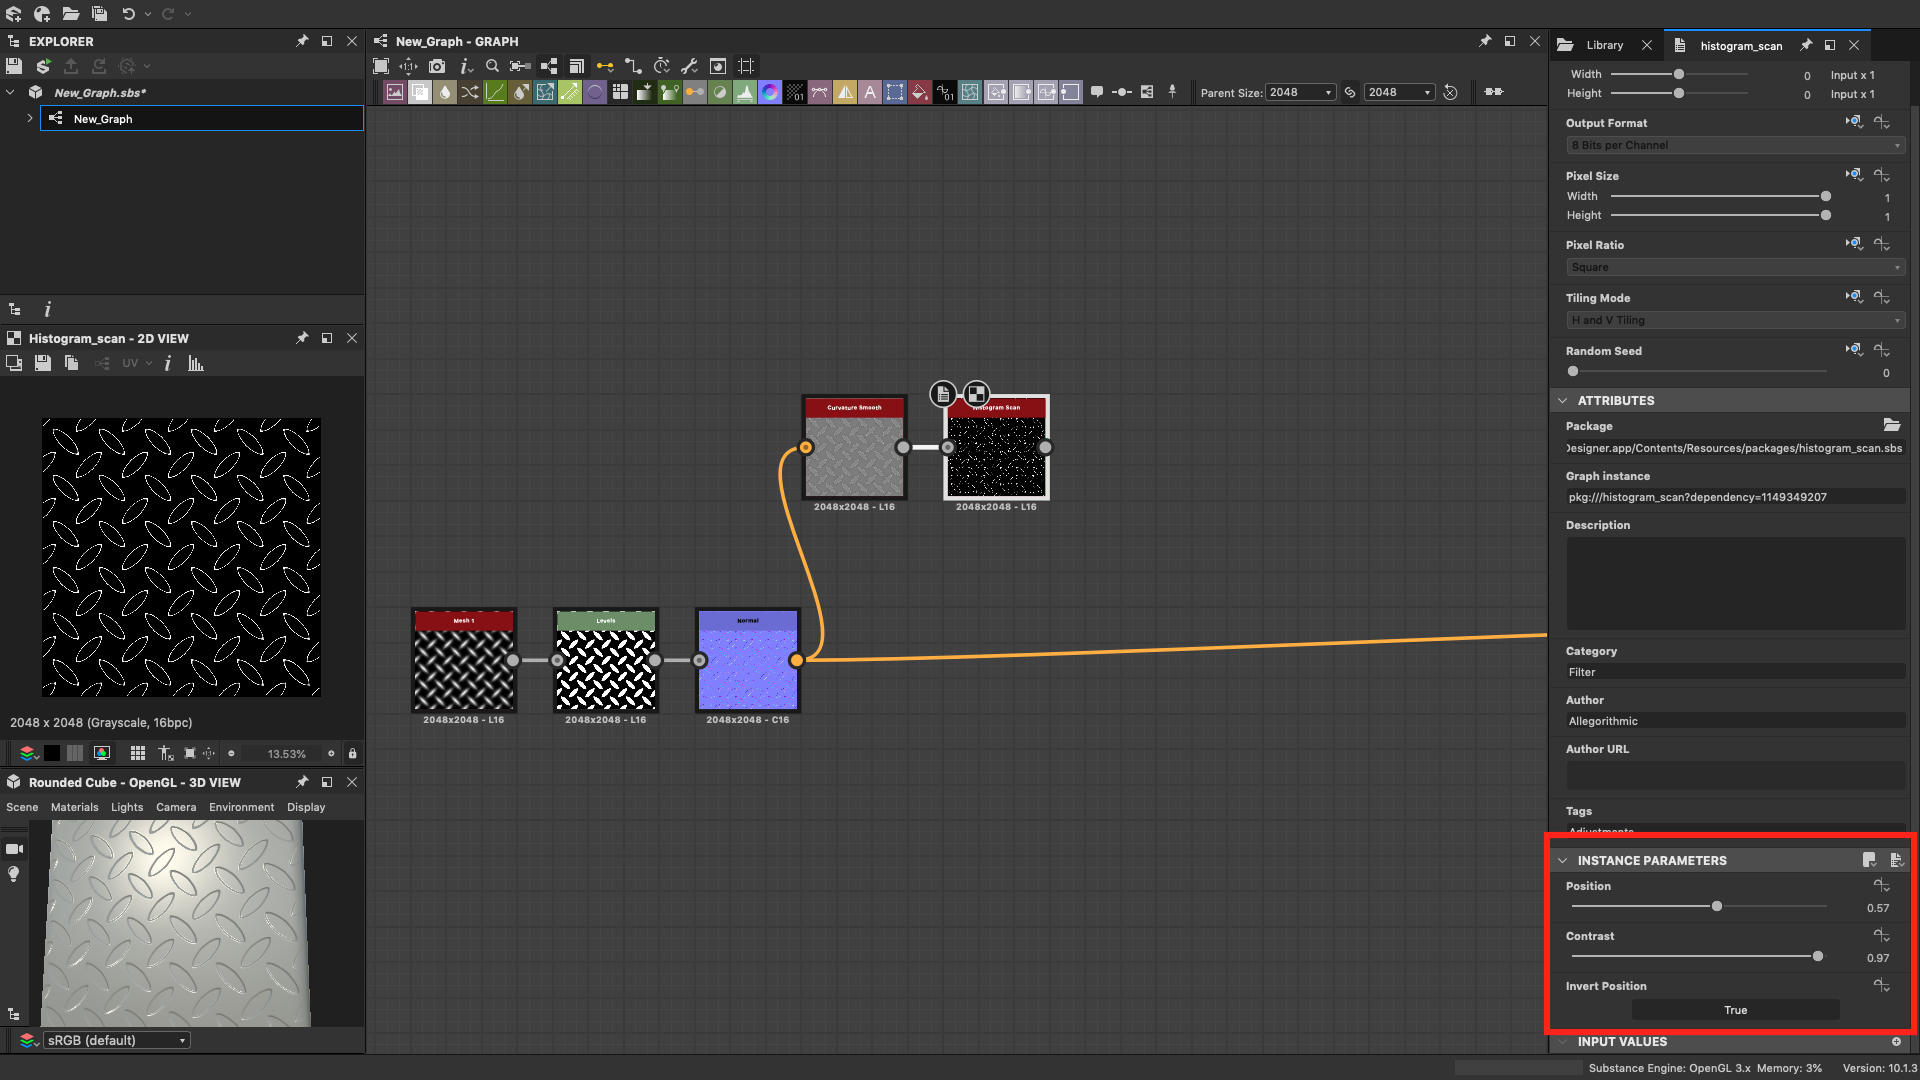
We got a textured steel sheet pattern - new, as if from the factory. It is worth adding a little rust. To do this, you need a mask that will identify areas of corrosion. Let's do it using the Normal , Curvature smooth and Histogram scan nodes .
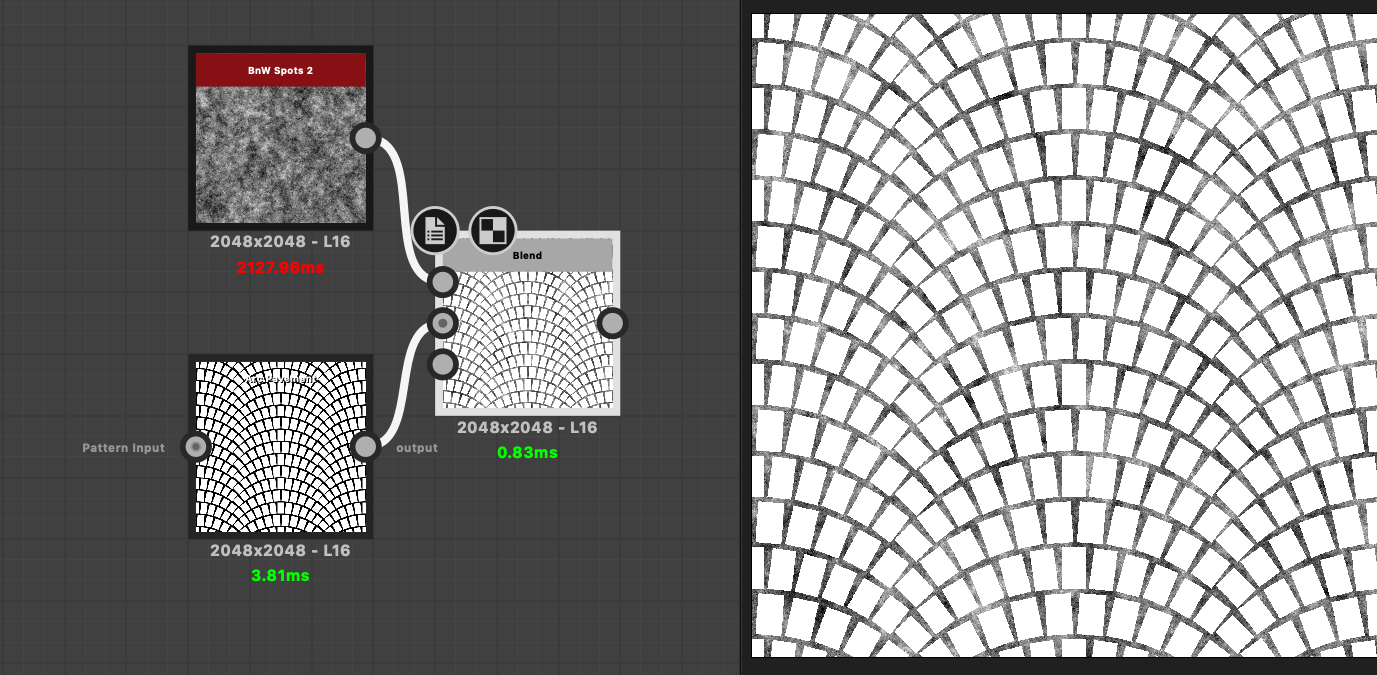
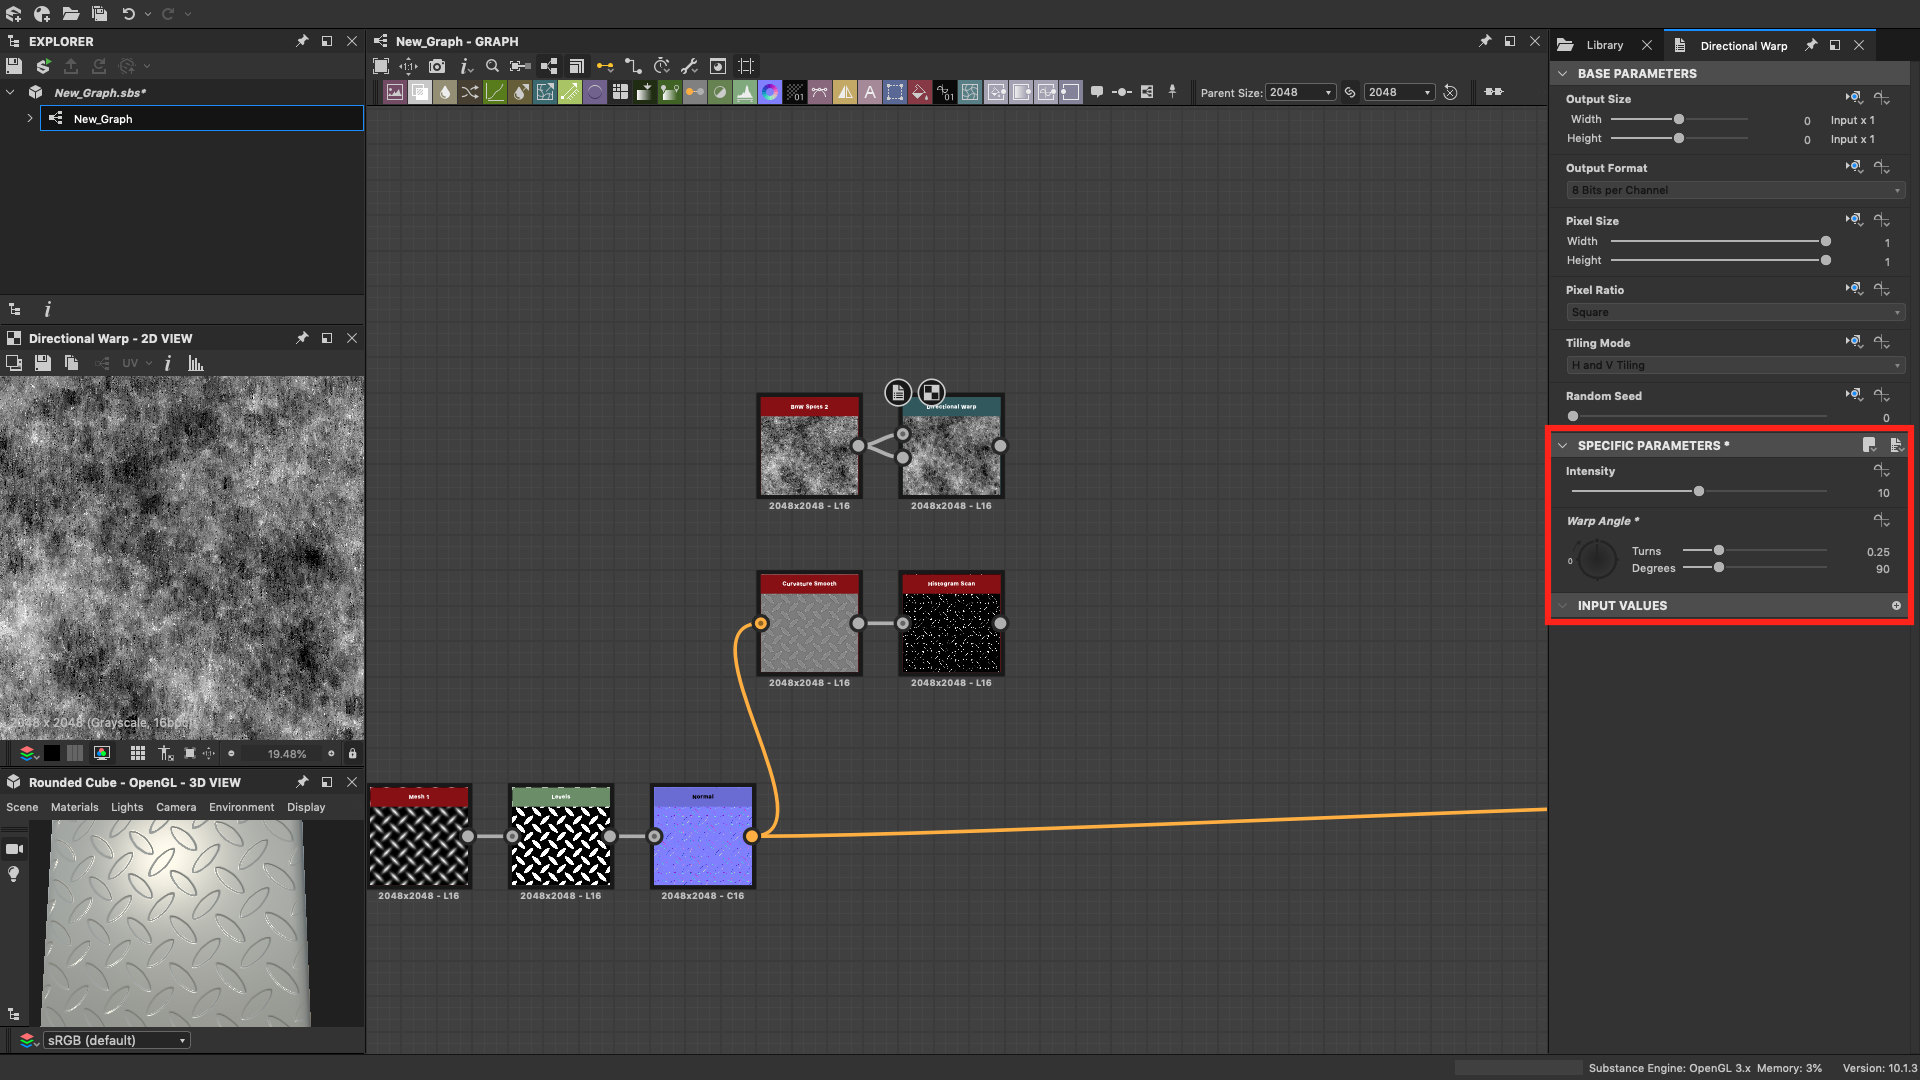
Generating a rust texture using BnW Spots 2 and Directional Warp : The
mask is almost complete. It remains to mix the rust with the edging and increase the contrast. Add the Blend and Histogram scan nodes :
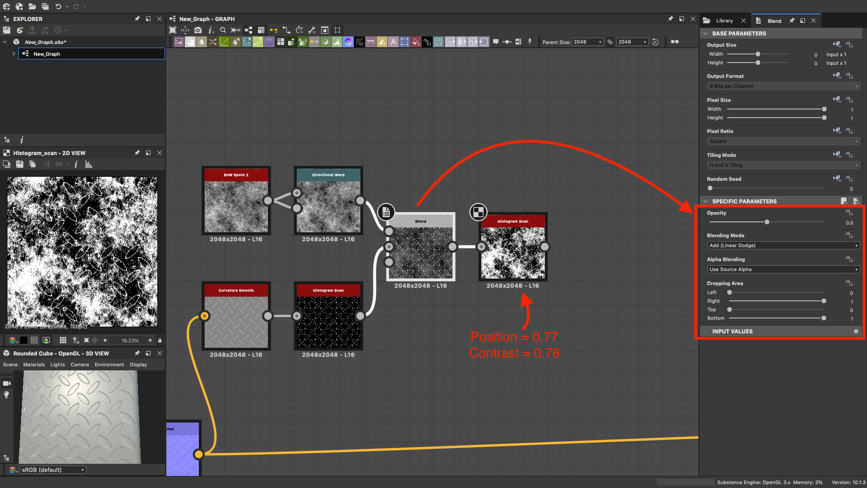
Of course, the parameters for the location of the mask can be changed by moving the rust stains over the metal.
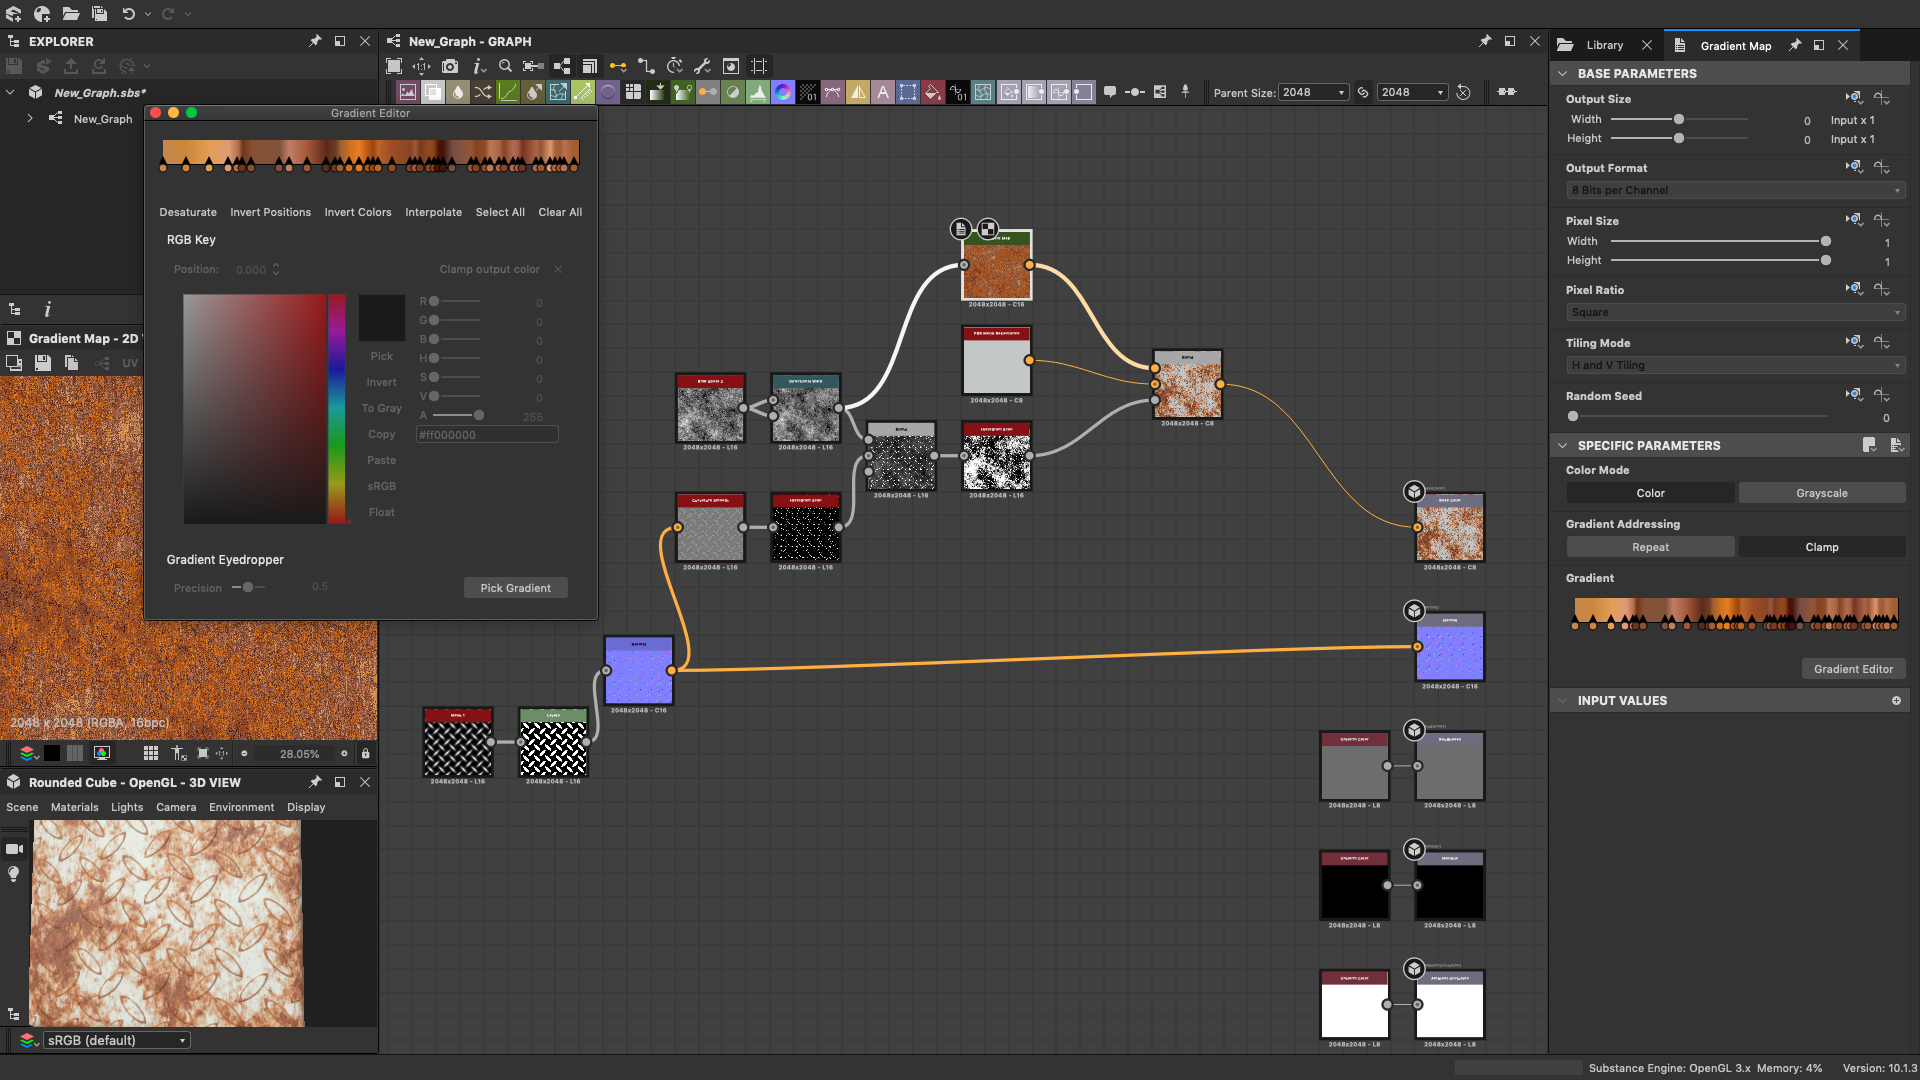
Now let's color our mask using the Gradient Map and PBR Metal Reflectance nodes (you can use the regular Uniform Color instead ). In the Gradient Color, press the Gradient editor - a window with settings will open. The color of rust, of course, can be selected manually, but this is slow and impractical. Instead, find any picture with a rusty piece of iron and hold down the left mouse button and drag the Pick gradient tool over the picture - you get the perfect rust gradient that would take hours to create by hand.
Next, blend the rust color with the texture using the Blend node ( Copy blending mode ) and output the result to the Base color node .
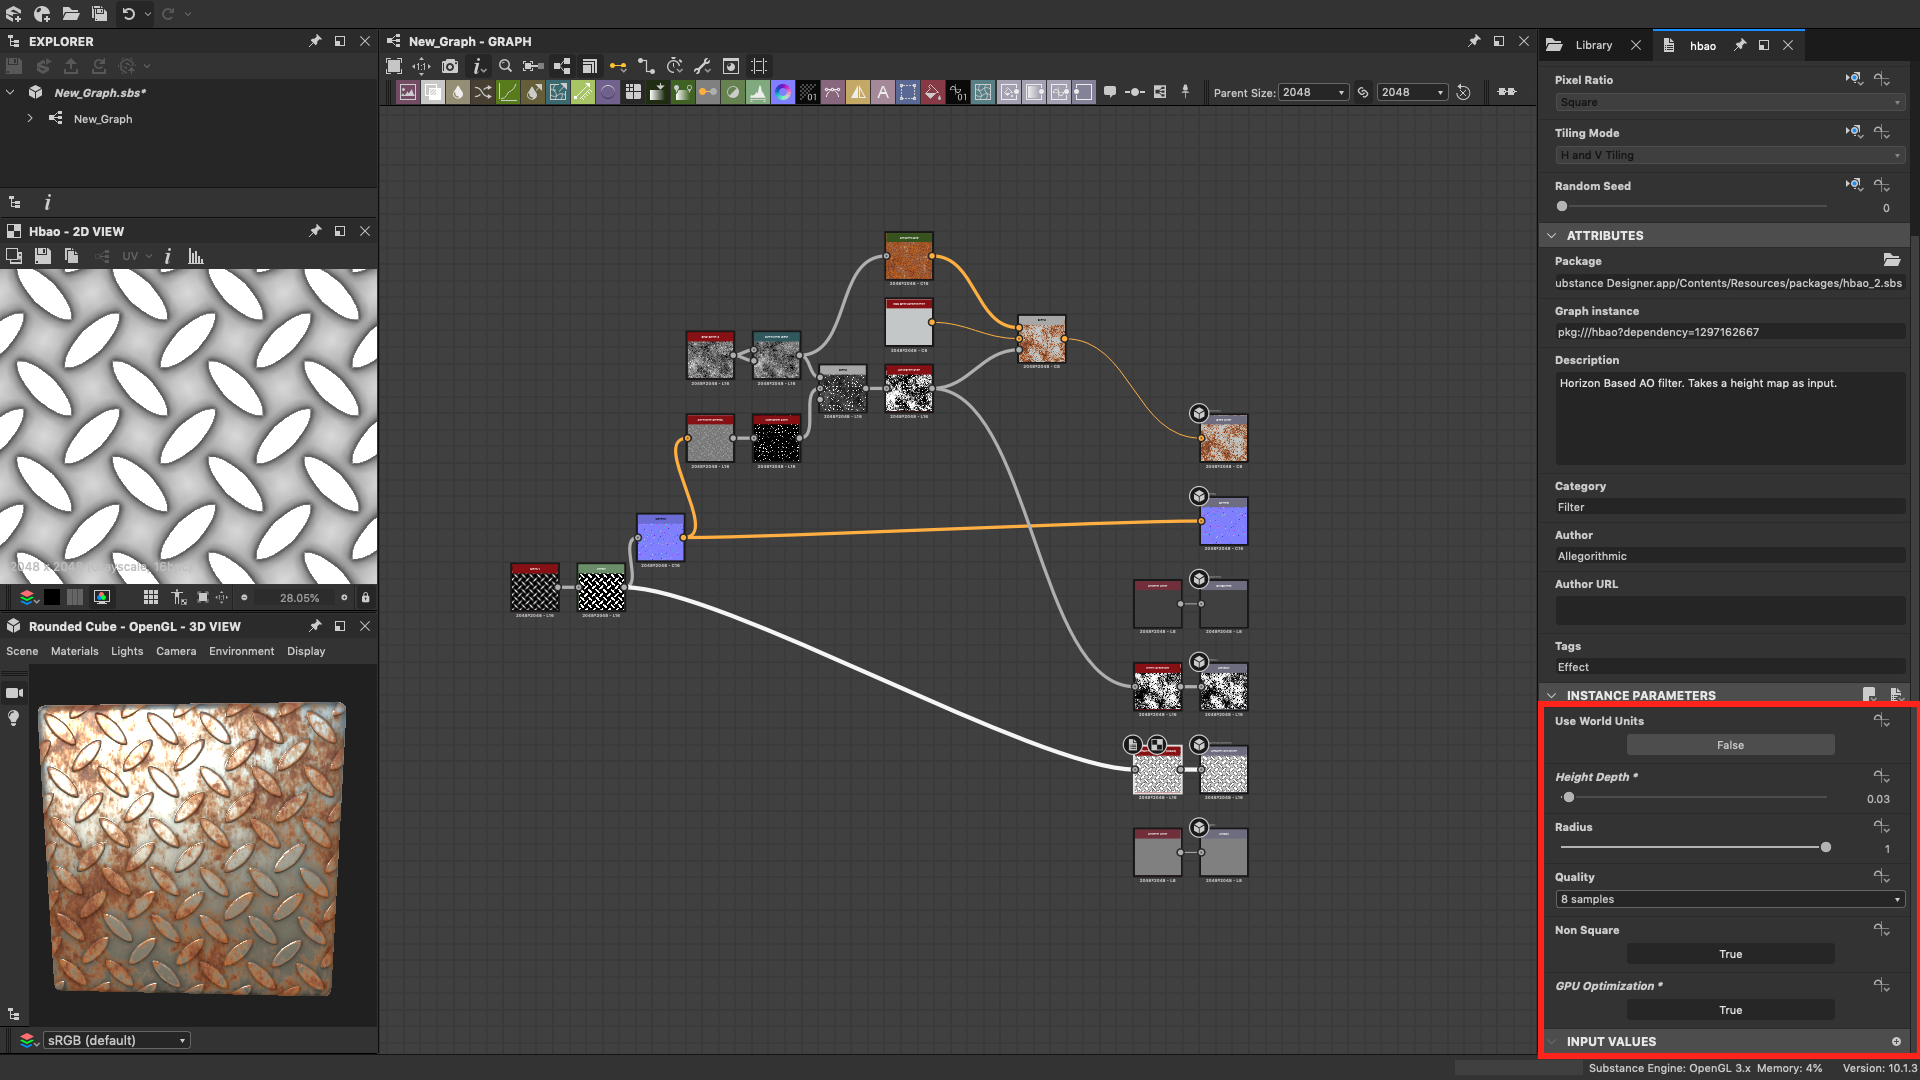
All that remains is to add a few details to make our metal look more realistic. We do not touch the Roughness map, but we will slightly correct Metallic : invert our mask and pull it into Metallic to determine where and how the surface will reflect the light. Now all that remains is to add some shadows. To do this, add HBAO to the Levels node and edit the parameters:
The resulting procedural texture is shown in the image below. At any time, we can change any parameter of the texture and immediately see how the appearance will change. The finished material can be used both in Substance Painter and in other programs that support Substance Designer texture formats.
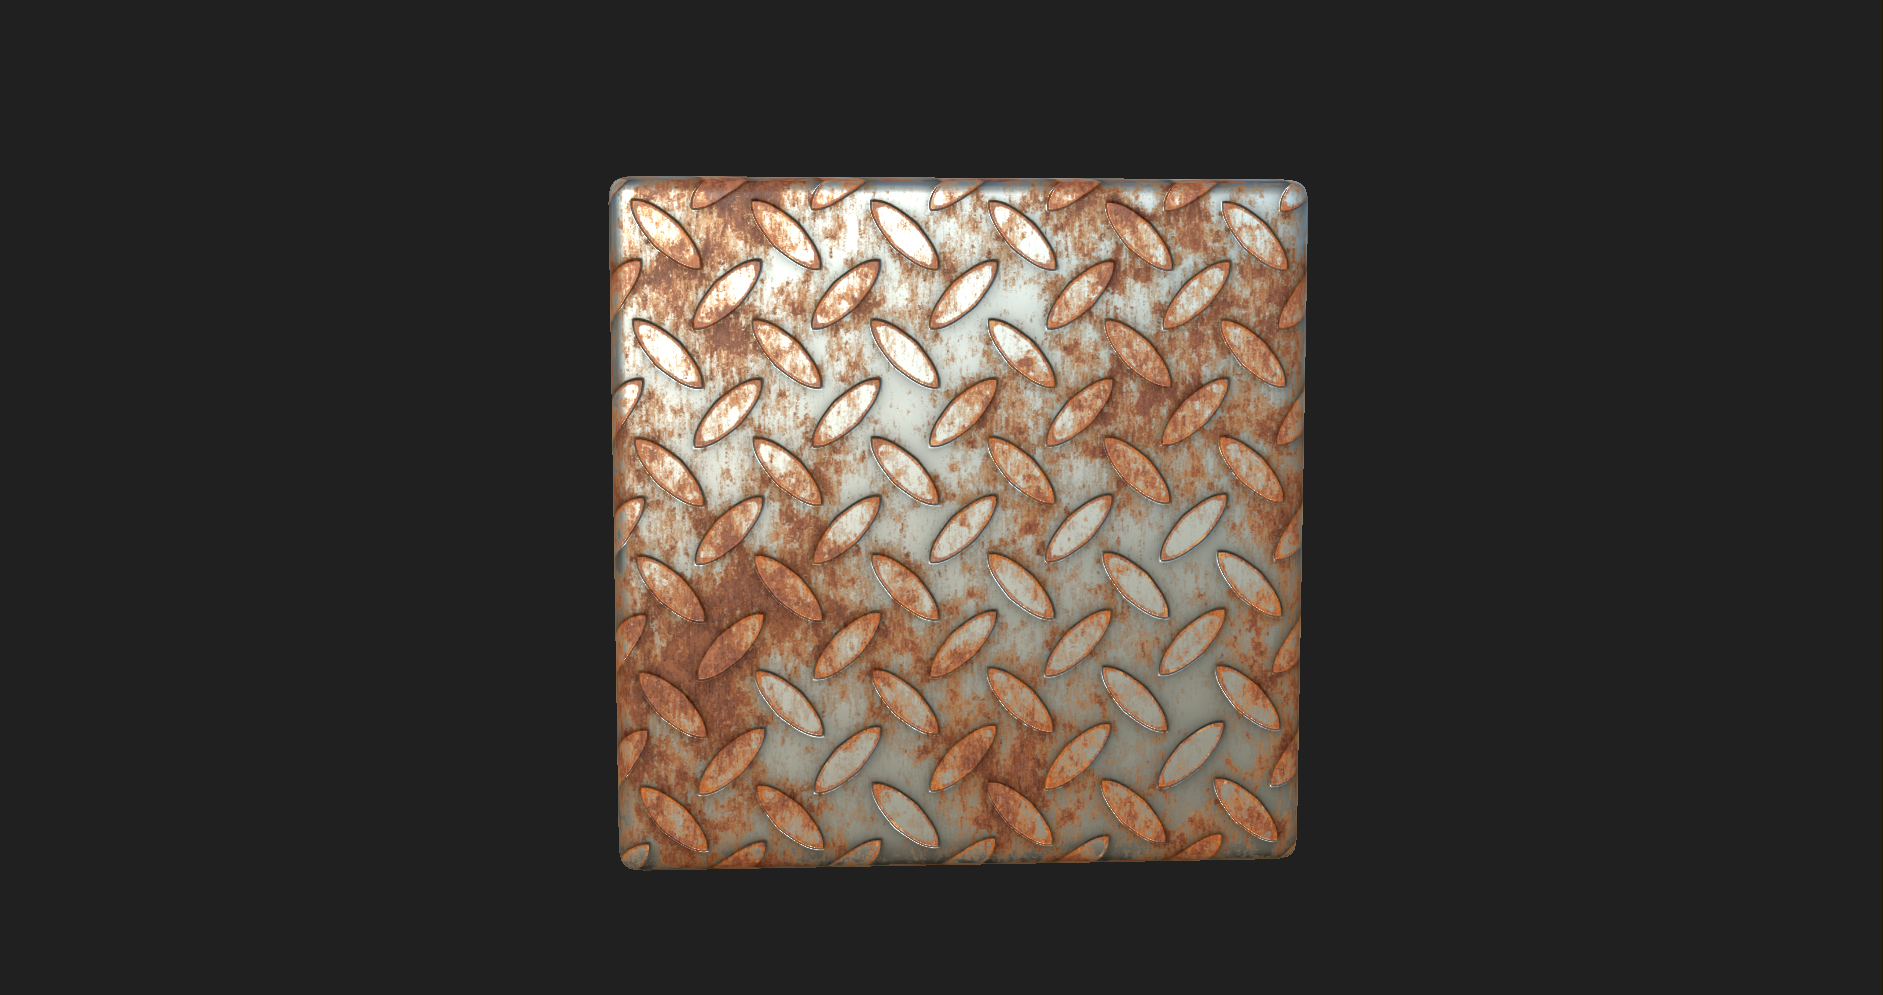
You can download the Substance Designer file with this texture and experiment with different node parameters: soften or enhance the contrast of the stamping on the steel sheet, change the amount of rust, its shade, or even add, for example, a layer of peeling paint. You can also watch a demo on creating a material in Substance Designer .
About the author: Alexey Baukin - instructor of the course "Substance Designer Basics" at the Realtime computer graphics school.
Additional information:
Consulting on Adobe Substance Designer - Anna Makeeva, Anna.Makeeva@softline.com;
Adobe solutions ;
Adobe Creative Cloud promo page .