
Three years ago we published an article “ Online tools for the simplest Pentest ”. There we talked about affordable and quick ways to check the protection of your network perimeter using tools such as Check Point CheckMe , Fortinet Test Your Metal , etc. But sometimes a more serious test is required when you want to “make noise” already inside the network (and preferably safe for the infrastructure). A free tool like Infection Monkey can be very useful for this purpose . For example, we decided to scan the network through the Check Point gateway and see what the IPS sees. Although nothing prevents you from conducting a similar experiment with other solutions to check how your IPS system or NGFW works. Results under the cut.
Infection Monkey
This tool can be classified as BAS (Breach and Attack Simulation) systems that allow you to assess the security of your network in an automatic mode. At the same time, a secure “penetration test” of your infrastructure is performed. The tool is open source and actively developed. Probably its main difference is that all tests take place inside your network, as if an attacker has already penetrated you. The majority still concentrate on perimeter protection, while forgetting about the need for other measures. The same IDS / IPS is very important for complex protection, since allows you to identify threats that are already inside the network. Infection Monkey is a good way to assess the maturity of information security in your company.
Supported Platforms
Infection Monkey itself can be deployed as a virtual machine. The following platforms are supported:
- VMware
- Hyper-V
- AWS
- Docker
- Azure
- Google cloud platform
AWS has a ready-made template that you can use with your free account. We use ESXi most often. The image can be requested at the office. website , or with us .
Installation
The installation itself is extremely simple and is described here , I see no reason to duplicate this information. There is also an instruction for starting the check. We'd better focus on the test results.
Attack techniques used
Infection Monkey uses several attack vectors and allows you to see the following things:
1) Vulnerable hosts . Finds hosts with weak passwords, old software versions, or known vulnerabilities. Here is a list of onboard exploits:
- SMB Exploiter
- WMI Exploiter
- MSSQL Exploiter
- MS08-067 Exploiter
- SSH Exploiter (essentially brute force)
- Shellshock exploiter
- SambaCry Exploiter
- ElasticGroovy Exploiter
- Struts2 Exploiter
- WebLogic Exploiter
- Hadoop / Yarn Expoiter
- VSFTPD Exploiter
2) Forbidden interaction . It is possible to find interactions between networks that should be prohibited at the DOE or router level.
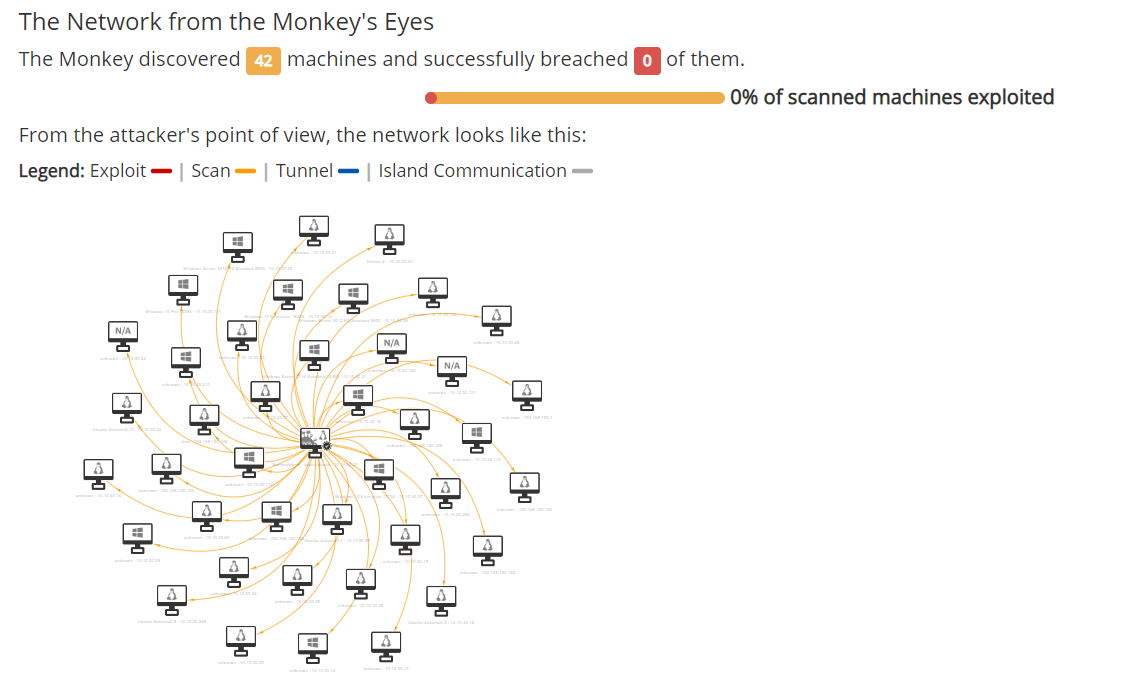
3) Horizontal spread . Graphical display of the movement of the "malware". How a bot "transplants" in your network.
All this is complemented by detailed reporting. For example using the MITER ATT & CK matrix:
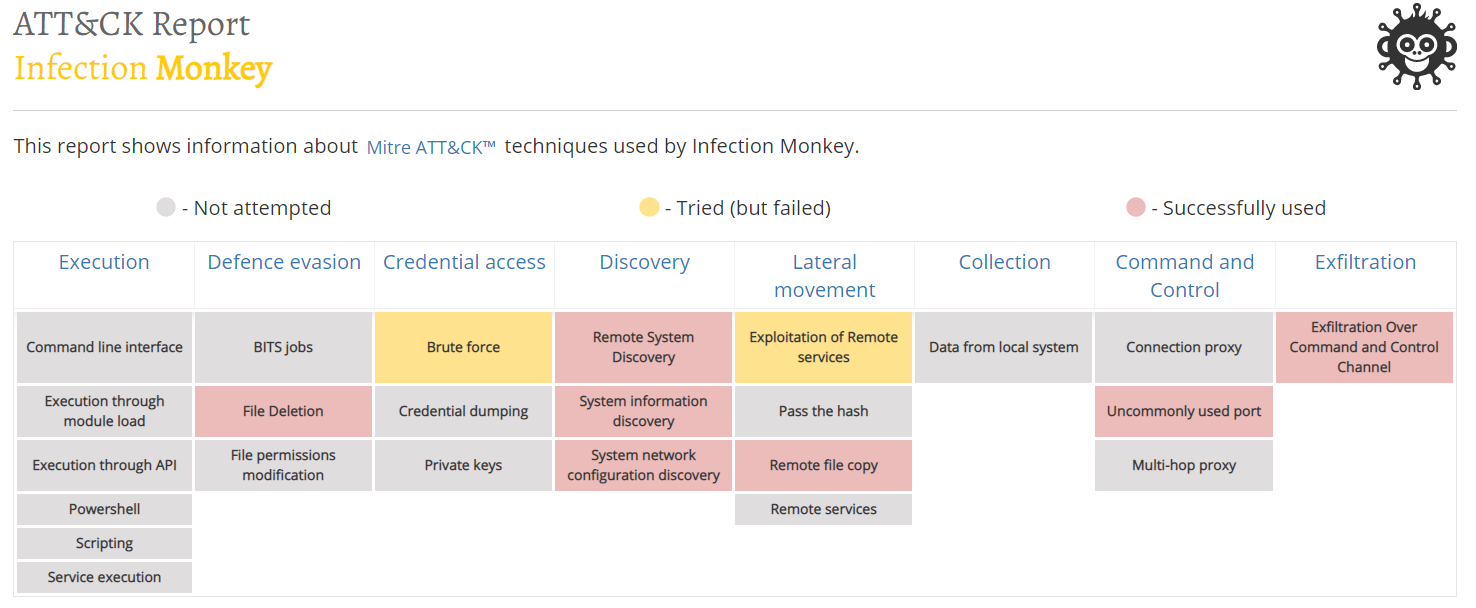
Scanmap:
Zero Trust Model Report : This is

also a good check for your existing defenses. Were they able to detect this activity? Have all the logs arrived at your SIEM?
Infection Monkey FAQ
Before moving on to the test results, I would like to answer a few of the most common questions about Infection Monkey.
Is this test dangerous for my infrastructure?
. Infection Monkey ,
Can I clean 'infected' devices after the test?
Infection Monkey
Are there any traces left on the 'infected' system after removing Infection Monkey?
. . Windows %temp%\\~df1563.tmp. Linux — /tmp/user-1563
Does the Infection Monkey put a strain on the system?
. (Windows Server) Monkey 0.6% CPU 80
Does the program require Internet access?
, , . (updates.infectionmonkey.com) «» (www.google.com).
Testing scheme
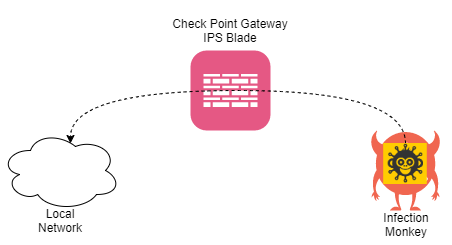
The scheme is quite simple. The virtual machine with Infection Monkey is in a dedicated segment. From it we scan the local network segment through the Check Point gateway:
Check Point IPS Results with Optimized Profile
Even in the Check Point course, I tried to show the maximum how dangerous the default settings are. This applies to all vendors. You must be able to properly “tighten” the nuts. In this case, I decided to first check the Check Point default profile - Optimized. The results can be seen in the picture below:

It is worth noting that with the default profile Infection Monkey successfully “hacked” the test host (despite the primitiveness of the attack). The required signature was simply not included.
Check Point IPS Results with My Profile
The settings were made in accordance with the recommendations that were given in the course “ Check Point to Maximum ”. The result was completely different:
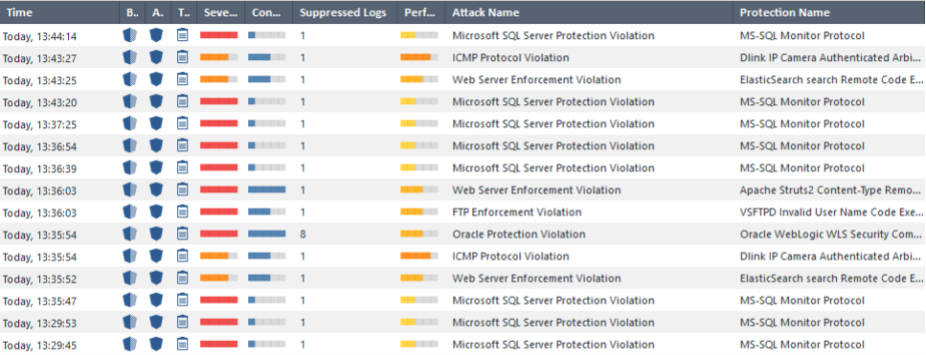
At the same time, IPS prevented infection of the host and further spread of Infection Monkey.
It is worth noting that Check Point has pretty good forensics. This is how the log itself looks like:
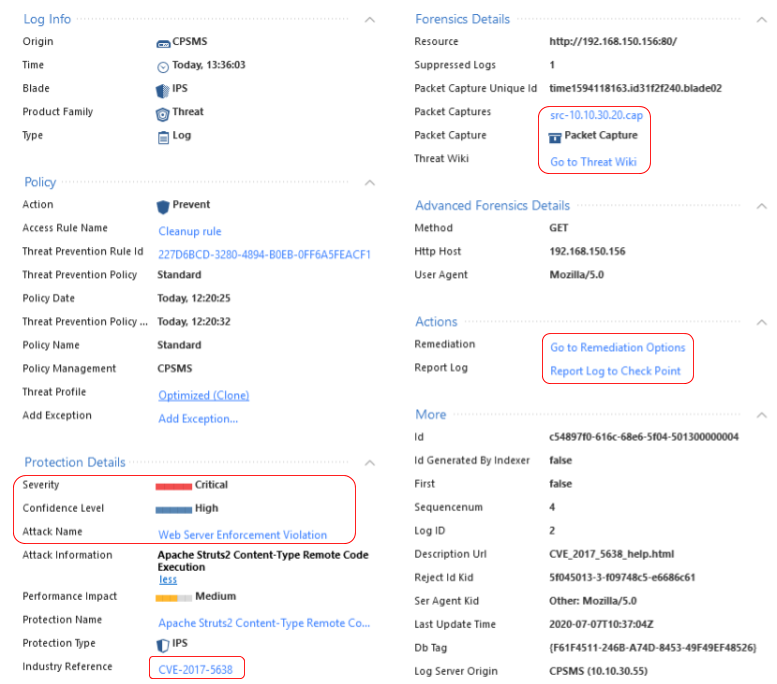
Here you can see the traffic dump, the CVE number, the type of attack, and detailed information about it, as well as recommendations for configuring Check Point. Example:

In this regard, Check Point did a good job, because they have a rich knowledge base of all kinds of malware.
Conclusion
Of course, Infection Monkey is not a panacea and cannot address all potential network security problems. But for a free tool, this is more than interesting. As I said, you can “make some noise” on the net and see how your security products behave. The same NGFWs with default settings can behave extremely unsatisfactorily. If you are not satisfied with the result, we can help you analyze your configuration .
In the near future we plan to publish similar tests for another tool ( Cymulate ), which can be used for free, a trial version. There are already many more attack options. In addition to the results, we will share recommendations on how to strengthen the protection. In order not to miss the following articles, stay tuned to our channels (Telegram , Facebook , VK , TS Solution Blog )!