
In this step-by-step guide, I will tell you how to configure Mikrotik so that forbidden sites are automatically opened through this VPN and you can avoid dancing with tambourines: I set it up once and everything works.
I chose SoftEther as my VPN: it's as easy to set up as RRAS and just as fast. Enabled Secure NAT on the VPN server side, no other settings were made.
I considered RRAS as an alternative, but Mikrotik does not know how to work with it. The connection is established, the VPN is working, but Mikrotik cannot maintain a connection without constant reconnections and errors in the log.
The configuration was carried out using the example of RB3011UiAS-RM on firmware version 6.46.11.
Now, in order, what and why.
1. Establish a VPN connection
As a VPN solution, of course, SoftEther, L2TP with a pre-shared key was chosen. This level of security is enough for anyone, because only the router and its owner know the key.
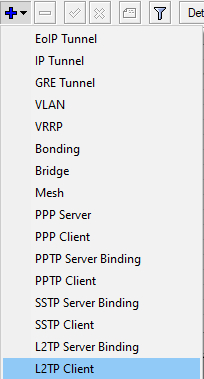
Go to the interfaces section. First we add a new interface, and then we enter ip, login, password and shared key into the interface. We press ok.
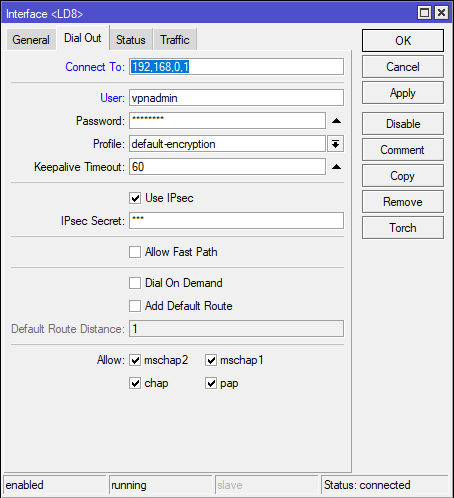
The same command: SoftEther will work without changing ipsec proposals and ipsec profiles, we do not consider their configuration, but the author left screenshots of his profiles, just in case.
/interface l2tp-client
name="LD8" connect-to=45.134.254.112 user="Administrator" password="PASSWORD" profile=default-encryption use-ipsec=yes ipsec-secret="vpn"
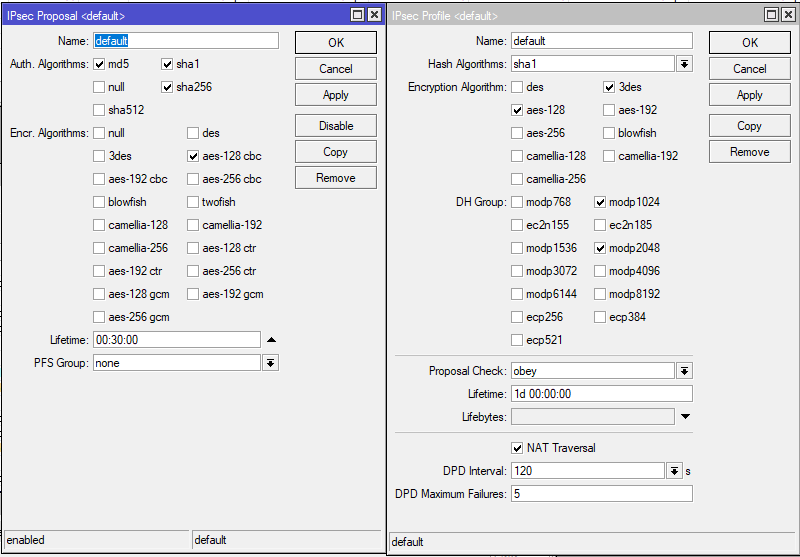
For RRAS in IPsec Proposals, it is enough to change the PFS Group to none.
Now you need to get behind the NAT of this VPN server. To do this, we need to go to IP> Firewall> NAT.
Here we enable masquerade for a specific or all PPP interfaces. The author's router is connected to three VPNs at once, so he did this:
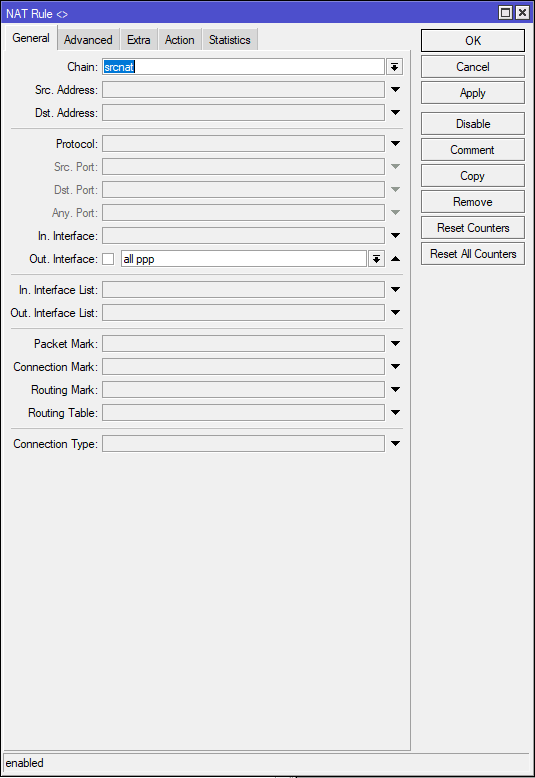

The same with the command:
/ip firewall nat
chain=srcnat action=masquerade out-interface=all-ppp
2. Add rules to Mangle
The first step, of course, is to protect everything that is most valuable and defenseless, namely DNS and HTTP traffic. Let's start with HTTP.
Go to IP → Firewall → Mangle and create a new rule.
In the Chain rule, choose Prerouting.
If there is a Smart SFP or another router in front of the router, and you want to connect to it via the web interface, in the Dst field. Address, you need to enter its IP address or subnet and put a negative sign in order not to apply Mangle to the address or to this subnet. The author has SFP GPON ONU in bridge mode, thus the author retained the ability to connect to his webmord.
By default, Mangle will apply its rule to all NAT States, this will make port forwarding on your white IP impossible, so in the Connection NAT State we put a check mark on dstnat and a negative sign. This will allow us to send outbound traffic over the network through the VPN, but still pass ports through our white IP.
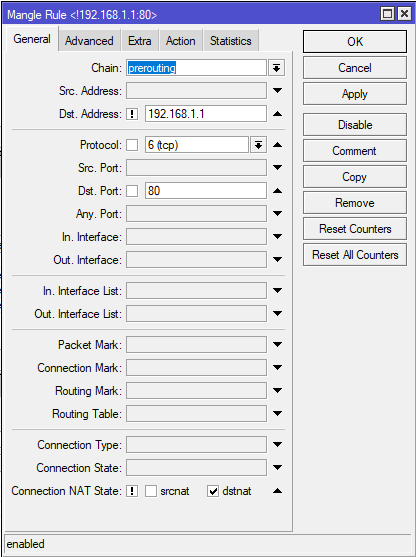
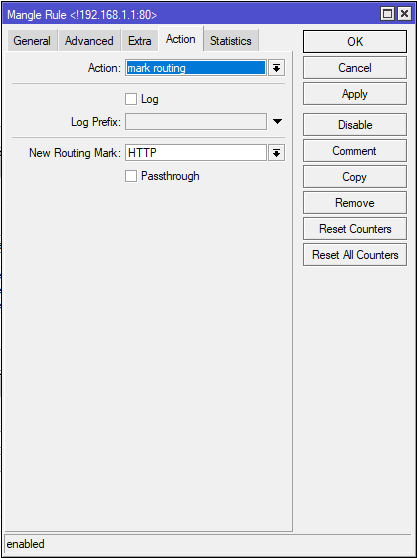
Next, on the Action tab, select mark routing, call New Routing Mark so that it is clear to us in the future and move on.
The same command: Now let's move on to DNS protection. In this case, you need to create two rules. One for the router, the other for devices connected to the router. If you use the DNS built into the router, which the author does, you need to protect it too. Therefore, for the first rule, as above, we select chain prerouting, for the second, we need to select output. Output is a chain that the router itself uses for requests using its functionality. Everything is similar to HTTP, UDP protocol, port 53.
/ip firewall mangle
add chain=prerouting action=mark-routing new-routing-mark=HTTP passthrough=no connection-nat-state=!dstnat protocol=tcp dst-address=!192.168.1.1 dst-port=80
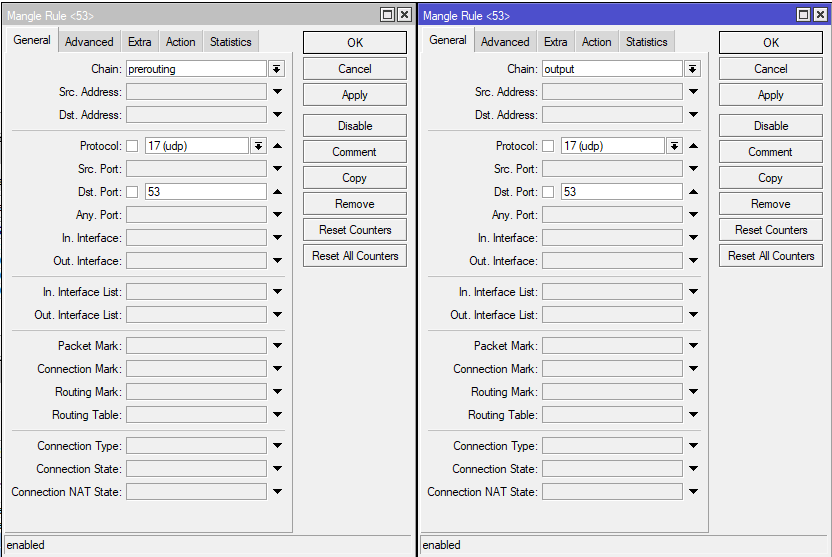

The same with the commands:
/ip firewall mangle
add chain=prerouting action=mark-routing new-routing-mark=DNS passthrough=no protocol=udp
add chain=output action=mark-routing new-routing-mark=DNS-Router passthrough=no protocol=udp dst-port=53
3. Build a route through VPN
Go to IP → Routes and create new routes.
Route for routing HTTP over VPN. We indicate the name of our VPN interfaces and select the Routing Mark.
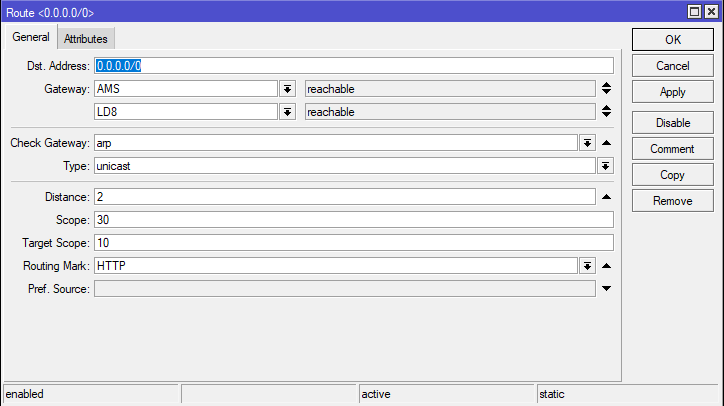
At this stage, you can already feel how your operator has stopped embedding ads in your HTTP traffic .
The same with the command: The rules for DNS protection will look exactly the same, just select the desired label:
/ip route
add dst-address=0.0.0.0/0 gateway=LD8 routing-mark=HTTP distance=2 comment=HTTP
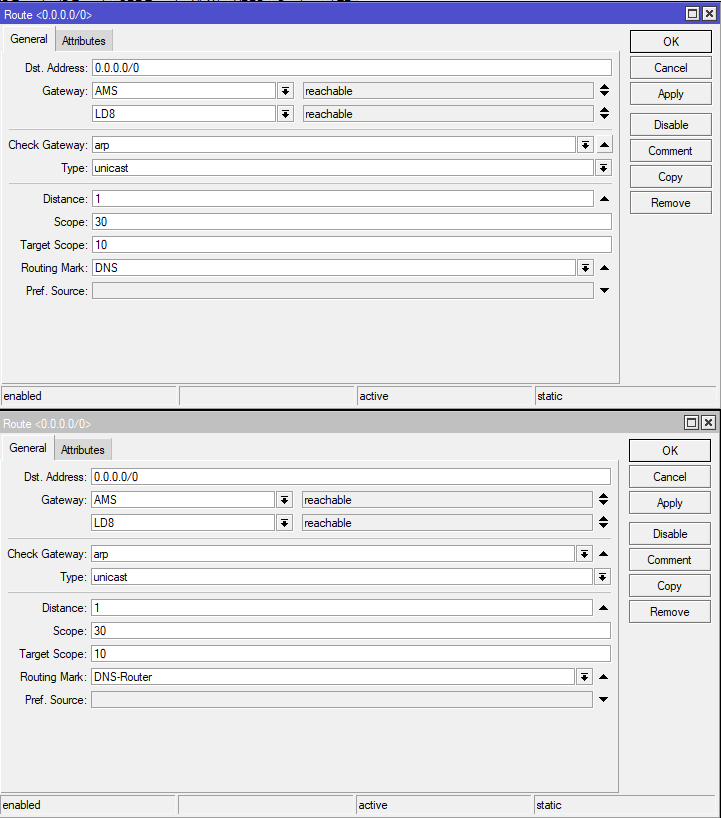
Here you felt how your DNS requests stopped listening. The same with the commands: Well, in the end, unlock Rutracker. The entire subnet belongs to him, therefore the subnet is indicated.
/ip route
add dst-address=0.0.0.0/0 gateway=LD8 routing-mark=DNS distance=1 comment=DNS
add dst-address=0.0.0.0/0 gateway=LD8 routing-mark=DNS-Router distance=1 comment=DNS-Router
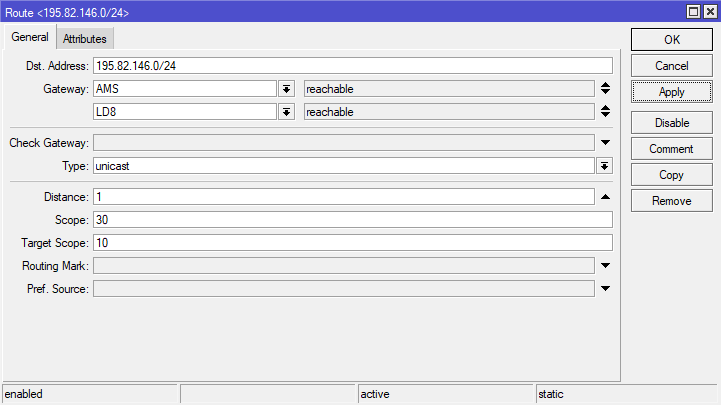
It was that easy to get the internet back. Team: In exactly the same way as with a root tracker, you can route corporate resources and other blocked sites. The author hopes that you will appreciate the convenience of entering the root tracker and the corporate portal at the same time without taking off your sweater.
/ip route
add dst-address=195.82.146.0/24 gateway=LD8 distance=1 comment=Rutracker.Org
