In the previous article devoted to time synchronization by radio and SRNS (radio navigation communication systems), I did not have time to talk about the choice of a GPS / GLONASS receiver with a PPS output. Meanwhile, the accuracy of signal reception depends on this, the value can be from one millisecond to several microseconds, and often this is of decisive importance.
For the most accurate time signal reception, you need a GPS / GLONASS receiver with a PPS output. The point is, however, that in the Russian market it is not easy to get a device with such characteristics at an affordable price. Many such models have long ceased to be produced, and in abandoned online stores with layout in the 1990s, only their descriptions remained with an offer to subscribe to a notification when goods arrived.

A complete list of tested GPS equipment can be found on the GitLab NTPSec resource. It is not difficult to notice that a small number of devices presented in the list are marked with 3-4 stars and the PPS option. Thus, the following receivers are shortlisted.
- Garmin GPS-18, not USB *** (approximate price 10 thousand rubles)
- GlobalSat MR-350P ****
- Jackson Labs FireFly-II ***
- Magellan Thales AC12 ***
- Motorola Oncore GT + ***
- Navisys GR601-W ****
- SkyTraq SKG16B ****
- Trimble Lassen IQ ***
- u-blox ANTARIS LEA-4T ***
- u-blox EVK 6H ****
- u-blox LEA SQ ****
4 * Excellent performance: GPSd recognizes the receiver quickly and reliably, and reports are fully and correctly generated.
3 * Good performance: gpsd with minor problems or latency recognizes devices, but reports are generated completely and correctly.
If you are intimidated by the price of these models, and there is also no great desire to tinker with glands, you can not read further. A receiver connected to a server via USB or RS232 interface will provide much more accurate time determination than an NTP server using tcp / ip. But if the samurai's way is not alien to you, then let's build your Raspberry PI NTP server with GPS time synchronization.
Putting together Raspberry PI
So: we take the following components for our micro server.
- Raspberry Pi 4 Model B board, 4 GiB RAM (6200 rubles);
- Case, for example this (890 rubles);
- Micro SD card for 32 GiB, 16 GiB is possible; (540 rub.)
- GPS module based on u-blox NEO-M8 chip (1700 rubles with antenna);
- GPS antenna at 15 dB;
- Soldering iron.
Actually, u-blox NEO-M8 is equipped with a UART interface, but for the PPS output, you need to solder pin-3 on the GPS module to the corresponding GPIO connector on the Raspberri Pi board. The module of the Swiss company has gained popularity among specialists and this is no coincidence, the characteristics speak for themselves.
- Supported SRNS: BeiDou, Galileo, GNSS; GPS / QZSS, GLONASS;
- Supply voltage: 2.7 ... 3.6 V;
- Interfaces: UART, USB, SPI, DDC, I2C;
- Supported protocols: NMEA 0.183 version 4.0, UBX (binary), RTCM 2.3;
- Detection sensitivity: -167 dBm;
- Tracking sensitivity: -160 dBm;
- Cold start time: 26 s;
- Hot start time: 1.5 s;
- Power consumption: 35 mW;
- Working temperature: -40 ... + 85 ° ;
- Dimensions: 16x12.2x2.4 mm
In this configuration with the latest equipment, the approximate total price of the assembled Raspberry PI will be 9330 rubles. You can save money by buying a Raspberry PI 3, or a four with 2 GiB RAM. You can still save on a GPS chip, u-blox NEO-6M with an antenna costs about 650 rubles. Then the price of the NTP server will drop to 5500 rubles.

GPS / Glonass module UBLOX NEO 8M The
question may arise, why are all these investments needed and what accuracy is provided by this or that method of time synchronization. Small summary plate for reference.
| Time signal source | Error |
| GPS with atomic clock | ± 50 nSec |
| KPPS | ± 1 μSec |
| PPS | ± 5 μSec |
| USB 1.1 interface | ± 1 mSec |
| USB 2.0 interface | ± 100 μSec (100000 nSec) |
| NTP over the network | ~ ± 30 mSec |
Kernel PPS (KPPS) differs from PPS in that it uses a Linux / Unix kernel function to accurately timestamp a state change in the PPS line. The usual PPS is implemented in user-space. If the Linux kernel supports KPPS through API RFC 2783, gpsd will use it to improve accuracy.
Many Linux distributions have a pps-tools package that provides KPPS support and installs the timepps.h header file. Make sure to install this package.
(1:1146)$ sudo emerge -av pps-tools

Local copy of remote index is up-to-date and will be used.
These are the packages that would be merged, in order:

Calculating dependencies... done!
[binary   R    ] net-misc/pps-tools-0.0.20120407::gentoo  0 KiB

Total: 1 package (1 reinstall, 1 binary), Size of downloads: 0 KiB
Would you like to merge these packages? [Yes/No]
Thus, by connecting a GPS receiver with PPS output via USB, we get a 300-fold increase in time synchronization accuracy. Reading from the GPS chip on the board in KPPS mode gives an increase in accuracy by another two orders of magnitude .
Let's be honest - not all of us know how to use a soldering iron, not everyone uses this tool regularly. In this case, it makes sense to look for a GPS module that does not require soldering contacts.
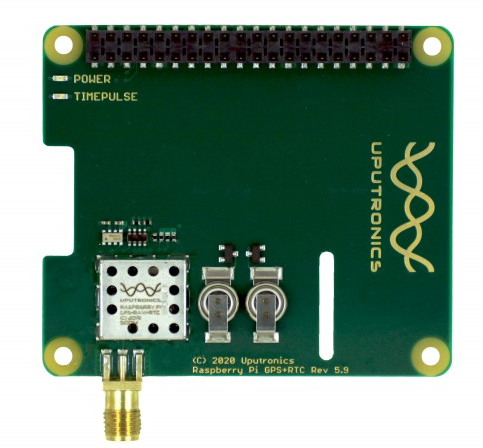
Raspberry Pi GPS / RTC Expansion Board
There are few such boards and they are expensive. The difference in price will be fully compensated by the purchase of a soldering iron and labor costs.
OS installation
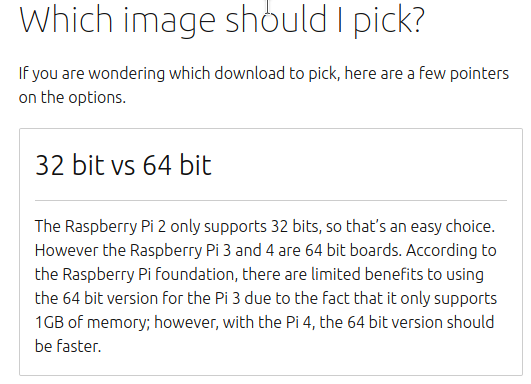
There is a Raspberry PI OS as well. ka Raspbian, you can just follow the link , download the latest version and install it. Many people do this, but let's remember that Raspberry PI 4 supports 64-bit operating system, while Raspberry PI OS has only 32-bit Debian Linux modifications for the Arm architecture.
There is such a point of view that it is unjustified on a 64-bit OS on Raspberry PI 4, since there is no way to provide a performance gain due to the peculiarities of the architecture and assembly. This point of view seems to me doubtful, they have already written about this on Habré - 64-bit OS is faster .
There is a port of Debian Linux for the arm64 architecture, however the distributionUbuntu for Raspberry PI has a clear page and instructions. On the page we find additional confirmation that it is better to choose a 64-bit OS.
Installation inventory:
- Raspberry Pi 4;
- USB-C power cable for Pi 4;
- Micro SD card with Ubuntu installation image;
- Monitor with HDMI output;
- MicroHDMI cable;
- USB keyboard.
The next step is to write the installation image to the Micro SD card. If you do not have a specialized utility and program at hand for these purposes, in the simplest case it is enough.
sudo dd if=/path/to/ubuntu-core-arm64.iso of=/dev/mmcblk0 status=progressThe exact name of the device is seen in the dmesg output when a new device is detected.
PM: Adding info for No Bus:179:0
device: 'mmcblk0': device_add
PM: Adding info for No Bus:mmcblk0
Insert a Micro SD card, connect an HDMI monitor, USB keyboard, and power cable to boot into Ubuntu Server on the Raspberry Pi. The default username and password is ubuntu.
NTP server setup
- Raspberry PI (headless), IP . .
(1:1151)$ arp -na | grep -i "dc:a6:32"
Pi HDMI USB , 1-2 . - ssh
(1:1152)$ ssh ubuntu@<Raspberry Pi’s IP address> - .
user@server ~$ sudo apt-get install aptitude user@server ~$ sudo aptitude install wpasupplicant gpsd chrony - Wi-Fi wpasupplicant.
- Linux UART0 Pi /dev/ttyAMA0. UART0 GPS Linux. console=ttyAMA0,115200, console=tty1. /etc/default/grub GRUB_CMDLINE_LINUX_DEFAULT. , /boot/config.txt, .
Raspberry Pi 4 6 UART-
UART2-5 .UART0 PLO11 /dev/ttyAMA0 (Bluetooth) UART1 mini UART /dev/ttyS0 UART2 PLO11 UART3 PLO11 UART4 PLO11 UART4 PLO11
, UART0 — , UART1, mini UART. Bluetooth UART1 , UART0. /etc/default/grub, /boot/config.txt enable_uart=1. - /etc/defaults/gpsd .
DEVICES="/dev/ttyAMA0 /dev/pps0" GPSD_OPTIONS="-n" USBAUTO="false" - , gpsd.
user@server ~$ sudo /etc/init.d/gpsd start user@server ~$ sudo /etc/init.d/gpsd restart - GPS.
user@server ~$ cat /dev/ttyAMA0 user@server ~$ cgps -s user@server ~$ ppstest /dev/pps0 - /etc/ntp.conf.
, Stratum 1, 2 NTP (, pool [0-9].subdomain.pool.ntp.org) , GPS/PPS .
# GPS Serial data reference (NTP0)
server 127.127.28.0 minpoll 4
fudge 127.127.28.0 flag1 1 time1 0.9999 refid GPS #flag1 - PPS on
# GPS PPS reference (NTP1)
server 127.127.22.0 minpoll 4
fudge 127.127.22.0 flag3 1 refid PPS #flag3 - enable KPPS API
NTP0 , GPS. NTP1 PPS . - ntpd
user@server ~$ sudo /etc/init.d/ntpd restart
- GPSD Time Service HOWTO
- The Raspberry Pi as a Stratum-1 NTP Server
- How to Setup a GPS PPS NTP Time server on Raspberry Pi
- GPS Raspberry Pi
- UART configuration
