However, getting data on linux is relatively easy. I had to use a small crutch, but in the end, the co2 and temperature readings can be obtained in the console and sent further.
This article has covered sending data to IoBroker and Home Assistant.
You will need libhidapi library and a small co2mon program located on github.
apt-get install git cmake g++ pkg-config libhidapi-devDownload and compile the co2mon program
mkdir co2
cd co2
git clone https://github.com/dmage/co2mon.git
cd co2mon
mkdir build
cd build
cmake ..
make
cd co2mond
mv co2mond ../../../co2mond
The paths may need to be adjusted to suit your system.
This program works in two modes - constantly receiving data in the console, and in daemon mode. When launched without parameters, the program constantly displays the current readings to the console until it is forcibly closed. A bit strange solution, maybe I didn't figure it out, but we are working with what we have.
In both modes, the program can save data to text files, just add the -D switch and specify the path to the directory.
I didn’t want to hang another demon on the already weak server of the smart home, and the data on carbon dioxide does not change quickly. Therefore, I threw in a simple script that launches the program, waits for five seconds, and kills it.
#!/bin/bash
cd /home/server/co2
./co2mond -D /home/server/co2 > log.txt &
sleep 5
pkill co2mond
rm log.txt
Add a script to cron, I run it once a minute, that's more than enough.
Done! Now in two text files that the program creates, there are current climate readings.
An important point - to receive data from usb, the user must have the appropriate rights, or cron must be run as root, respectively, the text files created will also be root, this must be taken into account.
Now the second part - we send the received data to the smart home systems. Let's start with IoBroker. To begin with, with it, since at the time when I set myself this task, I used it.
Everything is simple there - there is a systeminfo adapter that can read files from the file system, among other things. Not that these temperatures are needed, but why not.
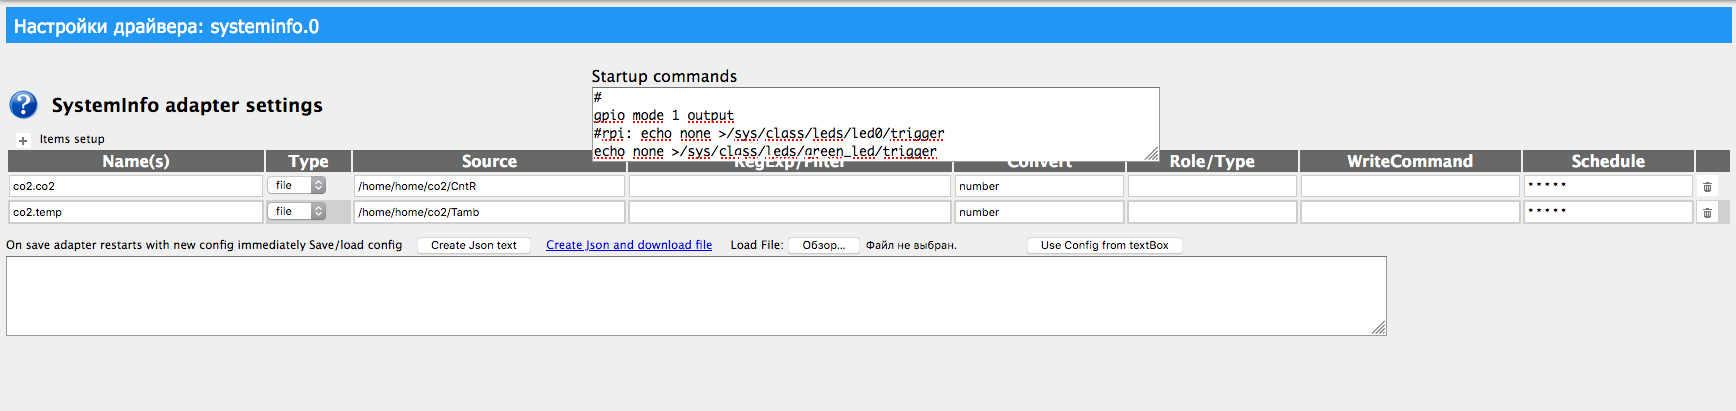
We save, and voila:

And then I switched to Home Assistant. In it I use mosquitto, and I decided to send data through it, aiming at separating computers in the future or adding sensors.
I do not consider the installation and configuration of the broker, this is beyond the scope of the article.
The mosquitto client must be installed on the computer to which the sensor is connected, if it is not installed:
apt-get install mosquitto-clientsAdd two sensors to the Home Assistant config, and reboot:
- platform: mqtt
  state_topic: "co2/co2"
  name: "co2.co2"
  unit_of_measurement: ppm

- platform: mqtt
  state_topic: "co2/temp"
  name: "co2.temp"
  unit_of_measurement: °C
Add four lines to the script that receives the data:
read co2 /home/server/co2/CntR
read temp /home/server/co2/Tamb
mosquitto_pub -h localhost -t "co2/co2" -m $co2 -u "" -P ""
mosquitto_pub -h localhost -t "co2/temp" -m $temp -u "" -P ""
Done, you're fine) Now our kroner publishes the sensor readings to the co2 topic once a minute, and which Home Assistant, in turn, reads them:
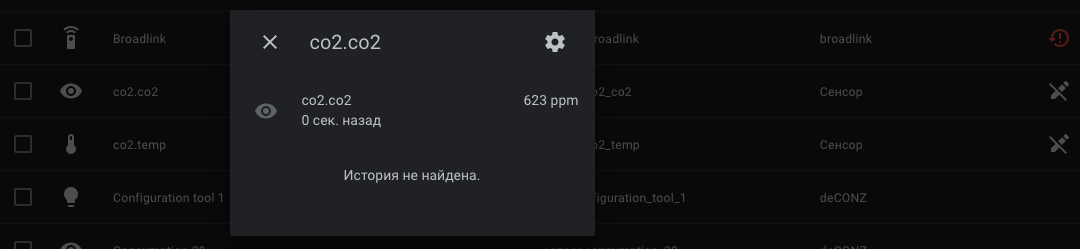
Now we have sensor data in the smart home system, and we can schedule automation. My hood turns on, I do not have controlled supply ventilation yet, but if you turn on the hood, the air is gradually renewed.