Good day, friends!
I continue to post a translation of this Node.js tutorial .
Other parts:
Part 1
Part 2
Part 3
Part 4
JavaScript V8 engine
V8 is the name of the JavaScript engine supported by Google Chrome. This is the thing that takes your JavaScript code and runs it in the browser.
In other words, V8 is a JavaScript runtime. DOM and other web APIs are also exposed by the browser.
The JavaScript engine is browser independent. This is what gave rise to Node.js. V8 was chosen as the engine for Node.js in 2009, and with the growing popularity of Node.js, V8 became the basis for a lot of server-side JavaScript.
The Node.js ecosystem is huge and thanks to V8 we are able to create desktop applications using Electron for example.
Other JS engines
Other browsers have their own JavaScript engines:
- Firefox - SpiderMonkey
- Safari - JavaScriptCore (Nitro)
- Edge - Chakra
etc.
All of these engines implement the ECMA ES-262 (ECMAScript) standard, the standard used by JavaScript.
About performance
V8 is written in C ++ and continues to evolve. It works on all operating systems.
We will not consider the features of the V8 implementation: you can find them here , they change from time to time, often radically.
V8 is constantly evolving, like other JavaScript engines, to improve the speed of the web and the Node.js ecosystem.
There is a performance competition on the web that has been going on for years, and we (as users and developers) get a lot out of this competition as we get faster and better tools every year.
Compilation
JavaScript is usually marketed as an interpreted language, but modern engines don't just interpret JavaScript, they compile it.
This has been happening since 2009 when the SpiderMonkey JavaScript compiler was added in Firefox 3.5.
JavaScript is compiled on the fly by V8 (just-in-time, JIT, dynamic compilation) to speed up its execution.
It might sound counterintuitive, but with the advent of Google Maps in 2004, JavaScript has evolved from a language in which small blocks of code are written to a language in which full-fledged applications are created, consisting of hundreds or thousands of lines of code that are executed in the browser.
Today, our browser applications can run for hours; they are no longer simple tools for solving primitive tasks like form validation.
In today's world, compiling JavaScript makes sense: although it takes more time to prepare the code, its performance significantly exceeds the performance of the interpreted code.
Running Node.js scripts from the command line
The standard way to run Node.js programs is to run a global command
nodeand pass the name of the executable.
If the main file of your Node.js application is named
app.js, you can call it like this:
node app.js
When executing the specified command, make sure you are in the directory with the file
app.js.
How do I exit Node.js?
There are various ways to stop a Node.js application.
When you run the program through the terminal, you can close it using
ctrl-C, however, let's discuss software methods.
Let's start with the most radical one and talk about why it shouldn't be used.
The main (global, kernel module) module
processprovides an easy method to get out of the software-Node.js application: process.exit().
When Node.js reaches this line of code, the program's execution process ends immediately.
This means that all callbacks in progress, requests submitted (pending), file system open access, writes to,
stdoutor stderr- all of them will be hard-aborted.
If this is acceptable to you, you can pass
exit()an integer to the method - a signal to complete execution of the code:
process.exit(1)
The default exit code is 0, indicating success. Different exit codes have different meanings, you can use them to ensure that some programs interact with others.
You can read more about exit codes here .
You can also assign the appropriate value to the property
exitCode:
process.exitCode = 1
and after the program finishes, Node.js will return this code.
Program execution will end gently when all processes are completed.
In Node.js, we often start the server:
const express = require('express')
const app = express()

app.get('/', (req, res) => {
    res.send('Hi!')
})

app.listen(3000, () => console.log('Server ready'))
This program will never terminate. If you call
process.exit(), all pending or running requests will be aborted. Is not cool.
In this case, it is necessary to send a signal command
SIGTERMand process it using a processor signal handler ( processyou do not need to connect it, it is available by default):
const express = require('express')

const app = express()

app.get('/', (req, res) => {
    res.send('Hi!')
})

const server = app.listen(3000, () => console.log('Server ready'))

process.on('SIGTERM', () => {
    server.close(() => {
        console.log('Process terminated')
    })
})
What are signals? Signals are a POSIX communication system: notifying a process that an event has occurred.
SIGKILL- signal about the immediate completion of the process, similar process.exit().
SIGTERM- a signal of soft completion of the process. This signal can be sent by a process control system such as upstart, supervisordetc.
You can send this signal within the program through another function:
process.kill(process.id, 'SIGTERM')
Or from another Node.js program or any other application running on the system, provided they know the PID of the process you want to terminate.
How do I read environment variables in Node.js?
The main Node.js module
processhas a property envcontaining all the environment variables set when the process starts.
Here's an example of accessing the default NODE_ENV environment variable
development:
process.env.NODE_ENV // development
Setting a value in production before executing the script will tell Node.js that it has a production environment in front of it.
In a similar way, you can access any set environment variable.
How to use the Node.js REPL
The command is
nodeused to run Node.js scripts:
node script.js
If we omit the file name, we will get into REPL mode:
node
REPL (Run Evaluate Print Loop) is a code runtime (usually a terminal window) that accepts an expression entered by the user and returns the result of evaluating this expression.
If you enter
nodein terminal, the following happens:
>
The terminal will go into standby mode.
To be more precise, the terminal in this case is waiting for some JavaScript code to be entered.
We introduce the following:
> console.log('test')
test
undefined
>
The first value,
testis what we told to output to the console, then we get the undefinedvalue that the execution returned. console.log()
After that we can enter something else.
Use tabfor auto-completion
REPL is interactive.
If pressed
tabwhile writing code, the REPL will try to complete what it has written by choosing from previously defined or predefined variables.
JavaScript objects
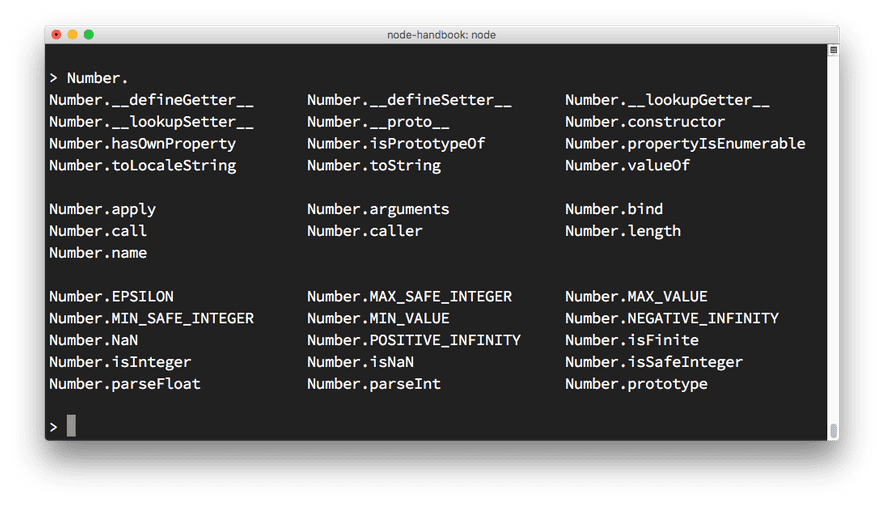
Try typing the name of the JavaScript class, for example
Numberadd a period to it and click tab.
REPL will show all the properties and methods of this class:
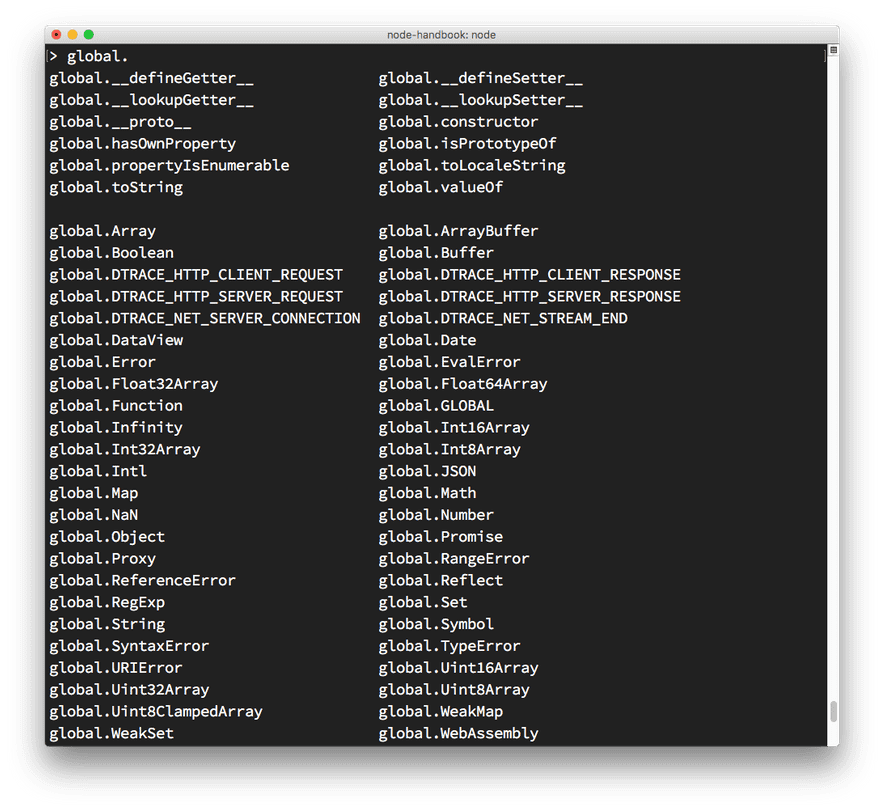
Global Objects
You can get a list of global objects by typing
global.and pressing tab:
Special variable _
If you type at the end of the code
_, the result of the last operation will be displayed.
Commands after point
The REPL contains some special commands starting with a dot. Here they are:
.help- shows a list of available commands.editor- enables editing mode for writing multi-line JavaScript code. To execute the code in this mode, pressctrl-D.break- stops entering multi-line code. Similar to pressingctrl-C.clear- resets the REPL context to an empty object, removes all entered code.load- loads a JavaScript file located in the current (working) directory.save- saves the REPL session to a file with the specified name.exit- exit from REPL. Same as double tapctrl-C
The REPL understands that you are entering multi-line code without calling
.editor.
For example, if you started implementing iteration:
[1, 2, 3].forEach(num => {
and pressed
enter, the REPL will jump to a new line with three dots at the beginning, indicating that you can continue working with the block of code:
... console.log(num)
... })
If you enter
.breakat the end, multi-line code mode will stop and the expression will not be executed.
Passing arguments using the command line
When launching a Node.js application, you can pass any number of arguments to it.
Arguments can be standalone or key and value.
For example:
node app.js joe
or
node app.js name=joe
How you retrieve the value in Node.js code depends on this.
A built-in object is used to retrieve values
process.
The property of
argvthis object contains an array of arguments passed through the command line.
The first argument is the full path of the command
node.
The second is the full path of the executable file.
The arguments of interest to us begin at the third position (array index).
You can iterate over the arguments (including the node path and file path) with a loop:
process.argv.forEach((val, index) => {
    console.log(`${index}: ${val}`)
})
The passed arguments can be obtained by creating a new array without the first two parameters:
const args = process.argv.slice(2)
If we have one argument without index (key):
node app.js joe
we can get it like this:
const args = process.argv.slice(2)
args[0]
In this case:
node app.js name=joe
args[0]- this name=joeis why we need to disassemble it. The best way to do this is to use the minimist library for dealing with arguments:
const args = require('minimist')(process.argv.slice(2))
args['name'] // joe
Here you need to use a double dash before each argument:
node app.js --name=joe
Outputting results to the command line using Node.js
Standard output via module console
Node.js provides a console module that contains many very useful ways to interact with the command line.
It looks like a
consolebrowser object .
One of the main methods of this module is
console.log(), which prints the passed string to the console.
If you pass in an object, it will be converted to a string.
We can pass
console.logseveral variables:
const x = 'x'
const y = 'y'
console.log(x, y)
and Node.js will output both.
We can also format the string using qualifiers:
For example:
console.log('My %s has %d years', 'cat', 2)
%s- formats the variable as a string%d- formats the variable as a number%i- converts a variable to an integer%o- formats the variable as an object
For example:
console.log('%o', Number)
Cleaning the console
console.clear() clears the console (behavior depends on the console used).
Counting Elements
console.count()Is a convenient method.
Check out this code:
const x = 1
const y = 2
const z = 3
console.count(
    'The value of x is ' + x +
    ' and has been checked .. how many times?'
)
console.count(
    'The value of x is ' + x +
    ' and has been checked .. how many times?'
)
console.count(
    'The value of y is ' + y +
    ' and has been checked .. how many times?'
)
The counter counts the number of line displays and displays this number.
The value of x is 1 and has been checked .. how many times?: 1
The value of x is 1 and has been checked .. how many times?: 2
The value of y is 2 and has been checked .. how many times?: 1
So you can count the number of apples and oranges:
const oranges = ['orange', 'orange']
const apples = ['just one apple']
oranges.forEach(fruit => console.count(fruit))
apples.forEach(fruit => console.count(fruit))
Displaying the stack trace
There are situations where you need to display the stack trace of a function, for example, in order to answer the question "How did we reach this piece of code?"
You can do it with
console.trace():
const function2 = () => console.trace()
const function1 = () => function2()
function1()
This will print the stack trace to the console. This is what we see on the command line if we execute the above code in the Node.js REPL:
Trace
    at function2 (repl:1:33)
    at function1 (repl:1:25)
    at repl:1:1
    at ContextifyScript.Script.runInThisContext (vm.js:44:33)
    at REPLServer.defaultEval (repl.js:239:29)
    at bound (domain.js:301:14)
    at REPLServer.runBound [as eval] (domain.js:314:12)
    at REPLServer.onLine (repl.js:440:10)
    at emitOne (events.js:120:20)
    at REPLServer.emit (events.js:210:7)
Counting code execution time
You can easily calculate how long a function has been running using
time()and timeEnd():
const doSomething = () => console.log('test')
const measureDoingSomething = () => {
    console.time('doSomething()')
    //  -
    doSomething()
    console.timeEnd('doSomething()')
}
measureDoingSomething()
stdout and stderr
As we know, console.log is great for printing messages to the console. This is called standard output or
stdout.
console.errordisplays the stream stderr.
This stream is not output to the console, but written to the error log.
Styling the output
You can colorize the text output to the console using escape sequences . These sequences are a set of symbols that identify a color.
For example:
console.log('\x1b[33m%s\x1b[0m', 'hi!')
If you type the code in Node.js REPL, it
hi!will be yellow.
The considered method is rather laborious. The simplest way to colorize the console output is to use a library. One of these libraries is Chalk , which, in addition to defining color, allows you to make text bold, italic, or underlined.
Install the library using
npm install chalkand use it as follows:
const chalk = require('chalk')
console.log(chalk.yellow('hi!'))
The use is
chalk.yellowmuch easier than memorizing complex sequences. It also makes the code more readable.
Creating a progress bar
Progress is a great library for creating progress bars in the terminal. Install it with
npm install progress.
This snippet creates a 10-step progress bar. One step is performed every 100 ms. When filling out the indicator, we turn off the counter:
const ProgressBar = require('progress')

const bar = new ProgressBar(':bar', { total: 10 })
const timer = setInterval(() => {
    bar.tick()
    if (bar.complete) clearInterval(timer)
}, 100)
Thank you for your attention, friends. If you find errors and typos, do not hesitate to write in a personal, I will be grateful.
To be continued…