Before finishing work on my code editor, I stepped on a rake many times, probably decompiled dozens of similar applications, and in this series of articles I will talk about what I learned, what mistakes can be avoided and many other interesting things.
Introduction
Hello to all! Judging from the title, it is quite clear what it will be about, but still I must insert a few words of my own before moving on to the code.
I decided to divide the article into 2 parts, in the first we will gradually write optimized syntax highlighting and line numbering, and in the second we will add code completion and error highlighting.
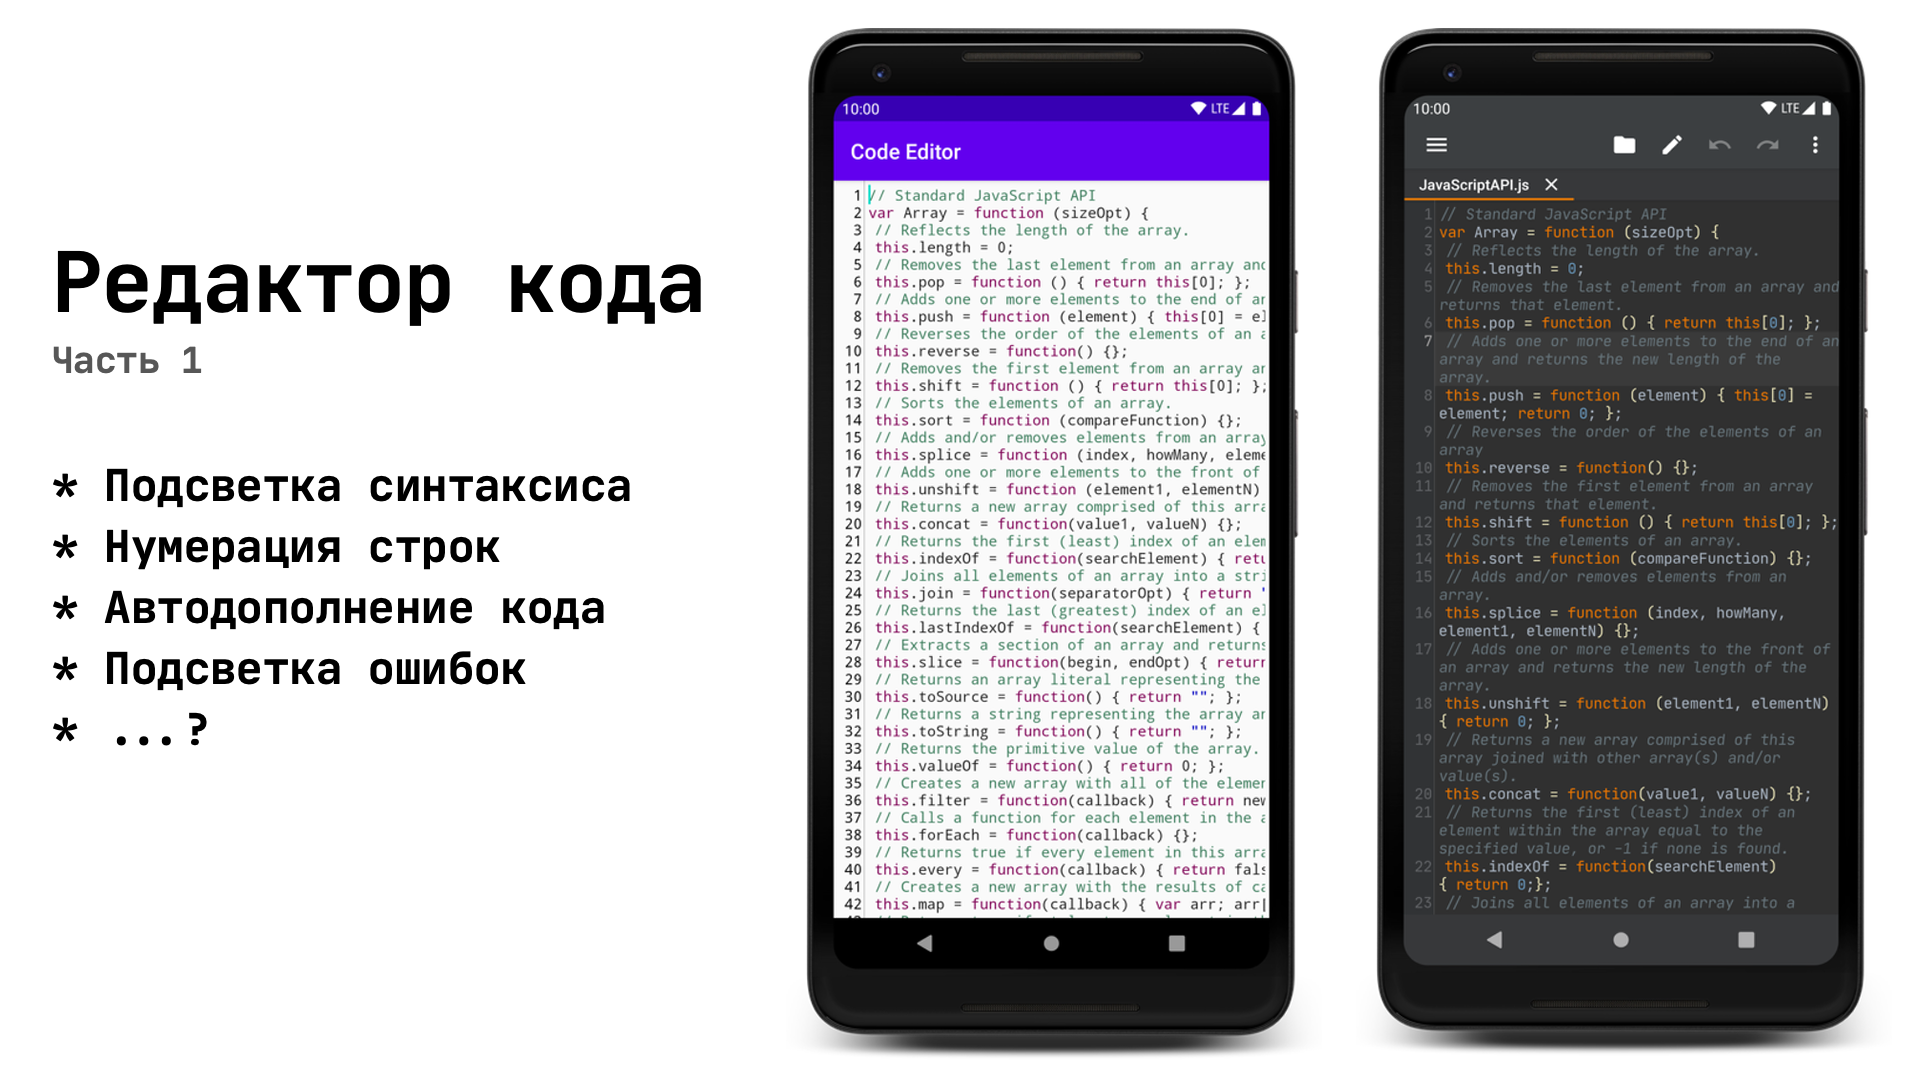
First, let's make a list of what our editor should be able to:
- Highlight syntax
- Show line numbering
- Show auto-completion options (I'll tell you in the second part)
- Highlight syntax errors (I will tell in the second part)
This is not the whole list of what properties a modern code editor should have, but this is exactly what I want to talk about in this small series of articles.
MVP - Simple Text Editor
At this stage, there should not be any problems - stretch
EditTextto the full screen, indicate gravitytransparent backgroundto remove the strip from the bottom, font size, text color, etc. I like to start with the visual part, so it becomes easier for me to understand what is missing in the application, and what details are still worth working on.
At this stage, I also did loading / saving files into memory. I will not give the code; there is an overabundance of examples of working with files on the Internet.
Syntax highlighting
As soon as we read the requirements for the editor, it's time to move on to the most interesting.
Obviously, to control the whole process - to respond to input, draw line numbers, we will have to write
CustomViewinheriting from EditText. We throw in TextWatcherto listen to changes in the text and override the method afterTextChangedin which we will call the method responsible for highlighting:
class TextProcessor @JvmOverloads constructor(
    context: Context,
    attrs: AttributeSet? = null,
    defStyleAttr: Int = R.attr.editTextStyle
) : EditText(context, attrs, defStyleAttr) {

    private val textWatcher = object : TextWatcher {
        override fun beforeTextChanged(s: CharSequence?, start: Int, count: Int, after: Int) {}
        override fun onTextChanged(s: CharSequence?, start: Int, before: Int, count: Int) {}
        override fun afterTextChanged(s: Editable?) {
            syntaxHighlight()
        }
    }

    private fun syntaxHighlight() {
        //
    }
}
Q: Why do we use
TextWatcheras a variable, because you can implement the interface directly in the class?
A: It just so happens that we
TextWatcherhave a method that conflicts with an existing method in TextView:
//  TextWatcher
fun onTextChanged(s: CharSequence?, start: Int, before: Int, count: Int)

//  TextView
fun onTextChanged(text: CharSequence?, start: Int, lengthBefore: Int, lengthAfter: Int)
Both of these methods have the same name and the same arguments, and they seem to have the same meaning, but the problem is that the
onTextChangedy method will be TextViewcalled together with onTextChangedy TextWatcher. If we put logs in the body of the method, we will see that it will be onTextChangedcalled twice:

This is very critical if we plan to add Undo / Redo functionality. Also, we may need a moment in which the listeners will not work, in which we can clear the stack with the text changes. We do not want, after opening a new file, you could click Undo and get a completely different text. Although this article will not talk about Undo / Redo, it is important to consider this point.
Accordingly, to avoid such a situation, you can use your own method of setting the text instead of the standard one
setText:
fun processText(newText: String) {
    removeTextChangedListener(textWatcher)
    // undoStack.clear()
    // redoStack.clear()
    setText(newText)
    addTextChangedListener(textWatcher)
}
But back to the highlight.
Many programming languages have such a wonderful thing as RegEx , it is a tool that allows you to search for text matches in a string. I recommend that you at least familiarize yourself with its basic capabilities, because sooner or later any programmer may need to "pull" some piece of information from the text.
Now it’s important for us to know only two things:
- Pattern defines what exactly we need to find in the text
- Matcher will run through the text trying to find what we specified in Pattern
Maybe not quite correctly described, but the principle of operation is as follows.
Since I'm writing an editor for JavaScript, here's a small pattern with language keywords:
private val KEYWORDS = Pattern.compile(
    "\\b(function|var|this|if|else|break|case|try|catch|while|return|switch)\\b"
)
Of course, there should be a lot more words here, and we also need patterns for comments, lines, numbers, etc. but my task is to demonstrate the principle by which you can find the desired content in the text.
Next, with the help of Matcher, we will go through the whole text and set the spans:
private fun syntaxHighlight() {
    val matcher = KEYWORDS.matcher(text)
    matcher.region(0, text.length)
    while (matcher.find()) {
        text.setSpan(
            ForegroundColorSpan(Color.parseColor("#7F0055")),
            matcher.start(),
            matcher.end(),
            Spannable.SPAN_EXCLUSIVE_EXCLUSIVE
        )
    }
}
Let me explain: we get the Matcher object of the Pattern , and indicate to it the area to search for in symbols (Accordingly, from 0 to
text.lengththis is the entire text). Further, the call matcher.find()will return trueif a match was found in the text, and with the help of calls matcher.start()and matcher.end()we will get the positions of the beginning and end of the match in the text. Knowing this data, we can use the method setSpanto color certain areas of the text.
There are many types of spans, but it is usually used for repainting text
ForegroundColorSpan.
So let's start!
 The result meets expectations exactly until we start editing a large file (in the screenshot the file is ~ 1000 lines)
The fact is that the method
setSpanworks slowly, heavily loading UI Thread, and given that the method afterTextChangedis called after each character entered, it becomes one torment.
Finding a solution
The first thing that comes to mind is to move a heavy operation to a background thread. But here it is a difficult operation
setSpanthroughout the text, not regular lines. (I think I need not explain why it is impossible to call setSpanfrom a background thread).
After a bit of searching for thematic articles, we find out that if we want to achieve smoothness, we will have to highlight only the visible part of the text.
Right! So let's do it! But ... how?
Optimization
Although I mentioned that we only care about the performance of the method
setSpan, I still recommend putting the RegEx work in a background thread to achieve maximum smoothness.
We need a class that will process all the text in the background and return a list of spans.
I will not give a specific implementation, but if anyone is interested, then I use the one that
AsyncTaskworks for ThreadPoolExecutor. (Yes, yes, AsyncTask in 2020) The
main thing for us is that the following logic is executed:
- In
beforeTextChangedstop Task which parses the text - In we
afterTextChangedstart the Task which parses the text - At the end of its work, Task must return the list of spans in
TextProcessor, which, in turn, will highlight only the visible part
And yes, we will write our own spans too:
data class SyntaxHighlightSpan(
    private val color: Int,
    val start: Int,
    val end: Int
) : CharacterStyle() {

    //     italic, ,
    override fun updateDrawState(textPaint: TextPaint?) {
        textPaint?.color = color
    }
}
Thus, the editor code turns into something like this:
A lot of code
class TextProcessor @JvmOverloads constructor(
    context: Context,
    attrs: AttributeSet? = null,
    defStyleAttr: Int = R.attr.editTextStyle
) : EditText(context, attrs, defStyleAttr) {

    private val textWatcher = object : TextWatcher {
        override fun beforeTextChanged(s: CharSequence?, start: Int, count: Int, after: Int) {
            cancelSyntaxHighlighting()
        }
        override fun onTextChanged(s: CharSequence?, start: Int, before: Int, count: Int) {}
        override fun afterTextChanged(s: Editable?) {
            syntaxHighlight()
        }
    }

    private var syntaxHighlightSpans: List<SyntaxHighlightSpan> = emptyList()

    private var javaScriptStyler: JavaScriptStyler? = null

    fun processText(newText: String) {
        removeTextChangedListener(textWatcher)
        // undoStack.clear()
        // redoStack.clear()
        setText(newText)
        addTextChangedListener(textWatcher)
        // syntaxHighlight()
    }

    private fun syntaxHighlight() {
        javaScriptStyler = JavaScriptStyler()
        javaScriptStyler?.setSpansCallback { spans ->
            syntaxHighlightSpans = spans
            updateSyntaxHighlighting()
        }
        javaScriptStyler?.runTask(text.toString())
    }

    private fun cancelSyntaxHighlighting() {
        javaScriptStyler?.cancelTask()
    }

    private fun updateSyntaxHighlighting() {
        //
    }
}
Since I did not show a specific implementation of processing in the background, imagine that we wrote a certain
JavaScriptStylerone that in the background will do the same thing that we did before in the UI Thread - run through the entire text in search of matches and fill out the list of spans, and at the end his work will return the result to setSpansCallback. At this moment, a method will be launched updateSyntaxHighlightingthat will go through the list of spans and display only those that are currently visible on the screen.
How do you know which text falls into the visible area?
I will refer to this article , where the author suggests using something like this:
val topVisibleLine = scrollY / lineHeight
val bottomVisibleLine = topVisibleLine + height / lineHeight + 1 // height -  View
val lineStart = layout.getLineStart(topVisibleLine)
val lineEnd = layout.getLineEnd(bottomVisibleLine)
And it works! Now let's move
topVisibleLineit bottomVisibleLineto separate methods and add a couple of additional checks, in case something goes wrong:
New methods
private fun getTopVisibleLine(): Int {
    if (lineHeight == 0) {
        return 0
    }
    val line = scrollY / lineHeight
    if (line < 0) {
        return 0
    }
    return if (line >= lineCount) {
        lineCount - 1
    } else line
}

private fun getBottomVisibleLine(): Int {
    if (lineHeight == 0) {
        return 0
    }
    val line = getTopVisibleLine() + height / lineHeight + 1
    if (line < 0) {
        return 0
    }
    return if (line >= lineCount) {
        lineCount - 1
    } else line
}
The last thing to be done is to go through the resulting list of spans and color the text:
for (span in syntaxHighlightSpans) {
    val isInText = span.start >= 0 && span.end <= text.length
    val isValid = span.start <= span.end
    val isVisible = span.start in lineStart..lineEnd
            || span.start <= lineEnd && span.end >= lineStart
    if (isInText && isValid && isVisible)) {
        text.setSpan(
            span,
            if (span.start < lineStart) lineStart else span.start,
            if (span.end > lineEnd) lineEnd else span.end,
            Spannable.SPAN_EXCLUSIVE_EXCLUSIVE
        )
    }
}
Do not be afraid of the terrible
if, but he just checks to see if the span from the list falls into the visible area.
Well, does it work?
It works, but when editing the text, the spans are not updated, you can fix the situation by clearing the text from all spans before overlaying new ones:
// :  getSpans   core-ktx
val textSpans = text.getSpans<SyntaxHighlightSpan>(0, text.length)
for (span in textSpans) {
    text.removeSpan(span)
}
Another jamb - after closing the keyboard, a piece of text remains unlit, fix it:
override fun onSizeChanged(w: Int, h: Int, oldw: Int, oldh: Int) {
    super.onSizeChanged(w, h, oldw, oldh)
    updateSyntaxHighlighting()
}
The main thing is not to forget to indicate
adjustResizein the manifest.
Scrolling
Speaking about scrolling, I will refer to this article again . The author suggests waiting 500ms after the end of scrolling, which contradicts my sense of beauty. I don't want to wait for the backlight to load, I want to see the result instantly.
The author also makes an argument that launching the parser after each “scrolled” pixel is expensive, and I completely agree with this (I generally recommend that you read its article completely, it’s small, but there’s a lot of interesting stuff). But the fact is that we already have a ready-made list of spans, and we do not need to run the parser.
It is enough to call the method responsible for updating the highlight:
override fun onScrollChanged(horiz: Int, vert: Int, oldHoriz: Int, oldVert: Int) {
    super.onScrollChanged(horiz, vert, oldHoriz, oldVert)
    updateSyntaxHighlighting()
}
Line numbering
If we add another one to the markup,
TextViewit will be problematic to link them together (for example, to synchronously update the text size), and if we have a large file, we will have to completely update the text with numbers after each letter entered, which is not very cool. Therefore, we will use any standard means CustomView- drawing on Canvasin onDraw, it's fast and not difficult.
First, let's define what we will draw:
- Line numbers
- The vertical line separating the input field from line numbers
First you need to calculate and install to the
paddingleft of the editor so that there are no conflicts with the printed text.
To do this, we will write a function that will update the indent before drawing:
Updating indentation
private var gutterWidth = 0
private var gutterDigitCount = 0
private var gutterMargin = 4.dpToPx() //

...

private fun updateGutter() {
    var count = 3
    var widestNumber = 0
    var widestWidth = 0f

    gutterDigitCount = lineCount.toString().length
    for (i in 0..9) {
        val width = paint.measureText(i.toString())
        if (width > widestWidth) {
            widestNumber = i
            widestWidth = width
        }
    }
    if (gutterDigitCount >= count) {
        count = gutterDigitCount
    }
    val builder = StringBuilder()
    for (i in 0 until count) {
        builder.append(widestNumber.toString())
    }
    gutterWidth = paint.measureText(builder.toString()).toInt()
    gutterWidth += gutterMargin
    if (paddingLeft != gutterWidth + gutterMargin) {
        setPadding(gutterWidth + gutterMargin, gutterMargin, paddingRight, 0)
    }
}
Explanation:
First, we find out the number of lines in
EditText(not to be confused with the number of " \n" in the text), and take the number of characters from this number. For example, if we have 100 lines, then the variable gutterDigitCountwill be 3, because there are exactly 3 characters in the number 100. But suppose we have only 1 line - which means an indent of 1 character will visually appear small, and for this we use the variable count to set the minimum displayed indent of 3 characters, even if we have less than 100 lines of code.
This part was the most confusing of all, but if you thoughtfully read it several times (looking at the code), then everything will become clear.
Next, we set the indentation after calculating
widestNumberand widestWidth.
Let's start drawing
Unfortunately, if we want to use the standard Androyd text wrap on a new line, we’ll have to conjure it up, which will take us a lot of time and even more code, which will be enough for the whole article, so in order to reduce your time (and the moderator’s time), we’ll enable horizontal scrolling so that all lines go one after another:
setHorizontallyScrolling(true)Well, now you can start drawing, declare variables with type
Paint:
private val gutterTextPaint = Paint() //
private val gutterDividerPaint = Paint() //
initSet the text color and the separator color
somewhere in the block. It is important to remember that if you change the font of the text, then the font Paintwill have to be applied manually, for this I advise you to override the method setTypeface. Similarly with the size of the text.
Then we override the method
onDraw:
override fun onDraw(canvas: Canvas?) {
    updateGutter()
    super.onDraw(canvas)
    var topVisibleLine = getTopVisibleLine()
    val bottomVisibleLine = getBottomVisibleLine()
    val textRight = (gutterWidth - gutterMargin / 2) + scrollX
    while (topVisibleLine <= bottomVisibleLine) {
        canvas?.drawText(
            (topVisibleLine + 1).toString(),
            textRight.toFloat(),
            (layout.getLineBaseline(topVisibleLine) + paddingTop).toFloat(),
            gutterTextPaint
        )
        topVisibleLine++
    }
    canvas?.drawLine(
        (gutterWidth + scrollX).toFloat(),
        scrollY.toFloat(),
        (gutterWidth + scrollX).toFloat(),
        (scrollY + height).toFloat(),
        gutterDividerPaint
    )
}
We look at the result
 It looks cool.
What have we done in
onDraw? Before calling the super-method, we updated the indentation, after which we rendered the numbers only in the visible area, and at the end we drew a vertical line that visually separates the line numbering from the code editor.
For beauty, you can also repaint the indent in a different color, visually highlight the line on which the cursor is located, but I'll leave that to your discretion.
Conclusion
In this article, we wrote a responsive code editor with syntax highlighting and line numbering, and in the next part we will add convenient code completion and syntax error highlighting while editing.
I’ll also leave a link to the source code of my GitHub code editor , there you will find not only the features that I described in this article, but also many others that have been ignored.
UPD: The second part is already out.
Ask questions and suggest topics for discussion, because I could well have missed something.
Thank!